“Miscellaneous” actions are native CoreView actions that, together with “Manual” actions are specifically dedicated to Workflows. They can only be accessed from the “Manage Workflow” section.
This article will examine in detail the capabilities of each of these Workflow management actions.
Delay
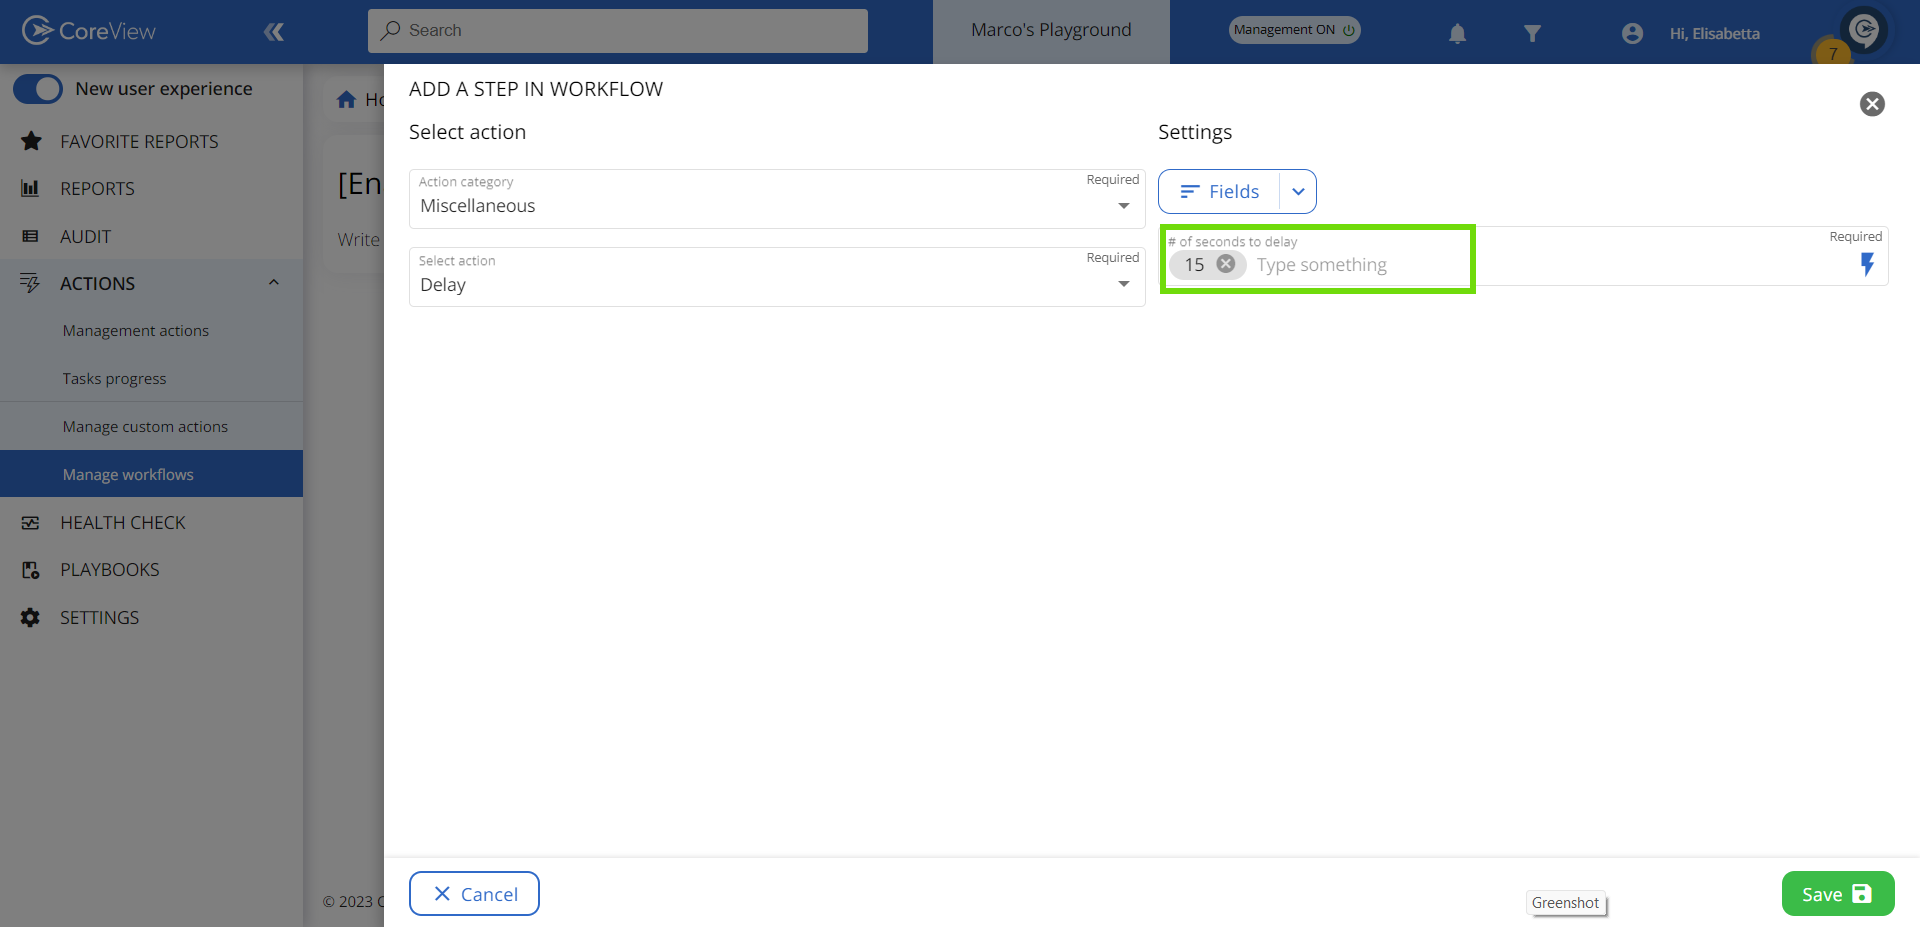
This action allows you to configure how many minutes a Workflow should wait before executing the following action. Adding a “Delay” action to a Workflow can be useful to allow sufficient time for technical execution between one action and the next.
Execute nested Workflow
This action enables you to execute a Workflow within another Workflow. Typically, it is configured to run only if a specified filter parameter is met. Let's view an example:
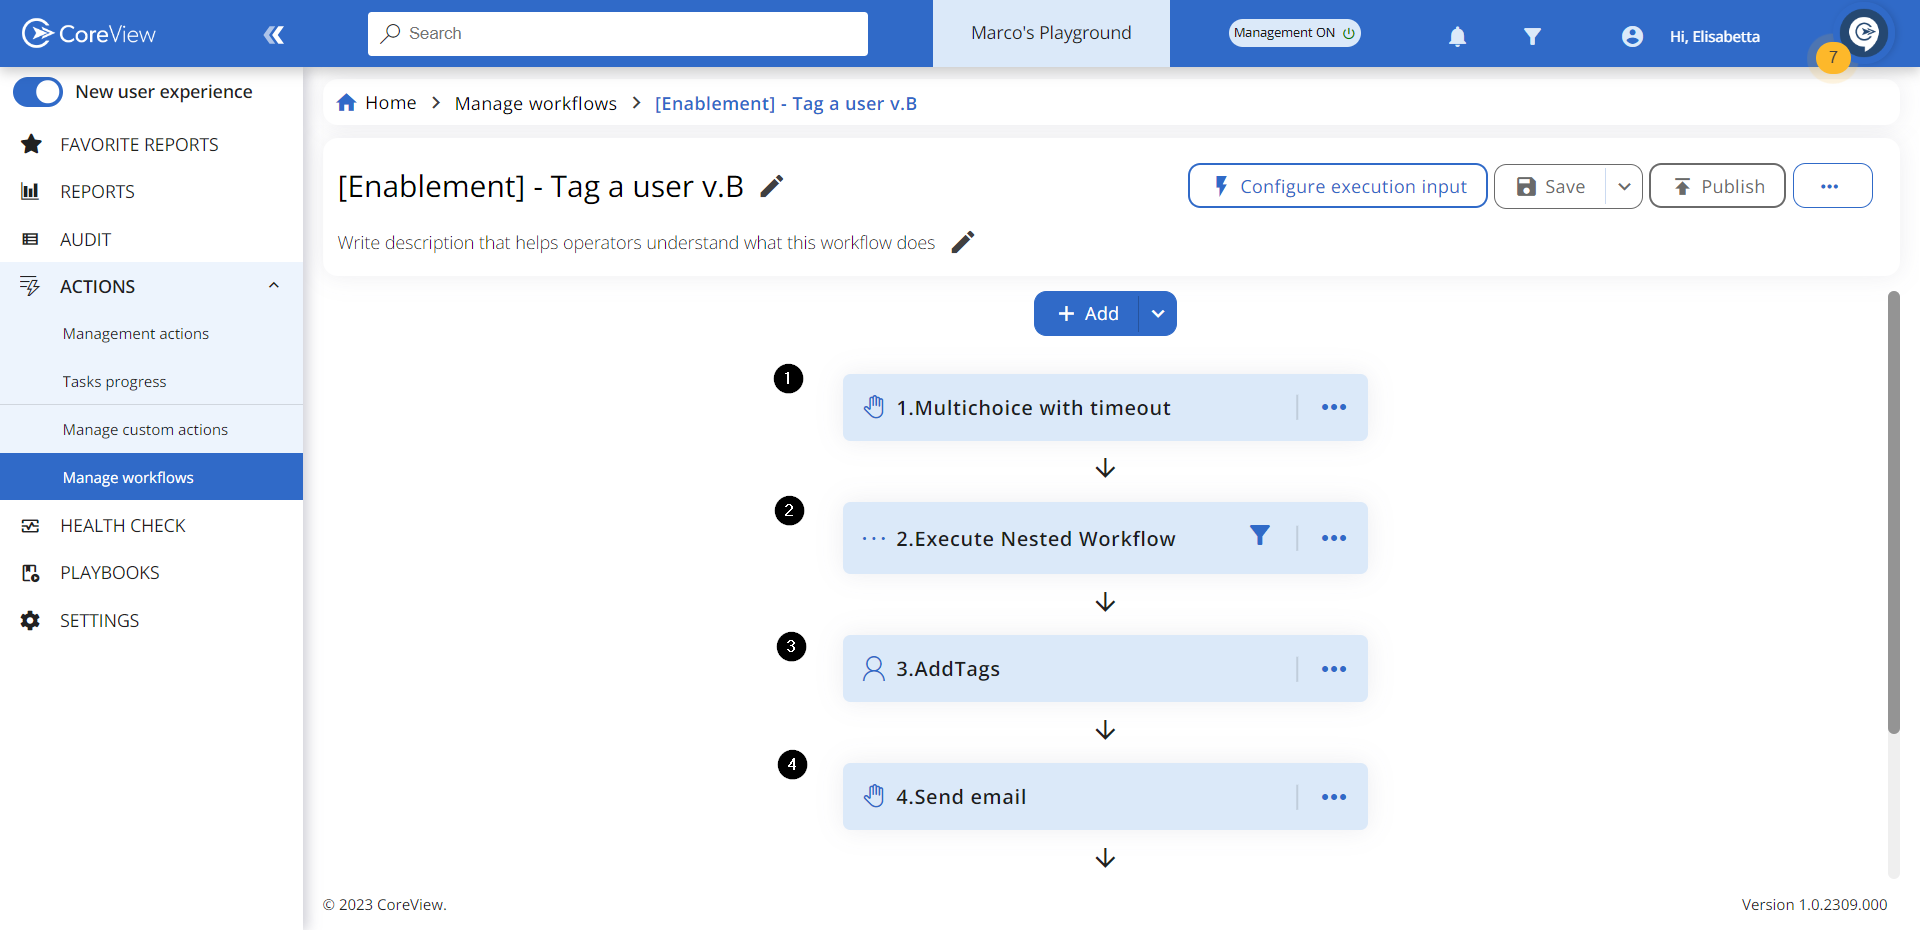
- The first action is a “Multichoice with timeout” that sends an approval request to execute the nested Workflow.
- If approved, the nested Workflow is executed. If rejected, the nested Workflow will be skipped due to the configured filter.
- The Workflow executes the following actions.
- A confirmation email is sent to the admin.
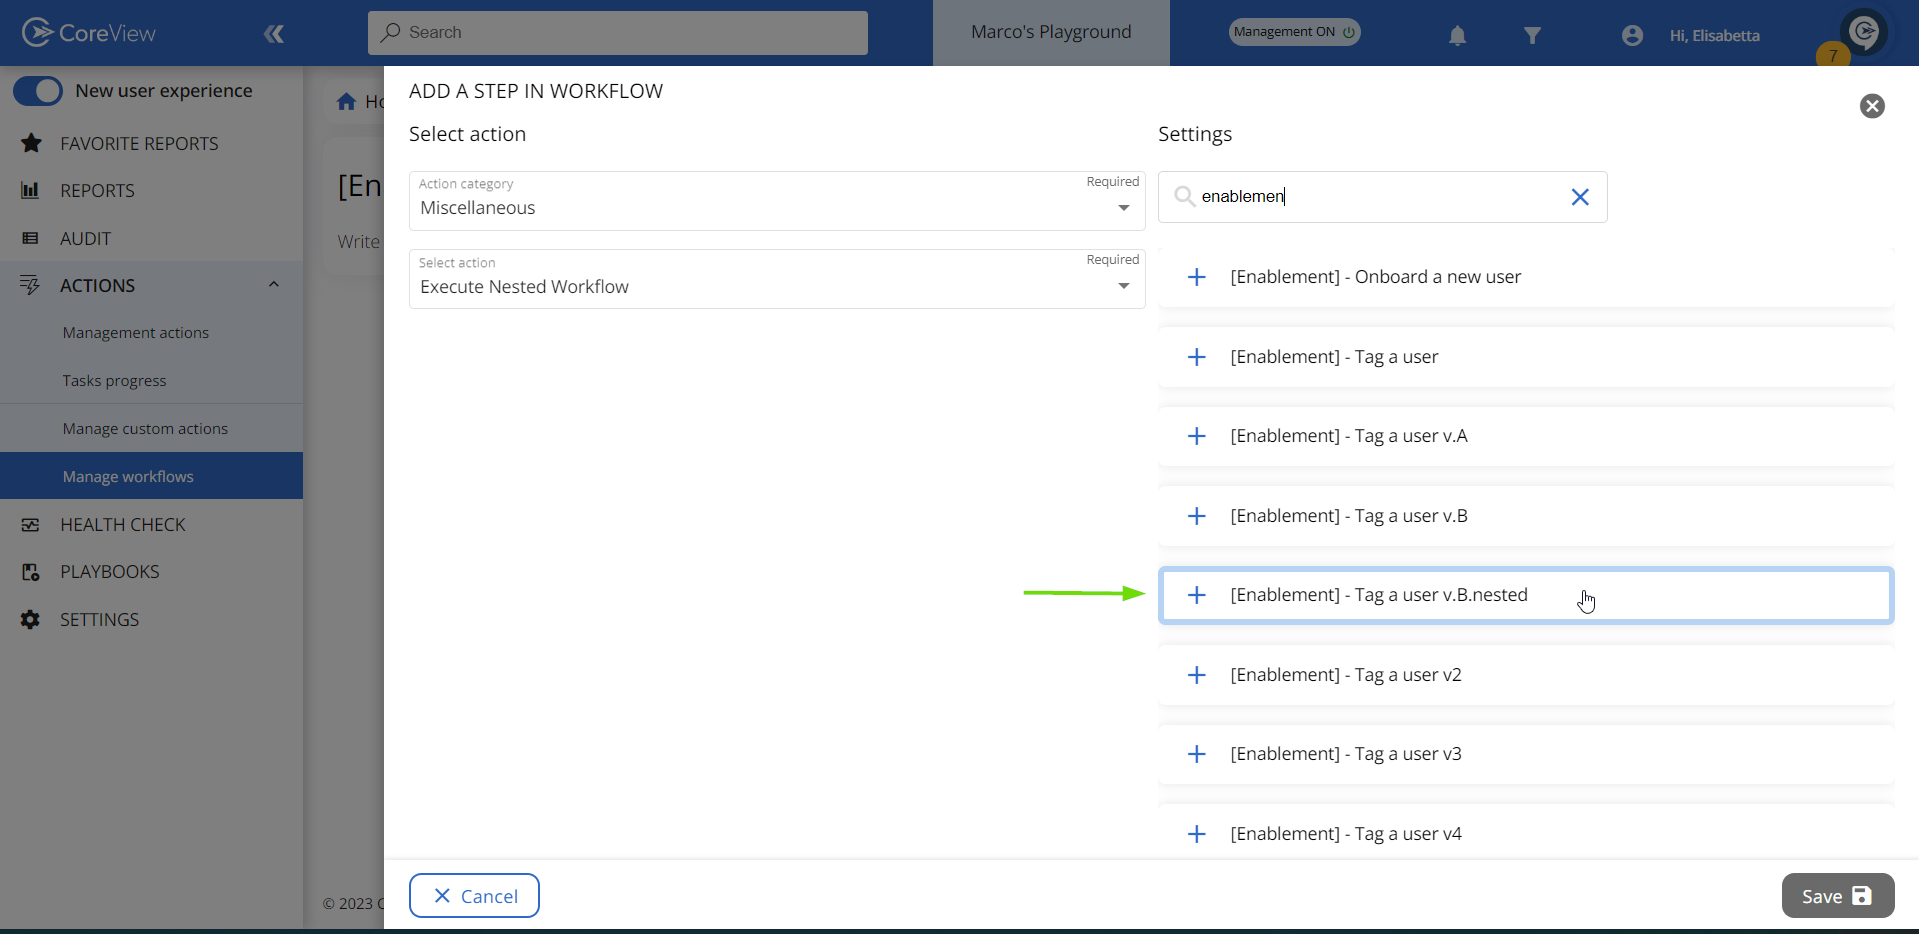
Let's view how to configure a nested Workflow like the one in the example above:
Step 1: Configuration
Add a new Miscellaneous action, select “Execute Nested Workflow” and pick the desired Workflow. In this example, the selected nested Workflow removes all tags from the user(s).
Step 2: Schedule when Workflow starts (optional)
You can schedule your nested Workflow by switching on the “Schedule when the Workflow starts” toggle and setting a delay of up to 90 days. This feature not only boosts performance, but also optimizes your action execution limit by dividing Workflows into two: one that completes, and another that starts as scheduled.

Step 3: Add execution input
Insert the required execution input, in this case it's the user principal name, and press “Save”.

Step 3: Add filter
Add a filter to the “Execute Nested Workflow” action that only executes the Workflow if the answer to the multichoice email request is “yes”.

Nested Workflow vs. 50 Workflow execution limit
When dealing with nested Workflows, it's important to consider them as single entities. This means that if you have a Workflow containing two nested Workflows, you count a total of three Workflows: the parent Workflow, the first nested Workflow, and the second nested Workflow.
In addition, when you have more than 50 Workflows running concurrently, we manage them through two different queues. The normal queue contains all the Workflows that are not nested, while the Priority queue is designated for nested Workflows. When available, we select the first Workflow from the Priority queue and continue to process Workflows from there until the queue is empty.
Now, let's illustrate these rules with a use case:
Imagine you are running 49 Workflows simultaneously, and you initiate the execution of the 50th Workflow, which contains two nested Workflows (Nested1 and Nested2). The parent Workflow will run as the 50th in the queue.
As soon as the nested Workflow action starts within the parent Workflow, we place Nested1 in the priority queue. However, Nested1 won't begin execution immediately because there's no available space due to the 50th parent Workflow still running. To address this, we temporarily suspend the parent Workflow while Nested1 is in the priority queue. Once the parent Workflow is in the sleeping state, Nested1 can start its execution, following the same rule applied to Nested2.
Retrieve data from object
This action enables you to gather specific pieces of information from an item, which can then be used as input variables within your Workflow.
Please visit Retrieve data from object: a practical example to learn more.
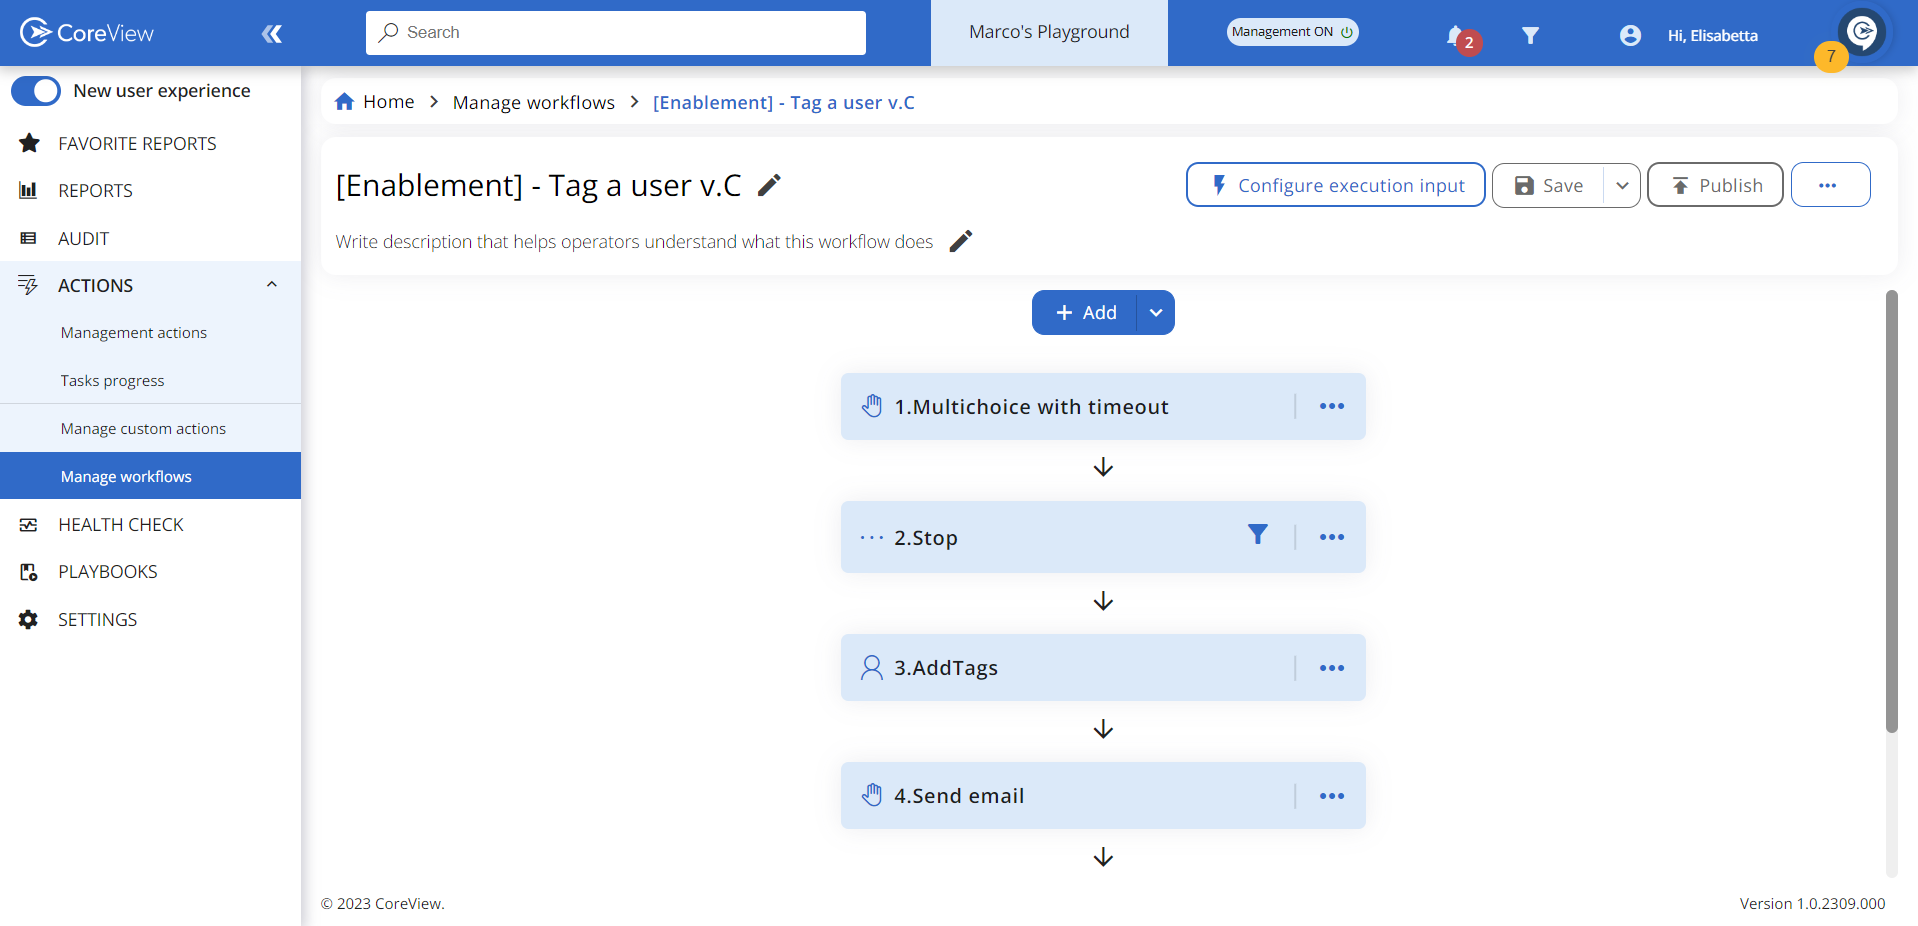
Stop
This action immediately terminates a Workflow. When configuring the "Stop" action, you can select the final status to display upon termination—choose either “Succeeded” or “Stopped” from the "Select final workflow status" dropdown menu.

If you select the “Stopped” status, it will appear in the execution list whenever the workflow terminates with the “Stop” action. Note that Workflows marked as “Stopped” cannot be restarted.

The “Stop” action is frequently used in combination with a filter that forces the Workflow to stop under certain conditions.
In the example below, the Workflow is configured to halt based on the user's response to the “Multichoice with timeout” action, which is scheduled at the beginning:
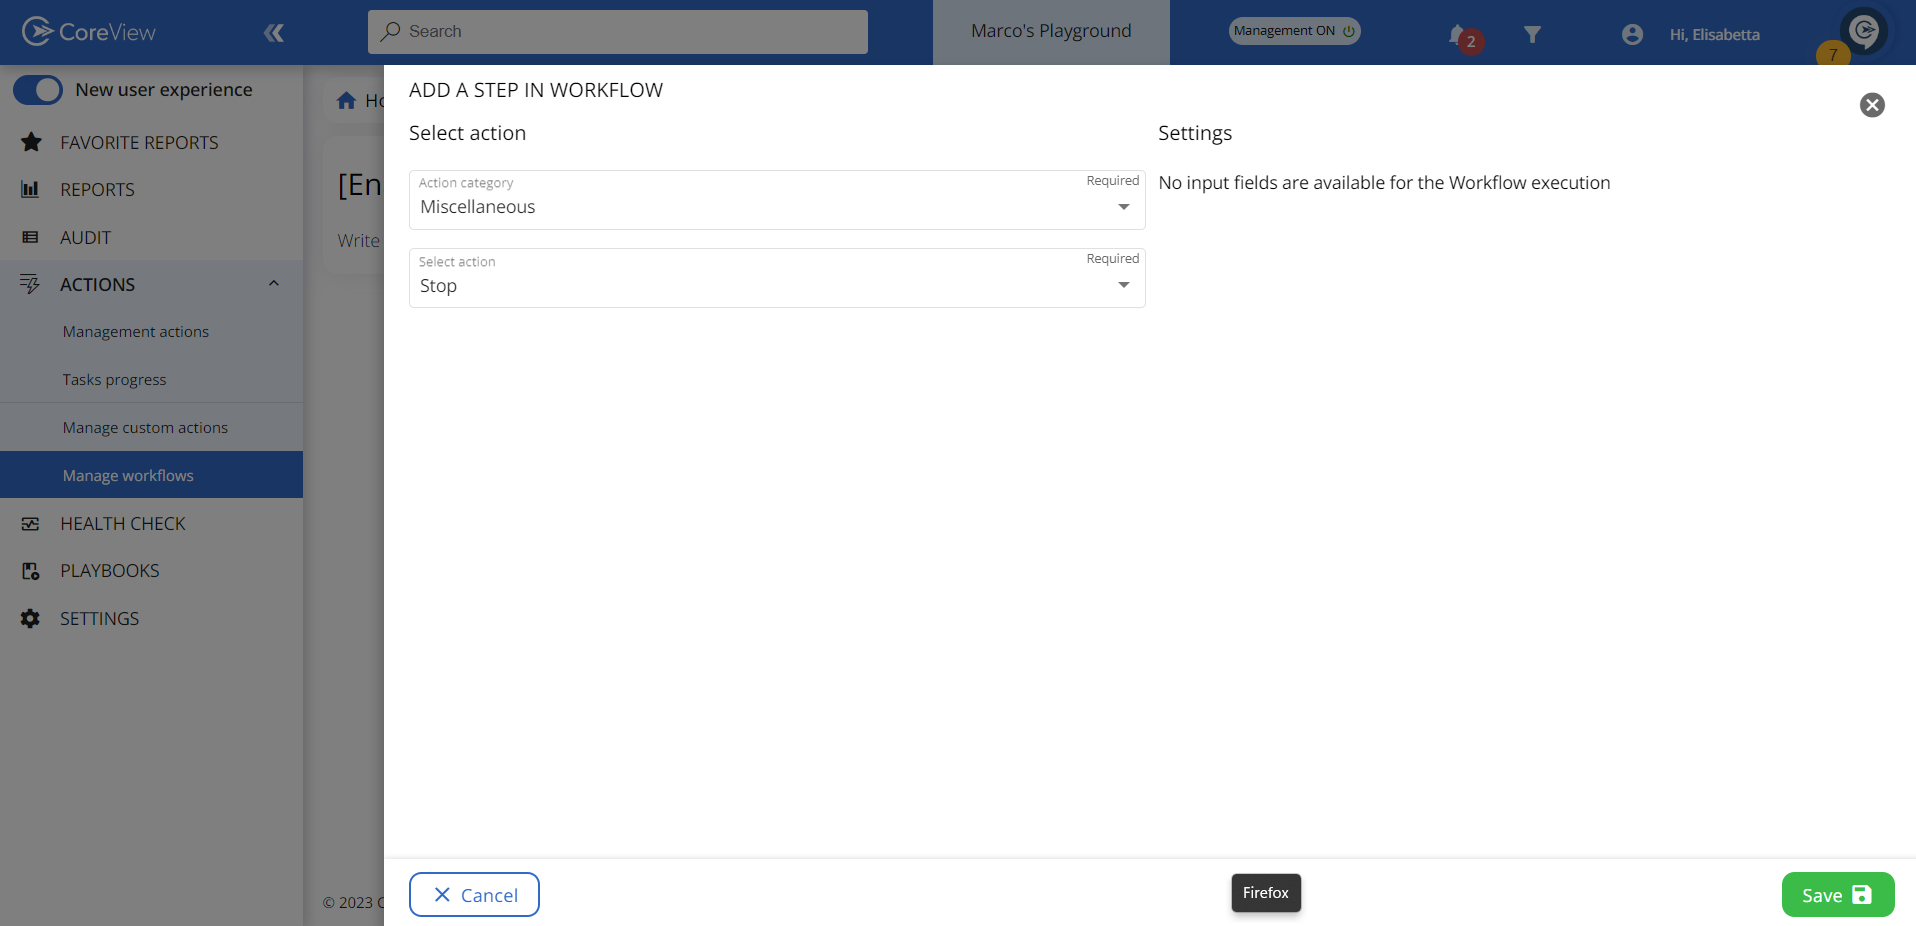
Step 1: Configuration
In this example, the “Stop” action is configured to only be executed if the answer to the “Multichoice with timeout” action is “no”.
Add a new action under the “Miscellaneous” category, select “Stop”, and press “Save”.
Step 2: Add filter
Add a filter to the “Stop” action that only executes it if the answer provided is “no”.

Step 3: Execution
Run the Workflow. The designated decision maker will get an email with the multichoice question.

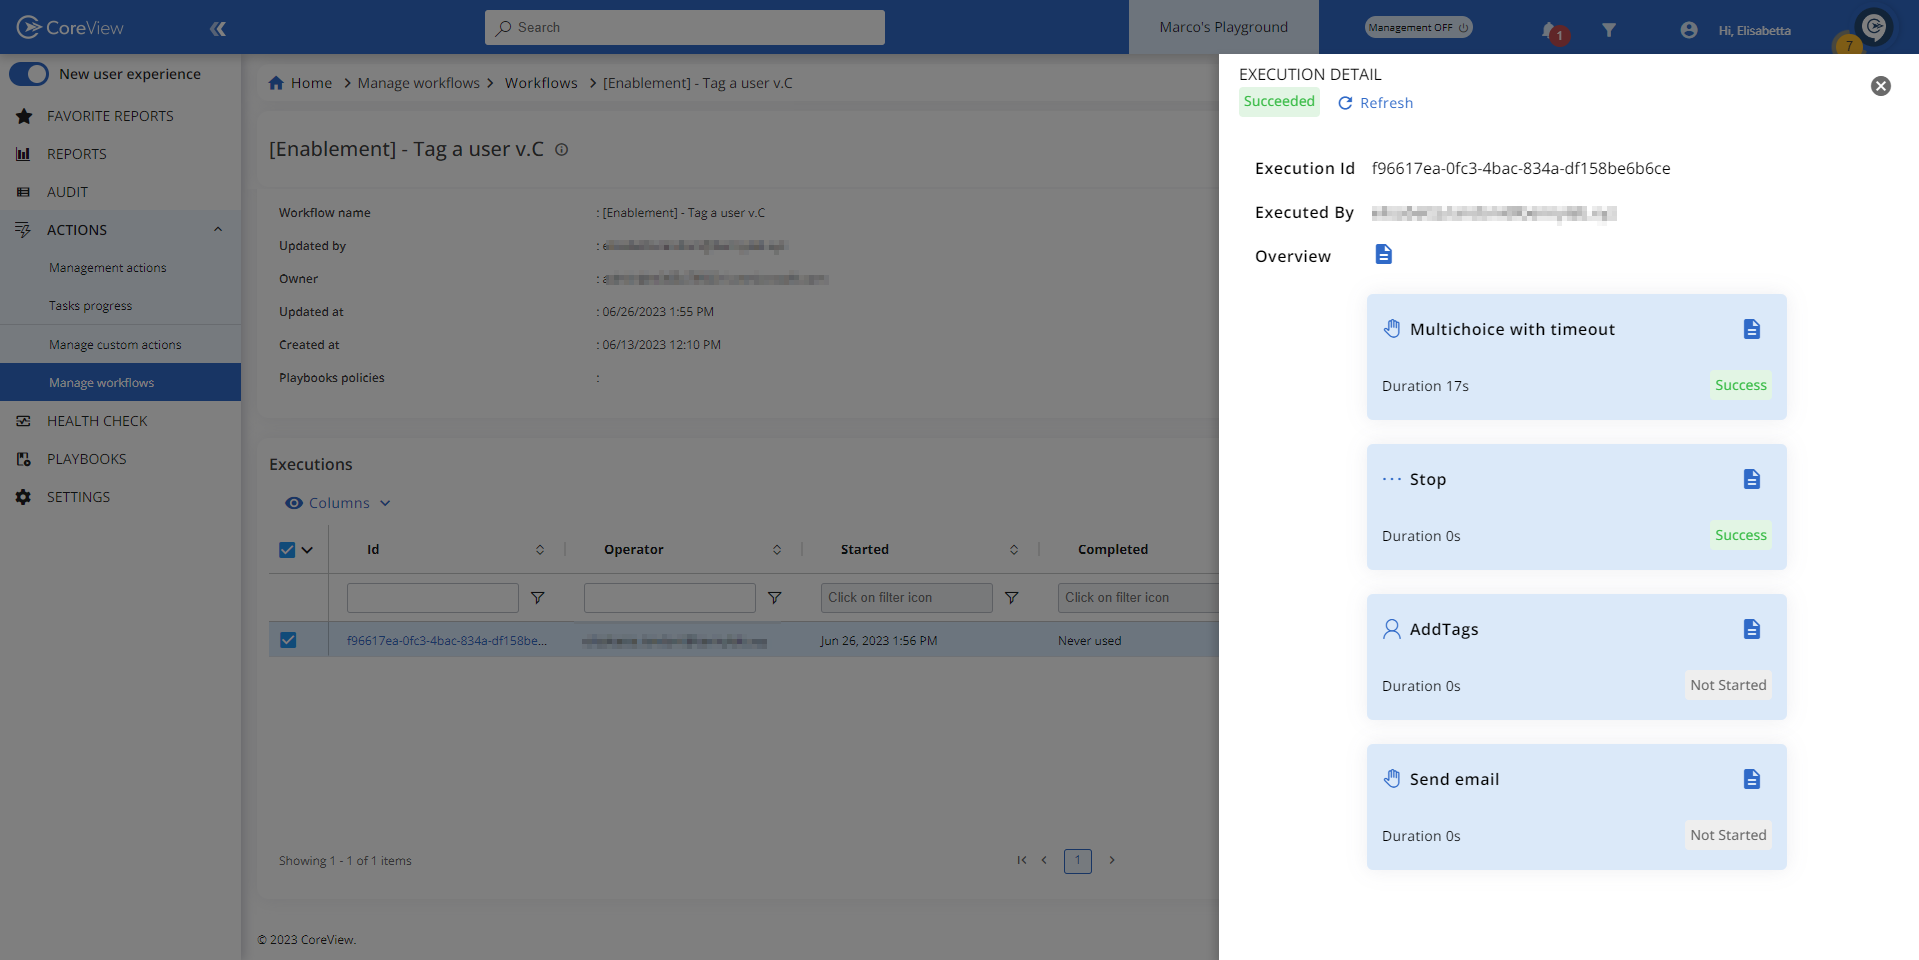
Step 3.1: Rejection
Let's select “no”.

In the “Execution detail” panel, we see that the “Stop” action has been executed, hence terminating the Workflow. The Workflow will appear as “Succeeded”.
Step 3.2: Approval
Now let's run the Workflow again and select “yes”.

This time, the “Stop” action has been skipped and the subsequent actions have been executed instead.

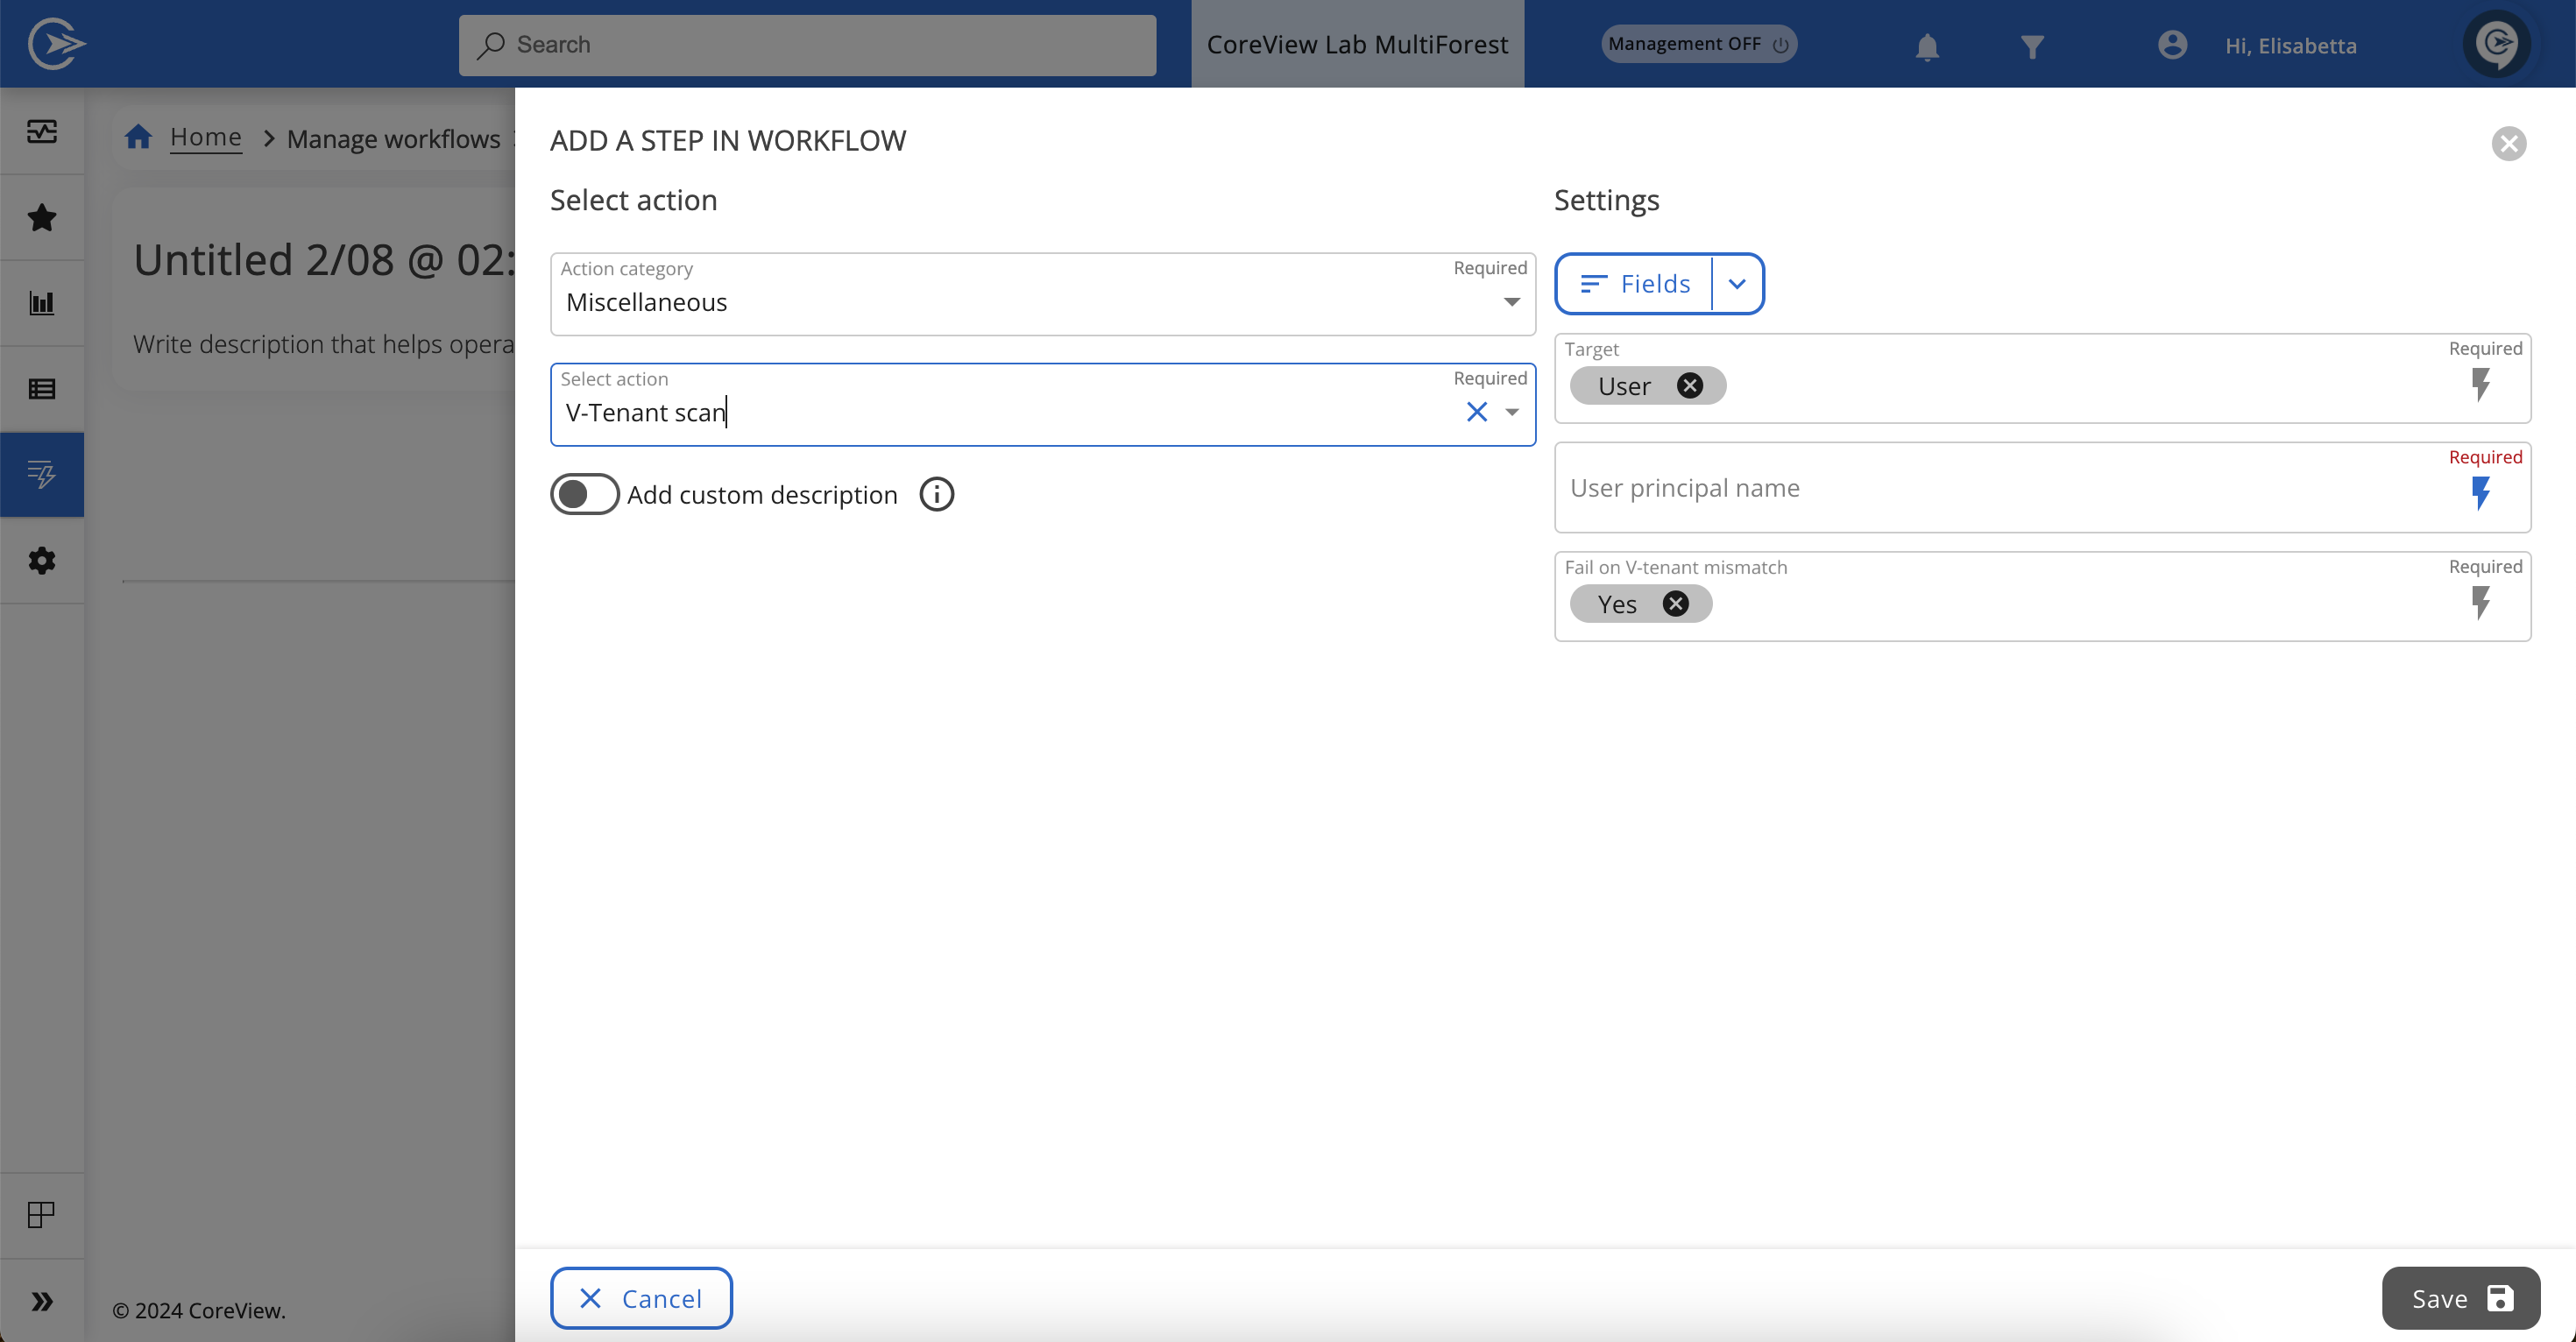
V-tenant scan
This action verifies whether the target user, identified by their User Principal Name (UPN), is visible within the Virtual Tenant scope of the Workflow runner. To proceed, select the target UPN for the Workflow execution. The Workflow can be configured to continue only if the target user is within the runner’s Virtual Tenant scope by choosing “Yes” in the “Fail on V-Tenant mismatch” field. A successful V-Tenant scan indicates that the target user is visible under the runner’s Virtual Tenant scope.