Similarly to management actions, custom actions can be performed from different sections within the CoreView app. This article will explore them and show the implications of choosing one over another.
Where can I execute a custom action from?
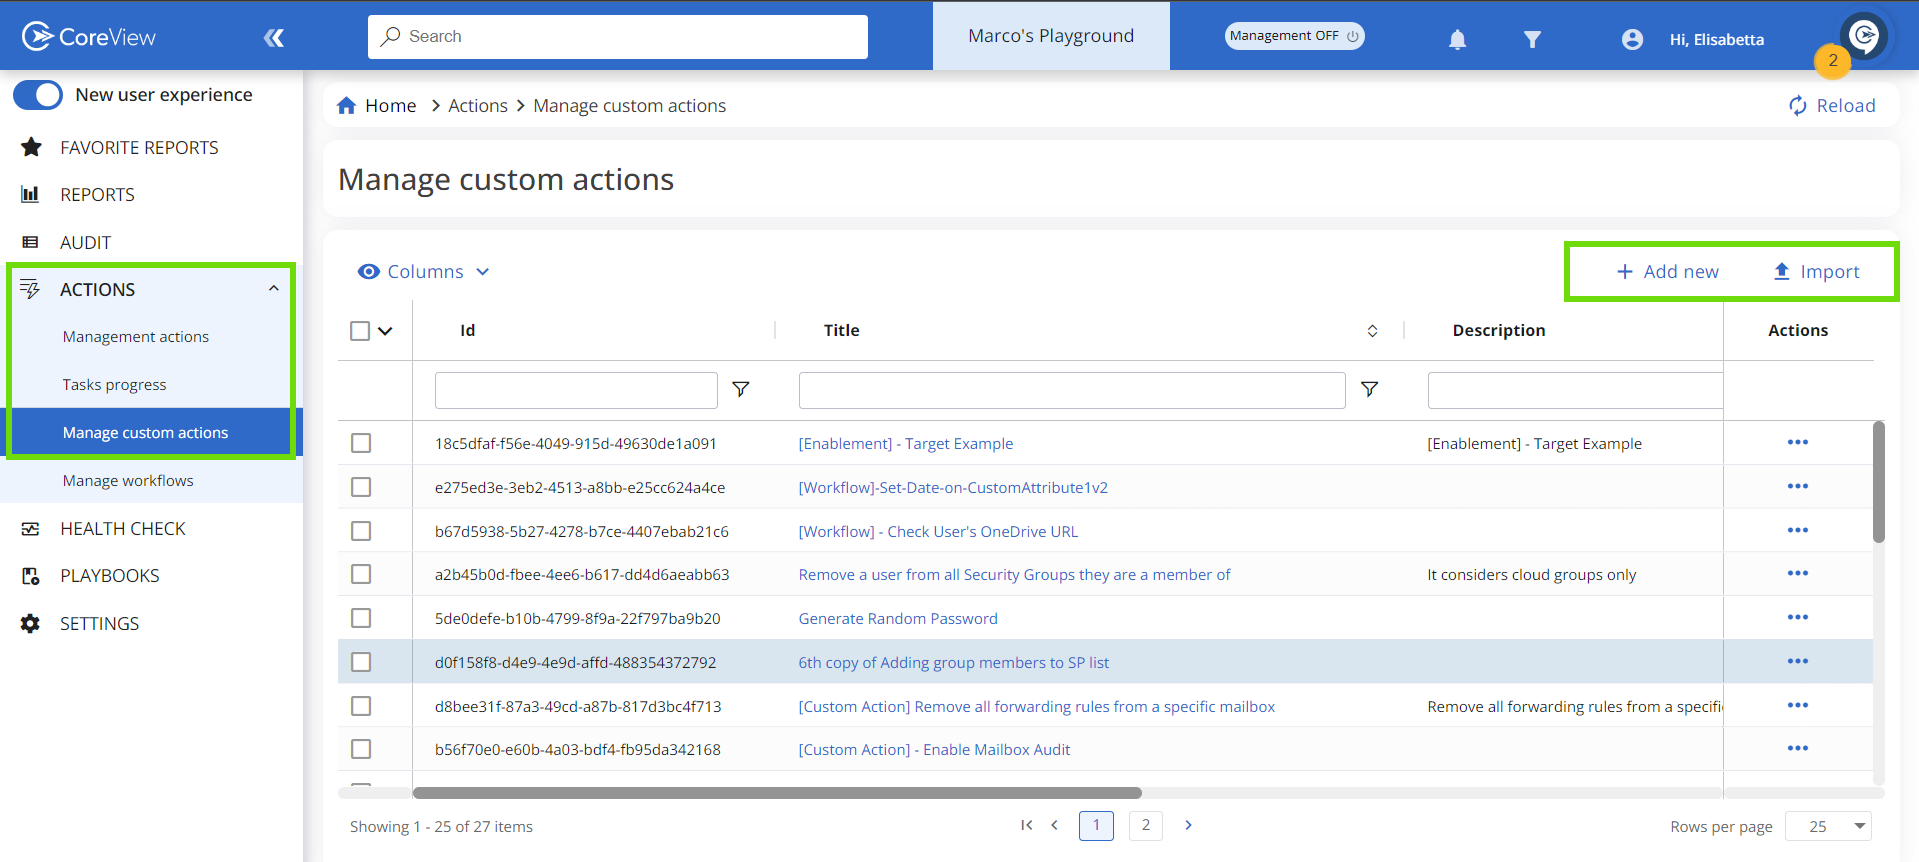
1. Manage custom actions list
Custom actions are not available in the Essentials solution.
This page can be accessed exclusively by Tenant Admins.
Custom actions can be found under the “ACTIONS” item in the side panel menu. From the “Manage custom action” list, you can both execute existing custom actions and create or import new custom actions.

2. Search bar
You can search for any existing management action using the search bar located in the top menu bar. The results displayed will correspond to the keywords you've entered.

4. Manage panel
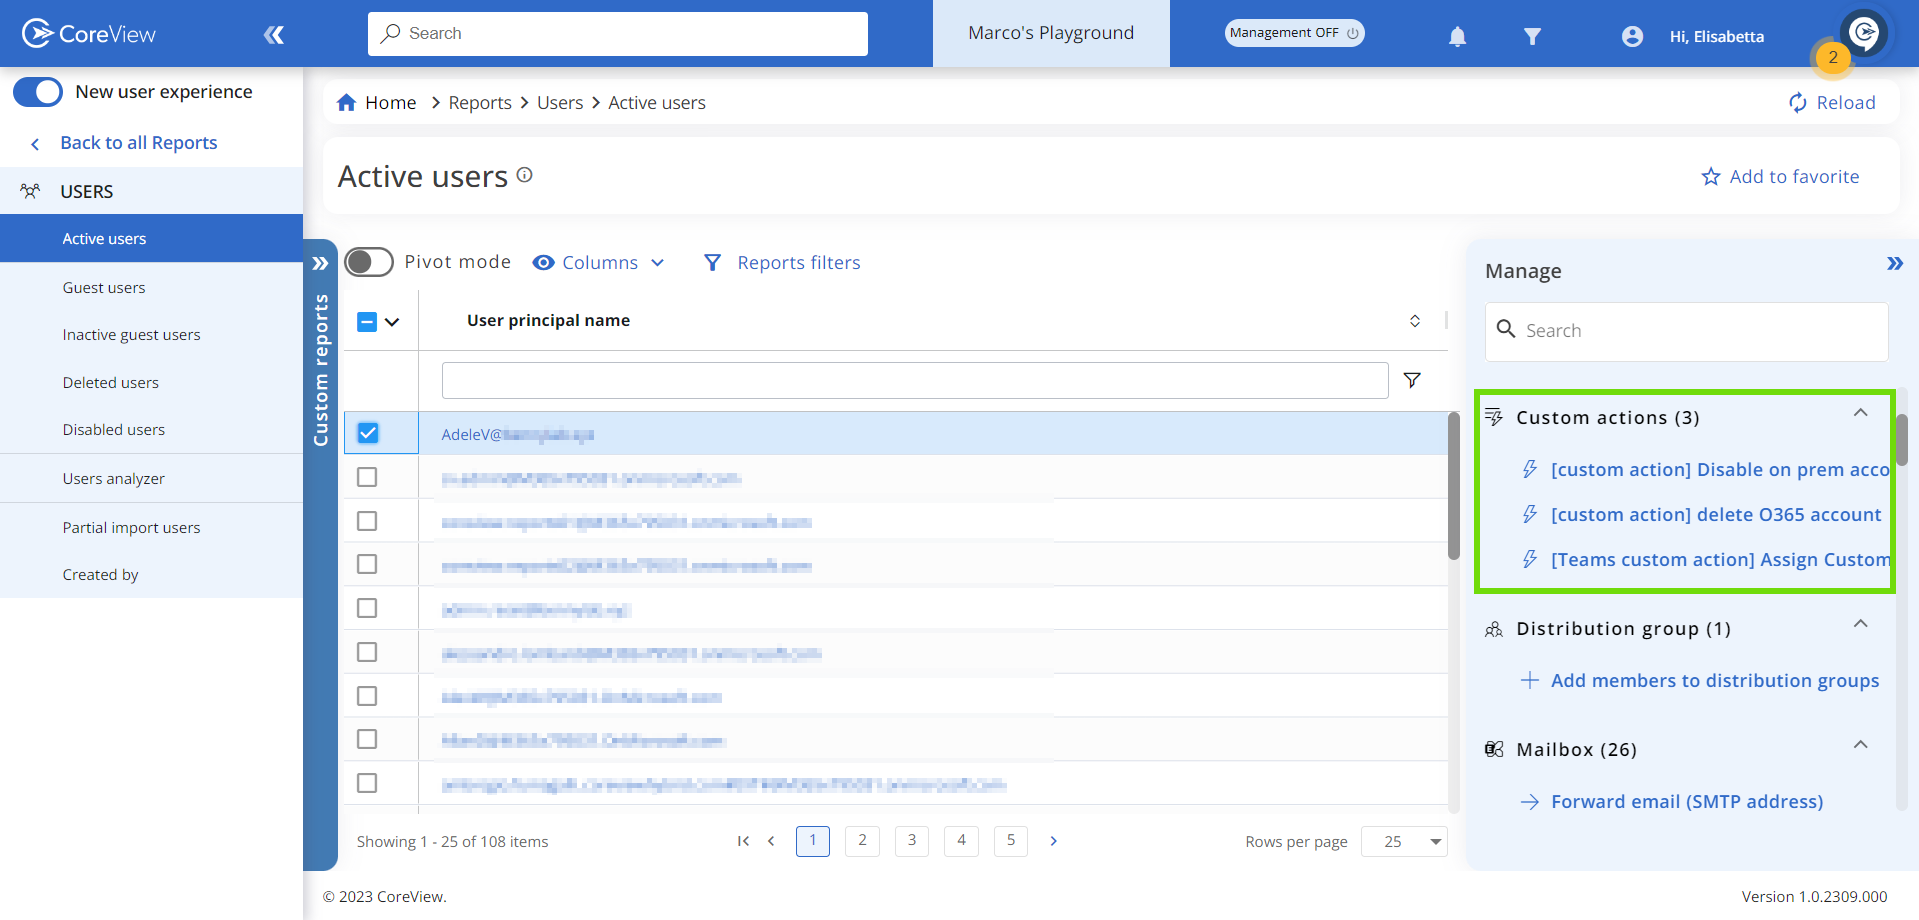
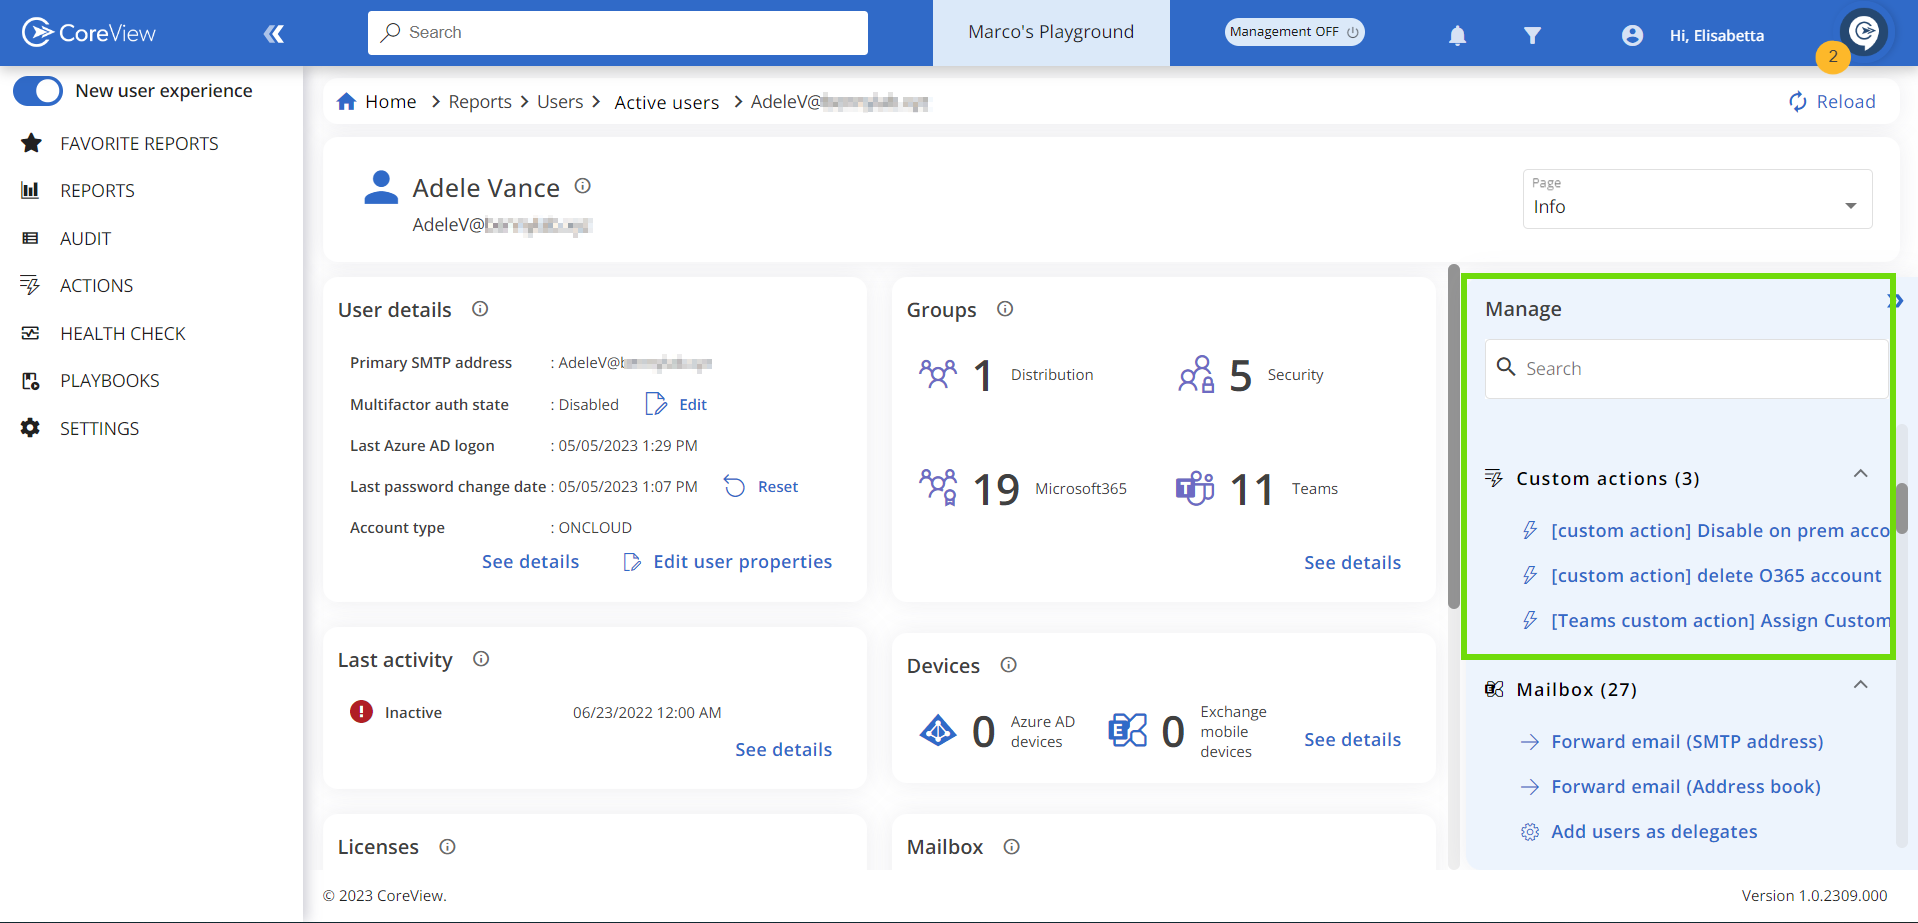
The “Manage” panel can be accessed from both the “Reports” and the “User card” sections. The actions displayed in the manage panel will vary based on the properties of the selected item. If multiple items are selected, the panel will show actions that can be executed on these items collectively.
4.1. Reports
When you select an item from a report, the “Manage” panel will open on the right side of the screen. Here, a list of custom actions will be displayed, based on the properties of the selected item(s).

4.2. User card
Similarly, in the “User card” section, the “Manage” panel will display the custom actions that can be applied to the selected user.

What are the differences?
When you click on a custom action, a wizard will open to guide you through its configuration. Depending on where you access the wizard from, it will display varying numbers of steps:
- From the search bar, and the custom actions list, the wizard's first step will ask you to select a target.

- From the “Manage” panel, the first step is skipped as the target is automatically selected from the report or the user card in question.

