The “Condition (If/Else)” actions provide an intuitive way to incorporate Yes/No branching into your Workflow. This article will show you how to use this feature, using the creation of an onboarding Workflow as an example.
Please note that existing Workflows with applied filters will not be affected by this update.
How to add a “Condition (If/Else)” action to a Workflow
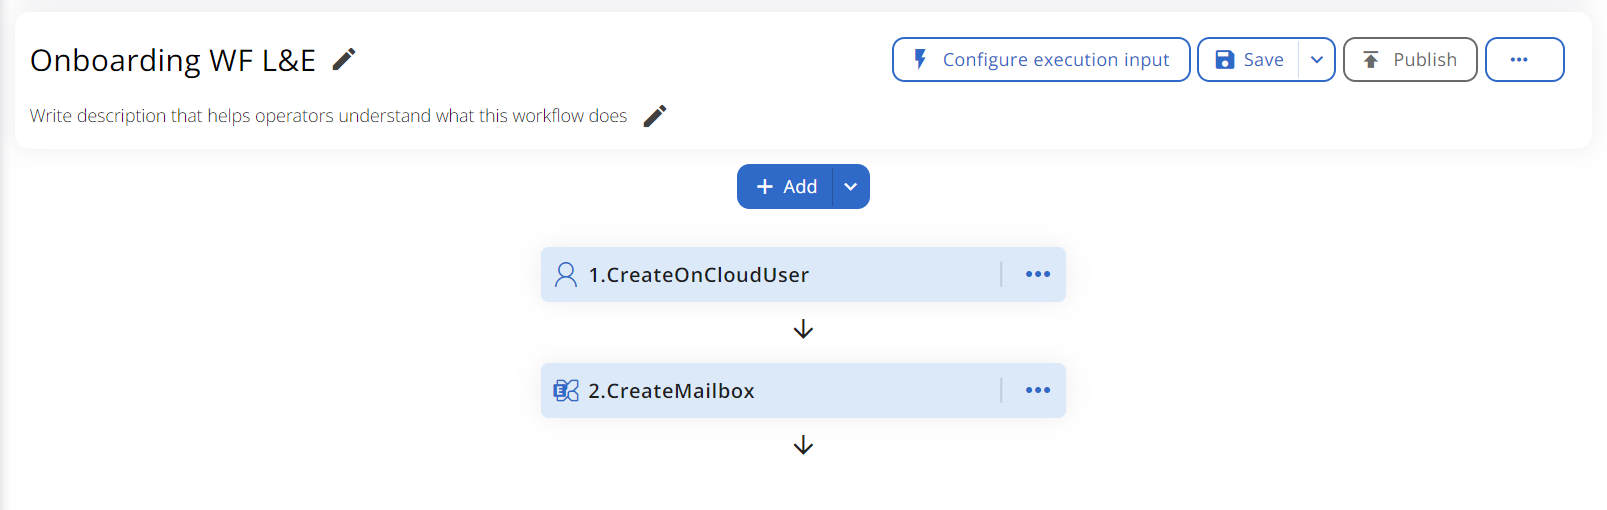
Start by setting up an onboarding Workflow. Assume you've already added a few standard actions:
- Create an on-cloud user
- Create user mailbox
Now, your goal is to add users located in Italy to a distribution group, ensuring only the appropriate users are added automatically. This requires using a “Condition (If/Else)” action.
Step 1: Add a “Condition (If/Else)” action
To add a “Condition (If/Else)” action to your Workflow:
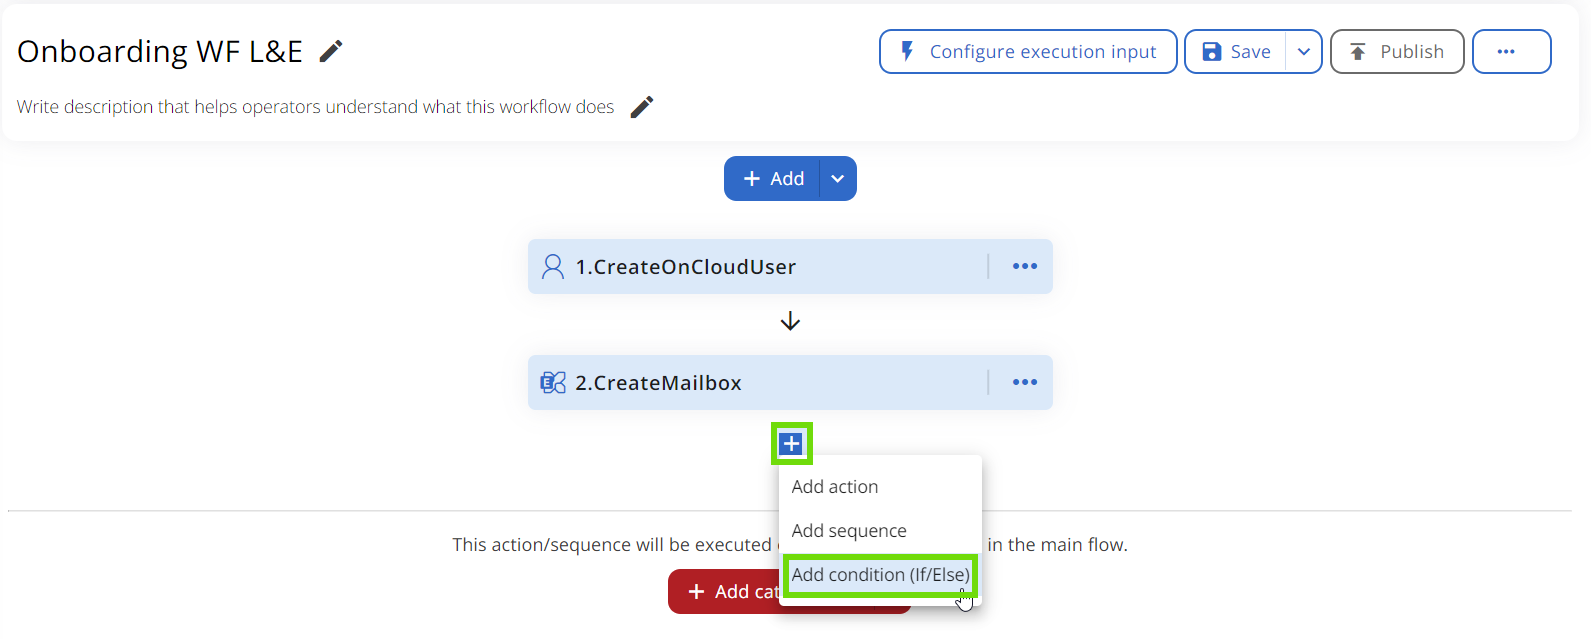
- Hover over the arrow below the previous action and click the “+” button.
- Choose “Add condition (If/Else)” from the dropdown menu.
Step 2: Set the conditions
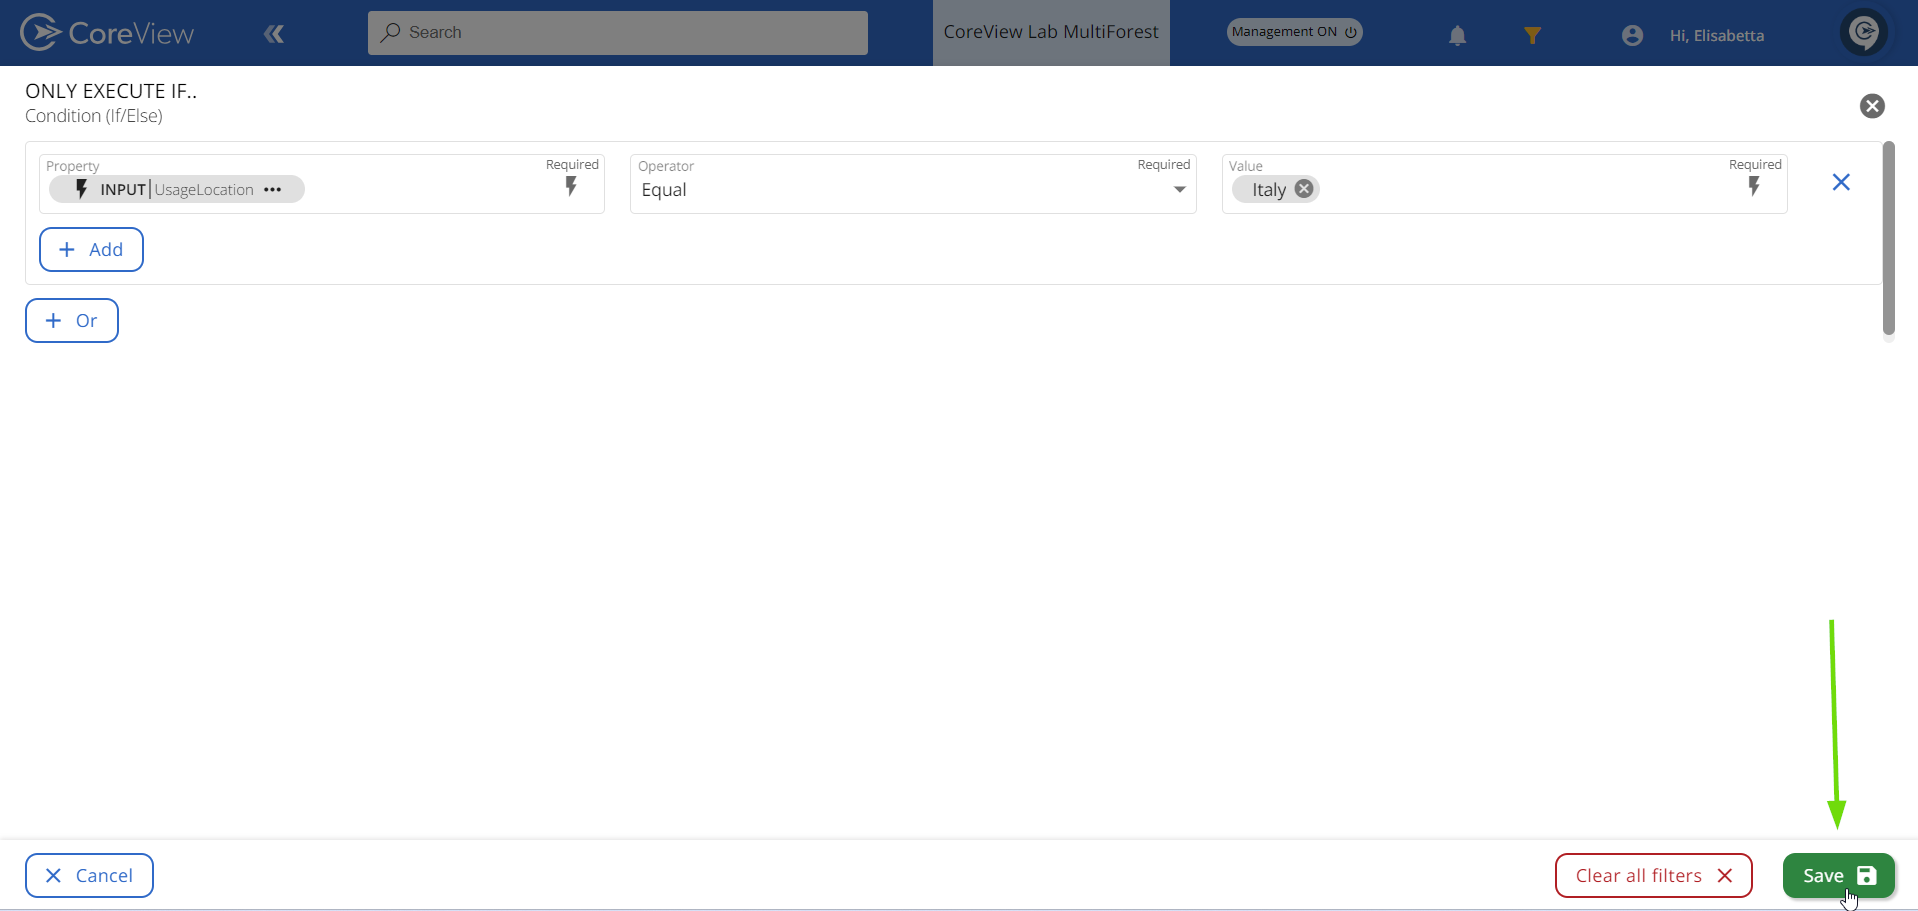
A modal titled “Only execute if…” will appear, prompting you to define the condition(s) for the Workflow to follow the Yes branch. Fill in the fields as follows:
- Property: select the execution input that must satisfy a specific requirement. For this example, we'll select the “UsageLocation” input, which defines the user location.
- Operator: choose the operation (e.g. equal, does not equal, contains, …) that better helps you define the value. For this example, we'll select “Equal”.
- Value: specify the value that completes the condition. For this example, we'll type in “Italy”.
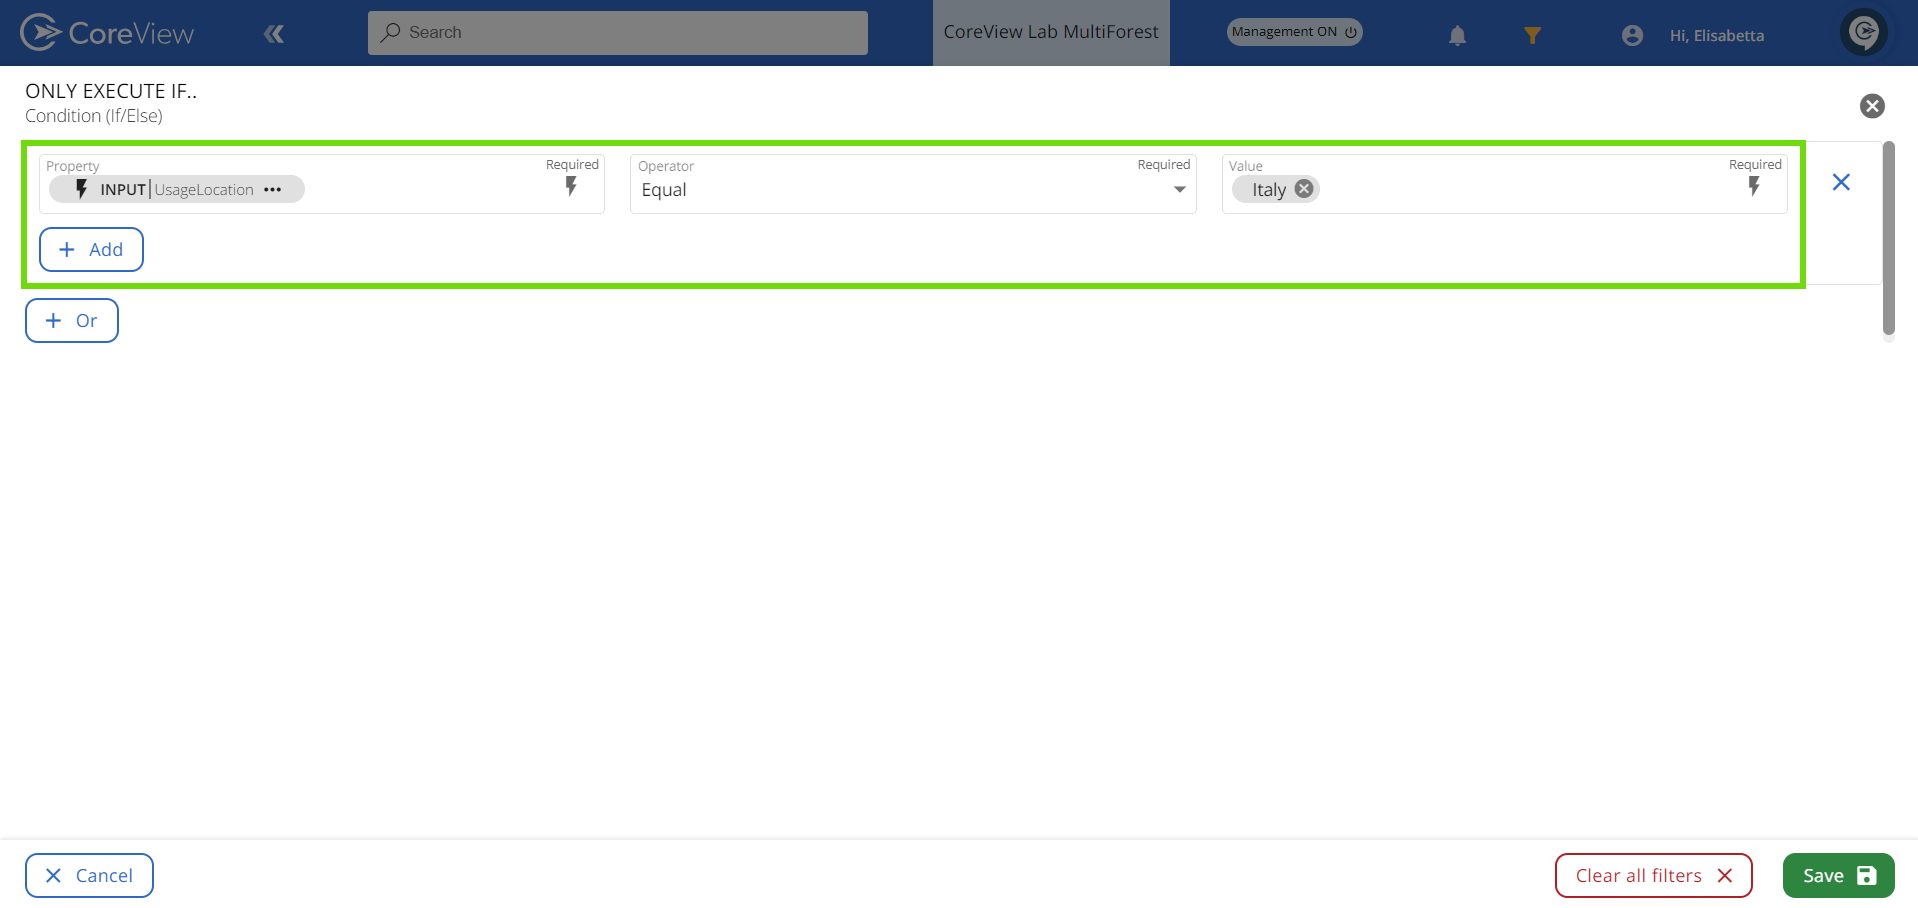
This setup ensures the Workflow continues through the Yes branch if the user's location attribute is “Italy”.
You can add more conditions using the AND (click on the “+Add” button) or OR (click on the “+Or” button) boolean operators for further refinement.

Understanding AND/OR boolean operators
AND
AND implies both conditions must be met for the Workflow to proceed with the Yes branch actions.
For example, if I set the following conditional criteria:
- User location EQUAL Italy
- AND
- User Principal Name IS NOT EMPTY
This means that the Workflow will proceed with the actions in the Yes branch only for those users who are both located in Italy and have been assigned a UPN.

OR
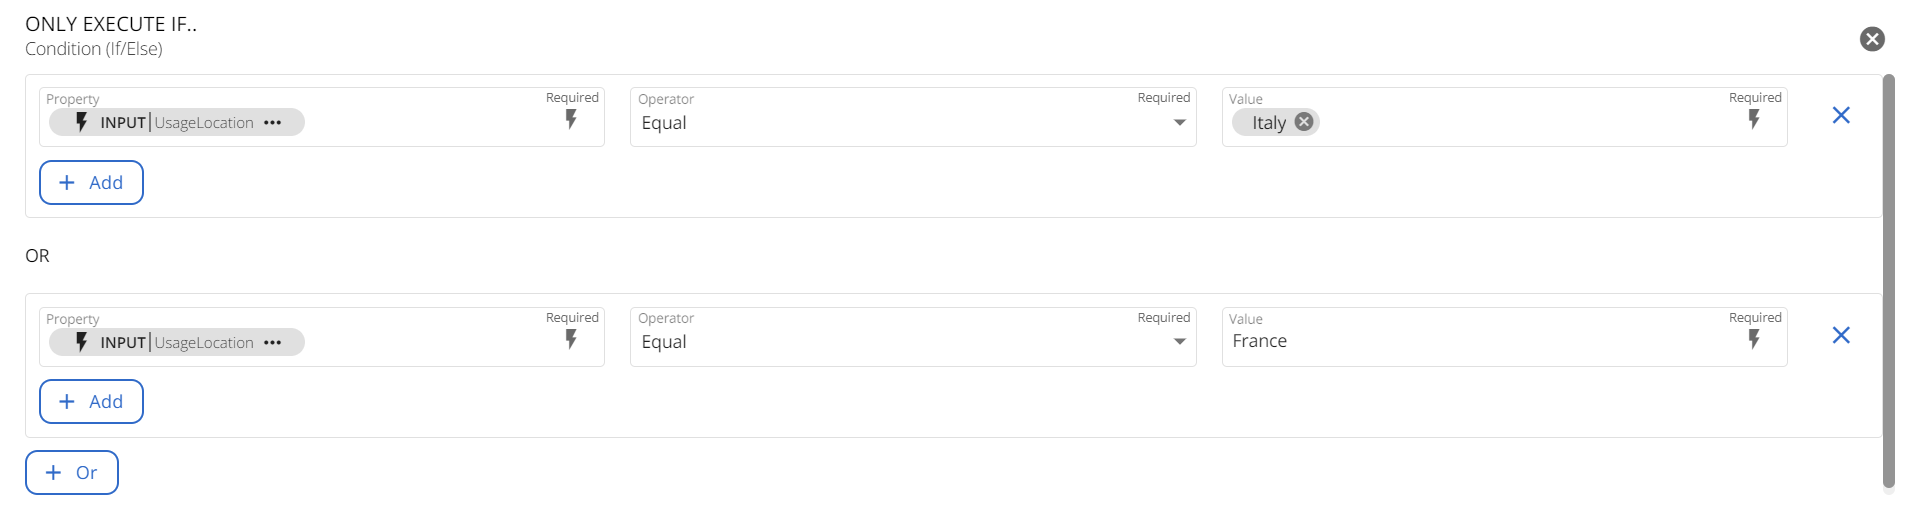
Or means the Workflow proceeds with the Yes branch if either condition is met.
For example, if I set the following conditional criteria:
- User location EQUAL Italy
- OR
- User location EQUAL France
This means that the Workflow will proceed with the actions in the Yes branch for all users located either in Italy or in France.
After setting all necessary conditions, click “Save” to incorporate your conditional actions into the Workflow.
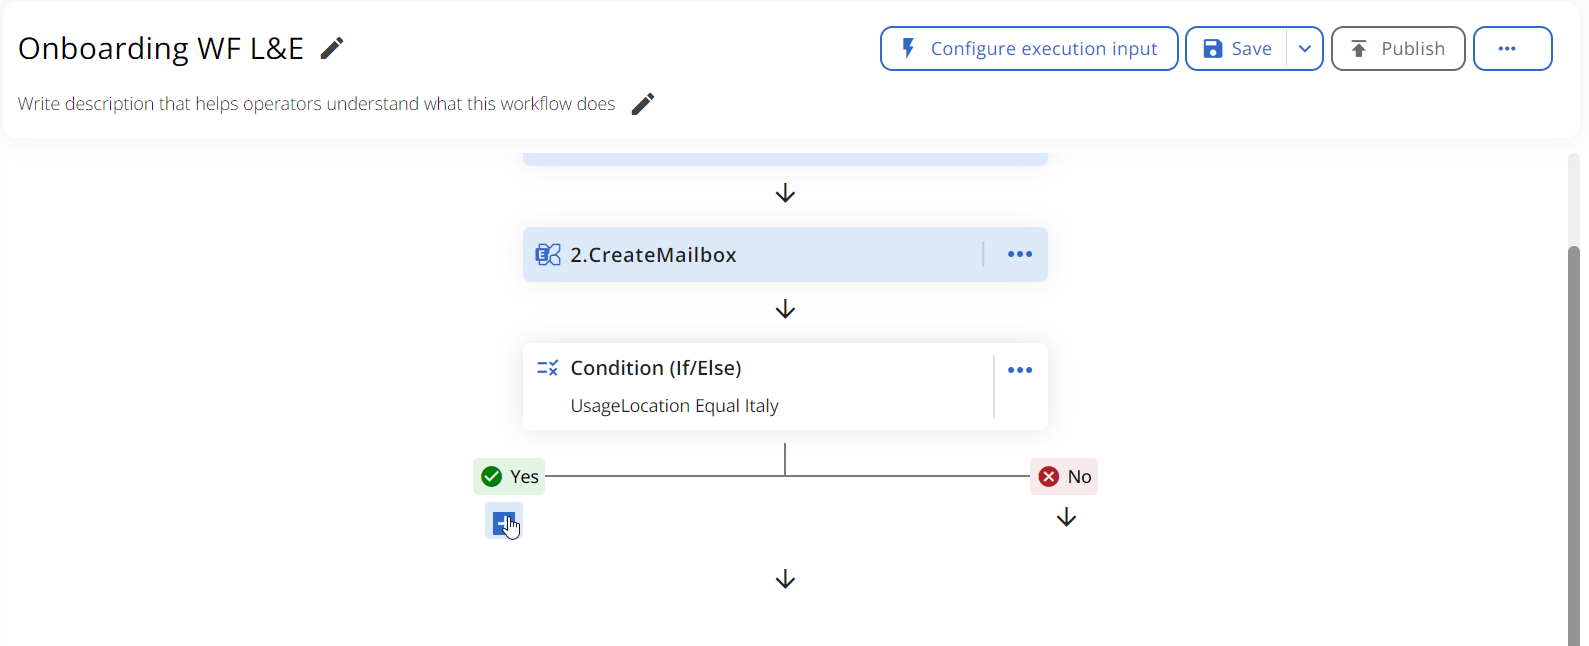
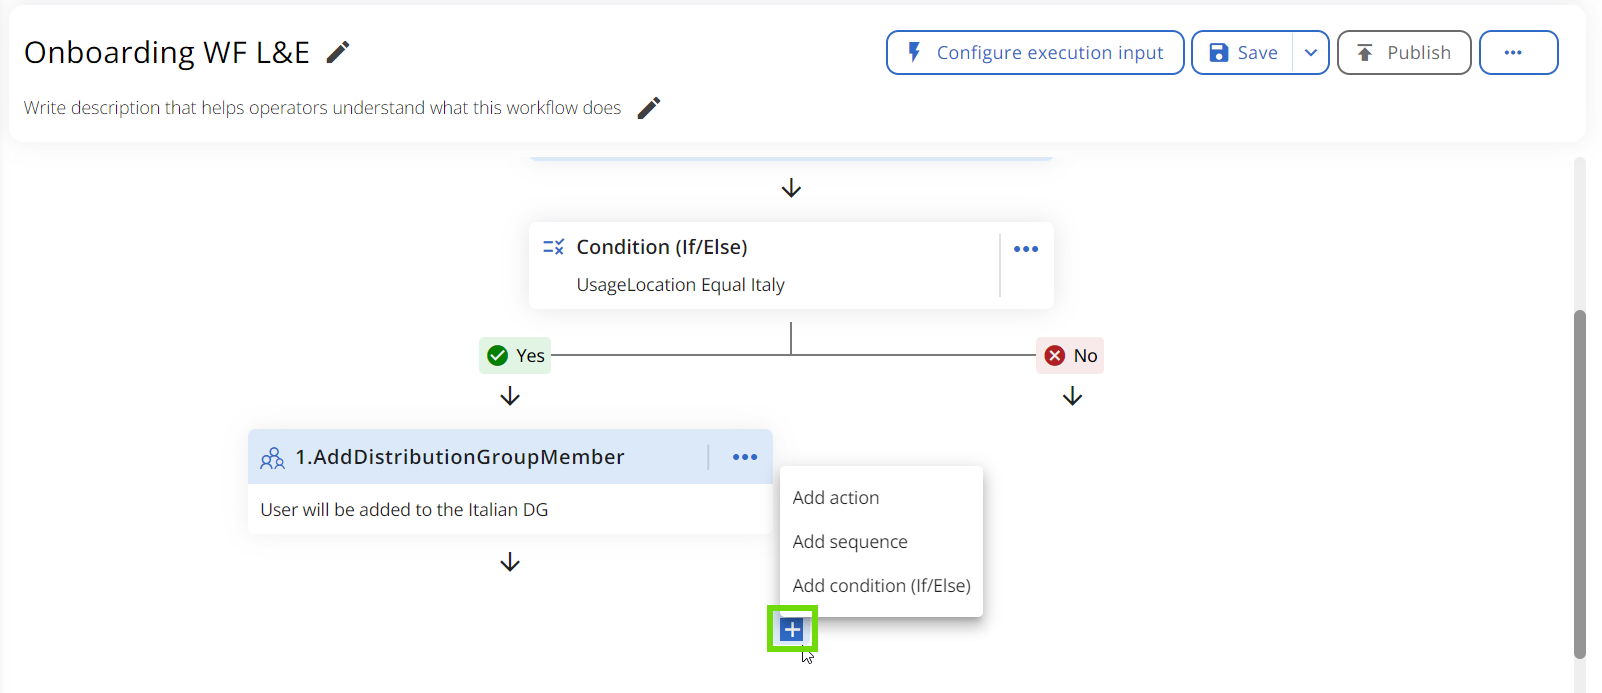
Step 3: Add actions to the Yes/No branches
Your “Condition (If/Else)” action should appear in your Workflow with a Yes/No branching positioned below it. Now, you can start adding actions to these branches. Again, hover over the arrow and select the “+” button to add actions.
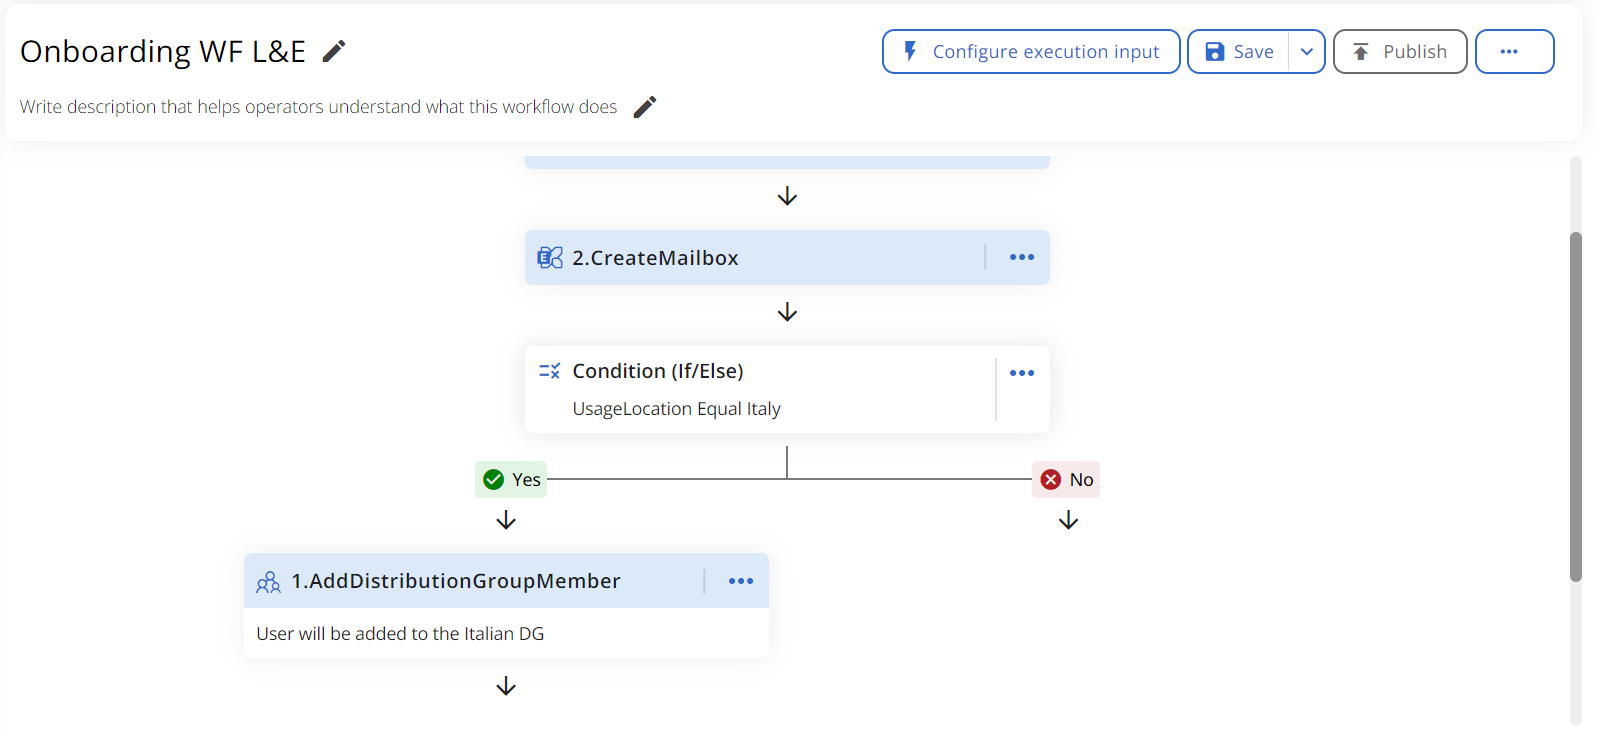
In this example, we'll add an action adding users as members of a distribution group to the Yes branch.
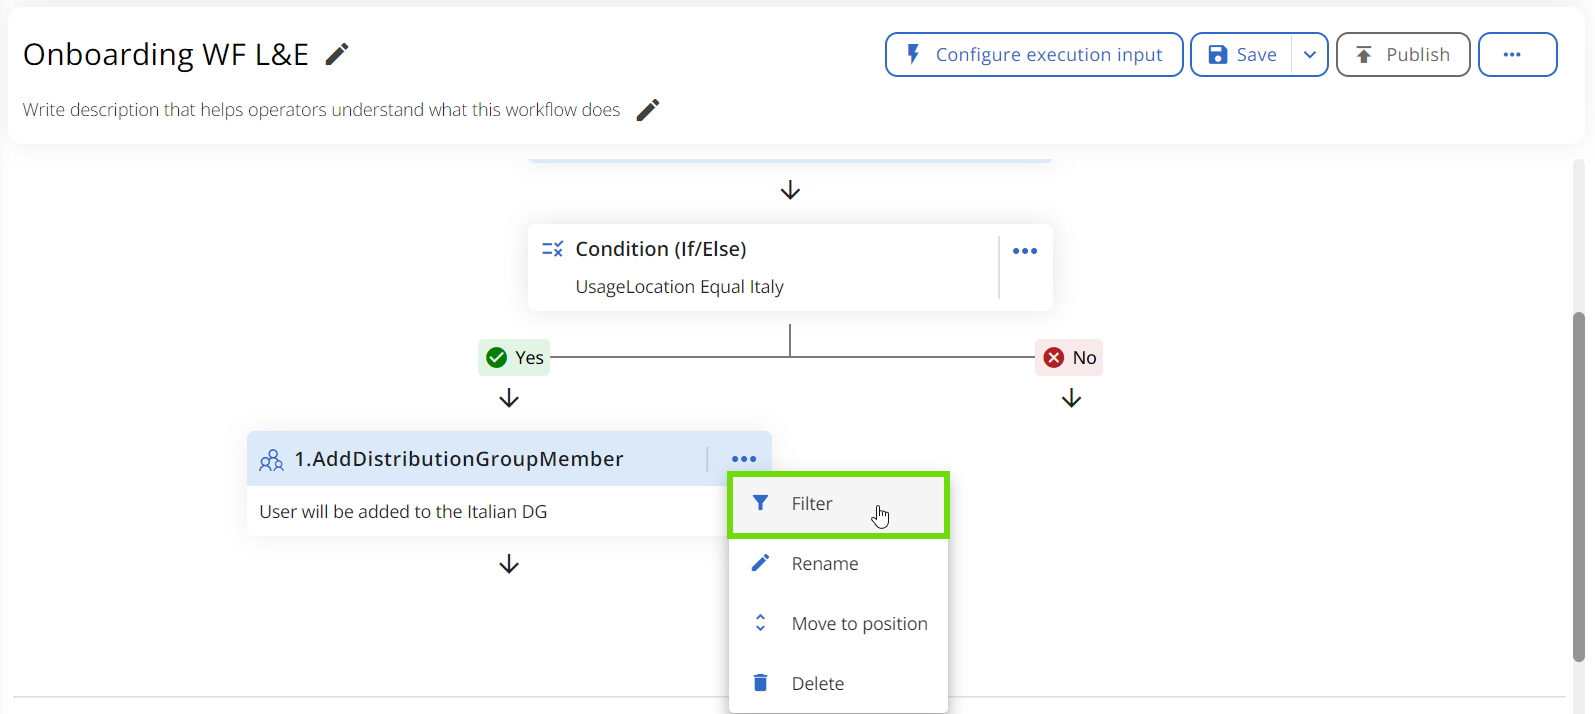
Please note that only regular actions can be added to the branches, as nested conditional actions are not supported. However, you can apply a Filter to these actions to craft complex logical sequences. Simply click on the “…” next to an action within a branch and select “Filter”. The same logic as explained in Step 2 applies.
At this point, decide if you need to add more actions to any branch or reconnect them using the same action.
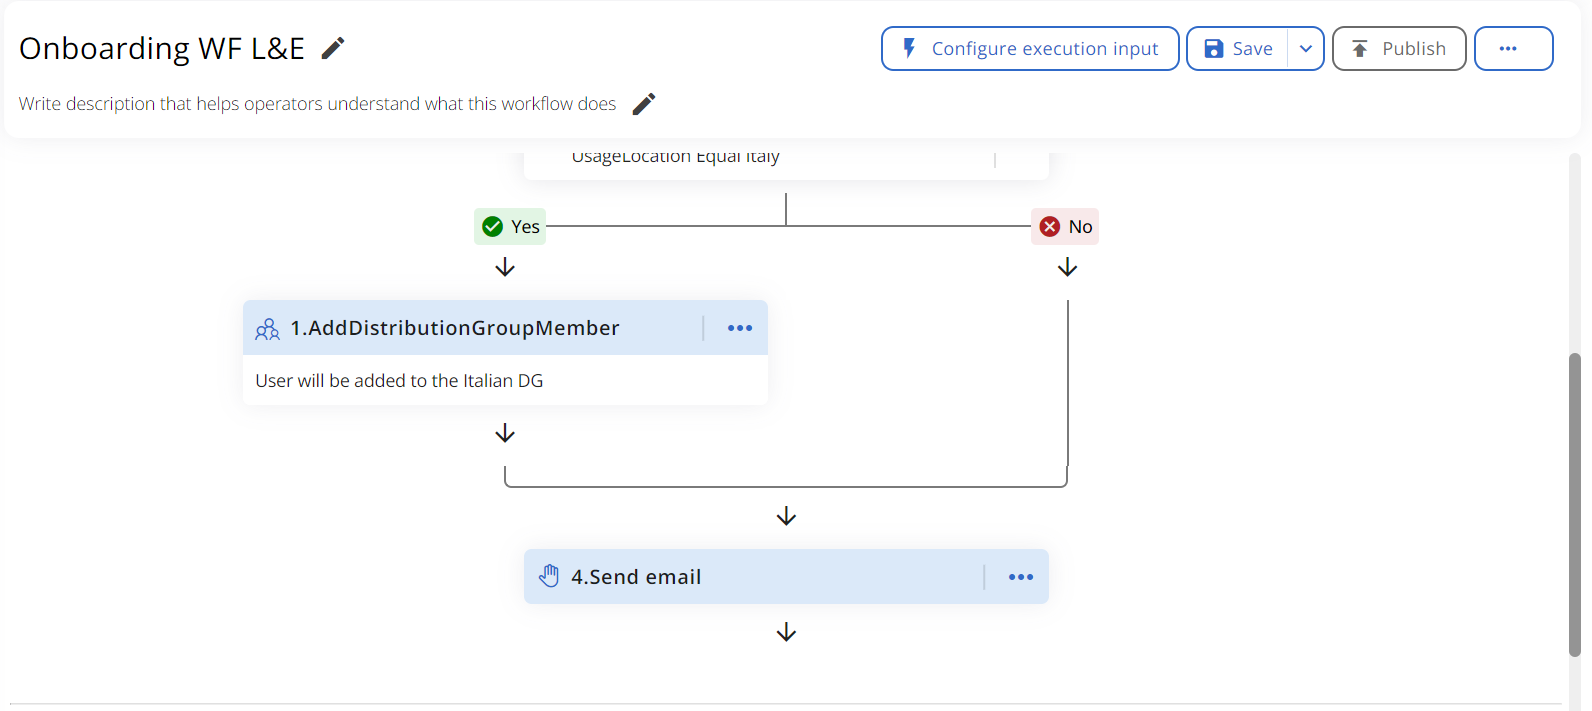
Step 4: Reconnect the branches (optional)
To execute additional actions at the end of branching, select the arrow in the middle.
In this example, we'll send a welcome email to all onboarded users.
The outputs from actions within If/Else branches, such as “Retrieve data from object” or “Create user” can be used in later steps of the Workflow, no matter where they are positioned.
Using error strings as execution inputs for if/else catch actions
A catch action is an action that is executed only if a workflow fails, and it can be added to any workflow. You can utilize error strings from failure messages as execution inputs in if/else catch actions, allowing each conditional action to execute based on the specific contents of an error message.
This approach enables your workflows to handle exceptions with greater precision, ensuring the most appropriate response for each error scenario.
Example: send email depending on error string

You can configure an if/else catch action to check the error string: if the message contains the word “user”, a dedicated “Send email” action for user-related errors will be triggered. If the error string does not contain the word “user”, a different “Send email” action can be executed for all other errors.