Execution inputs, also known as input variables, are crucial pieces of information required for executing a Workflow. In other words, they are the initial data points without which the Workflow cannot be initiated.
Input variables can be provided by:
- an operator (if the Workflow is manually triggered).
- the playbook the Workflow is associated with (if the Workflow is scheduled).
- a CSV file.
How to configure an execution input
Input variables can be configured through the following steps:
- Click “ACTIONS”.
- Select “Manage Workflows”.
- Click “Create a new Workflow”.
- Go to “Configure execution input”.
- Select “+ Manage execution input”.
Please keep in mind that, depending on the actions that you will create, the system might require different or more input variables than those you have planned.
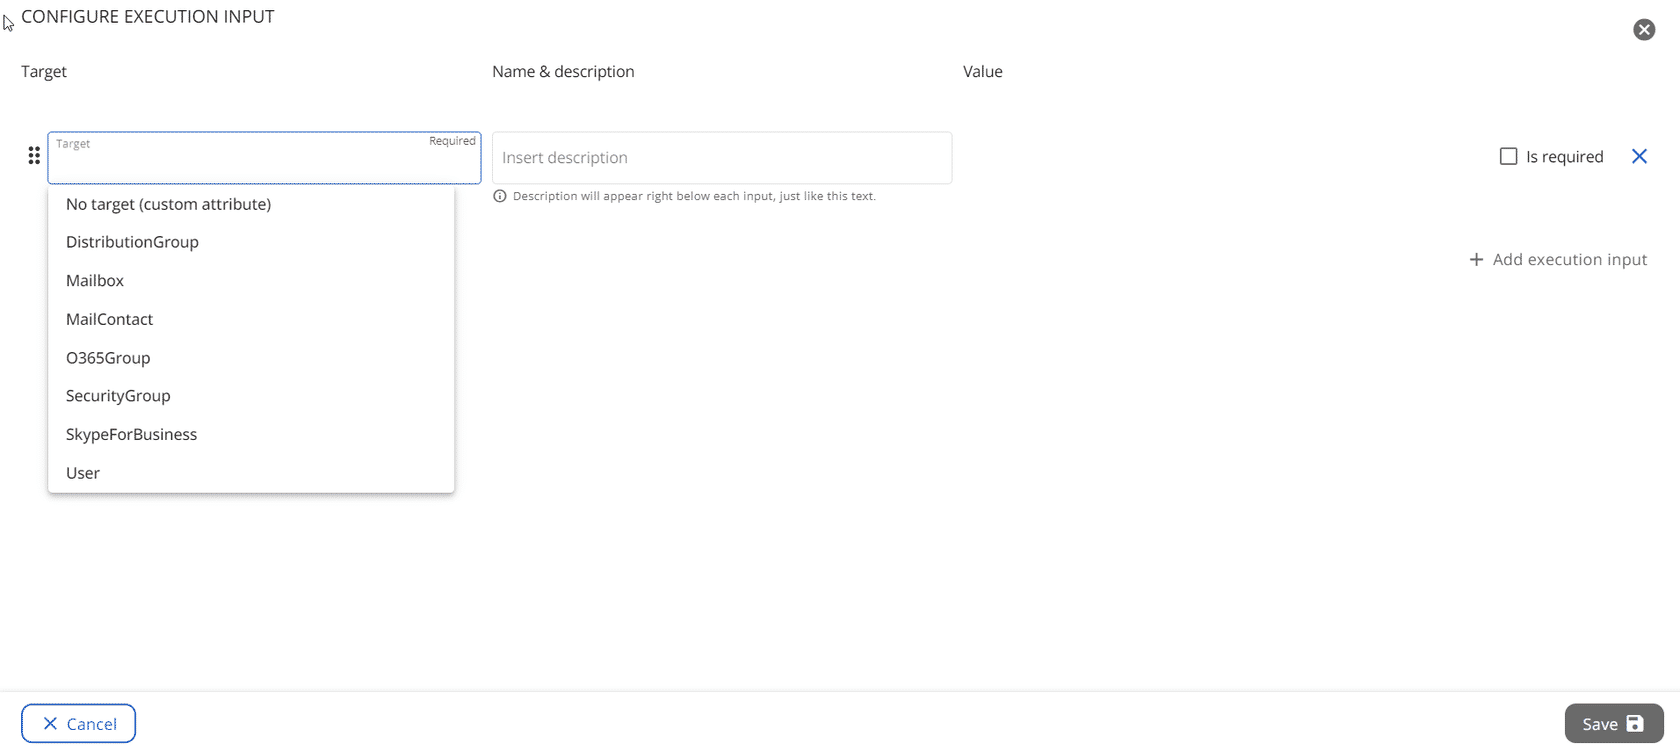
Target
The first step involves defining a target, that is the type of object the Workflow will manipulate.
Predefined targets
Selecting a predefined target will prompt you to pick a variable from a list of properties specific to that target. This simplifies both the creation and execution process.
For example, if you choose the “User” target, you'll see the “User Principal Name” variable. However, if you select the “DistributionGroup” target, the “User Principal Name” variable won't be an available option.

The available predefined targets are:
- DistributionGroup
- Mailbox
- MailContact
- O365Group
- SecurityGroup
- User
- Teans
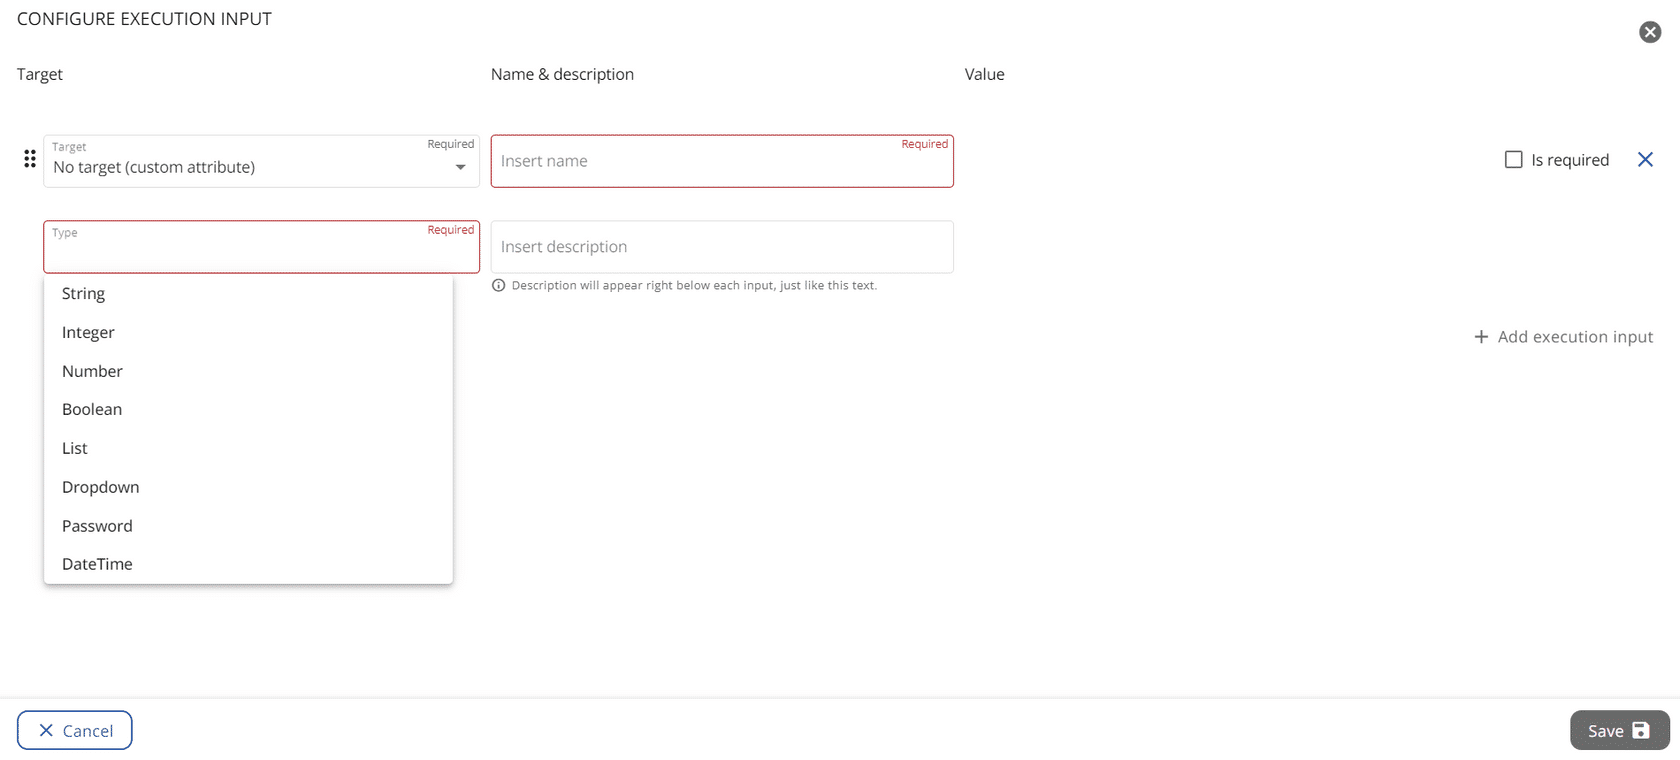
No target
Selecting “No target (custom attribute)”, on the other hand, gives you total flexibility when defining the variables. This option requires you to specify the “Type” of the variable, choosing from a dropdown menu. The available types are:
- String: a sequence of characters.
- Integer: indicates positive or negative whole numbers.
- Number: also includes decimal numbers, which should be typed in the following format: “2,3”.
- Boolean: a variable with two possible values: true or false.
- List: lets you pick a list of variables. You have the flexibility to add them manually or use a CSV file that was previously uploaded.
- Dropdown: provides you with a list of values you can choose from. For example, if you select “Countries”, the user will be presented with a dropdown menu that displays all the countries related to the item, and they'll need to make a selection from this list.
-
Password: generates a secure string, ensuring that the characters are not visible to the user. By clicking on “Set criteria”, you can customize your preferred password length and specify requirements for special characters, digits, and uppercase letters.
Note: password criteria validation is enforced only during manual workflow execution. When executing workflows via CSV CSV upload (OnPrem or Cloud), password validation is not applied—actions will proceed even if the password does not meet required criteria, and no error message will be displayed.
- DateTime: enables you to easily handle a date and a time.
- Multiselect: allows operators to easily select multiple values during workflow execution. Watch video tutorial.
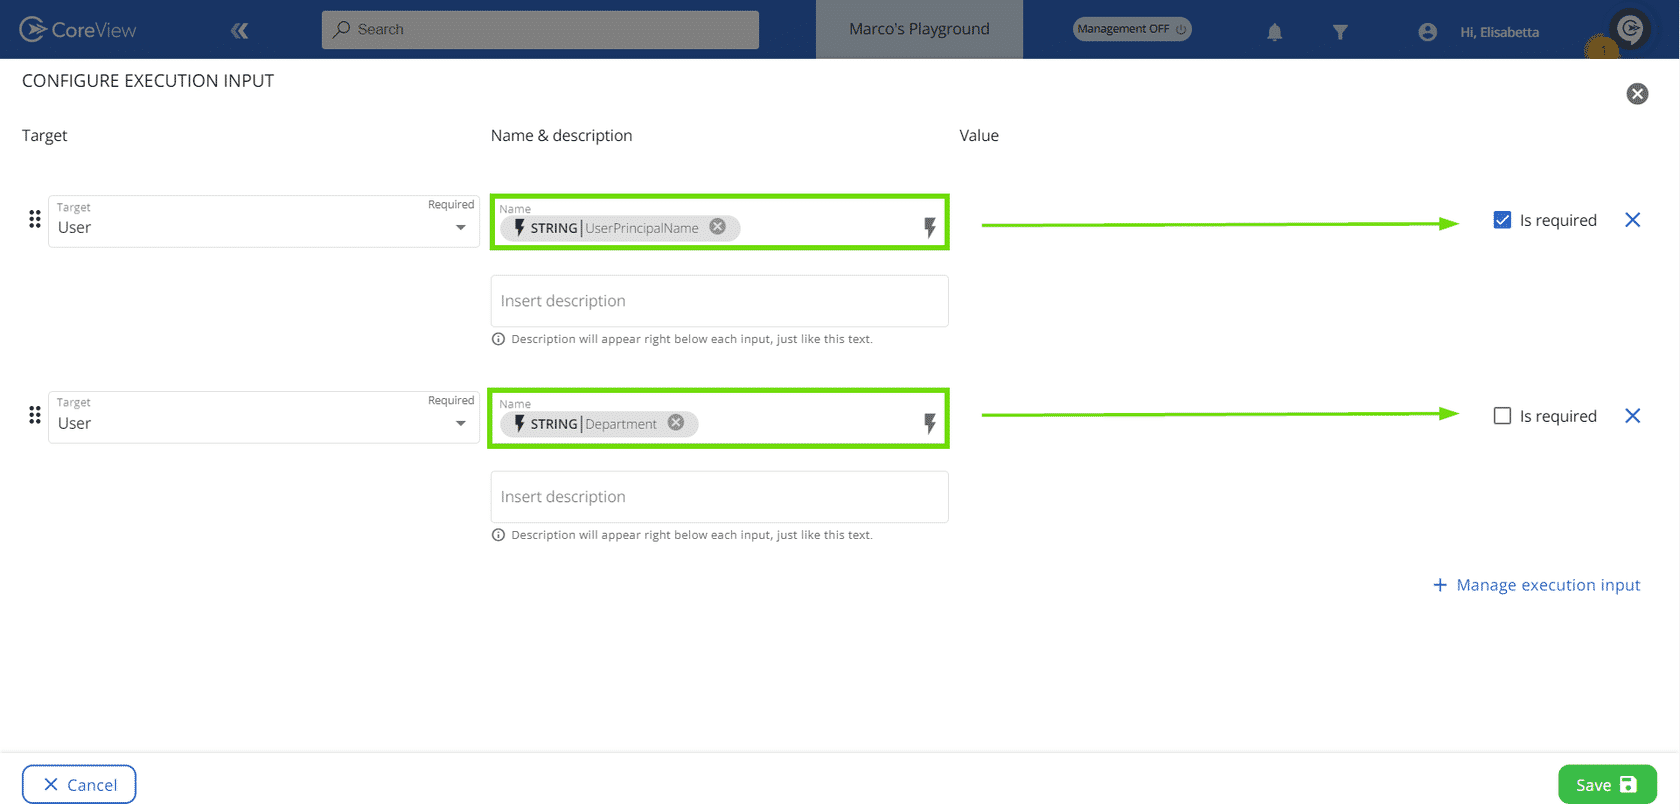
Required vs. unrequired inputs
You can also decide to mark some of the execution inputs that you add as not required by leaving the checkbox on the right blank. However, if you do so, remember to establish what to assume if no input is provided.
For example, if you're constructing an onboarding Workflow, it's crucial to mark “User Principal Name” as required. If it's not provided, the Workflow won't be able to initiate. On the other hand, some fields, like “Department”, can be left empty without affecting the Workflow process.
You can configure as many execution inputs as you need in your workflow—there are no limits.