To run the installer, follow the steps below.
In the Install page:
Step 1: starting installation
Navigate to Install and select the “Install reporting” tab located at the top right of the page.

Enter the domain name of the tenant. This is the tenant where we will provision all the resources to which you need admin access.
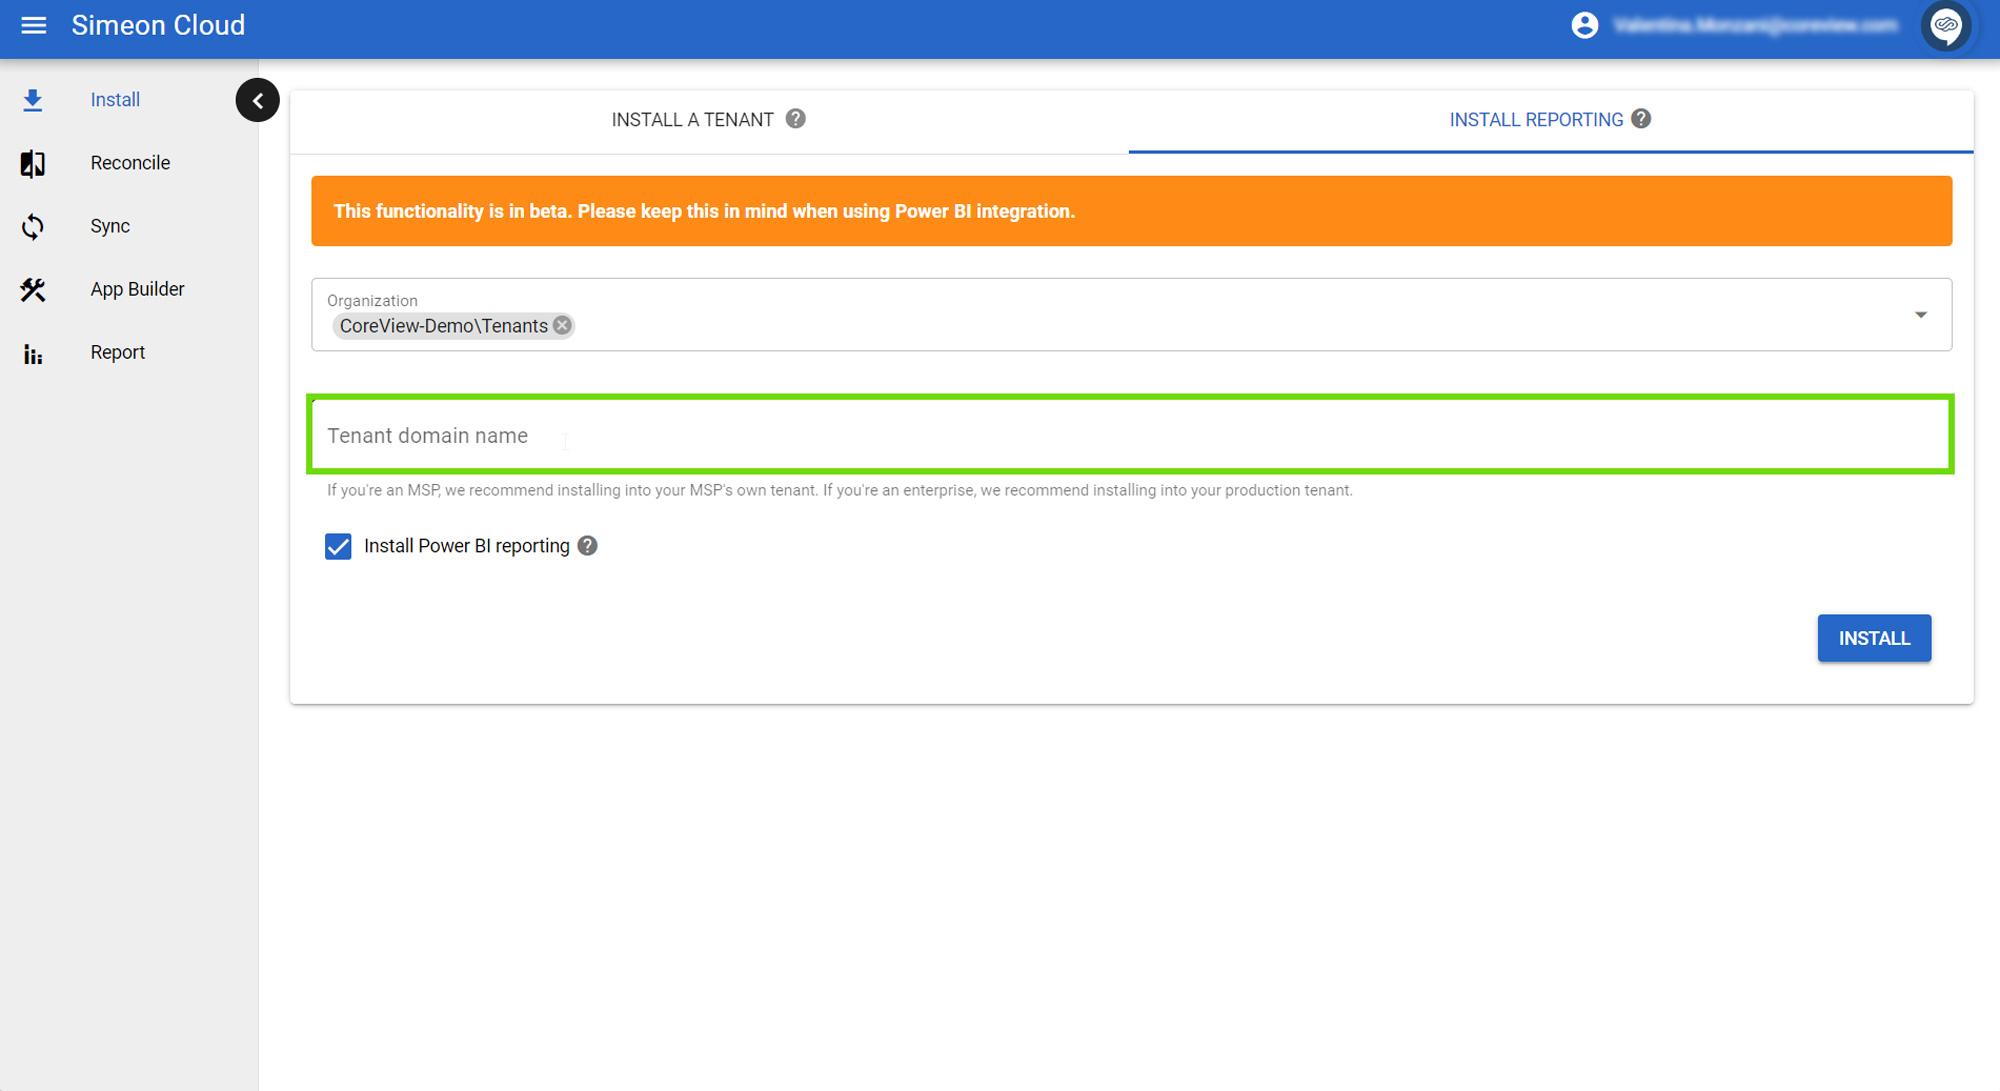
Leave the “Install Power BI reporting” box checked if you wish to install the log analytics workspace and also set up Power BI and provisions the Power BI dashboards.
Click “Install” at the bottom right.

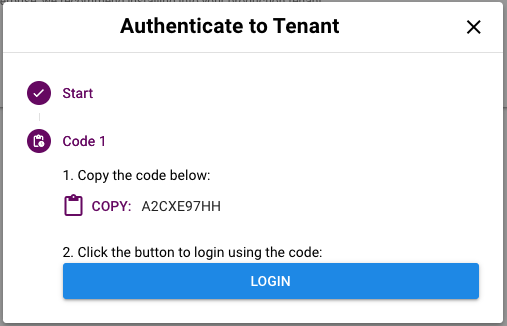
Step 2: authentication
- Authenticate with an account meeting the prerequisites.
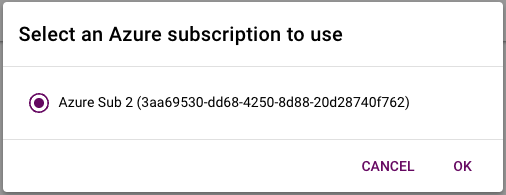
- Select the Azure Subscription when prompted. If you have multiple subscriptions, they will all be displayed here, allowing you to select the specific one you wish to use for installing log analytics. This choice will also determine which subscription will be billed for the log analytics services.
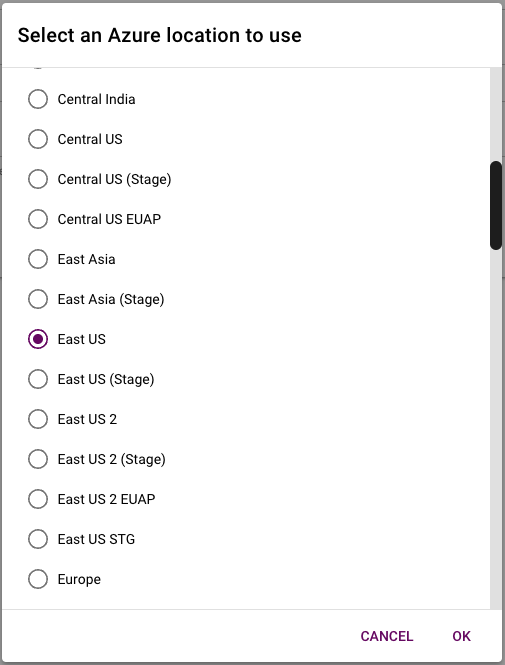
- Choose an Azure location. The system initially defaults to the US East region. You should select the region that most closely matches your Azure DevOps organization's region.
At this point, the installation will proceed and be complete, but the process is not over yet.
While the installation proceeds, all the tenant updates changes are performed. In addition to these tenant updates Simeon sets up a new pipeline in your Azure Dev OPS organization for Simeon as well. As the pipeline runs, it gathers all the data from previous syncs over the past 60 days and uploads this information to the Log Analytics workspace. This uploaded data is then made available in your Power BI reports, ensuring that you have meaningful data to analyze from day one.
It's important to note that while the initial installation process may appear complete at this stage, the process is not over yet. The installation has successfully set up all the necessary resources in the tenant, but now we need to run a backfill operation. This backfill process, which involves tenant updates, is essential for populating the system with historical data and ensuring that all components are fully functional. Without this step, the reports won't display accurate or complete information.
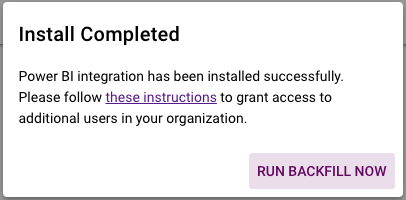
Step 3: run backfill
Once installation is complete, click “Run Backfill Now” to populate the report with demo data and past 72 hours of Sync data.
If you wish to, you can refresh the report manually when viewing in Power BI.
To do so:
- Go to Power BI > Workspaces > Simeon Cloud
- Hover your mouse over the Baseline Compliance Report dataset > Click on the refresh icon
At this point, all necessary resources are established in the tenant, and historical data has been populated and backfilled into the Log Analytics workspace. Now, it is time to set up the Power BI Datasets.