Before beginning the installation of the Hybrid Connector, ensure you have gathered all the necessary information. This checklist will help make sure you have everything ready for a smooth installation process.
1. Domain name
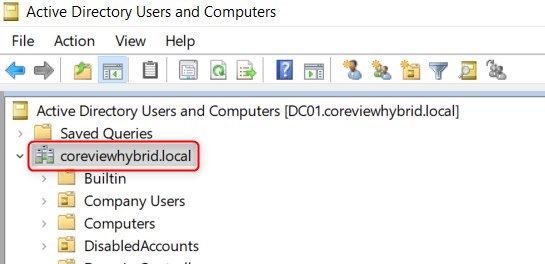
Locate your local domain name. Use a Domain Controller to open “Active Directory Users and Computers” and find the name displayed on the left.
2. Domain Controller name
Identify your primary Domain Controller's name. On your primary Domain Controller, open “File Explorer”, right-click on “This PC”, select “Properties”; and note the “Full computer name”.

3. Exchange Server name
Determine the name of your Exchange Server. Access the server where Exchange Server is installed and, as previously described, check the “Full computer name”.
4. Exchange Server PowerShell URL
Find the PowerShell URL for the Exchange Server. On the server where the Exchange Server is installed, sign in to the Exchange Admin Center. Navigate to “servers” > “virtual directories”, double-click on “PowerShell (Default Web Site)”, and note the “Internal URL”.
