Step 1: Installation
To start, download the latest installation package (version 2.1.8) and run the .exe file using administrative credentials. Agree to the terms by selecting “I accept the agreement” and click “Next”.

Modify the default installation directory if necessary by entering your preferred path, then click “Next”.

Customize your Start Menu shortcut if desired, then click “Next”.

Opt to create a desktop shortcut by clicking “Next”.

Click “Install” to begin the installation process.

On the final page, ensure both checkboxes are selected and click “Finish”.
If you are installing the Hybrid connector for a customer registered with the CoreView government data center, please refer to the Hybrid Connector installation for GOV data center article.
Step 2: Preparation
The browser will automatically open to the main configuration page at http://localhost:1234 after installation.
Please note that only the latest versions of Chrome and Edge browsers are supported.
Troubleshooting:
- If you see a “Page not found” error, wait 10 to 20 seconds and refresh the page.
- If the browser doesn't open automatically, manually navigate to
http://localhost:1234
Step 3: Configuration
When you reach the “Secrets configuration” page in the CoreView Hybrid Connector setup, you must provide values for both the SecurityKey and LiteDB password. There are two distinct scenario, depending on your use case:
Existing installation: use existing SecurityKey and LiteDB Password
Choose this option if you are upgrading the service or reinstalling it and already have these values from a previous installation. This ensures continuity and preserves any previously encrypted data.
- Select “Provide values”
- Retrieve your existing, base64-encoded SecurityKey and LiteDB password from your current installation.
- The file path is:
C: \Program Files (x86) \CoreView Agent - The file name is:
Forward365.Service.PowershellService.Agent.exe.config
- The file path is:
- Copy and paste these values into the respective fields
- Click “Save”.

First time installation: generate new keys automatically
Choose this option if you are installing the Hybrid Connector for the very first time and do not already have keys or passwords from a previous setup.
This option also applies when the configuration must be recreated from scratch. In this case, remove the existing configuration from both the CoreView portal and the virtual machine, then complete the entire setup again from the beginning.
- Select “Generate automatically”.

- The app will generate new, secure values for both the SecurityKey and LiteDB password.

Important
Copy and securely store the generated values. You may need them in the future for recovery, migration, or reinstallations.
In high-availability deployments with two or more servers running the Hybrid Connector, keep track of the SecurityKey and LiteDB password generated during the installation on the first server. Reuse the same values when installing the connector on the other servers in the pool to avoid repeating the session verification.
- Click “Save”. All values are stored securely by the application after saving.
- Click “Continue” (or use the main navigation button) to proceed to the next configuration step.
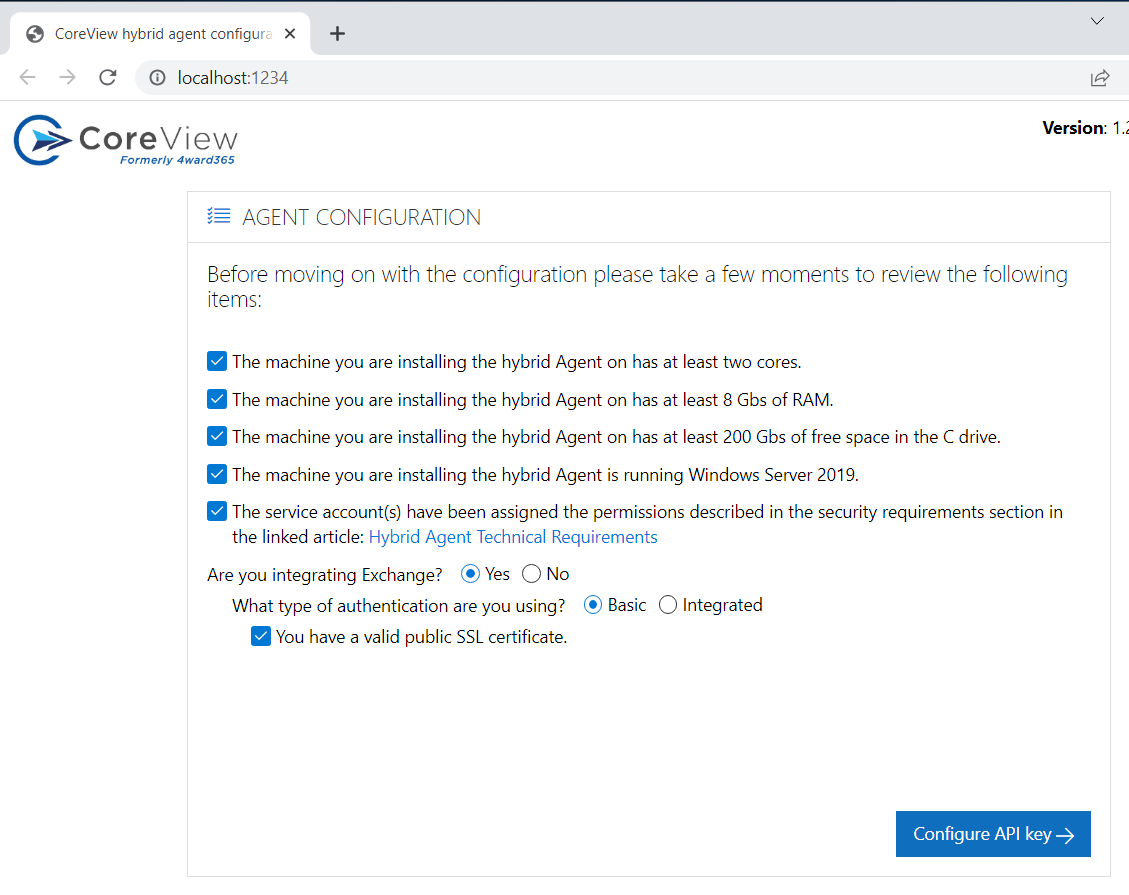
Step 4: Configuration review
Verify that all requirements are met on the configuration page. Check all the boxes, then click “Configure API key”.
Step 5: Connector configuration
Link your CoreView Tenant with the Connector by accessing the CoreView Portal.
Navigate through “Settings” > “My organization“ > “On premises“ and select “Configure on premises”:

Choose services, enter the required credentials, and click “Save”. If you are configuring more than one Active Directory forest, enter the credentials for each one.

Copy the generated API Key and paste it into the connector.

Click “Submit” after entering the API Key.
If unsure, click “Learn more” to visit our knowledge base article on the On-premises import process.

A “Success” message indicates a successful configuration.

User account creation
A new user named “agentuser1” will be created, and it will appear on your “Operators” page at this stage. This account allows CoreView to interact with the Hybrid Connector.
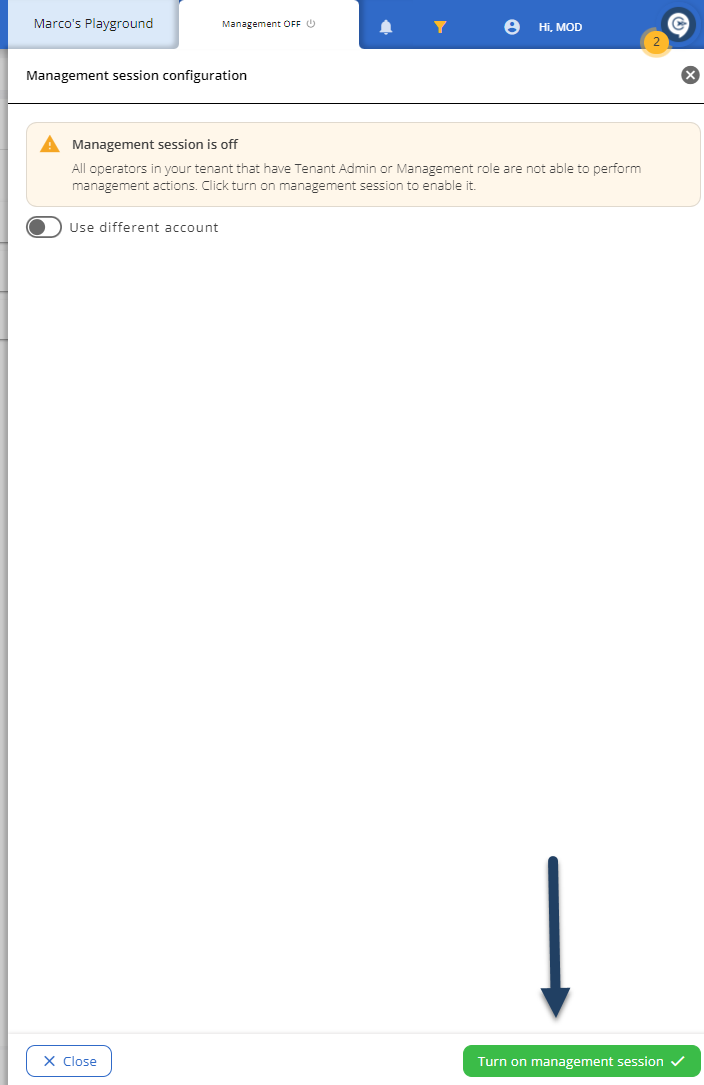
Step 6: Verify and open a session on the CoreView portal
Once the connector is configured, go back to the CoreView portal and click “Verify session”.

Remember to close your management session before proceeding.
The portal will verify the configuration and open the session. A green “Verified” message indicates a successful installation.

If you get any errors, consult the logs at c:\temp\logs, resolve any issues, and then retry “Verify session”.
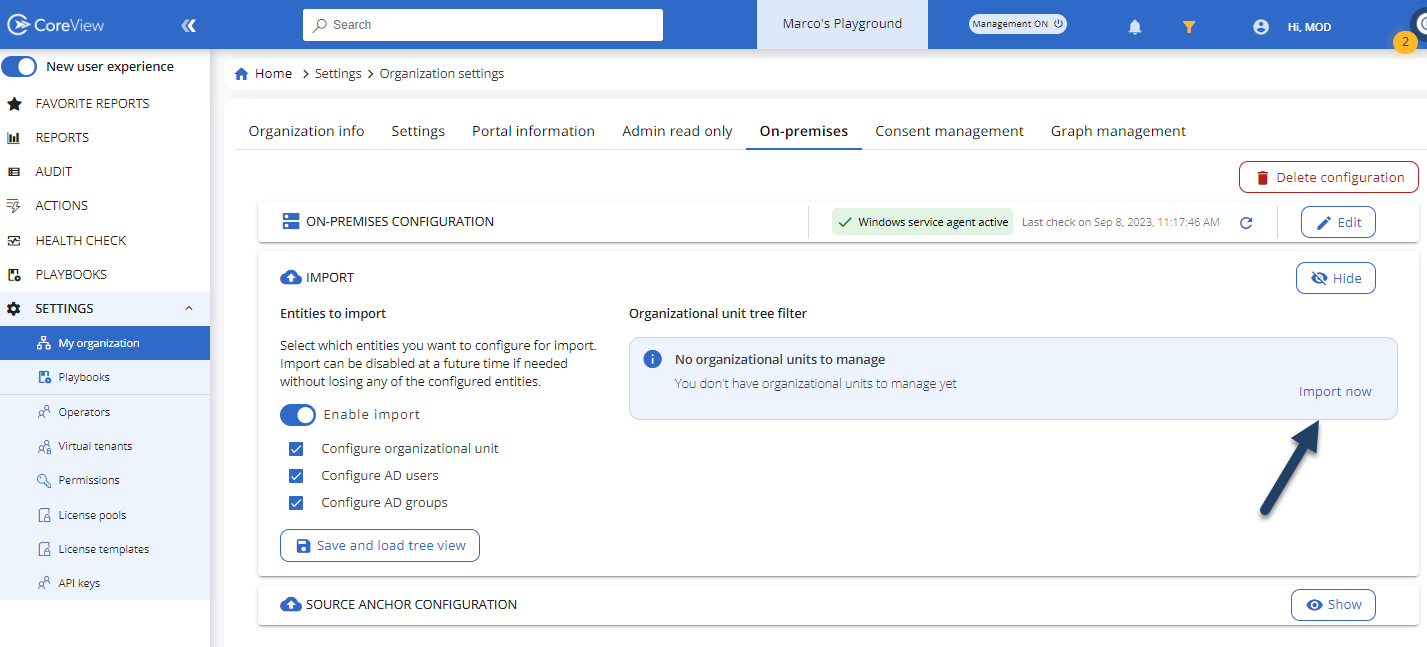
Step 7: Import data
You can now import on-premises data to your CoreView tenant. Click “Show”.

Enable the import by turning on the “Enable import” toggle, select the components you would like to import into CoreView, and click “Save and load tree view”.

The Hybrid Connector will initiate a docker image to connect and display a tree view of your configured Active Directory forests. Click “Import now” to begin.
Importing may vary in time based on the data volume and the number of Active Directory forests configured.
The system will display the Organizational Units of your Active Directory forest(s). Select the ones you would like to import into CoreView and click “Save”.
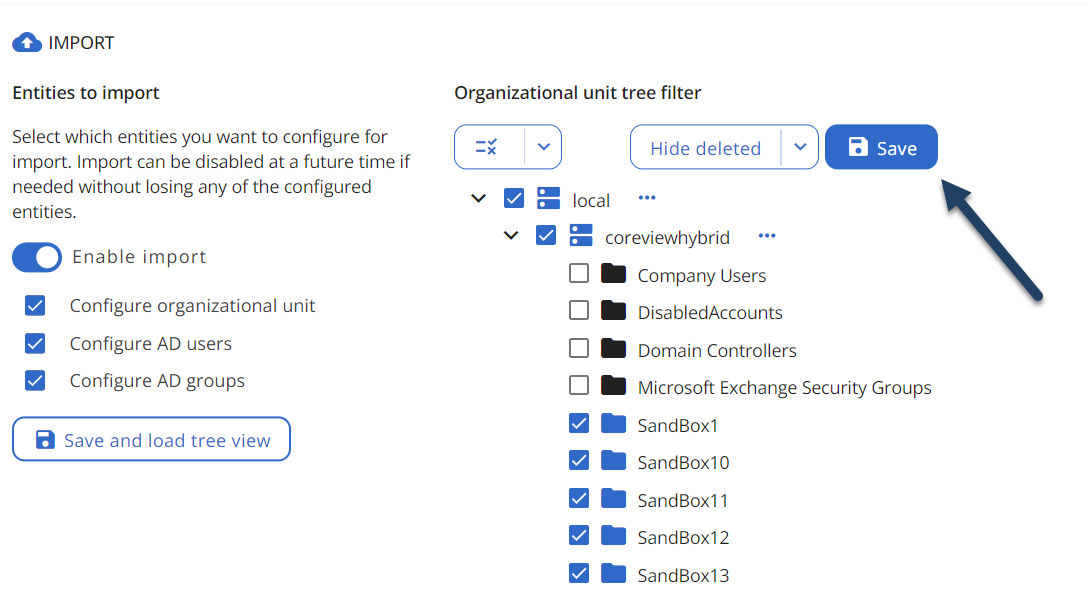
For multiple forests, select the necessary Organizational Units for each.
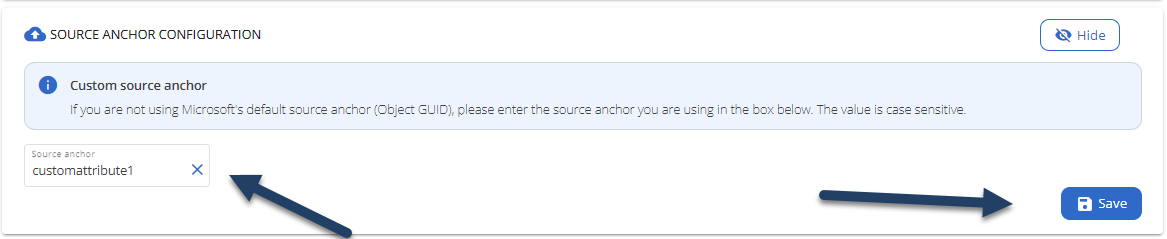
Step 6: Source anchor configuration (optional)
For Microsoft 365 environments using a custom attribute for Active Directory Connect synchronization instead of the default Source Anchor (Object GUID), configure the same setting in CoreView.
Click “Source anchor”, input your custom attribute, and click “Save”.
Please, note that for technical reasons, we do not support the Ms-Ds-ConsistencyGuid attribute.
Step 8: Final steps
The setup and configuration of the CoreView Hybrid Connector are now complete. Enable your Management Session, and your CoreView sessions will be hosted by your server.