We are pleased to announce that CoreView has introduced support for dynamic groups. You can now directly manage and view dynamic membership within the CoreView app. This enhancement allows you to delegate these management tasks to users who do not hold a global admin role. This guide will show you how to access and utilize these features effectively.
Understanding dynamic groups
Unlike regular groups, which require manually selecting members each time you want to add someone, dynamic groups operate based on rules. Once you establish a rule (for example, including all users in the retail department or all users based in the US), the system automatically updates the group's membership. It adds users who meet the criteria and removes those who no longer do. This functionality eliminates the need for manual adjustments to the group's membership.
Identifying dynamic groups in CoreView
Currently, CoreView supports dynamic security groups and dynamic Microsoft 365 groups.
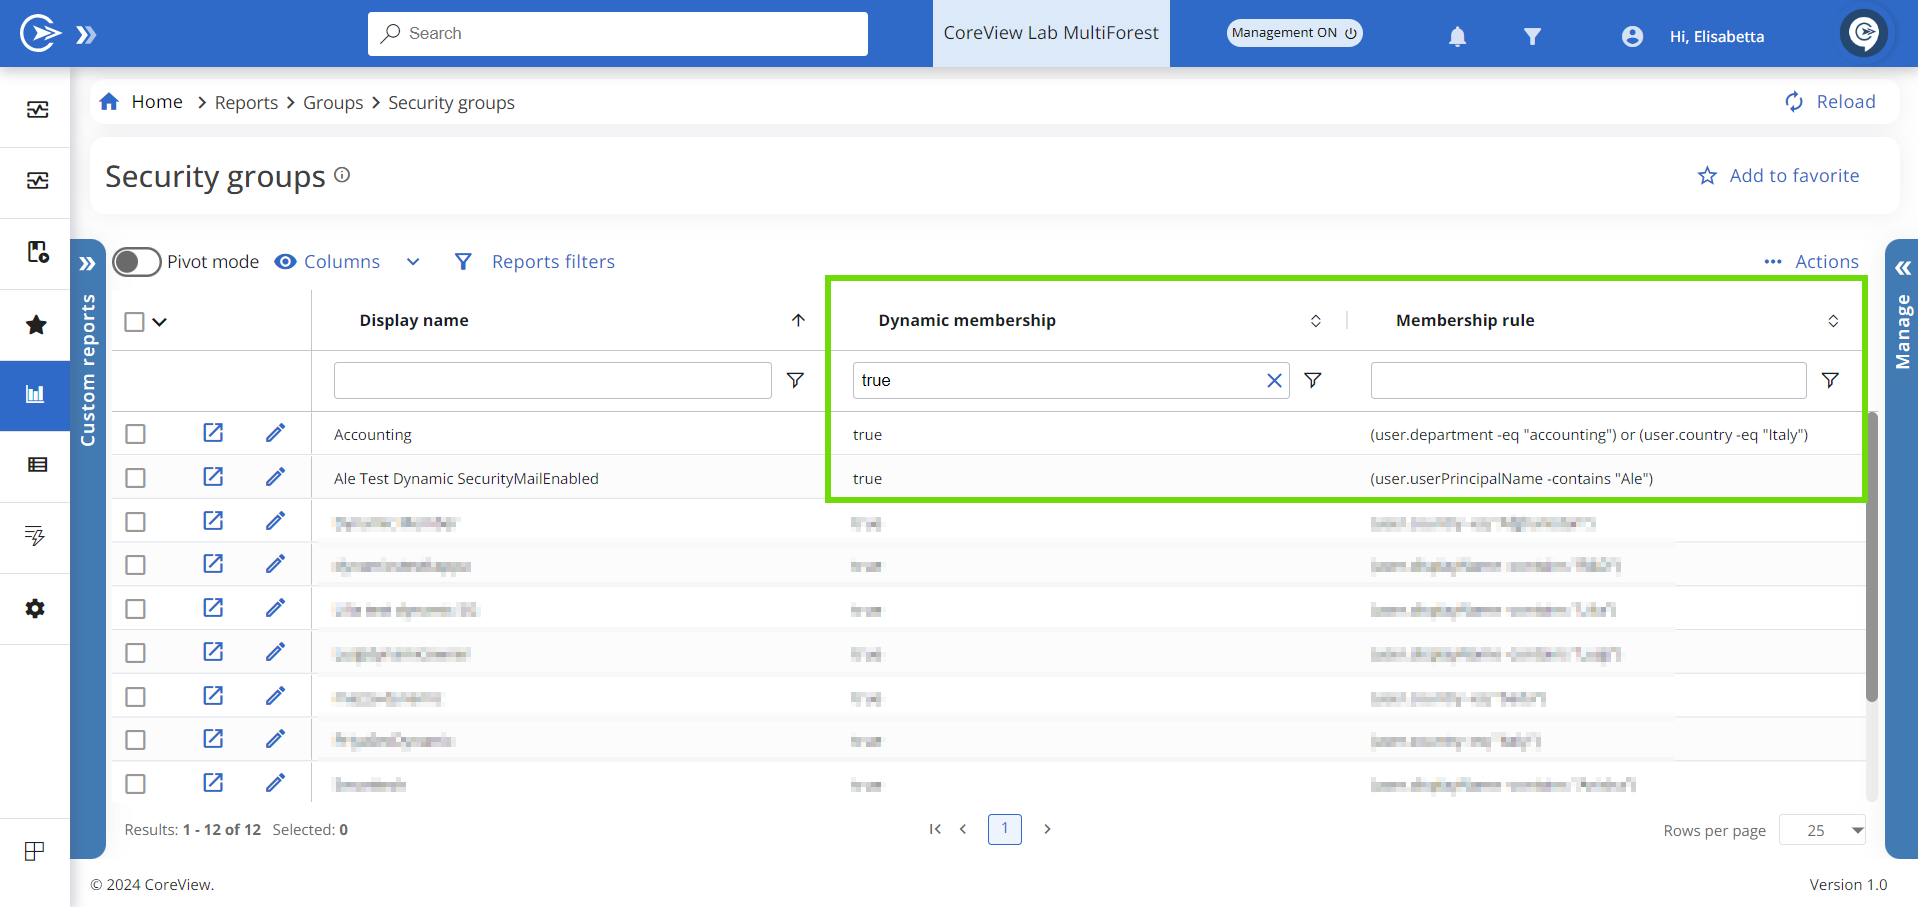
To determine if a group is dynamic, look for the “Dynamic membership” column in either the dynamic group members or dynamic group reports. A “true” mark indicates a dynamic group.

Additionally, you can view the membership rule script in the “Membership rule” column of dynamic group reports. This feature provides insight into the criteria determining group membership.
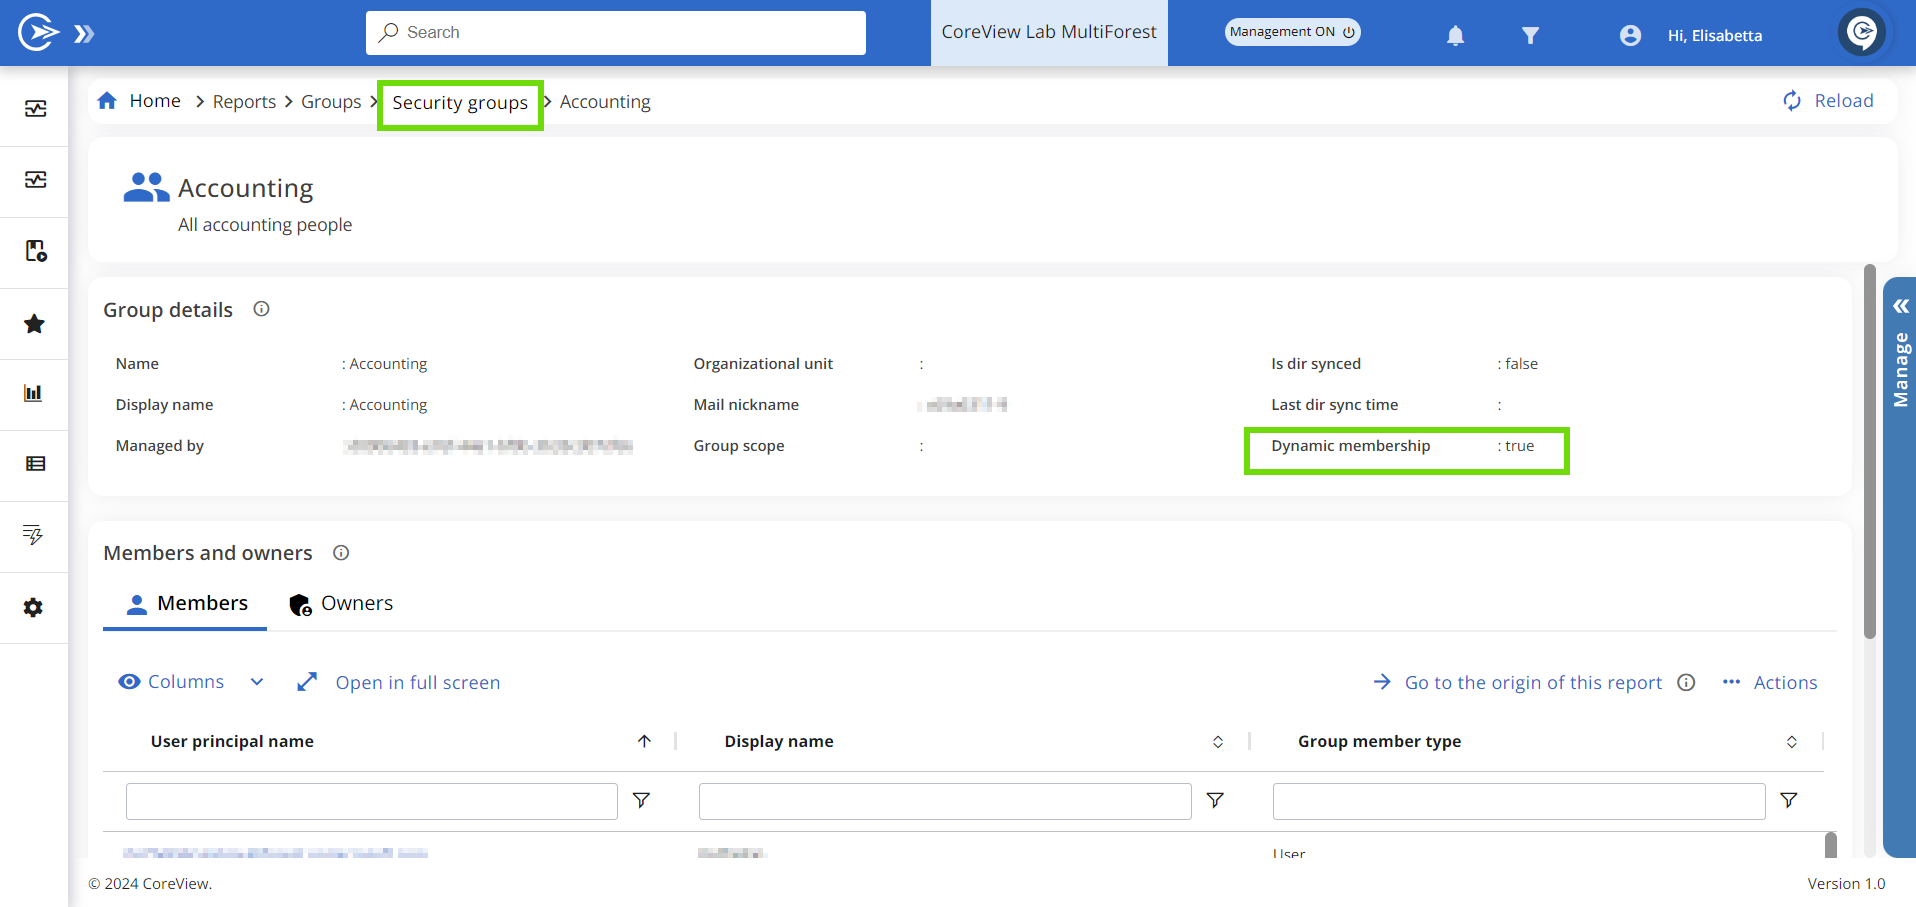
Group card details also display a “Dynamic membership” indicator, marked as true or false.
Creating dynamic groups
To create a dynamic group, follow these steps:
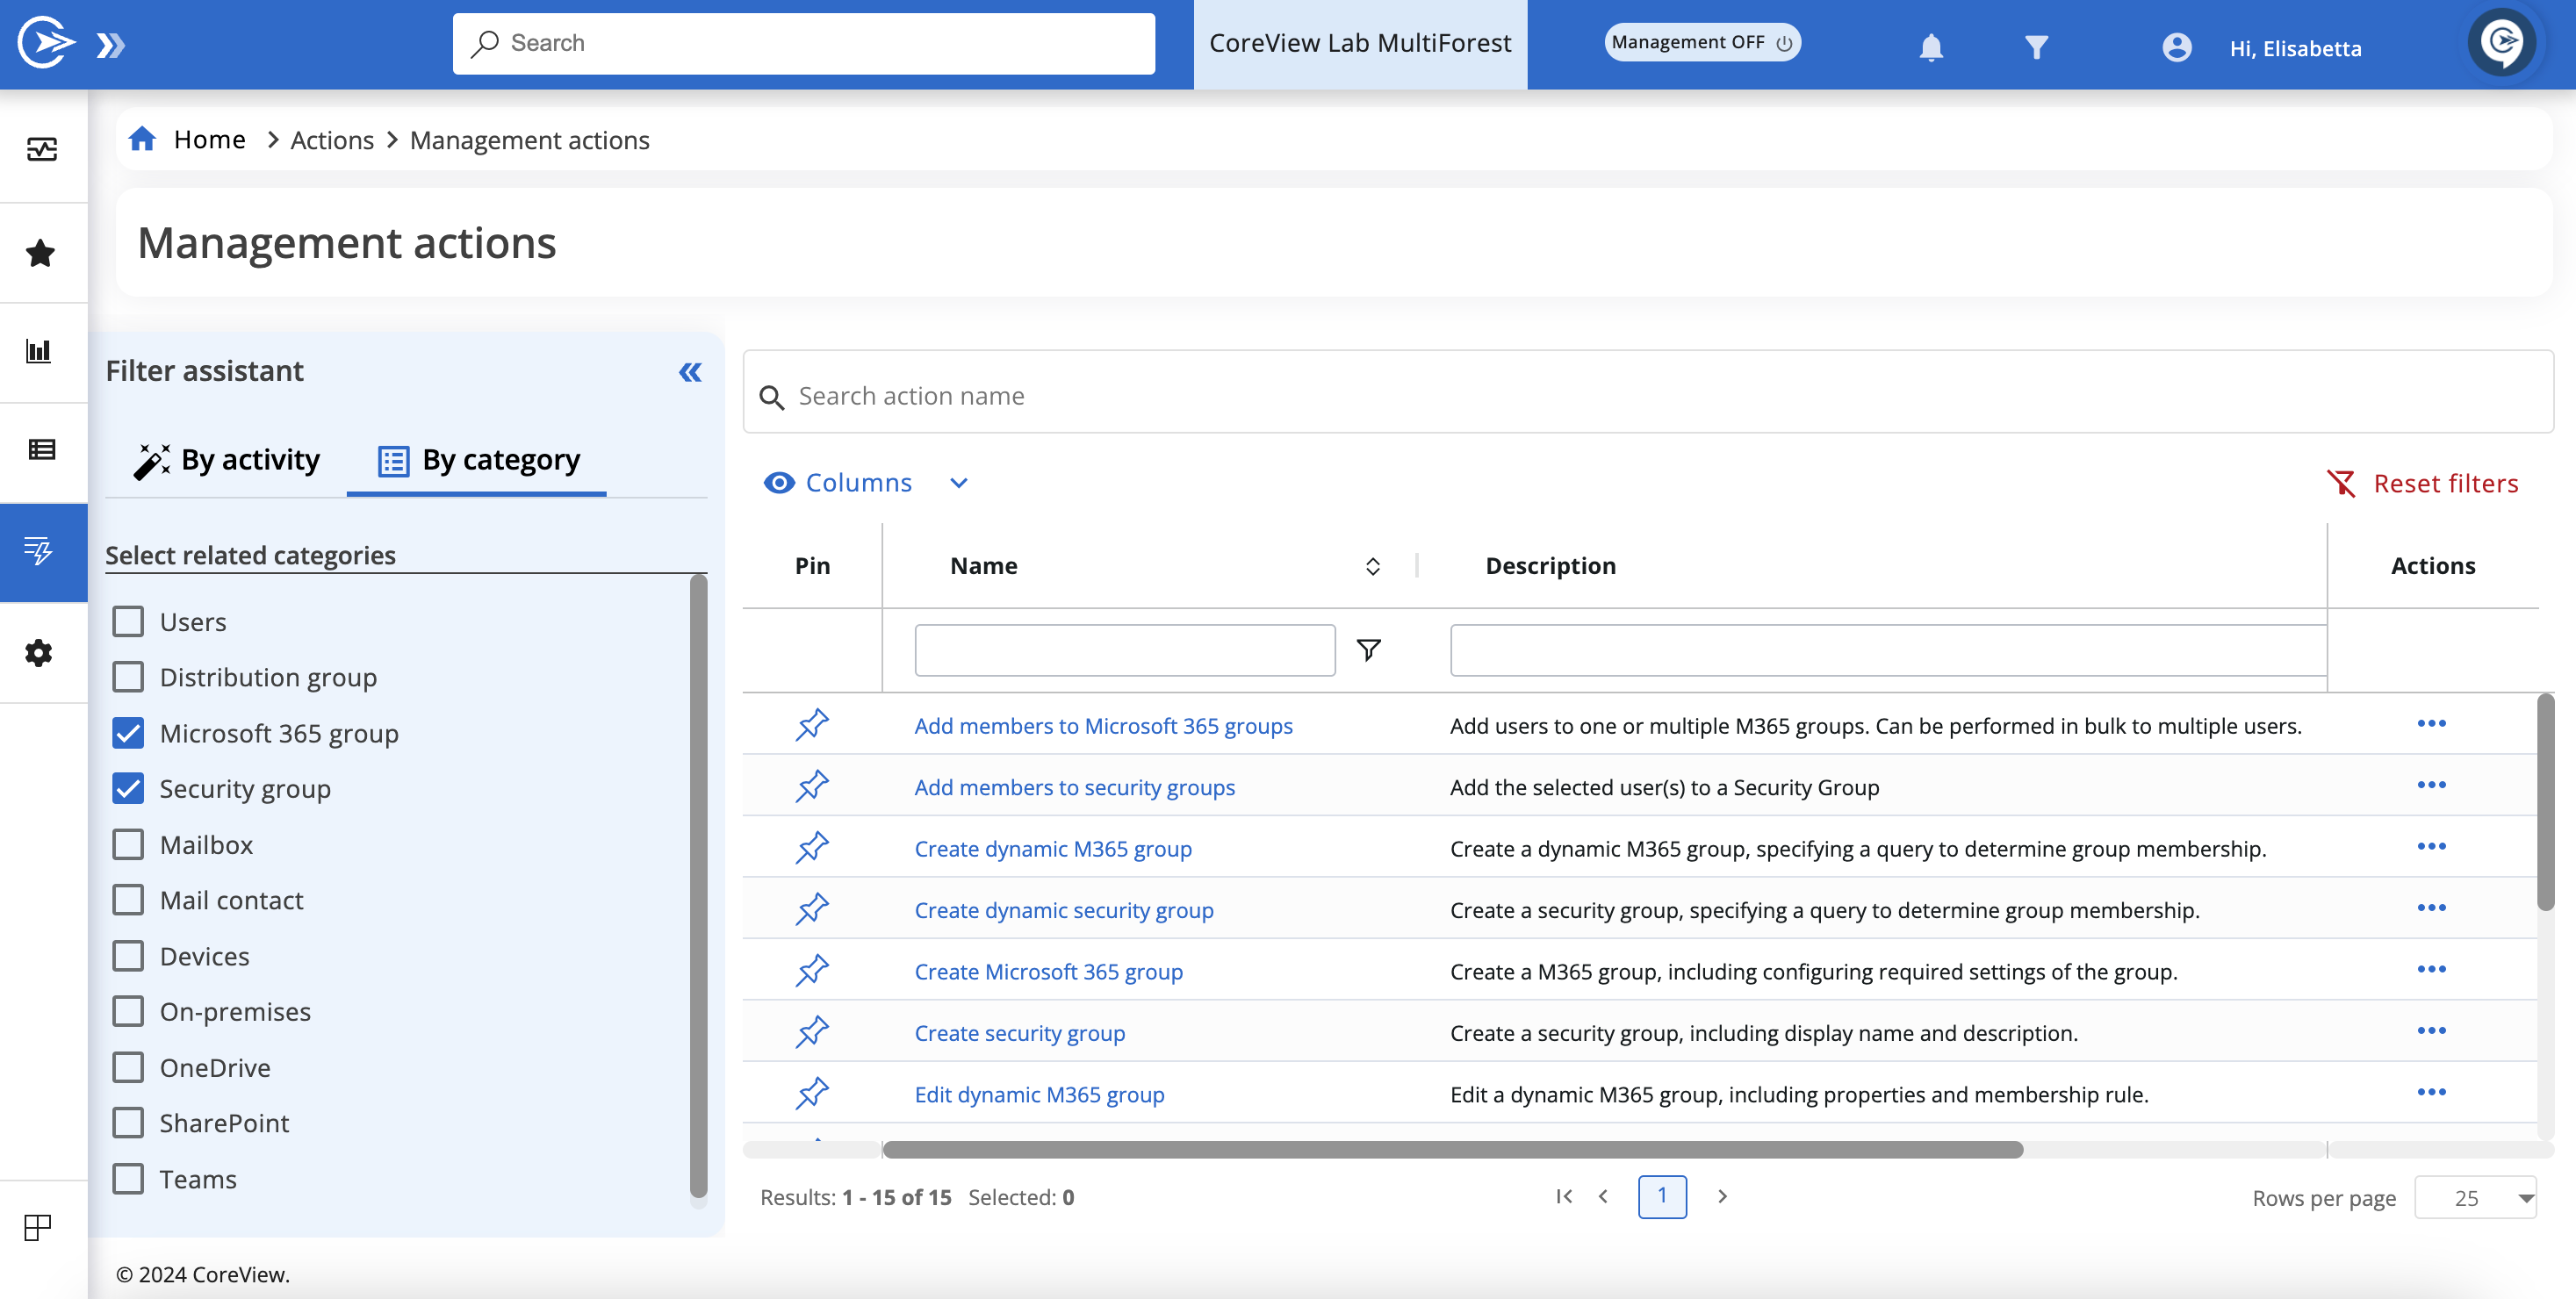
Step 1: Choose group category
Navigate to “Actions > Management actions”. Select either “Microsoft 365 group” or “Security group”, then click “Create dynamic M365 group” or “Create dynamic security group”. A wizard will launch.
Step 2: Fill out General fields
In the “General” section, input the necessary information to create your group. For example, to create a dynamic M365 group, you’ll need to provide:
- “Display name”: the name of your group.
- “Mail nickname”: the prefix for your group's email address. The domain will be determined by Microsoft 365.
- “Owners”: specify at least one group owner. Begin typing the email address, and a dropdown will assist you in selecting the correct one.

Please note that CoreView dynamic security groups do not support email addresses and owners.
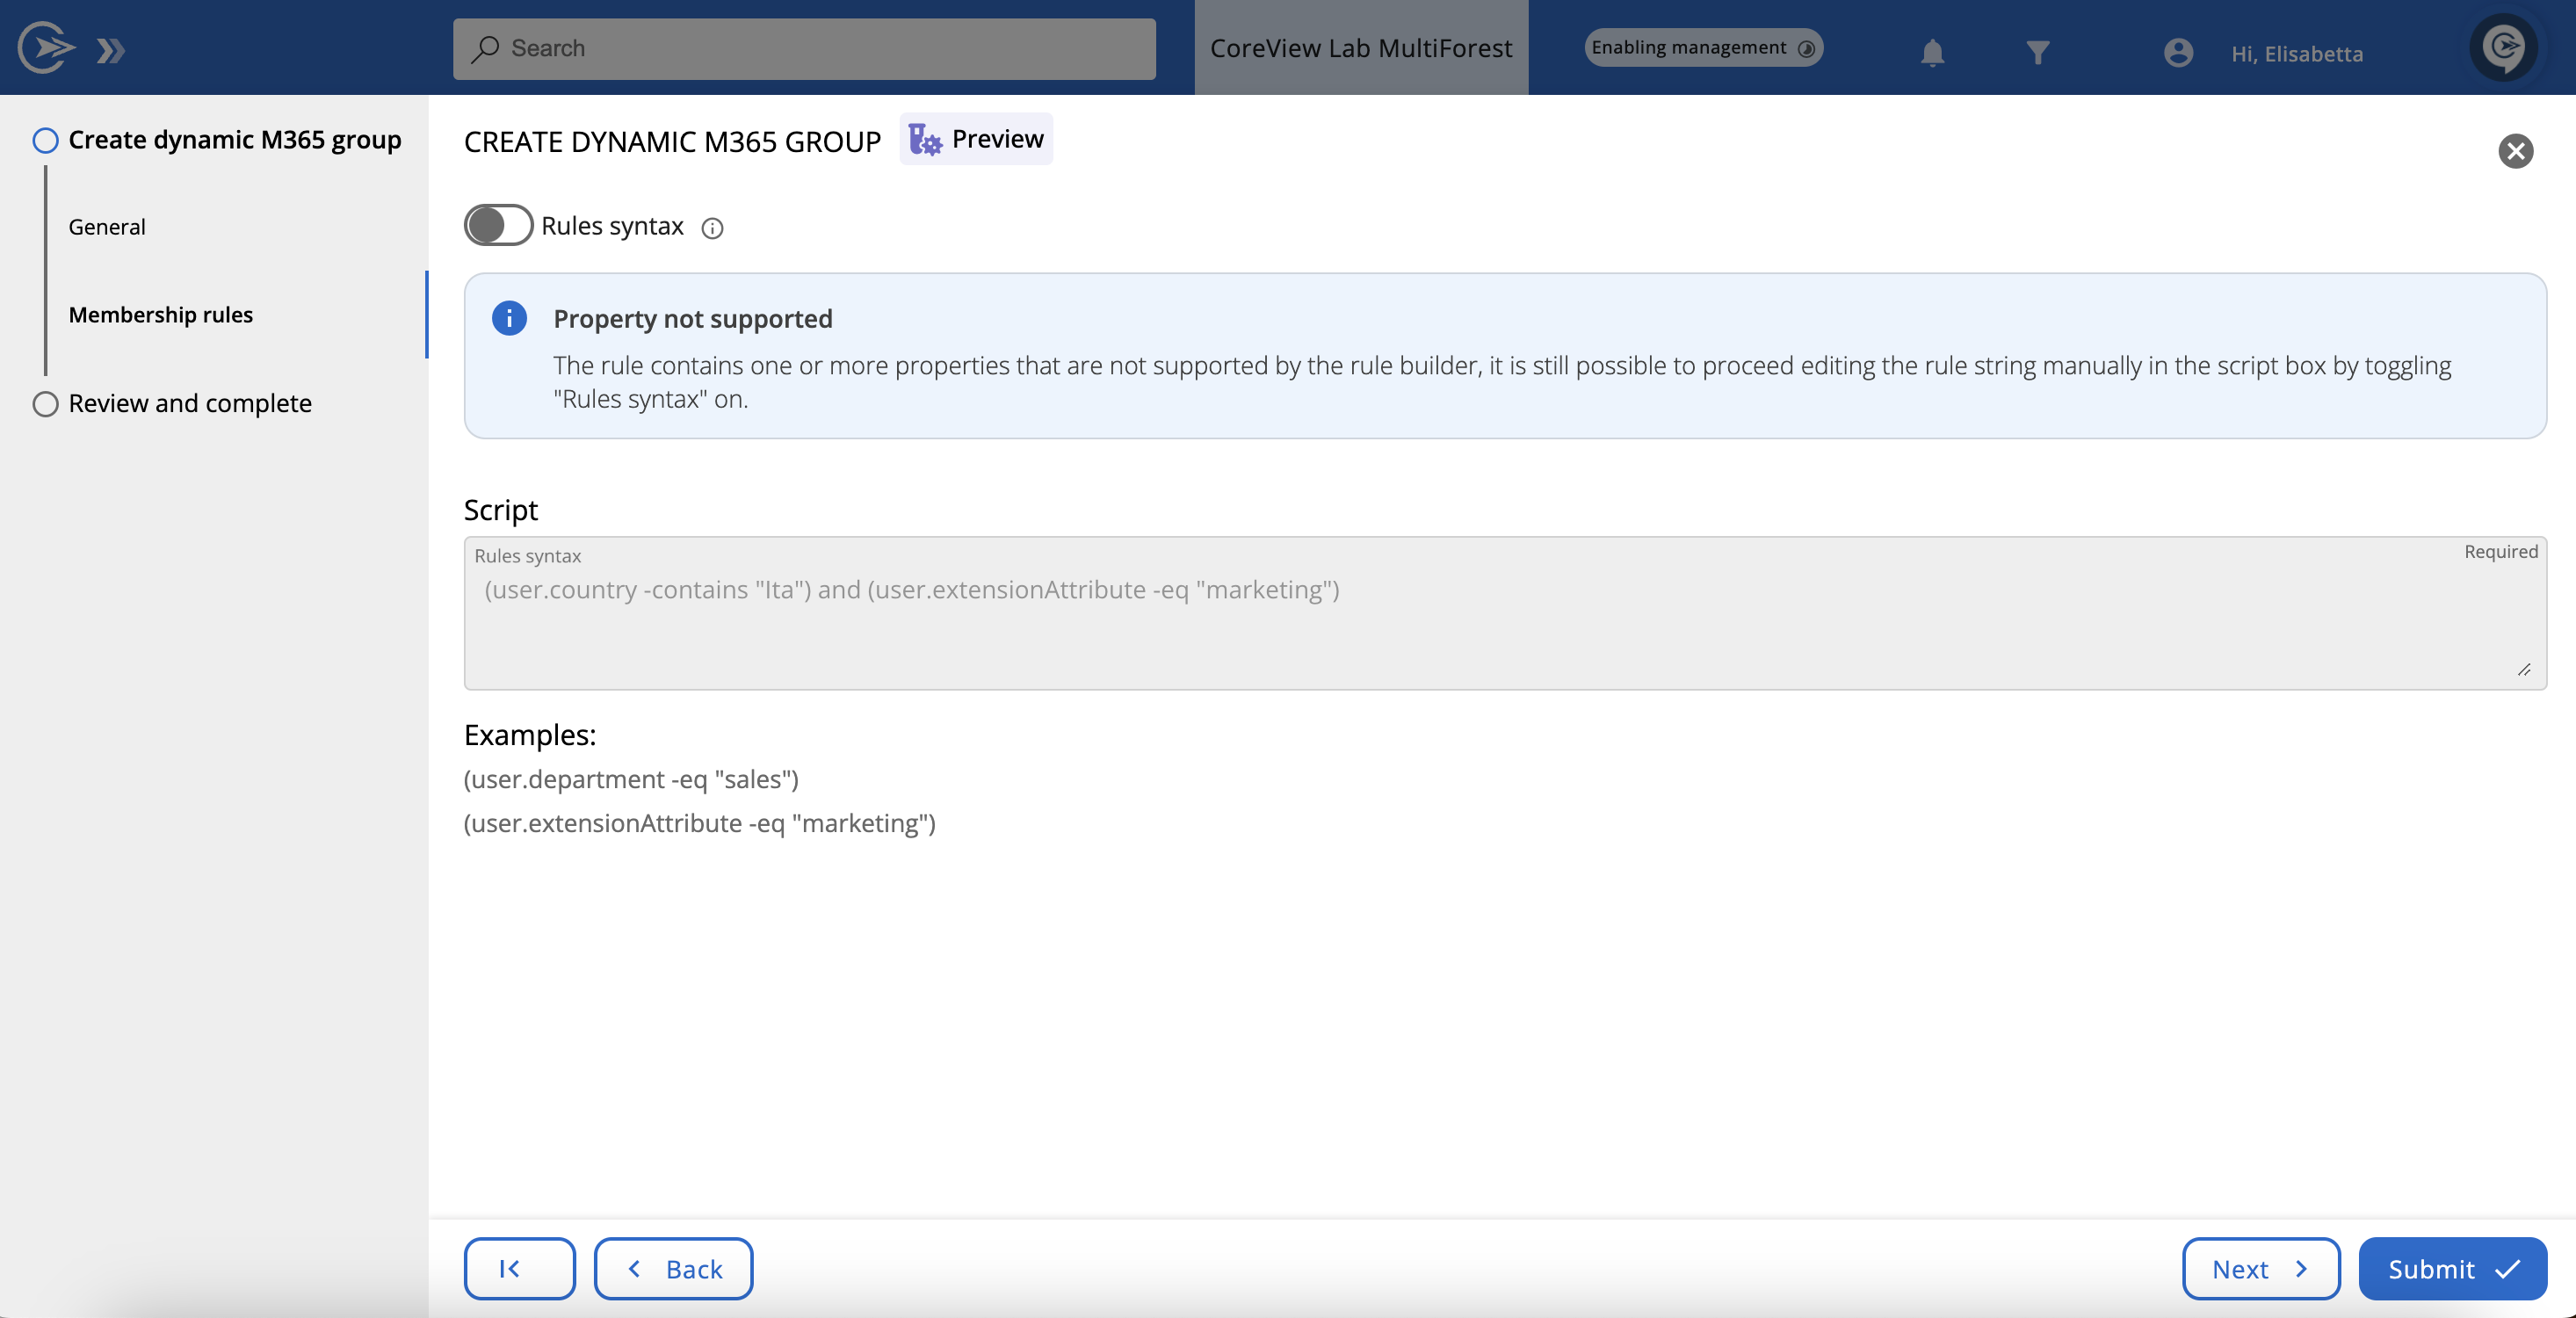
Step 3: Establish membership rule
Set up the query that will automatically manage membership based on your criteria (e.g., users by country or reporting to the same manager). Use the smart rule builder by disabling the “Rule syntax” toggle. Select items from the dropdown menu to construct your rule, using “And” or “Or” for multiple conditions. The “Script” section will display your rule script.

While all attributes and operators in the builder are supported by Microsoft 365, feel free to use others by directly editing the script. However, keep in mind that unsupported terms may cause the management action to fail.
For existing dynamic groups
The builder intelligently converts supported rules into blocks for straightforward editing, while unsupported rules will disable the builder to ensure integrity.
Creating dynamic groups via workflow
Dynamic groups can also be created via workflow, as shown below.

Editing dynamic groups
To edit a dynamic group:
Step 1: Choose group category
Go to “Actions > Management actions”. Select either “Microsoft 365 group” or “Security group”, then click “Edit dynamic M365 group” or “Edit dynamic security group”. A wizard will appear.
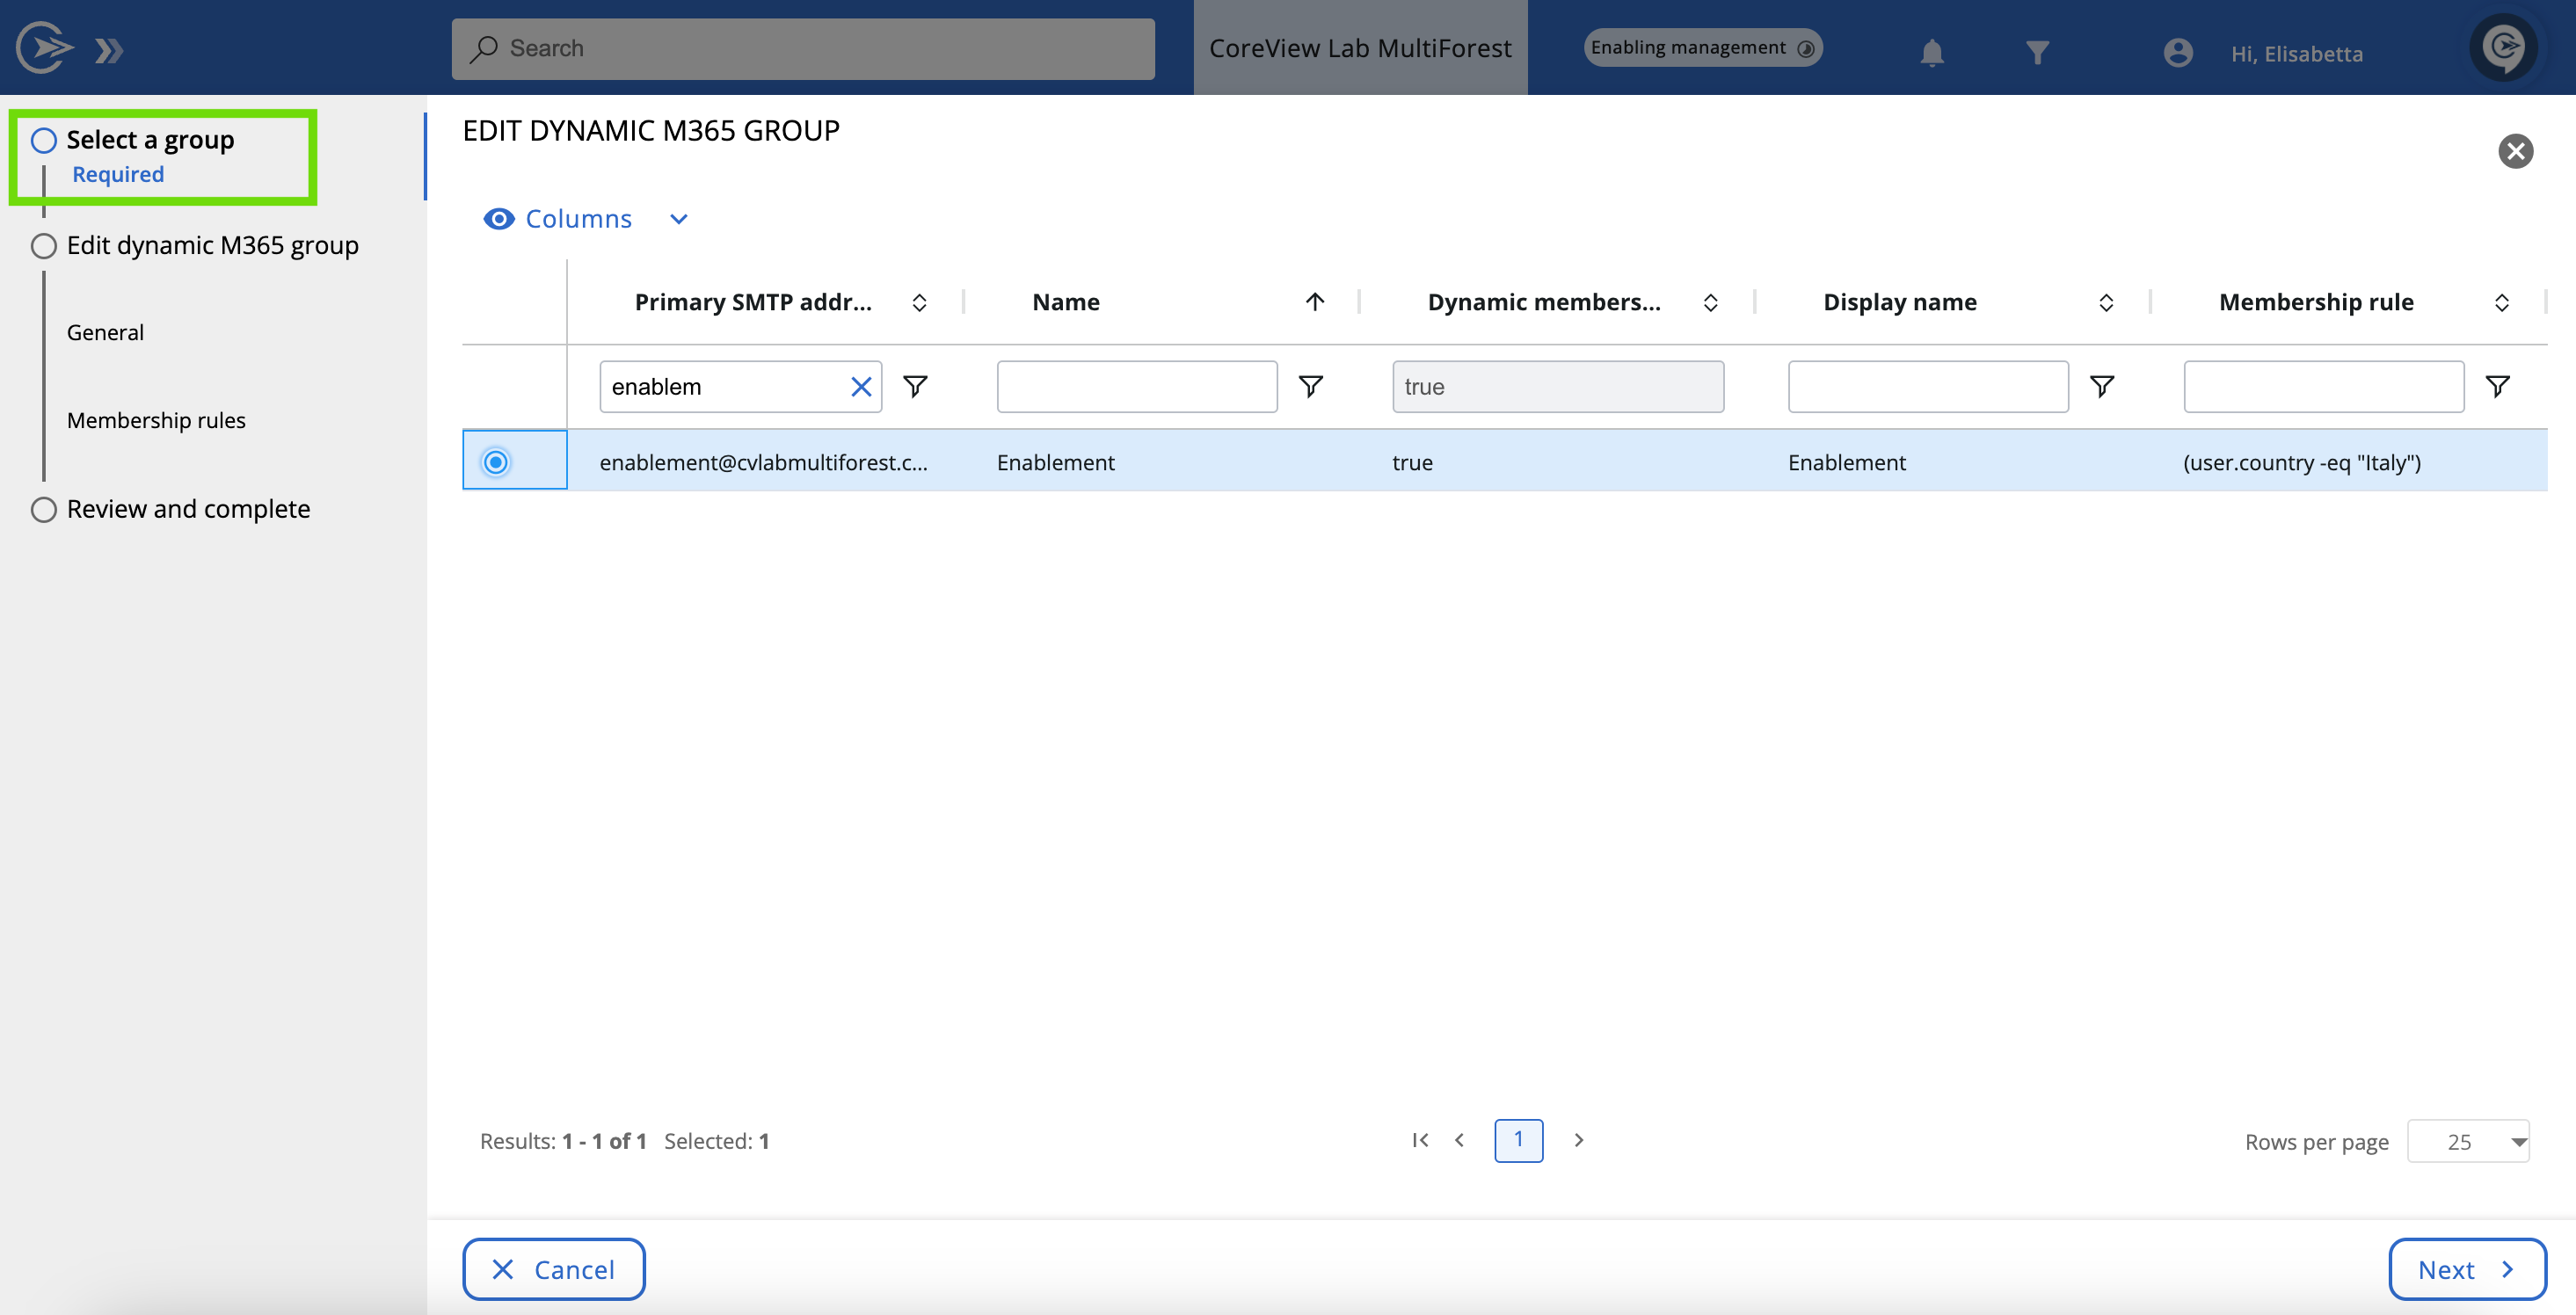
Step 2: Select a group
In the “Select a group” section, find and select the group you wish to edit.
Step 3: Edit your group
Modify the group's general details and/or membership rules as needed. Click “Submit” to apply changes.
Editing dynamic groups via workflow
Editing dynamic groups via workflow is also an option. Ensure to select the appropriate field from the “Fields” menu under Settings.
