Workflow exercise: remove guest accounts
The goal of this exercise is to set up a Workflow that is going to remove automatically guest user accounts that are at least six months old and have been inactive for more than 180 days, on a weekly basis.
In this exercise, you will see:
- How to create a Workflow
- How to configure an execution input
- How to add and configure an action
- How to publish a Workflow
- How to schedule a Workflow on a custom policy
The exercise is divided into two parts: in the first, we will create the Workflow, while in the second, we will schedule it to a custom policy in a playbook that we will specifically create.
You can use the interactive tutorial or follow the step-by-step guide in the accordions.
First part: how to create a Workflow
Step 1: create a new Workflow
The first step is to create a Workflow that includes an action to remove guest users.
For further information, refer to the article: Create a Workflow.
- Click on the “ACTIONS” tab on the sidebar.
- Click “Manage Workflows”.
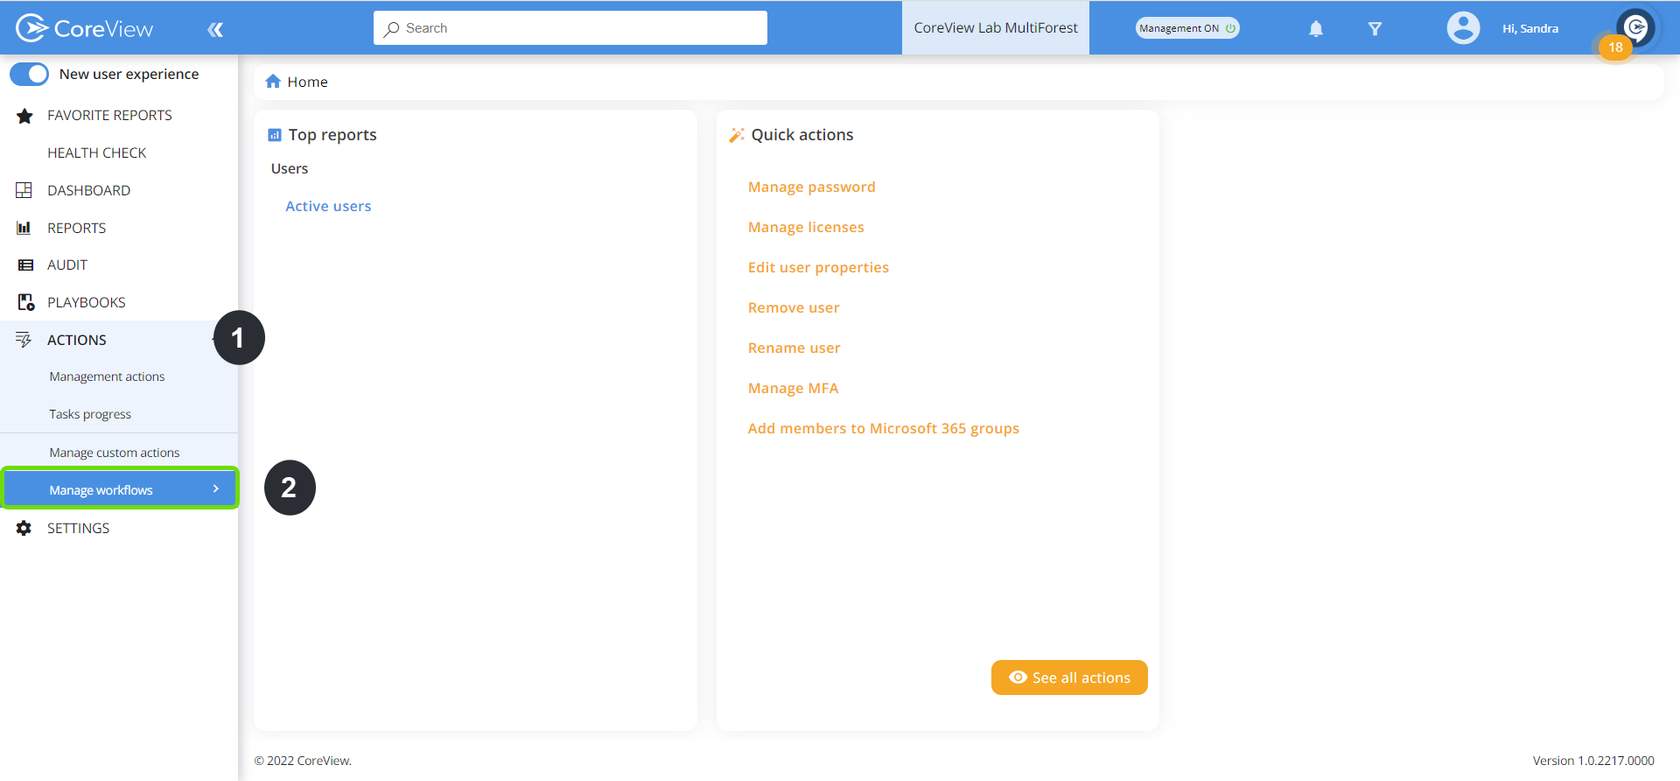
- Select “Workflows”.
- Select “Create new”.

Step 2: configure execution input
Now let's configure “execution inputs”, also referred to as input variables, which are essential data points required to initiate the Workflow.
For further information, refer to the article: Configure execution inputs.
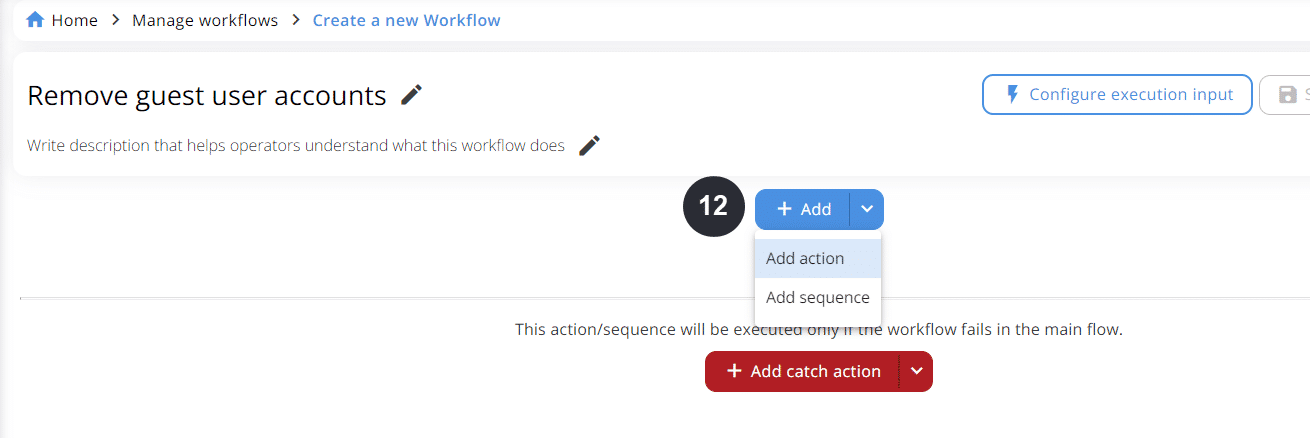
- Click the pencil icon and type the name “Remove guest user accounts” in the “Name” field.
- (Optional): Click the “Description” button below the name of the Workflow to add a description.
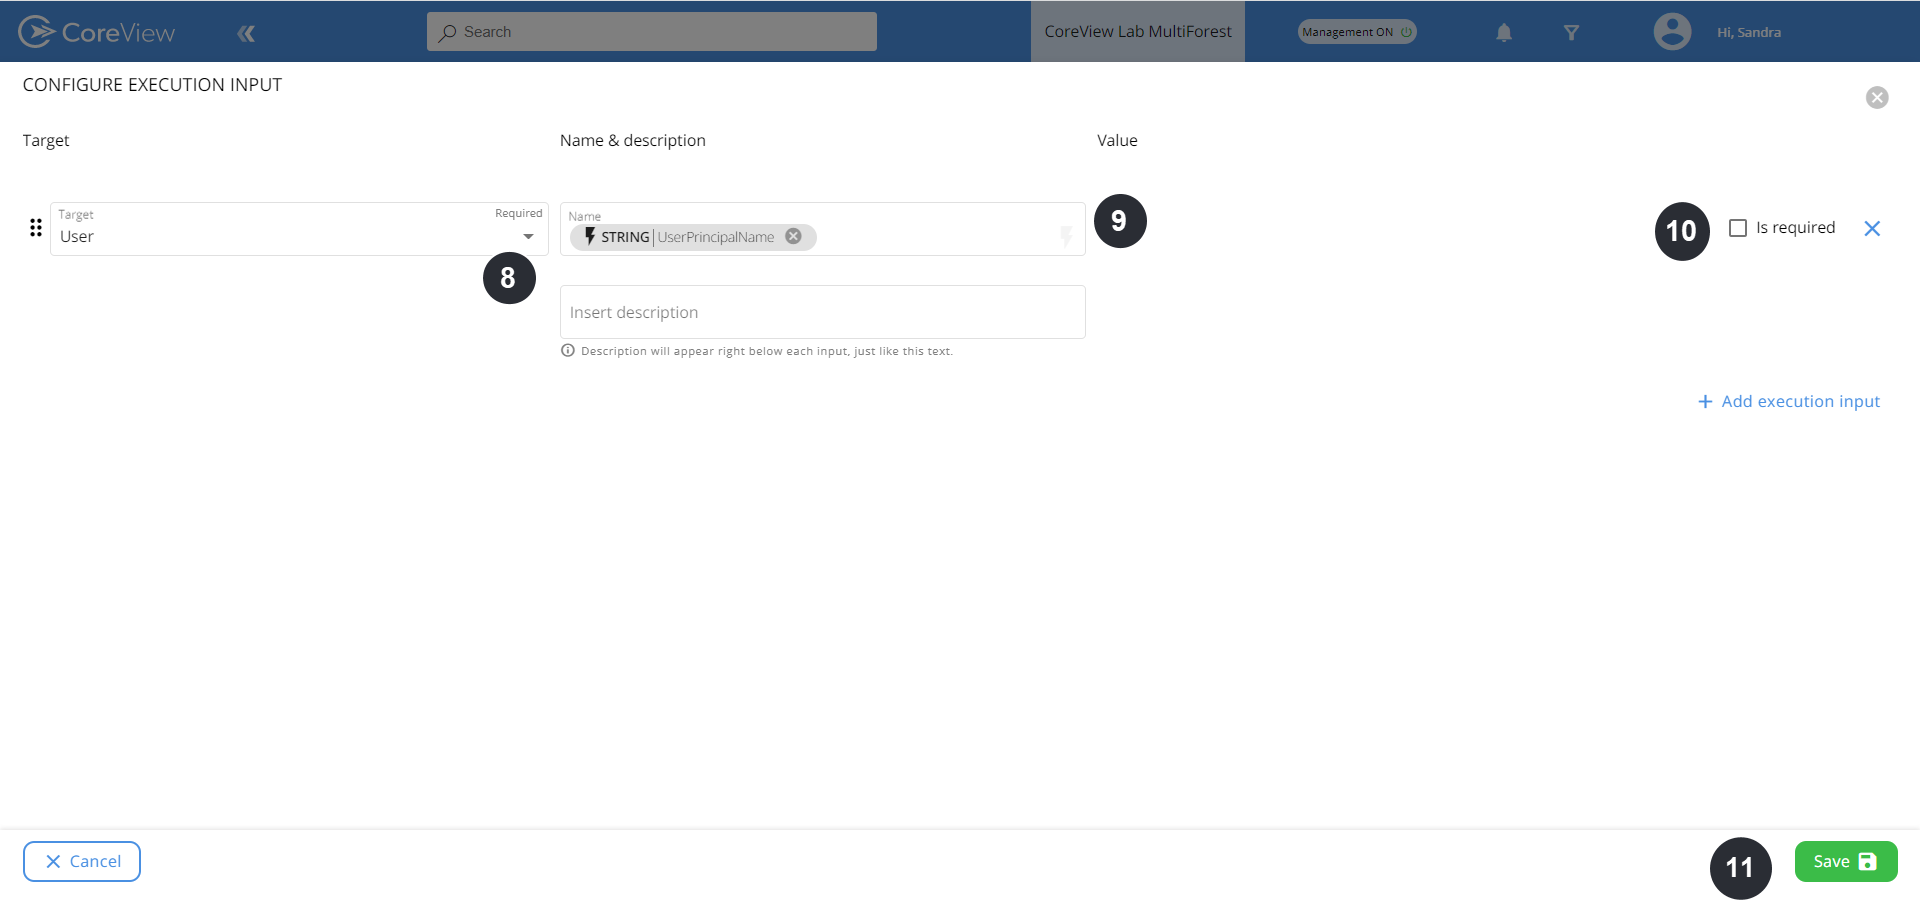
- Click “Configure execution input”, then click “Add execution input” on the next page.

- Under “Target“, select “User” from the drop-down menu.
- Search for “UserPrincipalName” in the list and click on it.
- Make sure the “is Required” box is checked.
- Click “Save”.
At this point, you have specified and created the required execution input for your Workflow.
Step 3: add and configure an action
After setting execution inputs, we can add actions, which are the individual tasks that make up a Workflow.
For further information, refer to the article: Adding Workflows actions.
- In the “Add“ drop-down, click the “Add action” button.
- In the “Action“ category, select “User”.
- In the “Select action” drop-down, select “Remove guest user”.
- Under “Settings”, click on the lightning icon to the right of the User Principal Name field.
Choose the "UserPrincipalName" input that you previously created from the displayed list. - Click “Save”.

Step 4: publish a Workflow
Let's save our Workflow first as a draft, and then publish it.
For further information, refer to the article: Publish.
- Click “Save” at the top right. This will save your Workflow as a draft.
Then, click “Publish” at the top right: this will publish your Workflow and make it available to you, and everyone you grant access to it.

Second part: how to add to a playbook
Step 5: schedule a Workflow on a custom policy
A Workflow can be scheduled on a custom policy. We will create a custom policy from a report and then associate the Workflow with it to use it as the remediation action.
For further information, refer to the article: Create a custom policy
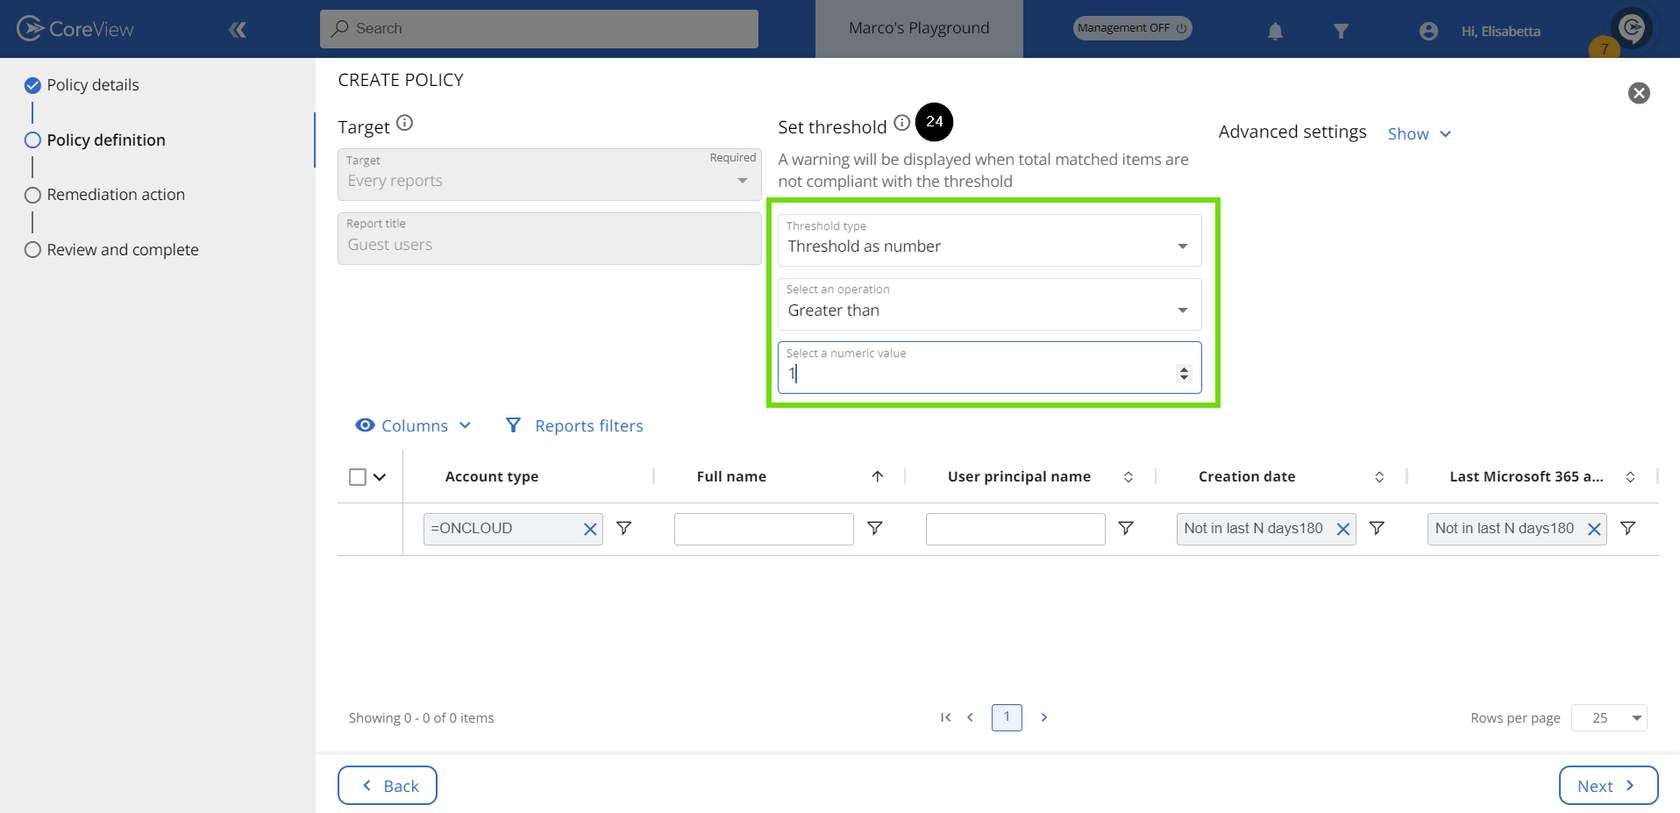
- Go to “REPORTS” > “USERS” > “Guest users”.
- Display the columns “Last Microsoft 365 activity date” and “Creation date”, along with the “User principal name” column, which will supply the execution input for the Workflow.
- Add the filter “Not in last N days” = 180 to both the “Creation date“ and the “Last Microsoft 365 activity date” columns.

- Select “Actions“ and click “Create Custom Policy”.

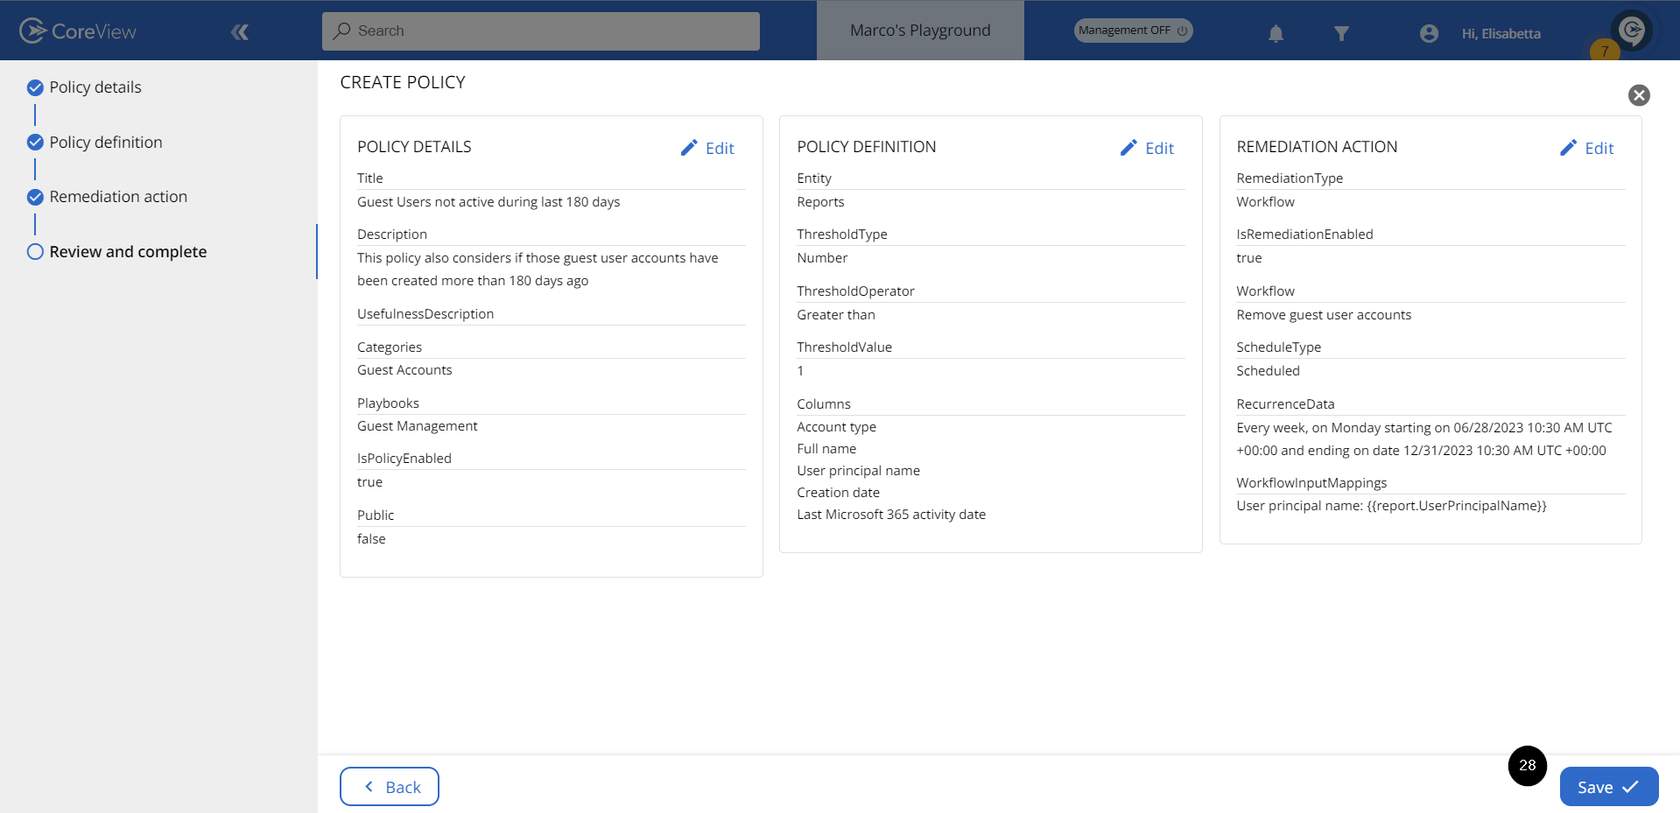
- Fill out all the required fields: “Name”, “Description”, “Category”, and “Playbooks”.

- Set the desired threshold. This will trigger a warning when there are matched items. For further information, refer to the article: Thresholds.
- Under “Remediation action” choose “Run Workflow” as a remediation and select your Workflow from the drop-down. For further information, refer to the article: Remediation settings and actions.
- Under ”Remediation execution input”, click on “Automap” to automatically generate the input.
- Under “Schedule”, specify how often you would like the Workflow to be executed.
When selecting the columns for the report, ensure that you have chosen the column that will supply the execution input for the Workflow; otherwise, the Automap button will not function!

- Review and ”Save”.
- Under ”PLAYBOOKS”, you should be able to see your new custom Workflow with scheduled remediation.
