Let's see how to add a new set of permissions.
Here we will see:
- How to reach the “Add new” functionality and how it works.
- What the required information is.
Furthermore, you can read an in-depth article of the usage of “show all” vs. “Select all” to assign the right permissions to operators.
Please, note that you can edit a permission set by clicking on the name of the permission in the permission list page.
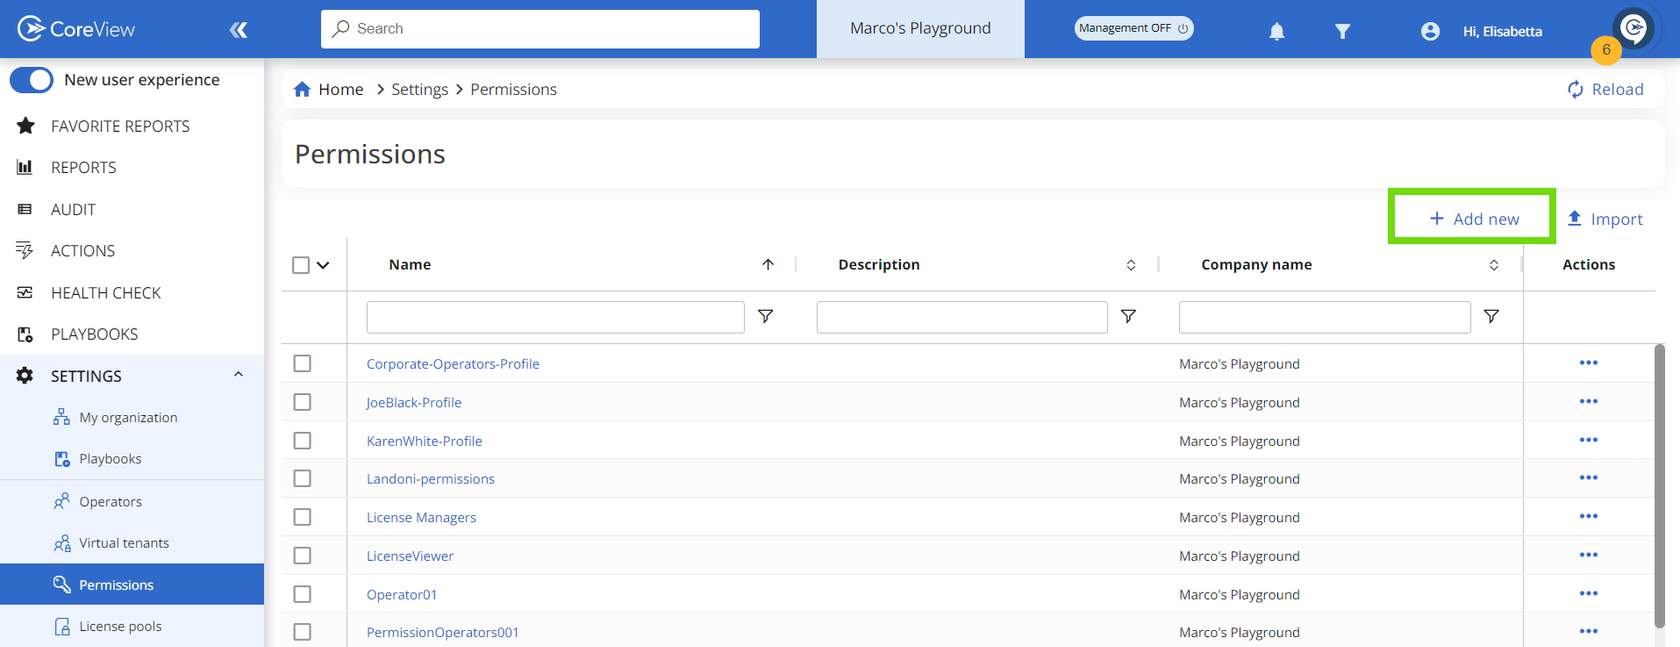
Step 1: permissions list
- Click on “SETTINGS” in the sidebar menu.
- Select “Permissions”.
- Click on “Add new” to create a new permission set.
A new page will open. Here, you need to populate the needed information.
Mandatory tabs
Before starting, it is important to note that it is not mandatory to fill all the tabs, as the General info (step 2) and Menu (step 4) are the only required steps.
Step 2: general info (required)
- Add a name for the new permission set.
- It's a good practice to add a description that explains the set's purpose and who will be using it.
- The company field will be automatically populated based on your organization.

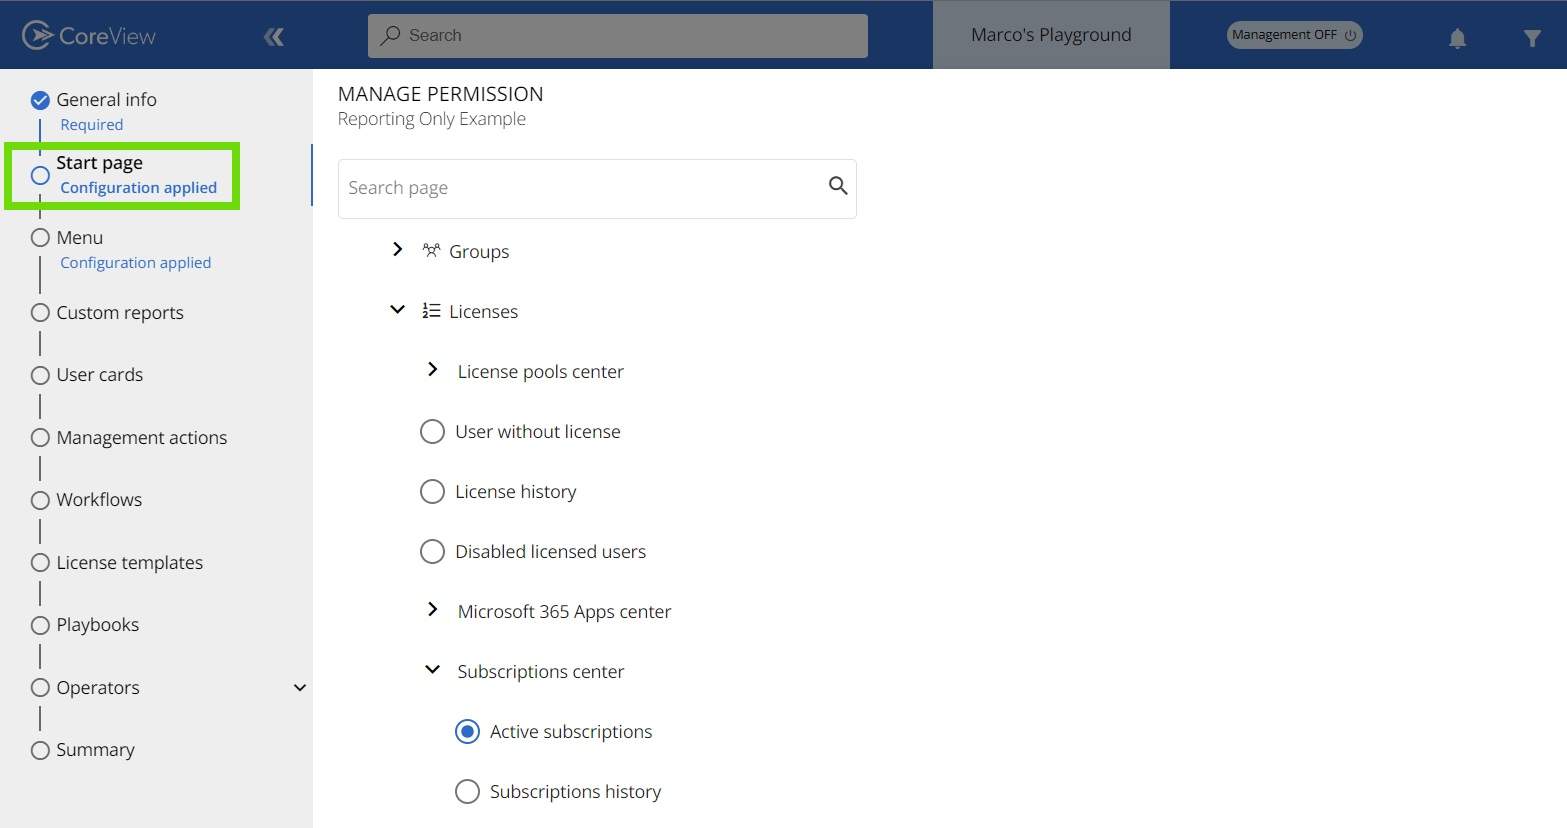
Step 3: Start page (optional)
In the Start page tab, you can select the home page for the user(s) who will have this permission set.
When selecting a home page, you must choose an item included in the Menu, or the system will automatically select the item under the Menu step as well.

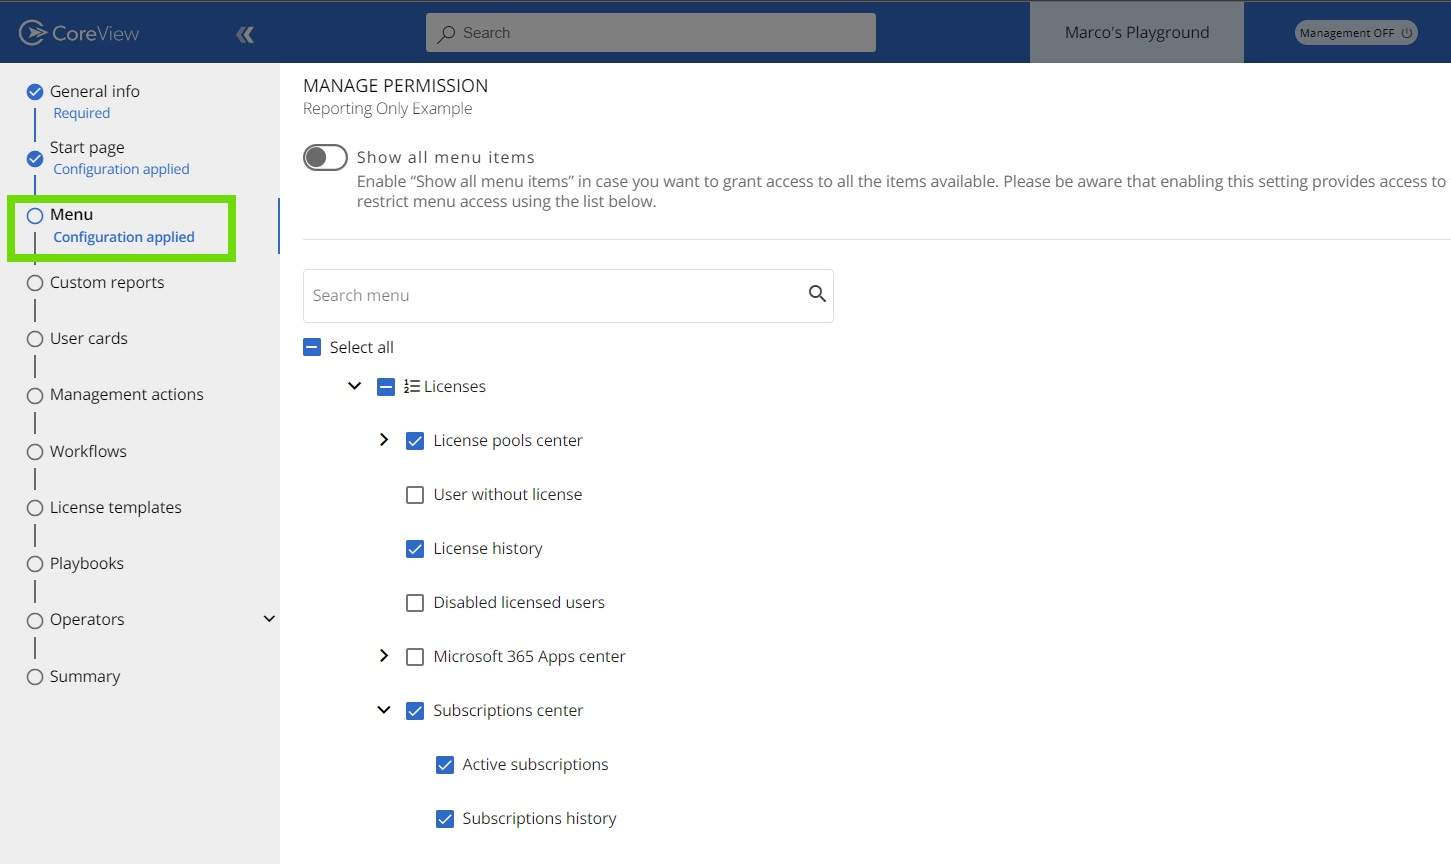
Step 4 Menu (required)
In this section, you must select which menu items the user(s) will see in the sidebar when they log on to the platform. In this case, they will be able to see a series of license reports.
Note that if you assign management actions, workflows, or Playbooks to your operator but do not add them to their menu, they will not be able to view them! So, make sure you enable the menu item that grants access to those.
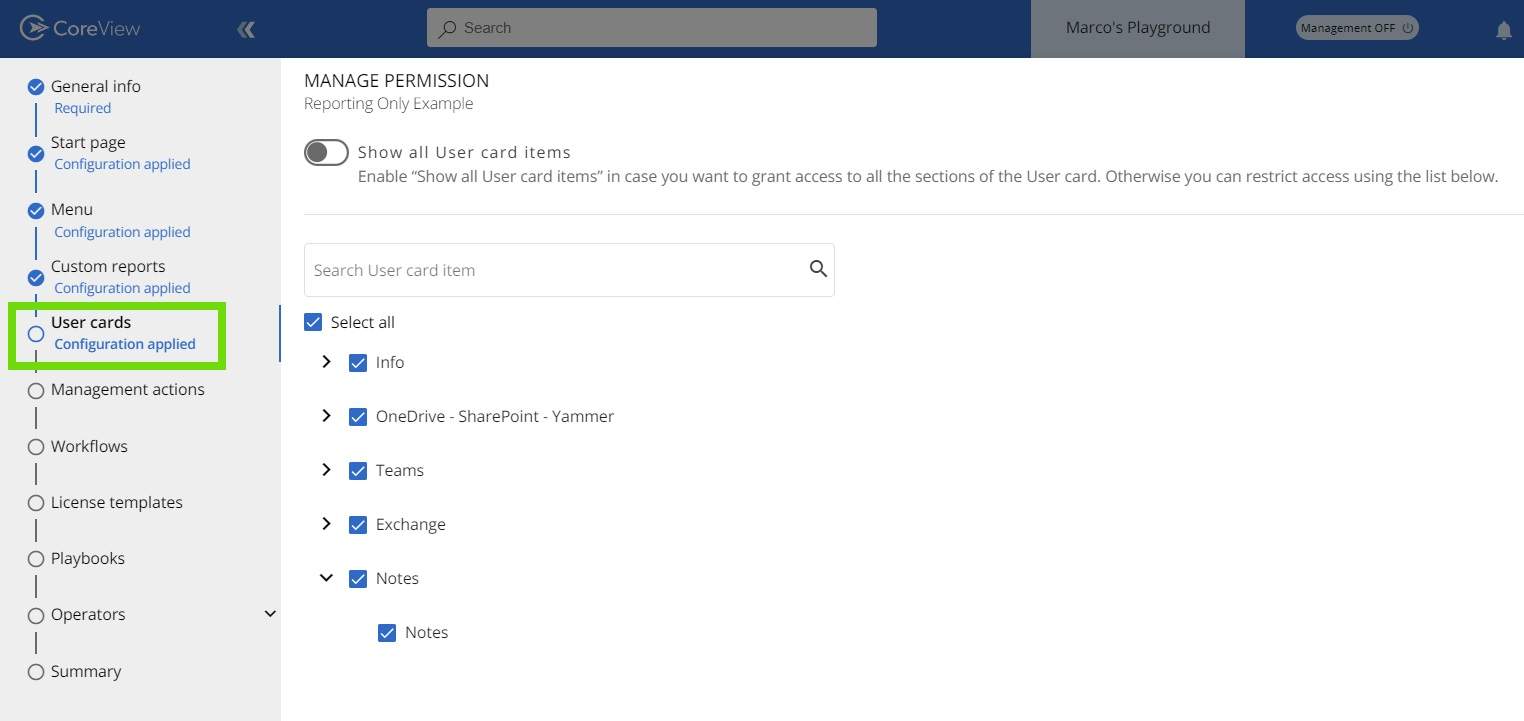
- Semi-checked box: this symbol indicates that only some items of the list have been selected.
- Checked box: the checked symbol means that all items of the list have been selected.
- Unchecked box: the empty checkbox indicates that no items of the list have been selected.
Step 5 Custom reports (optional)
You can further customize your users' access by selecting which custom reports they will be able to view.
Only custom reports that have been set as public will be displayed in this section.
Step 6 User cards (optional)
This window allows you to customize which sections (if any) of the “User card” the operator(s) can view.
Step 7: Management actions (optional)
If you want to grant your user(s) permission to run management actions, you can select them from this tab.
This permission tab works in conjunction with the “Operator” role. To view any selected management actions, the operator must have a Management role.
Step 8: Workflows (optional)
Similarly, you can grant permission to view and run workflows. To do this, simply select which workflows the user can run. Alternatively, you can click "Select all" to allow them to run all workflows.
This permission tab works in conjunction with the Operator role. To view and run any selected workflow, the operator must have a Management role.
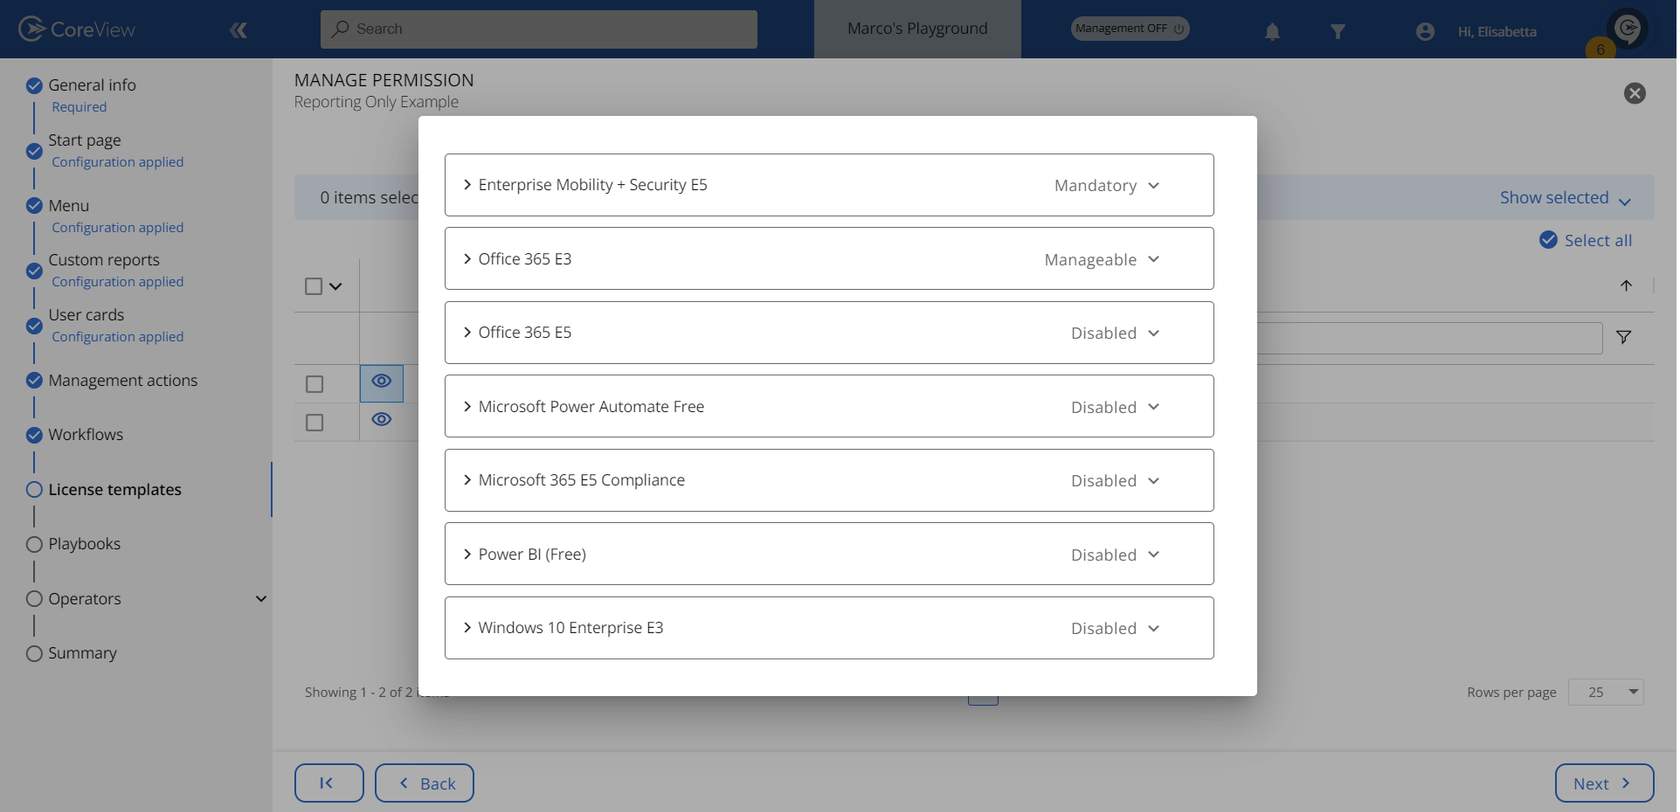
Step 9: License templates (optional)
In this section, you can select the license templates that will apply to your users. Within a license template, individual items are marked as Mandatory, Manageable, or Disabled, which determines which items an operator can assign when allocating licenses.
To view the configuration of a license template, click on the eye icon from the “License templates” window.
- Mandatory means that the operator must assign that element within the license, and has no other option.
- Manageable means that the operator is free to decide whether to assign that element when giving the license.
- Disabled means that the operator will never assign that element when giving the license.
Step 10: Playbooks (optional)
To grant users with this permission set the ability to view and manage playbooks, simply select them from the list on this tab.
Step 11: Operators (optional)
In this section, you can assign the Permission set to users or groups. Simply enter their name in the search field and check the box to the left of their name to add them to the set.
Note: you can also assign the permission set to a distribution group, a security group, or an M365 group.

Step 12: Summary
The final step is to submit and confirm your changes. To save the Permission set, click the “Continue” button.

Step 13: Congratulations!
You have successfully created and assigned a new Permission set.
By following these steps, you can create any variation of permissions and access for your operators.