This how-to explains how to assign roles to an application in the Microsoft Entra Admin Center.
As an example, we will assign roles to the CoreView Graph application.
For additional information, you can refer to the Assign Microsoft Entra roles to users article in Microsoft's official documentation.
Please note that procedures may vary with Microsoft updates or your configuration. If you encounter any doubts or issues, it's best to refer directly to Microsoft's documentation.
For the guide we will implement the “Manage Password” scenario, assigning the necessary roles to the Graph application.
Step 1: copy the Client ID
Copy the Client ID of the application you have registered with CoreView.
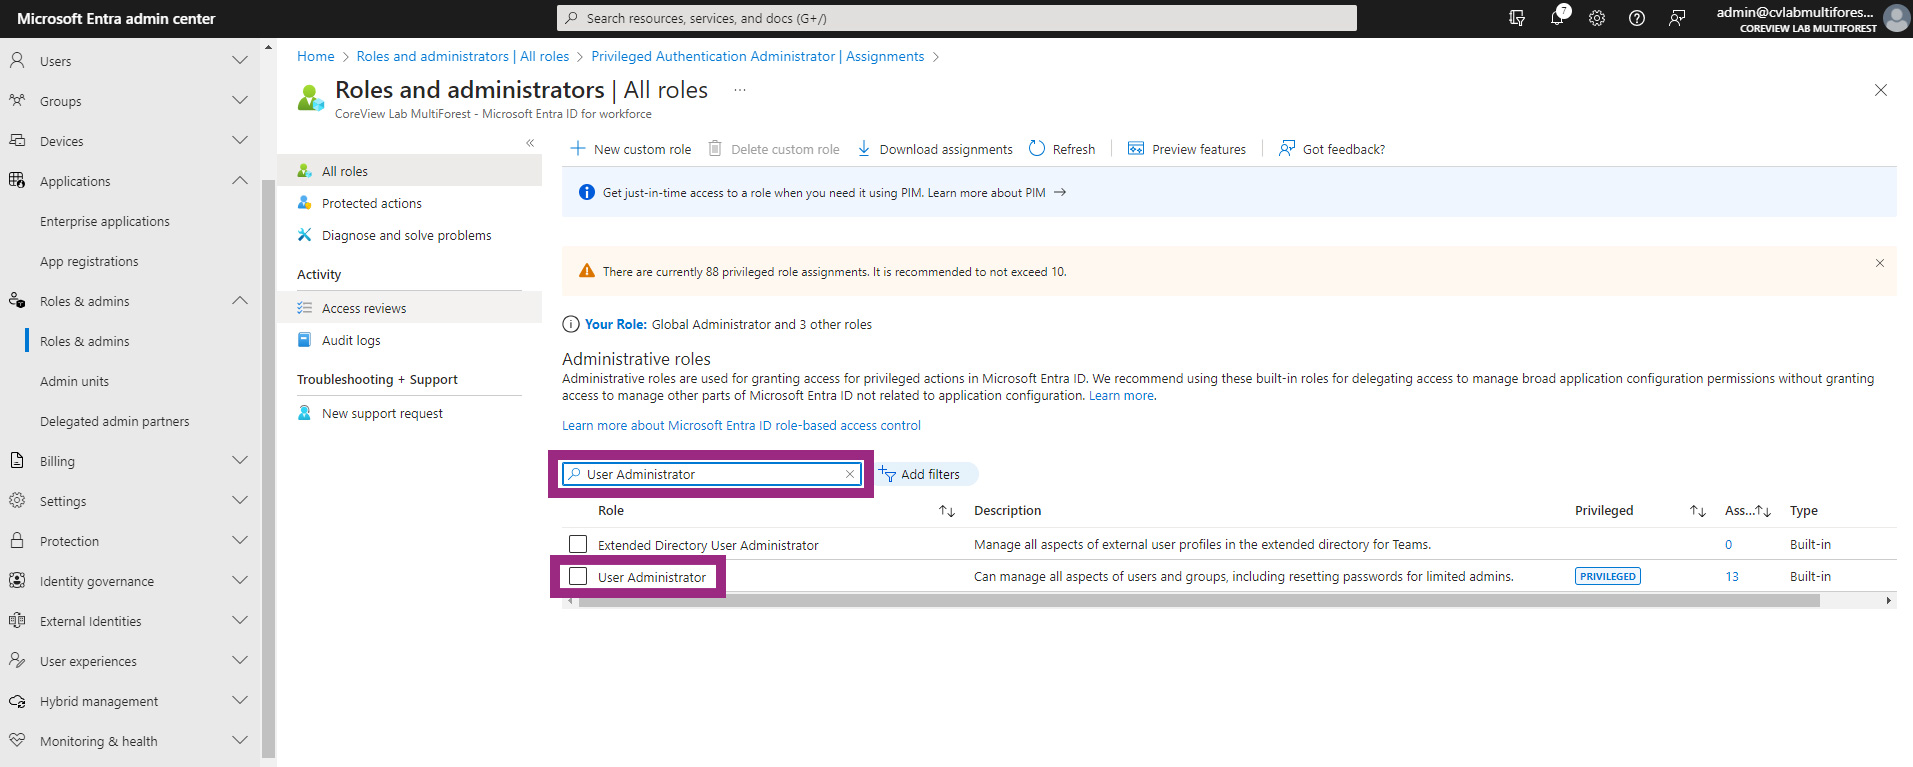
Step 2: access “Roles & admins” and find the role
- Visit the Microsoft Entra admin center.
- In the left-hand menu, expand the “Identity” section.
- Click on “Roles & admins”.
- Use the search engine to look for the required role:
User Administrator rolePrivileged Authentication Administrator
- Double click on the desired “Role” from the search results.
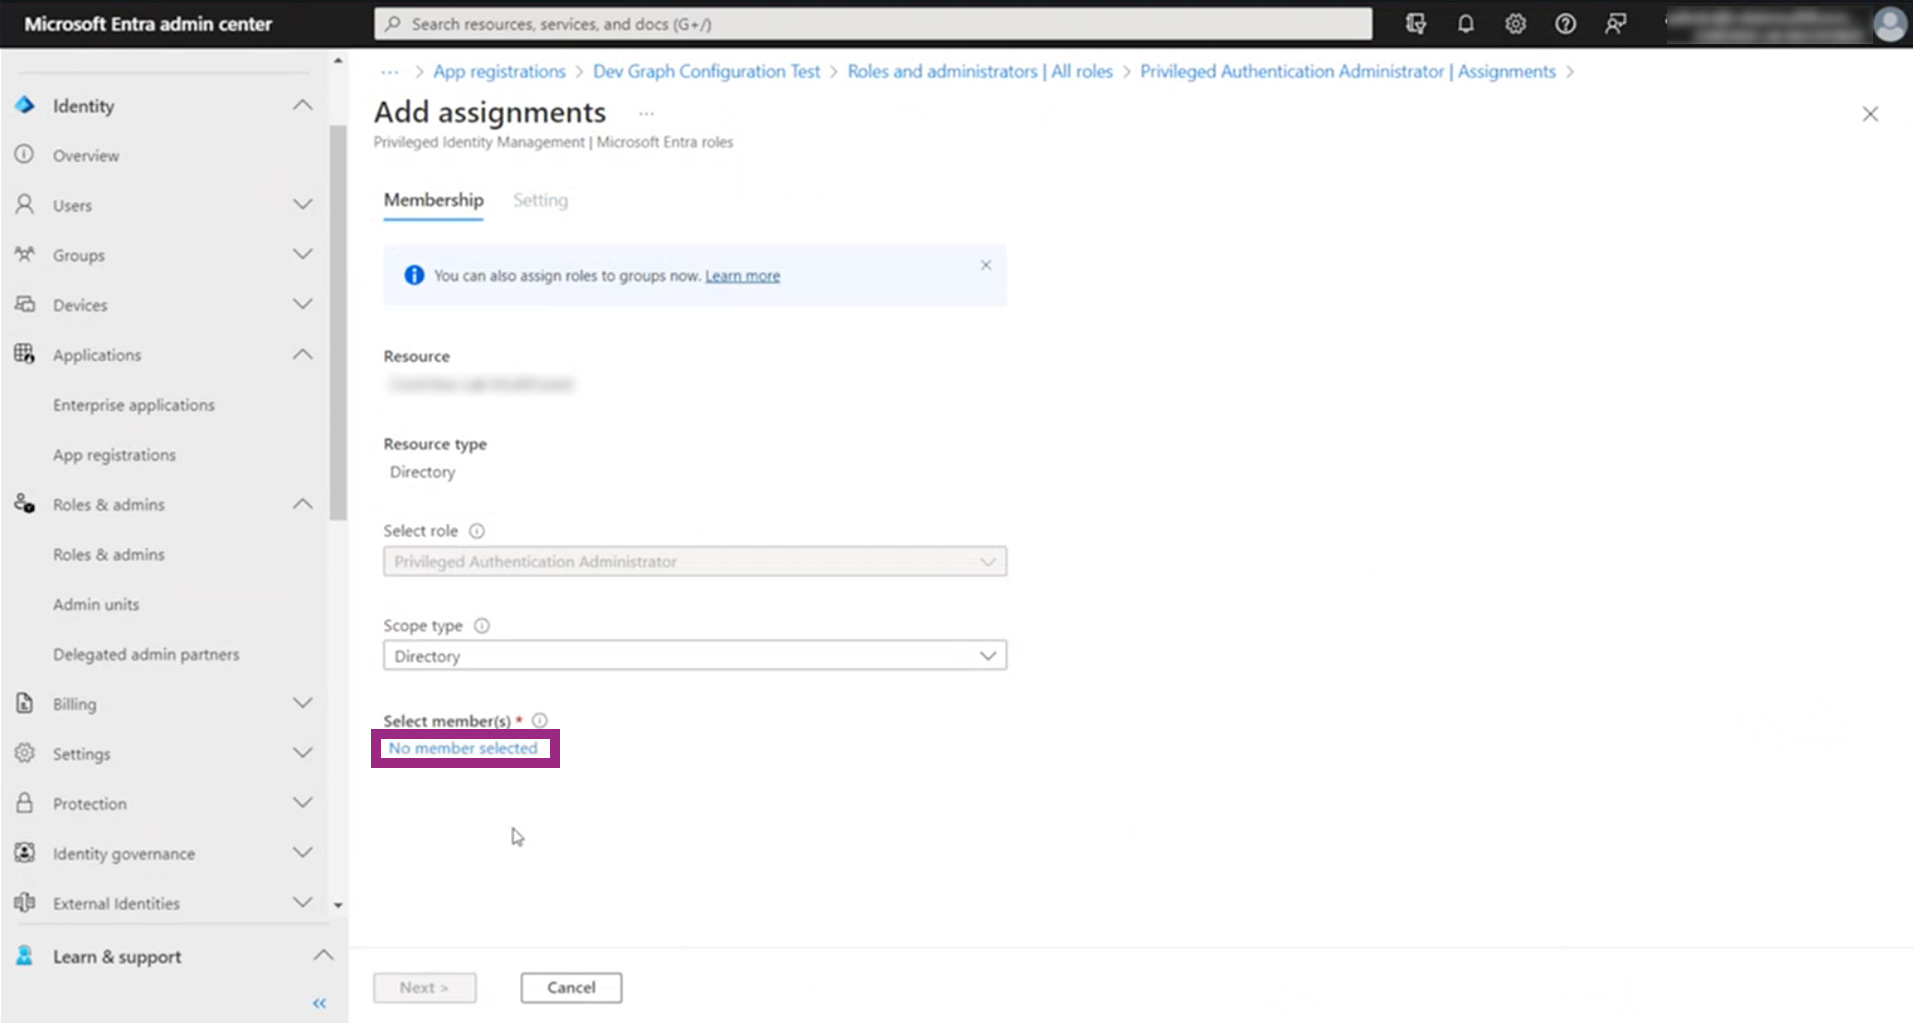
Step 3: assign the role to the Graph application
- From the role detail page click on “Add assignments“.

- Under “Select member(s)”, click the link indicating the number of members or “No member selected”.
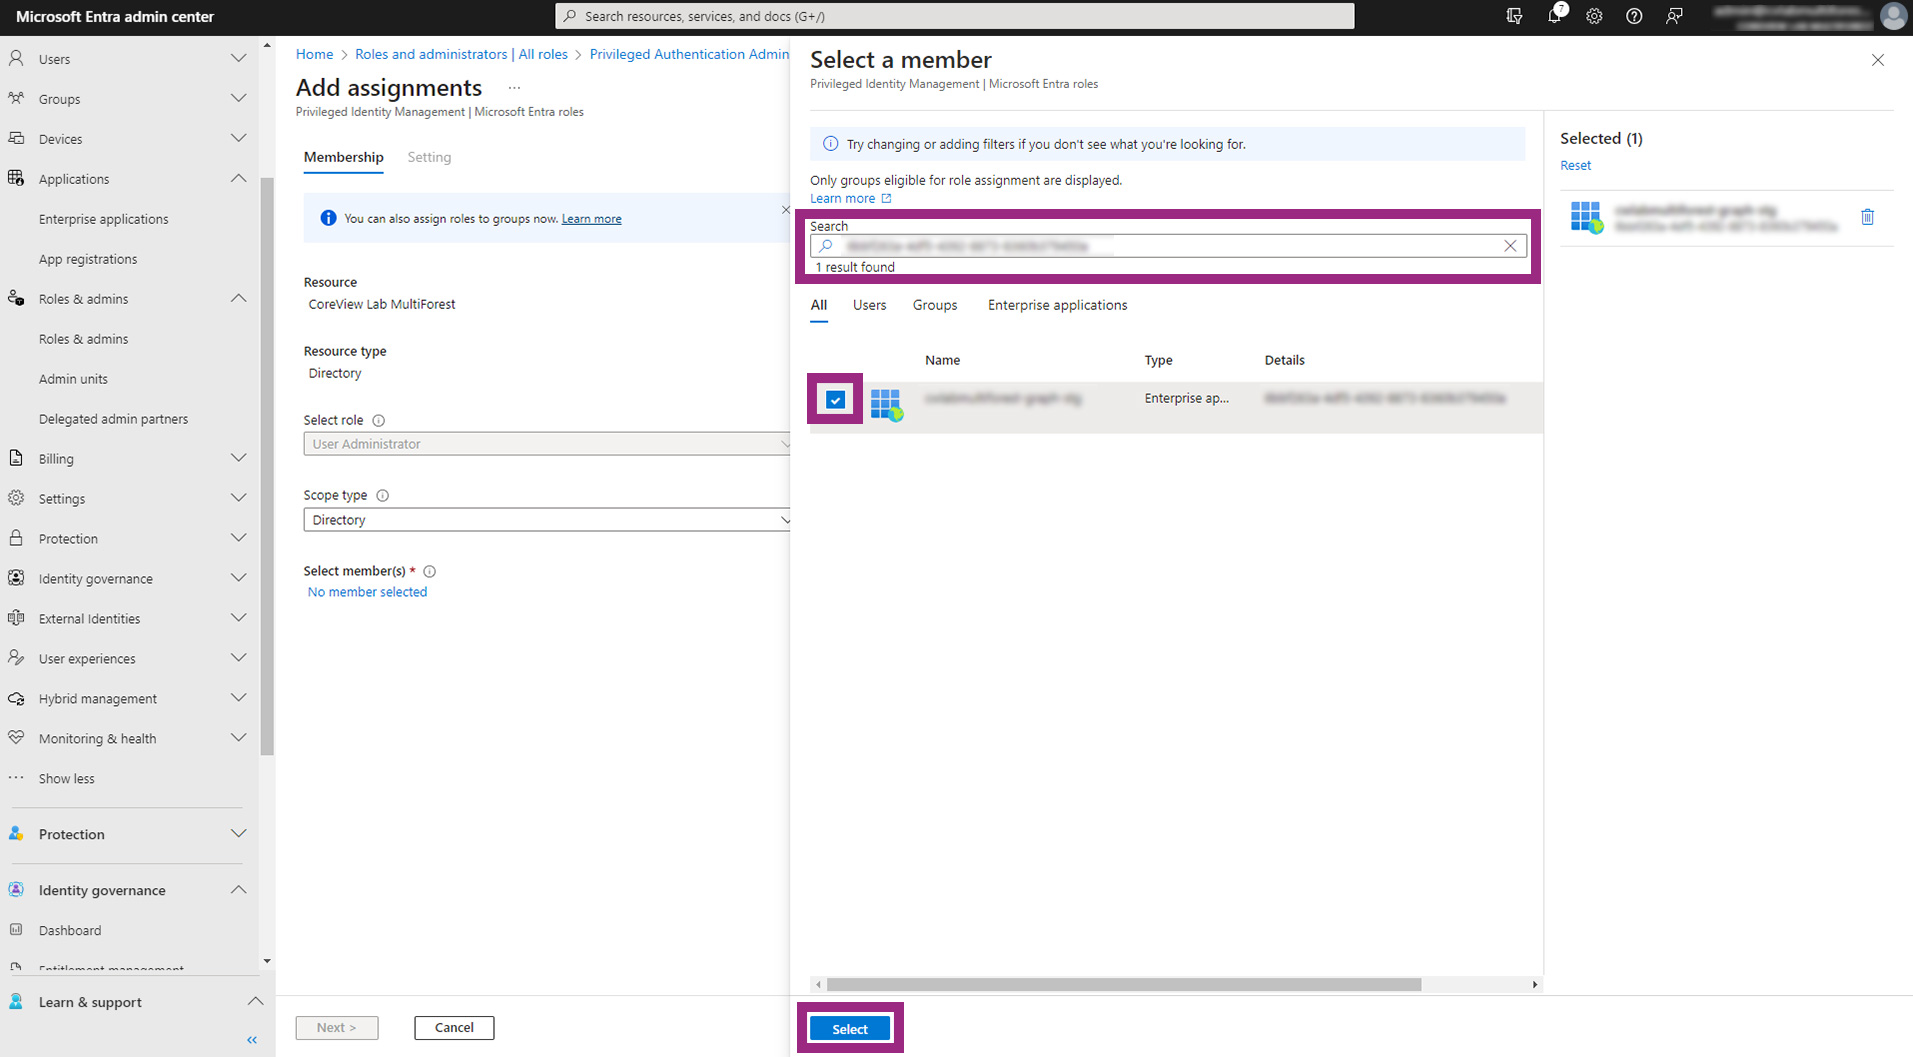
- A pop-up titled “Select a member” will appear.
- Paste the previously copied Client ID into the search engine.
- Check the box next to the registered app in the search results.
- Click the “Select” button.
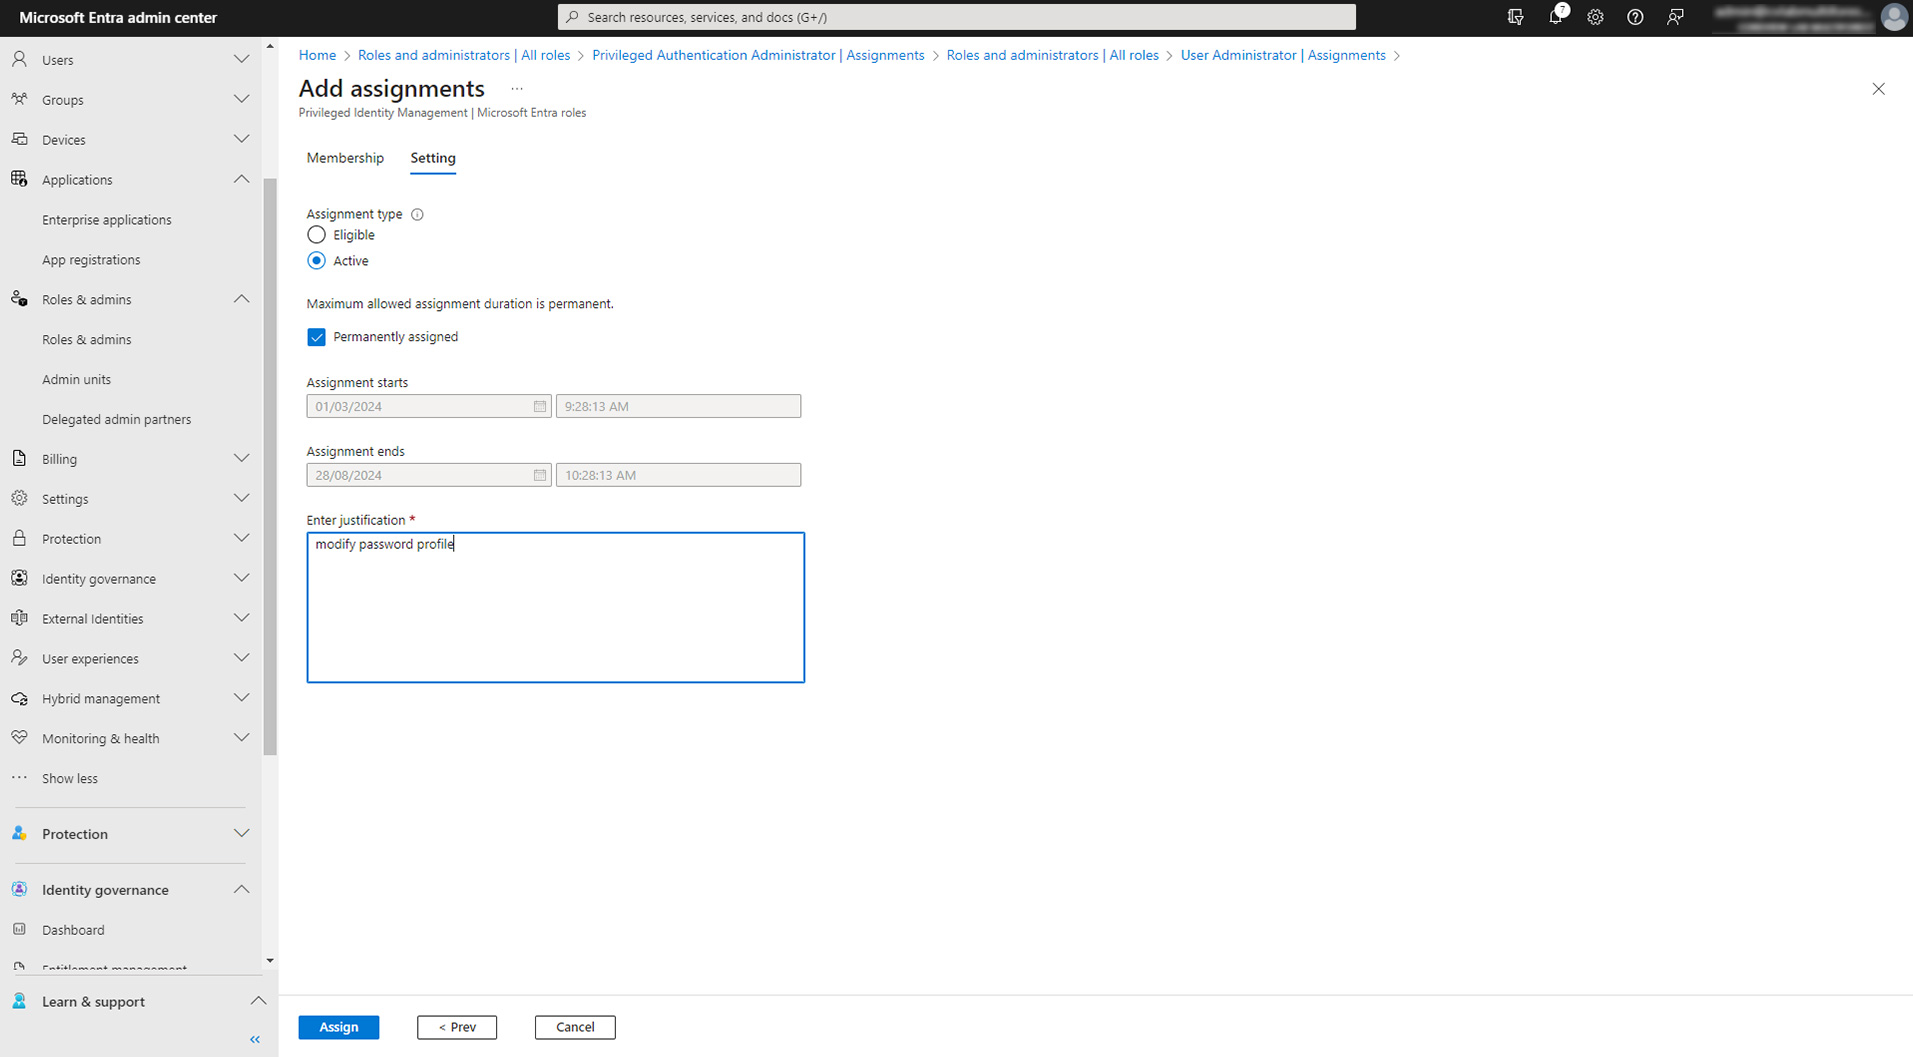
- Fill in the fields.
Step 4: check
The application you selected should now appear in the “Assignments” results for that role.

With these steps completed, the application has the necessary roles assigned.