In anticipation of Microsoft's deprecation of PowerShell modules MSOL and Azure by the end of March 2024, which will render some commands unusable, we have proactively transitioned to Graph for executing management actions.
One critical management action affected by this transition is “Manage password”, which allows for the resetting of passwords for both non-admin users and users with admin roles.
The default permissions assigned to the Graph application registered within CoreView are not sufficient to execute this action. To address this, additional roles must be granted to the Graph application.
The guide provides steps for role assignment in the Microsoft Entra admin center. For additional information, see the ”Assign Microsoft Entra roles to users“ article in Microsoft's official documentation.
Please note that procedures may vary with Microsoft updates or your configuration. If you encounter any doubts or issues, it's best to refer directly to Microsoft's documentation.
Assigning roles to the Graph Application
To enable the “Manage password” management action, you will need to assign one or more roles to the Graph application:
Manage passwords of non-admin users only
User Administrator This role does not allow for the modification of password profiles of users with admin roles. Assign this role if you intend to change passwords for non-admin user.
Manage passwords of admin and non-admin users
Privileged Authentication AdministratorWith this role, you can also change the passwords of users with admin roles. Assign this role if you need to change passwords for both admin and non-admin users.
How to assign roles
This section shows how to assign a role to the Graph application. The procedure applies to both roles.
Step 1: copy the Client ID
Copy the Client ID of the application you have registered with CoreView.
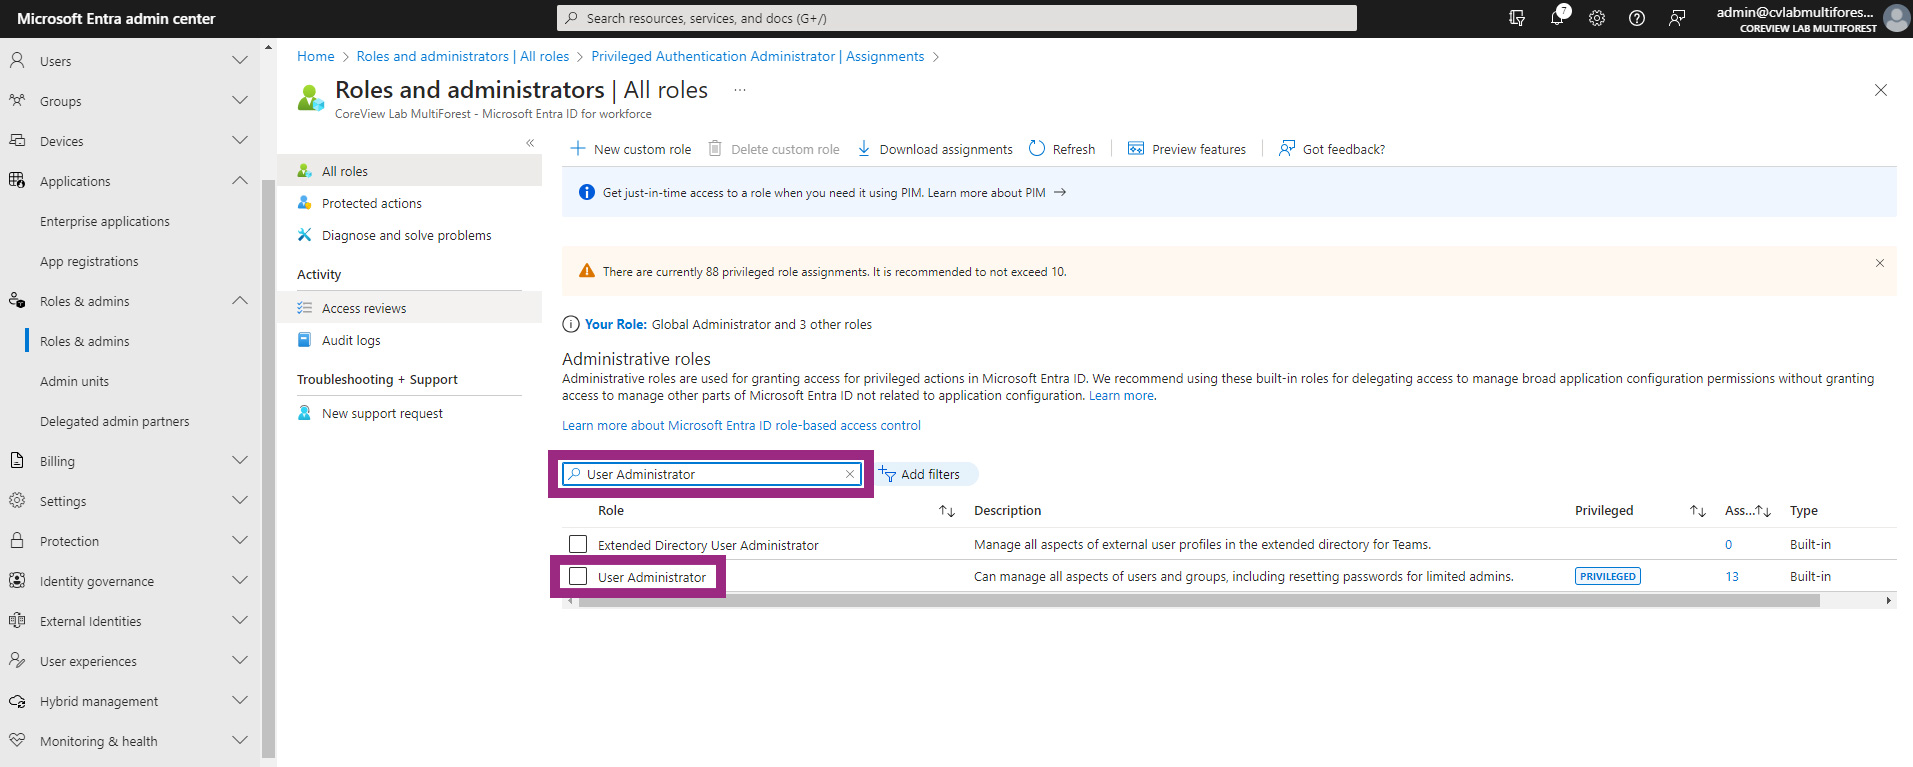
Step 2: access “Roles & admins” and find the role
- Visit the Microsoft Entra admin center.
- In the left-hand menu, expand the “Identity” section.
- Click on “Roles & admins”.
- Use the search engine to look for the required role:
- “User admin role”
- “Privileged Authentication Administrator”.
- Double click on the desired “Role” from the search results.
Step 3: assign the role to the Graph application
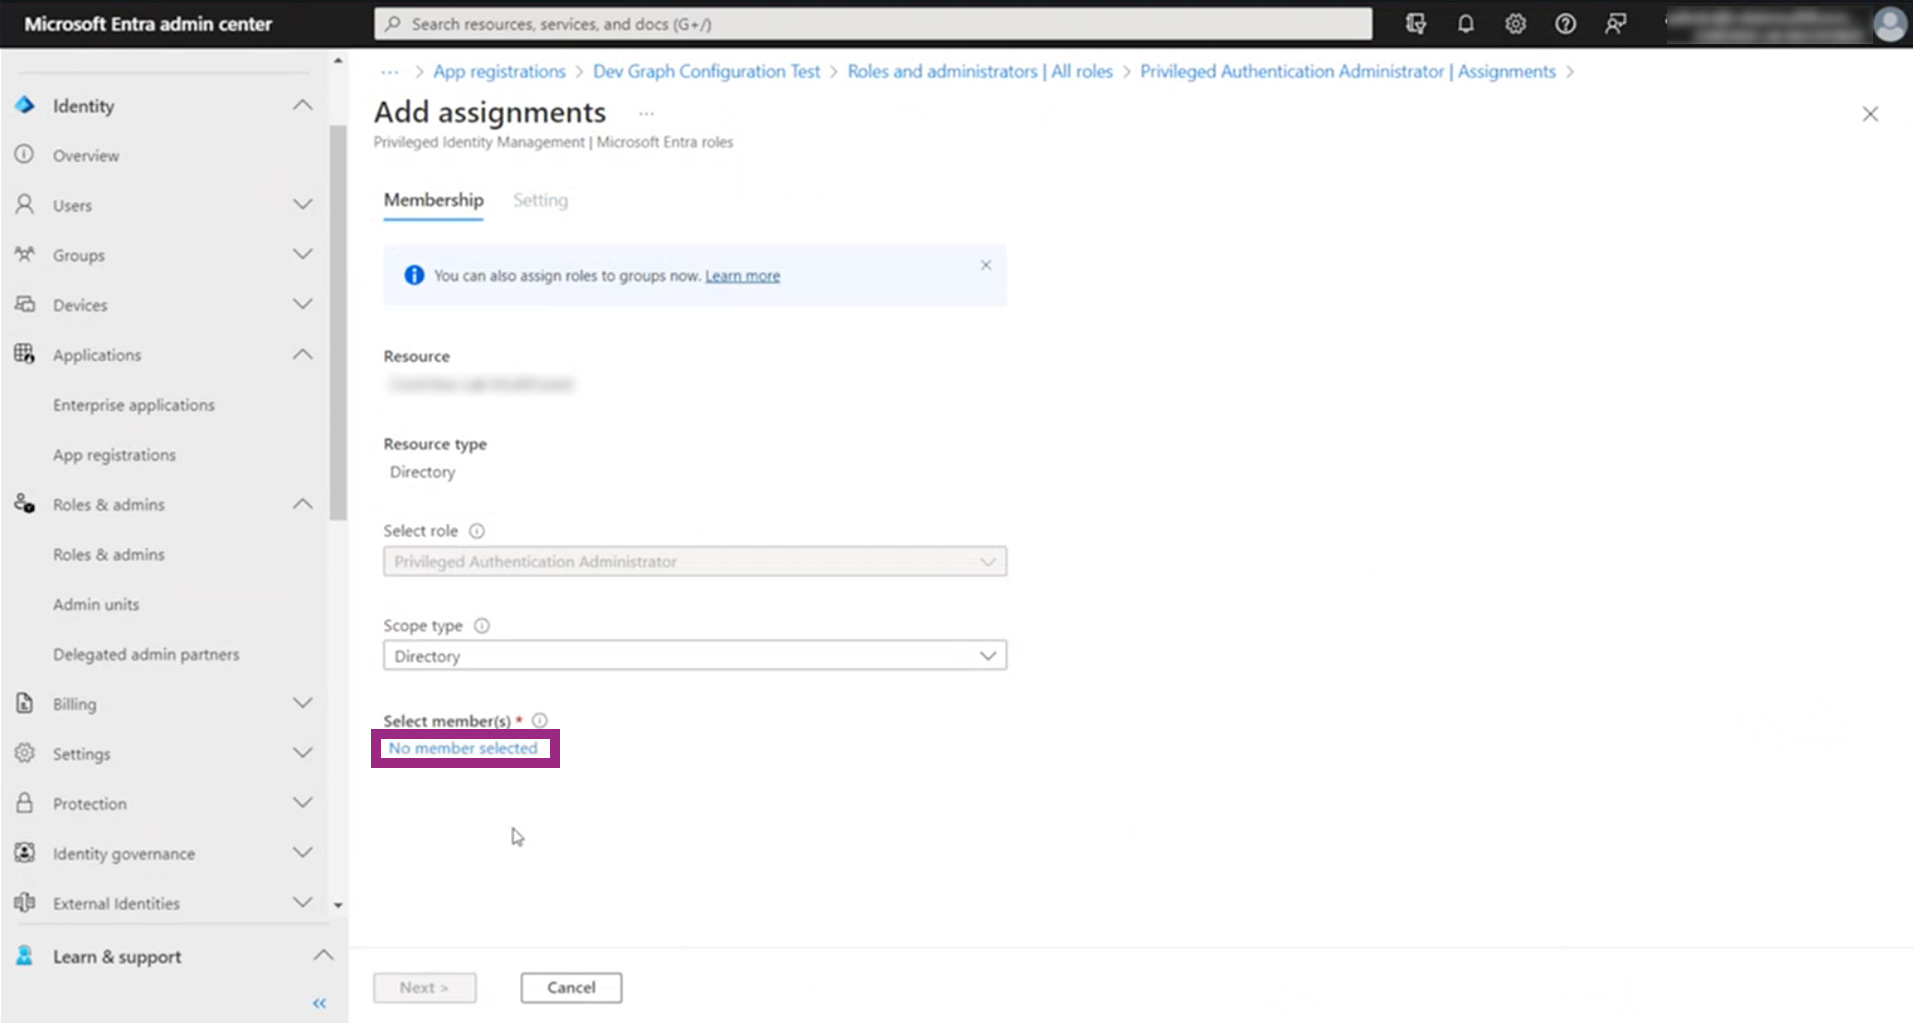
- From the role detail page click on “Add assignments“.

- Under “Select member(s)”, click the link indicating the number of members or “No member selected”.
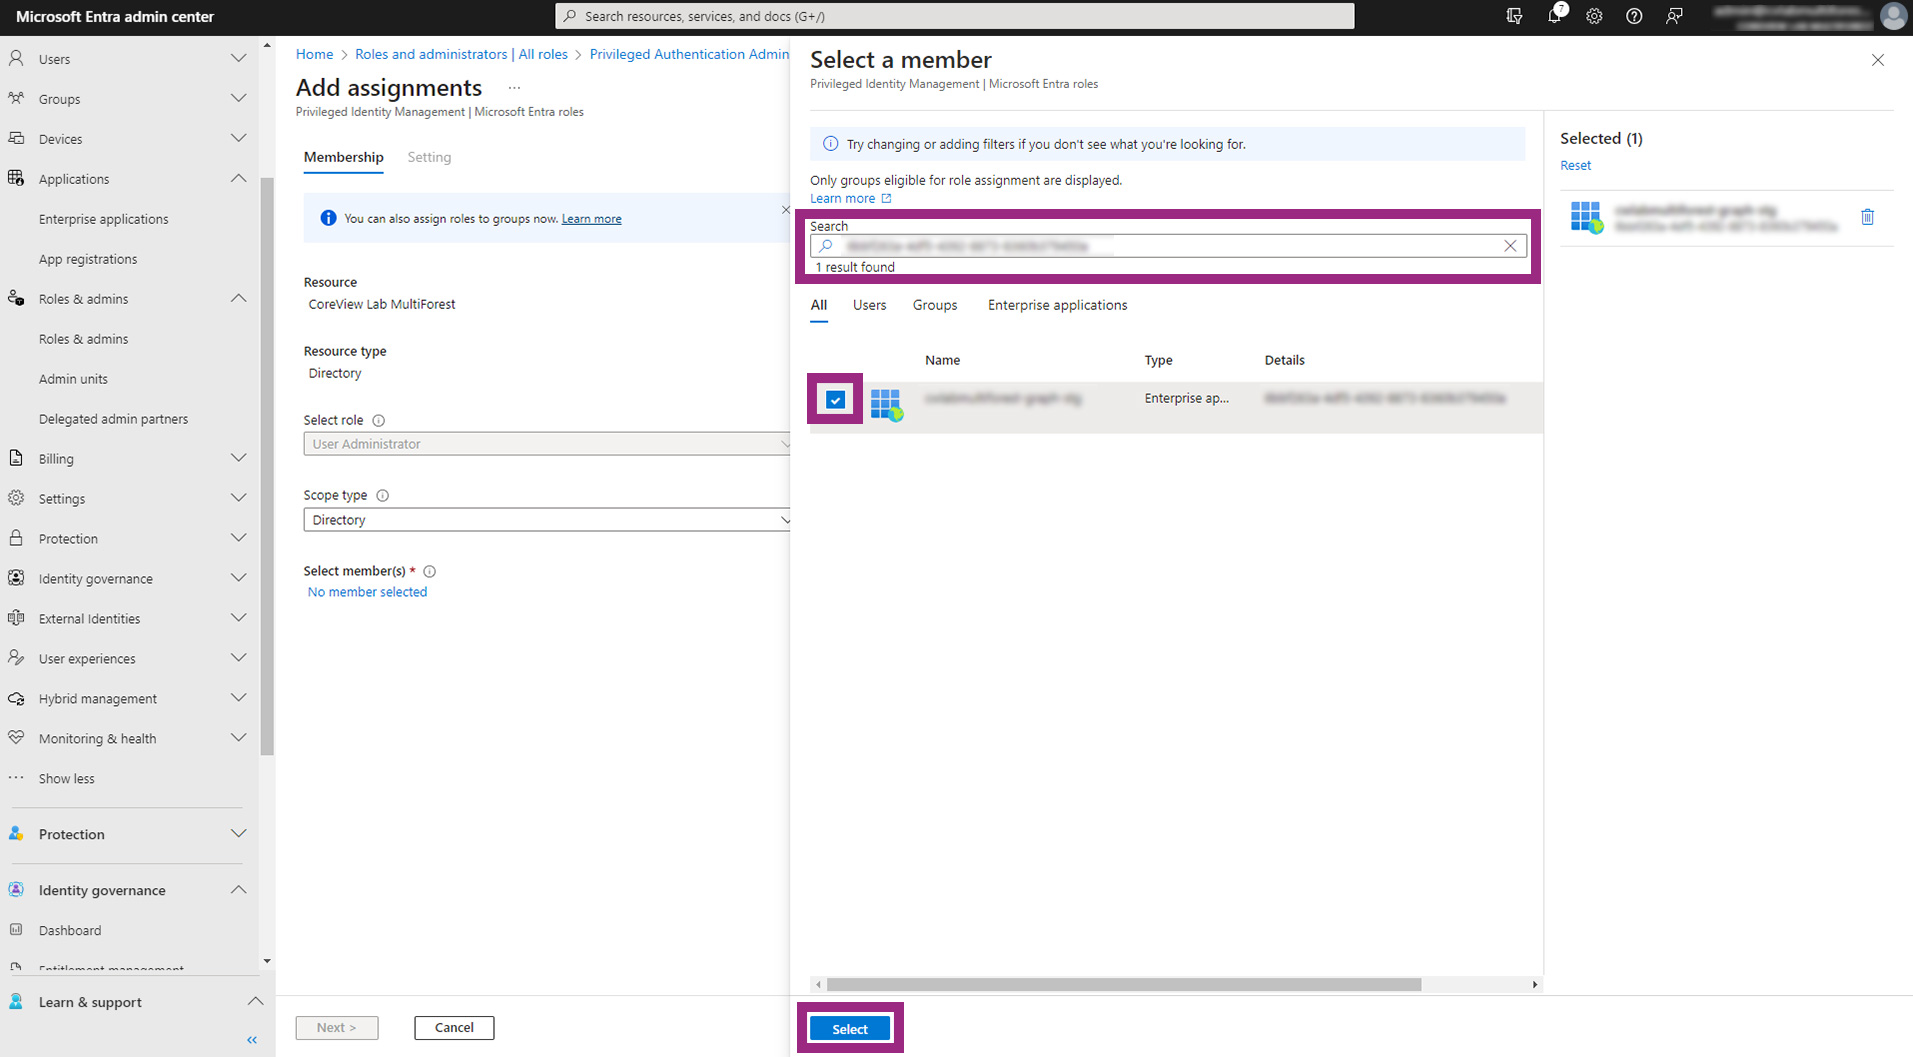
- A pop-up titled “Select a member” will appear.
- Paste the previously copied Client ID into the search engine.
- Check the box next to the registered app in the search results.
- Click the “Select” button.
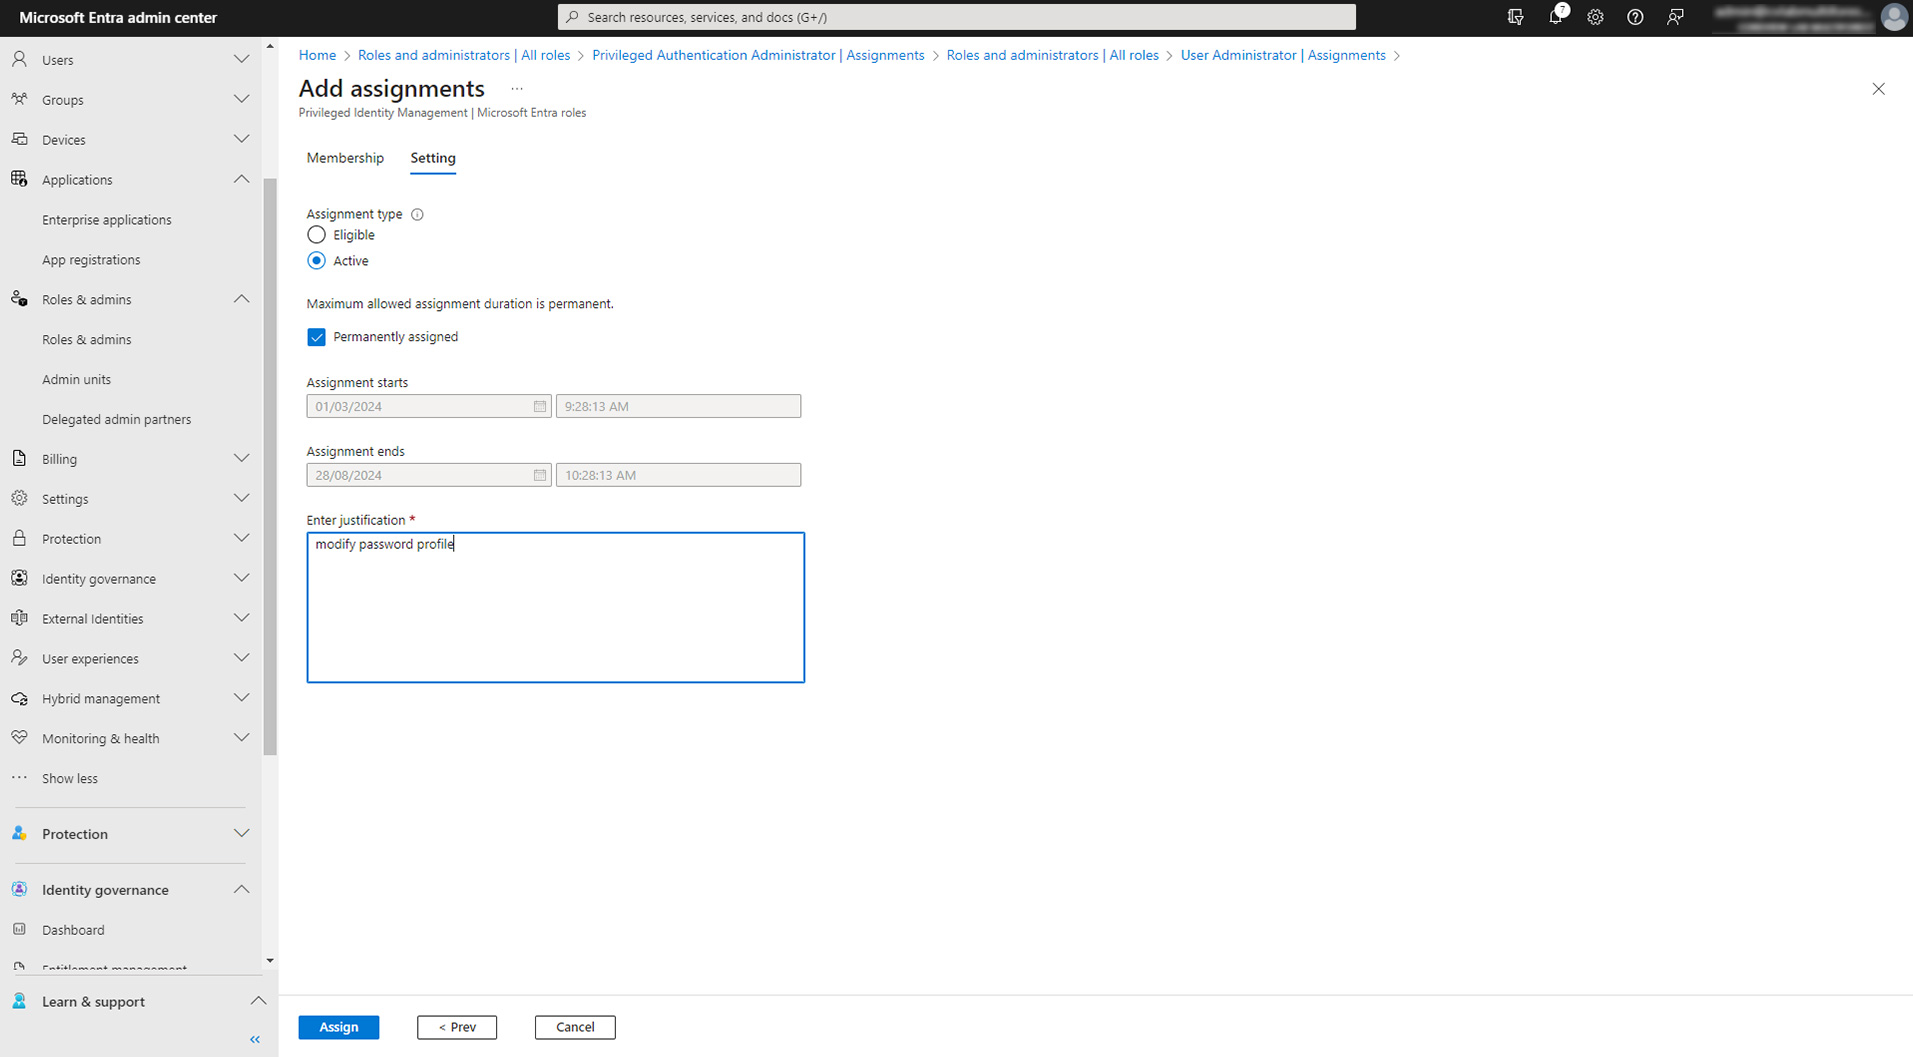
- Fill in the fields.
Step 4: check
The application you selected should now appear in the “Assignments” results for that role.

With these steps completed, the Graph application will have the necessary permissions, and you can use the “Manage password” management action to reset passwords as required.