The App Builder screen is made up of two areas: the top bar and the options and files area.
Remember, you will see the top bar once you have selected a tenant and the area below once you have selected an application.
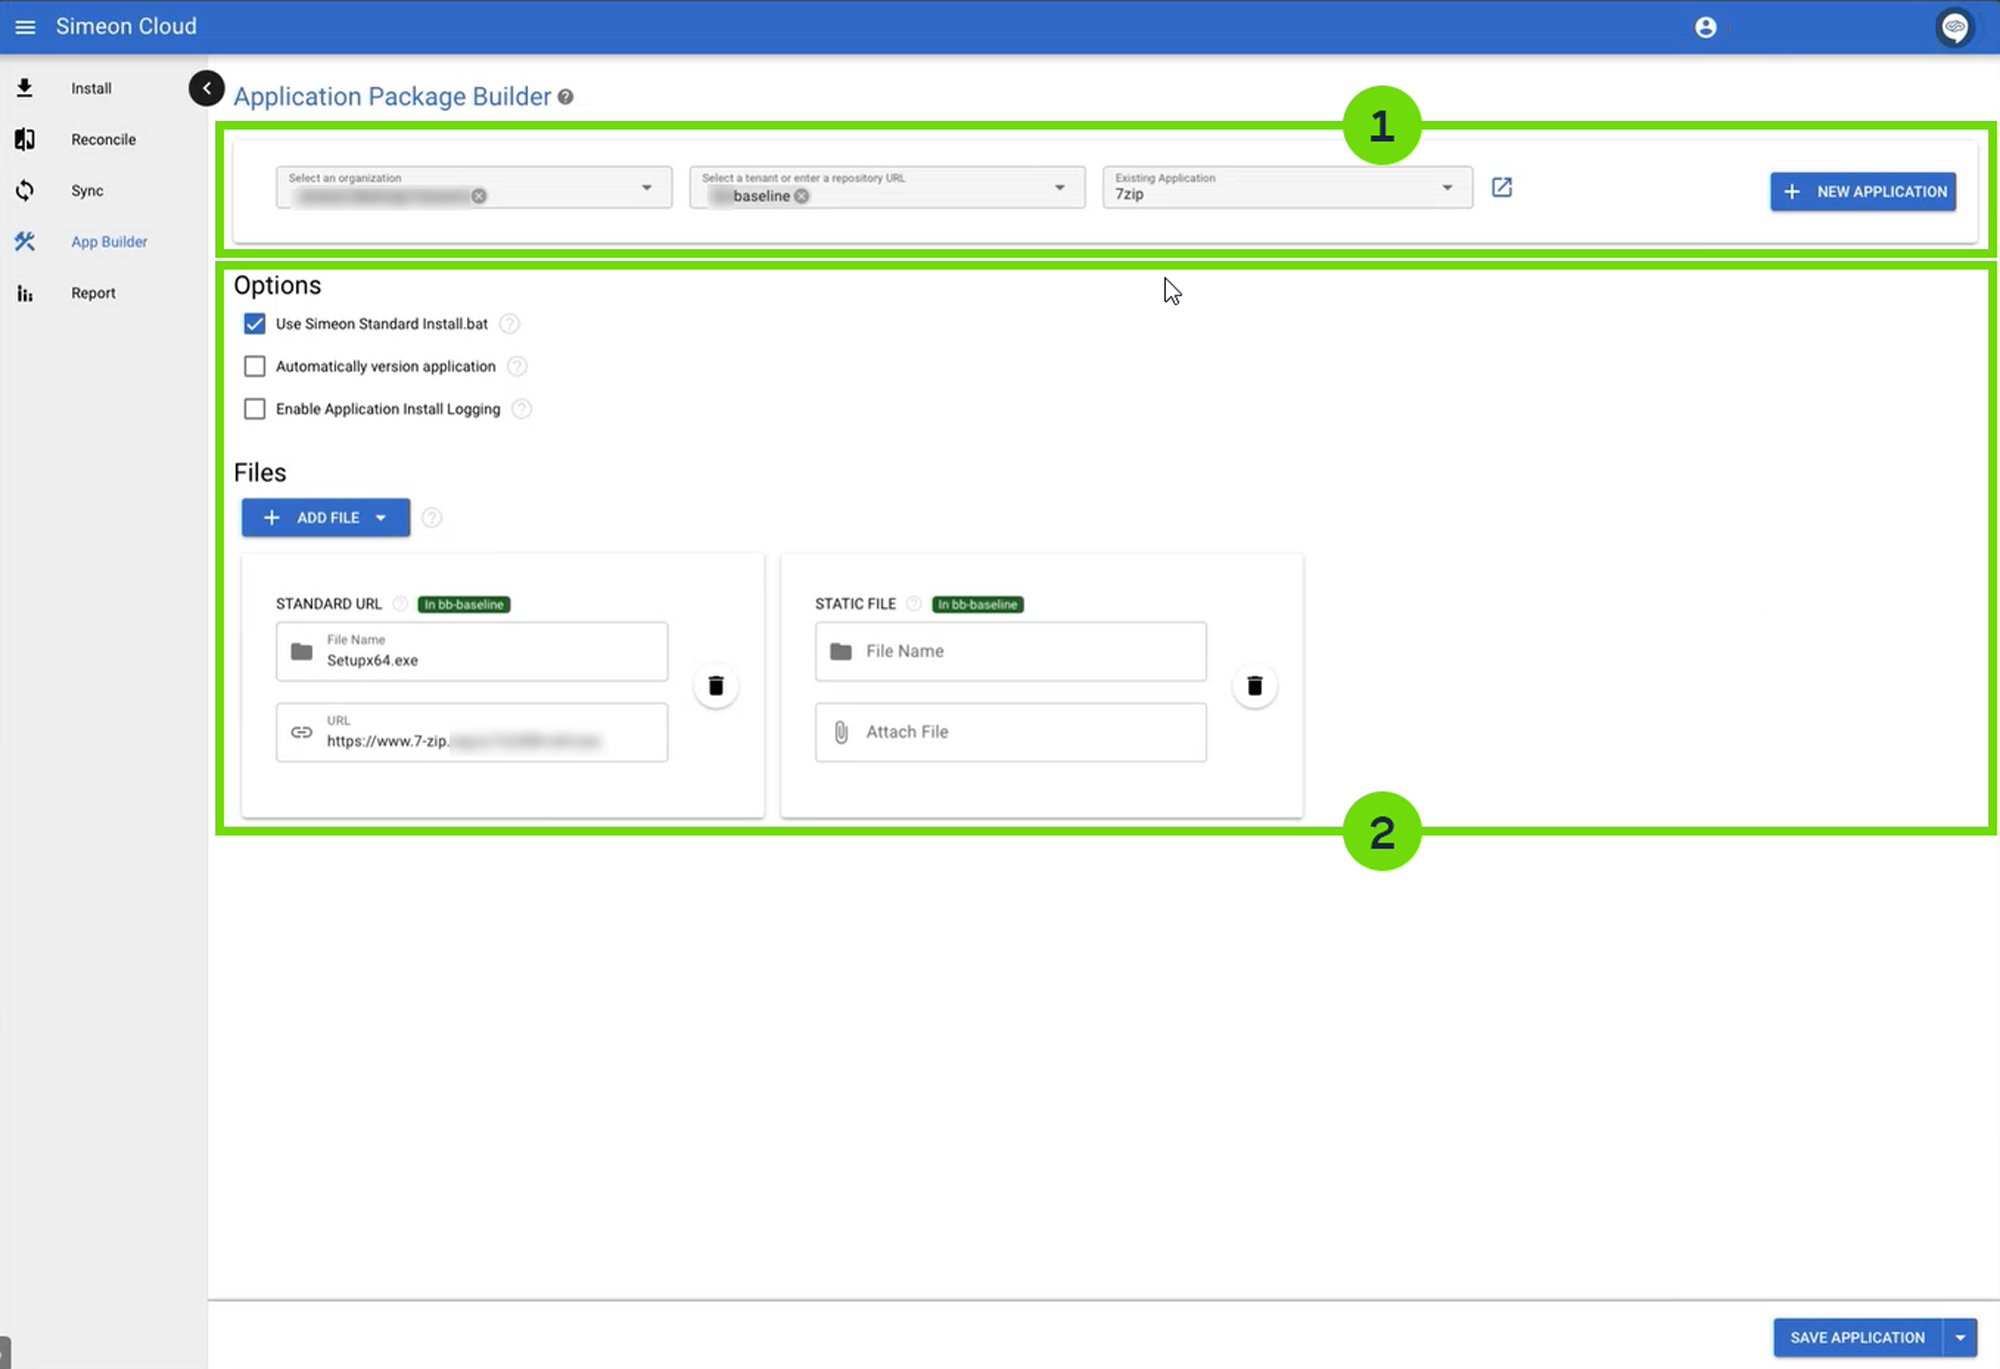
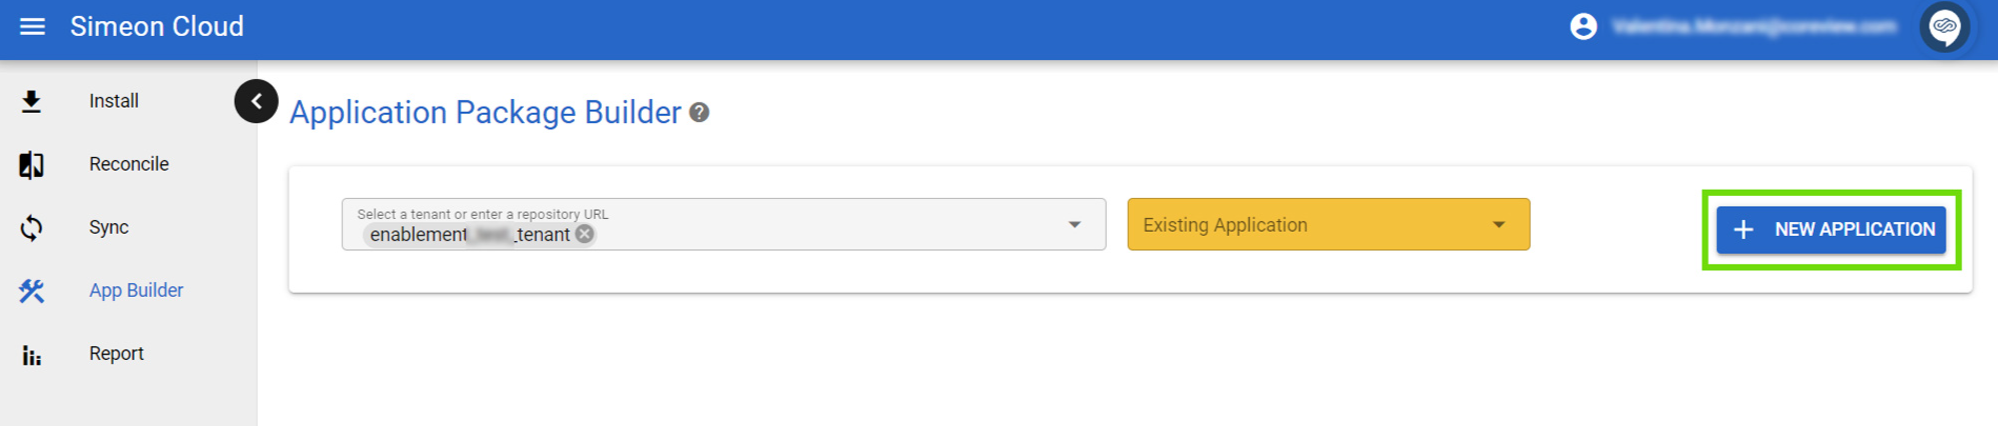
Top bar
The top bar appears after selecting a tenant.

Here, you can
- select an organization if you have more than one,
- change the selected tenant,
- select an existing application from the dropdown menu,
- package a new application (+ NEW APPLICATION button on the right)
Options and files
The “Options” and “Files” area becomes visible after you select and existing application or after configuring the Application in Intune and syncing it with Configuration Manager, and you need to add the actual installation files.
Files
In the “Files” area Configuration Manager offers several options to accommodate different file sizes and hosting scenarios.
You can choose between:
- Static files
- Standard URL
- Zipped URL
- Azure File Share Path
Visit our “Files options” guide for more information.
Options
After selecting your file option, you have additional choices to optimize how Configuration Manager handles the installation process.
Consider enabling these options based on your needs:
- Use Configuration Manager Standard Install.bat
- Automatically version application
- Enable Application Install Logging
Visit our “Additional options” guide for in-depth information.

Save application button
The “Save application” button located at the bottom right of the page allows you to finalize the process and save your application.
