Assign mode
The “Assign” mode constructs License Pools using CoreView portal attributes, rather than an attribute associated with a Microsoft account.
This mode allows you to create a pool that is separate from your user's data on Microsoft, as it groups users based on the portal attributes of CoreView that you assign to them.
To access the “Assign” mode, please follow the steps below.
Configure filter criteria
Step 1: Select mode
Select “Assign” under “Pool configuration mode”.

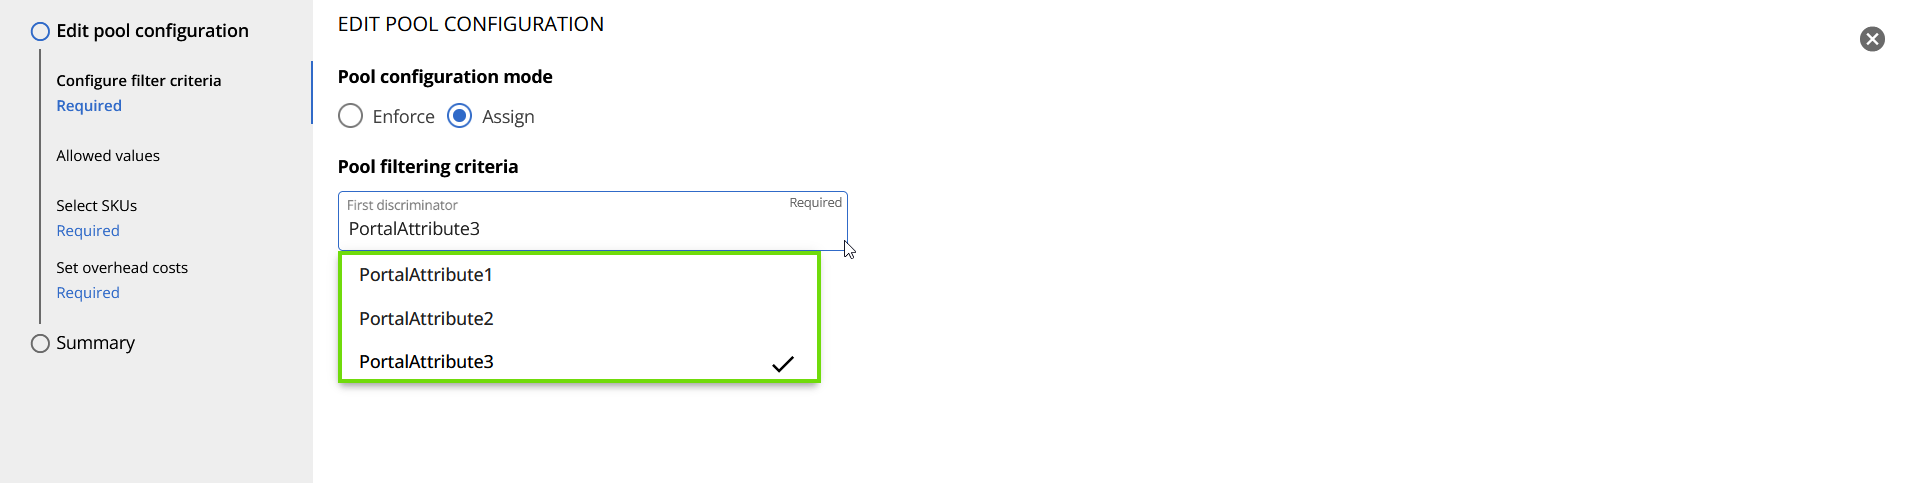
Step 2: Select criteria
Choose a discriminator from the “Pool filtering criteria” list.
Step 3: Reporting only (optional)
Once you've selected the criteria, if necessary, you can switch on the “Reporting only” toggle. This eliminates the “Select SKUs” step from the required functions.
Essentially, enabling the “Reporting only” toggle simplifies the creation of License Pools by removing the SKUs tab. This means you can create License Pools, but they can only be used for reporting purposes. It calculates all the licenses and shows how many are in use.
So, you have two options: “Assign pools” and “Reporting only”. With the first option, you assign SKUs to each created License Pool, preventing operators from over-allocating those pools. On the other hand, the “Reporting only” option merely displays the number of licenses in use within each pool, without any assignment or enforcement of limits.
Once you've made your selection, click “Next”, located at the bottom right corner of the screen.

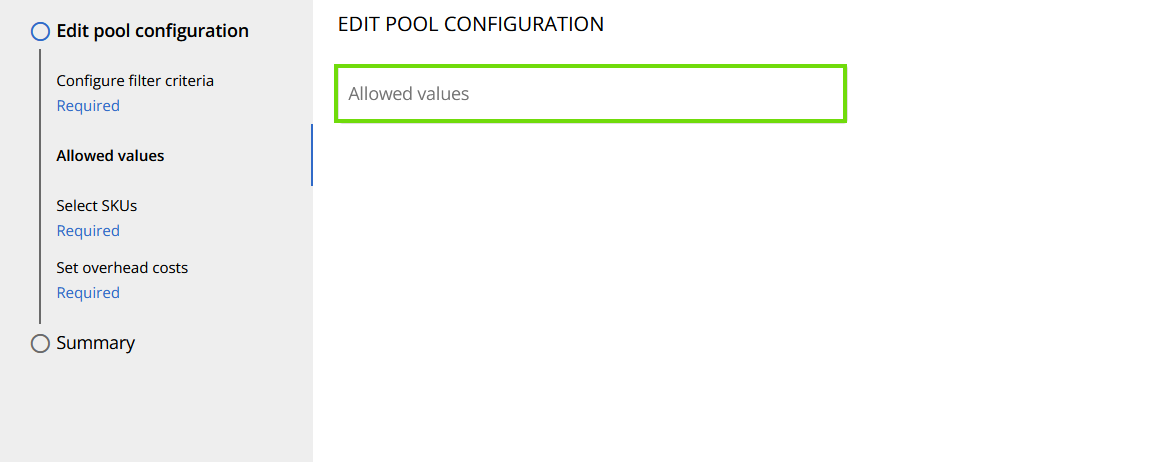
Allowed values
Fill in the “Allowed values” for your License Pool’s creation. These values will be added to the existing values of the portal attribute you selected. That means, for example, that if you have two values, such as LicensePool_1 and LicensePool_2 already filled in Portal Attributes 2, the values you add here will be the names of the additionalLicense Pools created.
Select SKUs
This page will display all SKUs that have been detected within the tenant. Uncheck those you wish not to show, or check those you wish to include. Click Next, located at the bottom right corner of the screen.

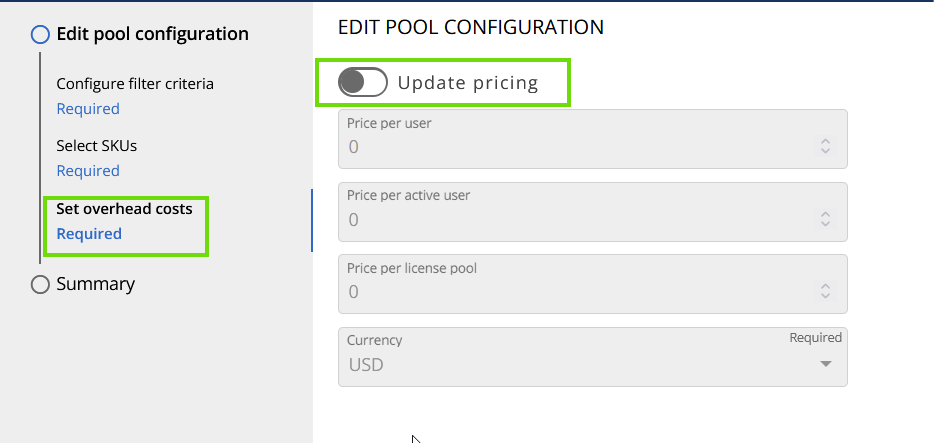
Set overhead costs (optional)
This section enables your organization to include overhead charges associated with users or pools for the purpose of chargeback reporting. If you want to update and edit pricing details, like the price per user, per active user, per License Pool, or the currency, follow these steps:
- Enable the “Update pricing” toggle
- Fill in the values you would like to assign to your License Pools.
- Click “Next”.

Summary
Step 1: Review
Finally, review all the details. If necessary, you can edit the details by clicking on the pencil icon located in each section.

Step 2: Submit
Once you are done, click “Submit” to make changes official.

With the “Assign” mode, you can determine the user composition of each pool by assigning or removing the relevant portal attribute from the users. This can be done through the “Set portal attribute” management action.