Run a workflow via API
Important information
This guide is designed for those looking to integrate third-party applications with their CoreView portal. This might be relevant if you want to trigger a workflow in response to specific events such as:
- HR submitting a new form after hiring a new employee;
- The creation of a new ticket in a trouble-ticketing system.
However, if your CoreView portal is exclusively managed by human tenant admins and operators, you can skip this section entirely.
The aim of this article is to equip our customers with the necessary information on the requirements, prerequisites, and step-by-step process to successfully integrate third-party applications with your CoreView tenant via the CoreView API.
The intended readers for this article and the execution of the described activities are senior technology staff members from your organization who support enterprise services.
It is crucial for the appropriate individuals within your organization to review the information provided here and contact CoreView with any questions before scheduling a deployment.
Overview
The following instructions explain how the CoreView API can be used to execute your CoreView workflows. Currently, the CoreView API is simple to use and supports workflow interaction. This means the only actions you can programmatically manage with the public API are:
- Get Workflow Executions
- Get Workflow Execution History
- Start Manual Executions
- List Workflows
- Get Workflow Details
- Get JWT Token
Before using the API, you must deploy at least one workflow in your CoreView portal; otherwise, no API method can be used for interaction with CoreView.
PostMan
API integration allows customers to invoke any CoreView workflow from external platforms capable of calling URLs and passing values to them.
In this guide, we will use PostMan as the software that simulates the API call to the CoreView data center. You can download the latest version of PostMan here.
PostMan is a free API platform for building and using APIs. It simplifies each step of the API lifecycle and streamlines collaboration, allowing you to understand how to work with APIs more quickly.
As the first step, please import the “CoreFlow Public API.postman_collection.json” file into your Postman dashboard. This will display all the methods you can call.
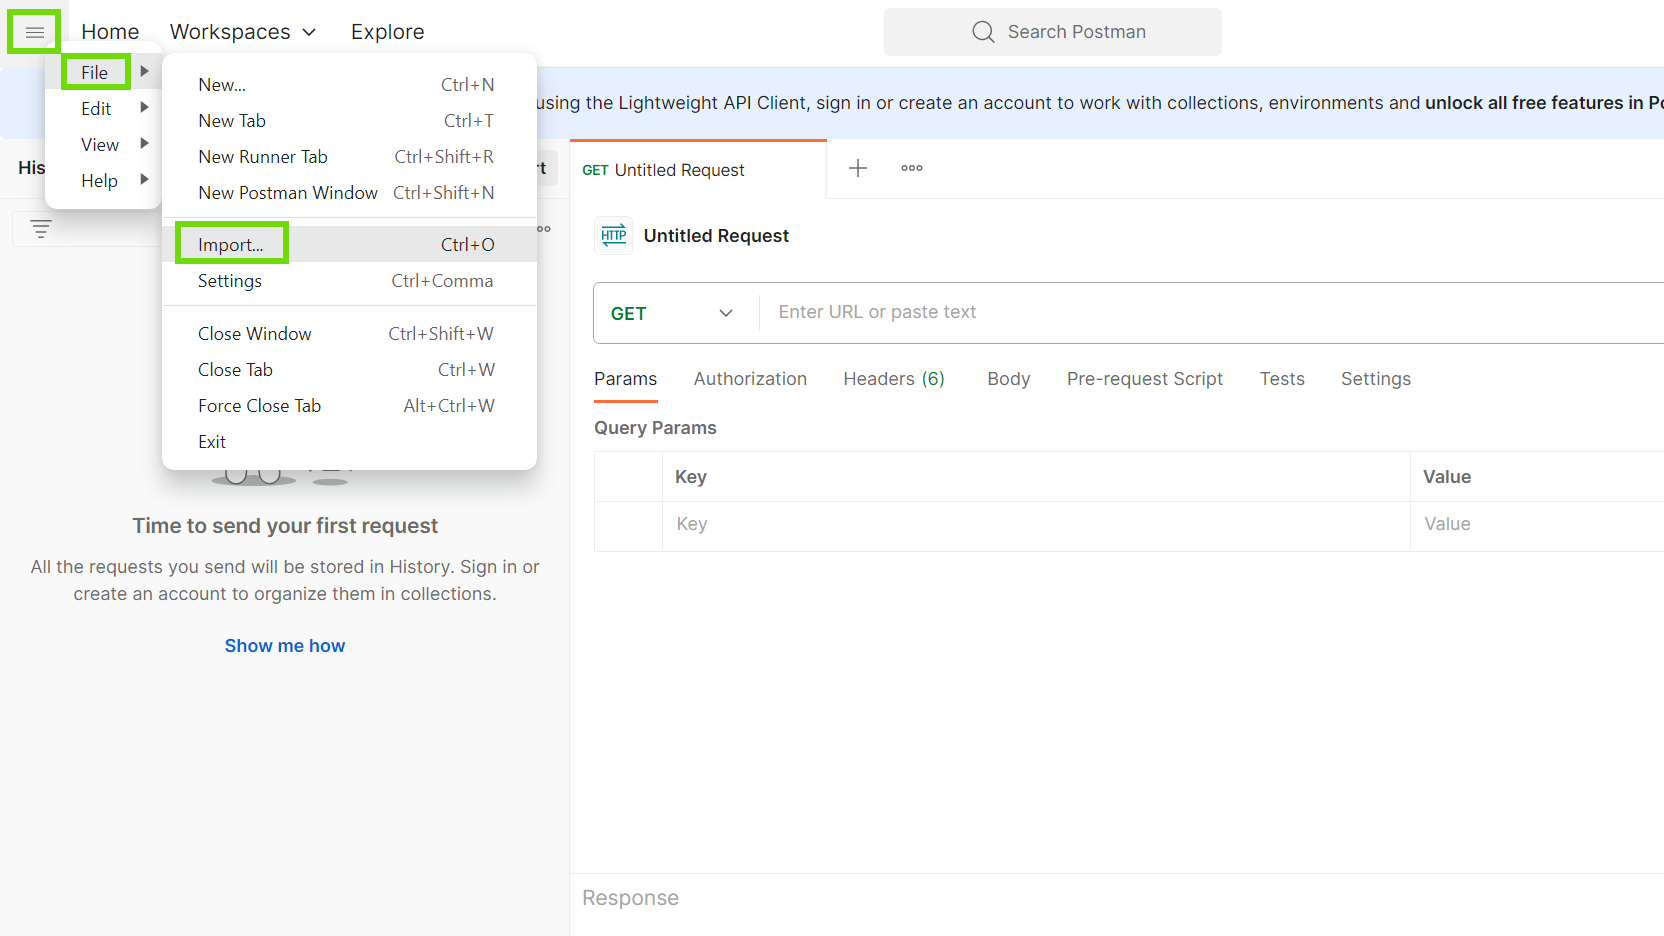
To import the JSON file, follow these steps:
- Open Postman and create an account.
- Click on the icon in the top right corner.
- Select: “File” > “Import”.
- Click on “Import an existing file”.
- Select the “CoreFlow Public API.postman_collection.json” file you saved on your computer.

CoreView API Details
Now you are ready to call CoreView API methods. Before calling any method, you need to handle authentication.
Authentication is managed through an API key, which is required for generating a bearer token that you must use in every method call.
To obtain your bearer token, click on “Get JWT API” and set the following URL: https://www.loginportal.online/api/auth

Generate your API key
You need to replace the API key in the Headers section with your own API key, which can be generated within your CoreView portal:
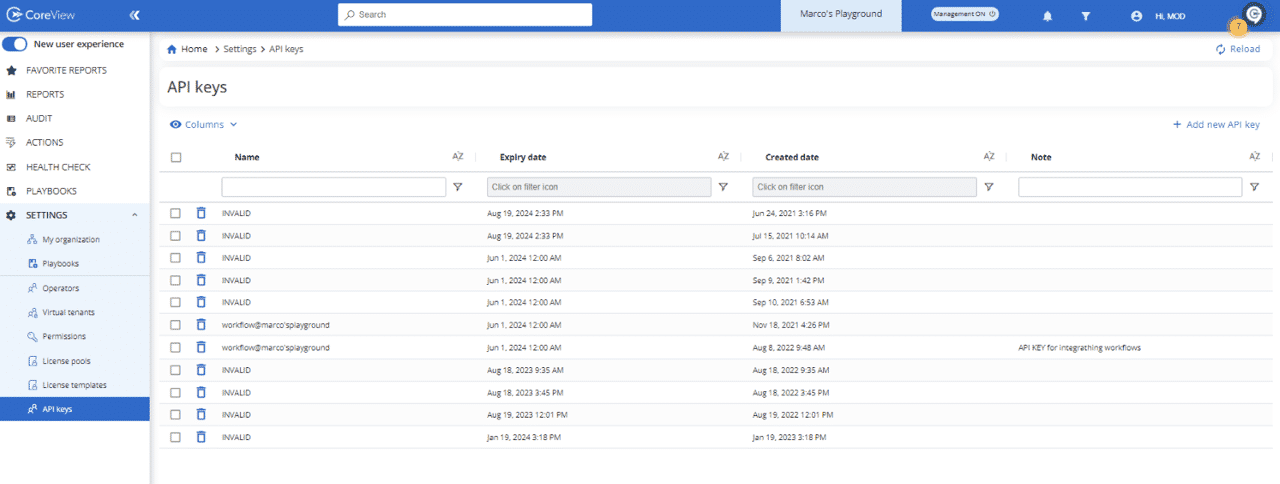
Step 1
Log into your CoreView portal with administrative rights, open the “SETTINGS” drop-down menu and select “API keys”.
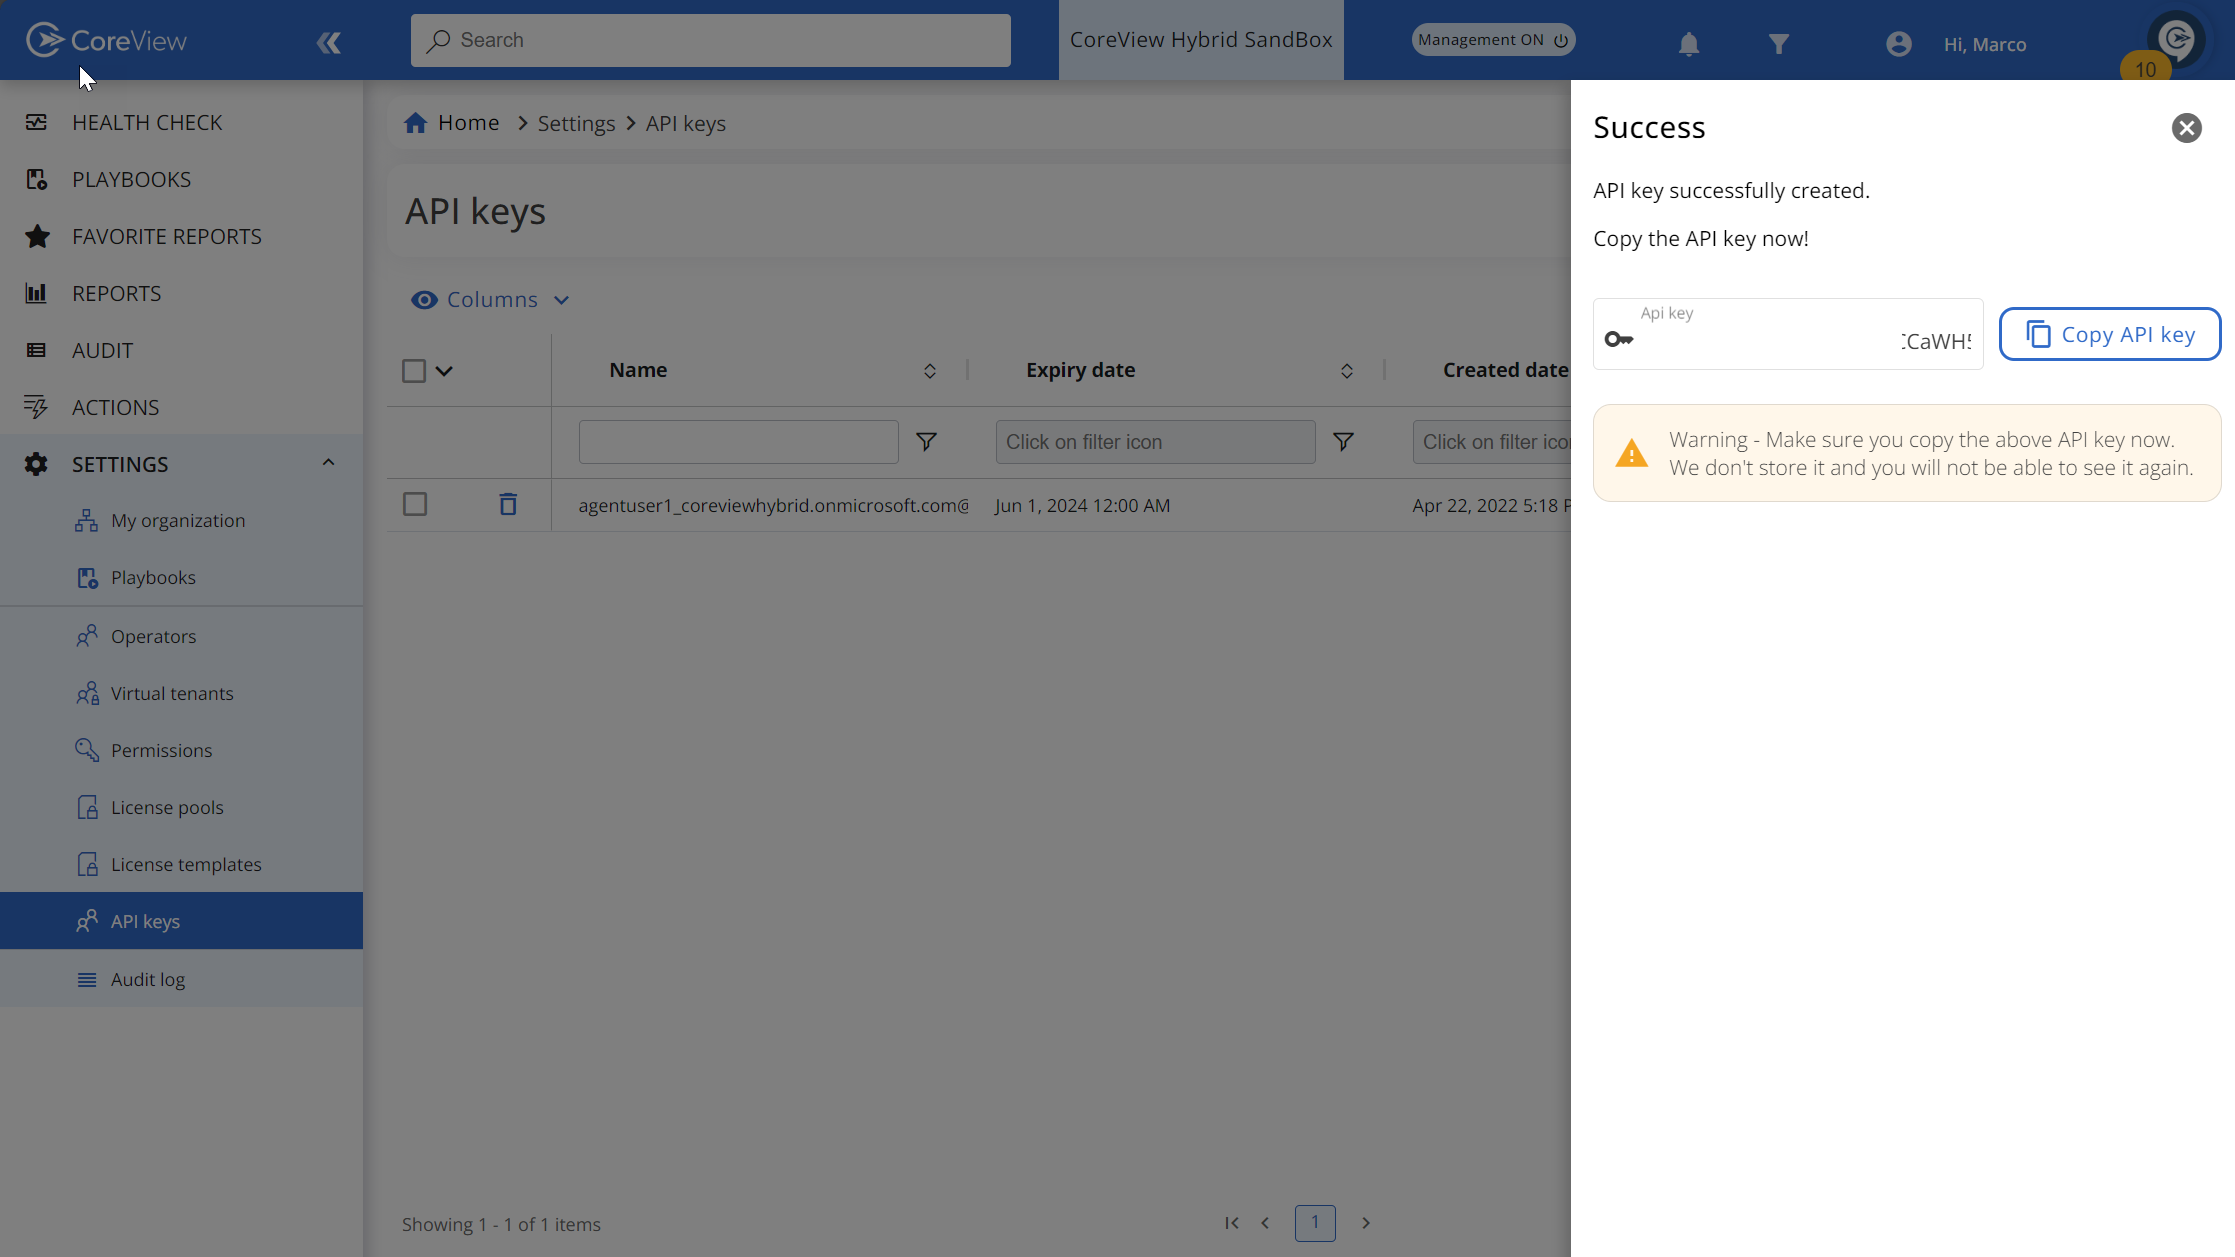
Step 2
To add a new API key, click on the “Add new API key” button.


As soon as you create the API key, make sure to copy it, as it will no longer be visible.
Method 1: Get JWT Token
Return to Postman, select “Headers”, and paste the API key you just copied into the field named “Authorization”:
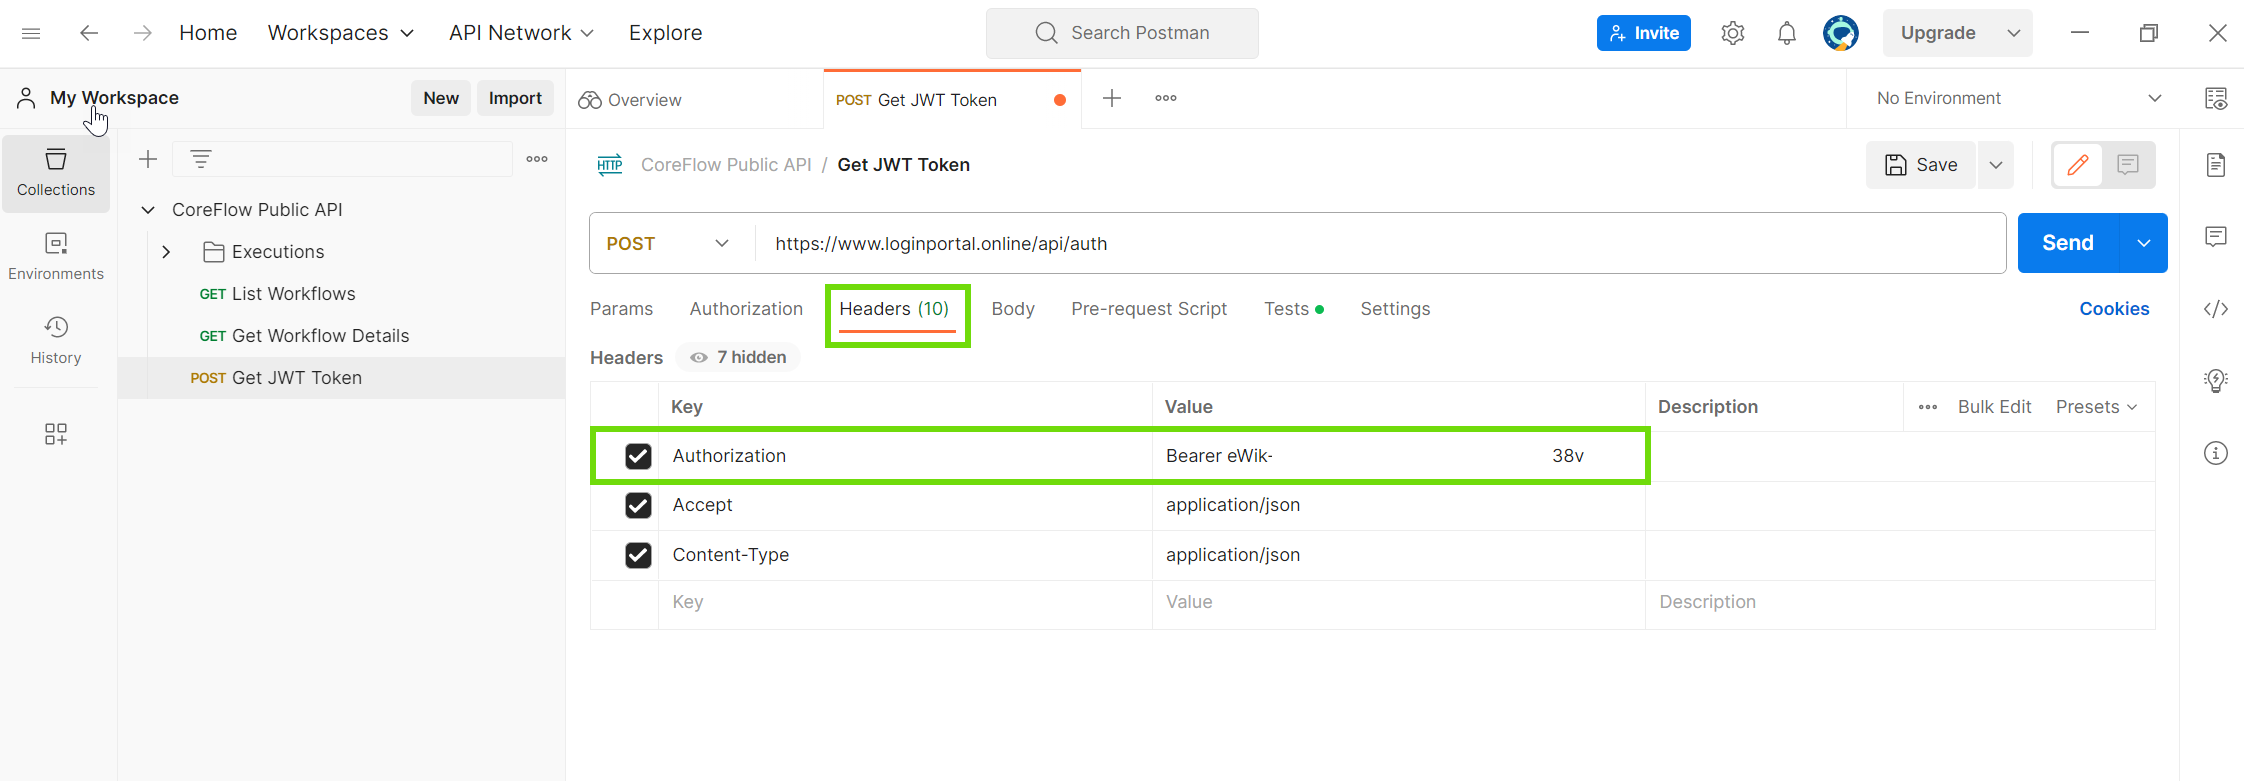
Once you click “Send”, you will receive a bearer token in the body section of the result, which you will use for any additional API method call.
Please note that tokens expire in 48 hours (about 2 days), so we recommend generating a bearer token for each request.
If you would like to check the bearer token details, copy the token value to the site jwt.io, and you will see all the information related to your token.
The expiration date will be displayed in the “exp” field. Hover your mouse over the “exp” value, and you will see when your bearer token expires:
ID
Method 2: List Workflows
Now, click on the “List Workflows” item and replace the authorization value with the bearer token you just generated:

Please note that to call any API method, you also need the “X-scompany ID” value. You should contact your CoreView consultant to obtain the X-scompany ID assigned to your CoreView tenant.
Method 3: Start Manual Execution
Let's now explore how to start a workflow using the “Start Manual Execution” method. To run a workflow, you need to change the URL to call the correct CoreView data center.
Please refer to the following table to identify the appropriate URLs to use:
| V2 API URLs | |
|---|---|
| Authentication GOV US | https://uslogin.coreview.com/api/auth |
| Authentication (all other DC) | https://www.loginportal.online/api/auth |
| Europe | https://coreflowapi.coreview.com |
| Canada | https://coreflowcaeapi.coreview.com |
| East US | https://coreflowusapi.coreview.com |
| Gov US | https://coreflowusgovapi.coreview.com |
| Australian | https://coreflowausapi.coreview.com |
Please view all the steps of the process below:
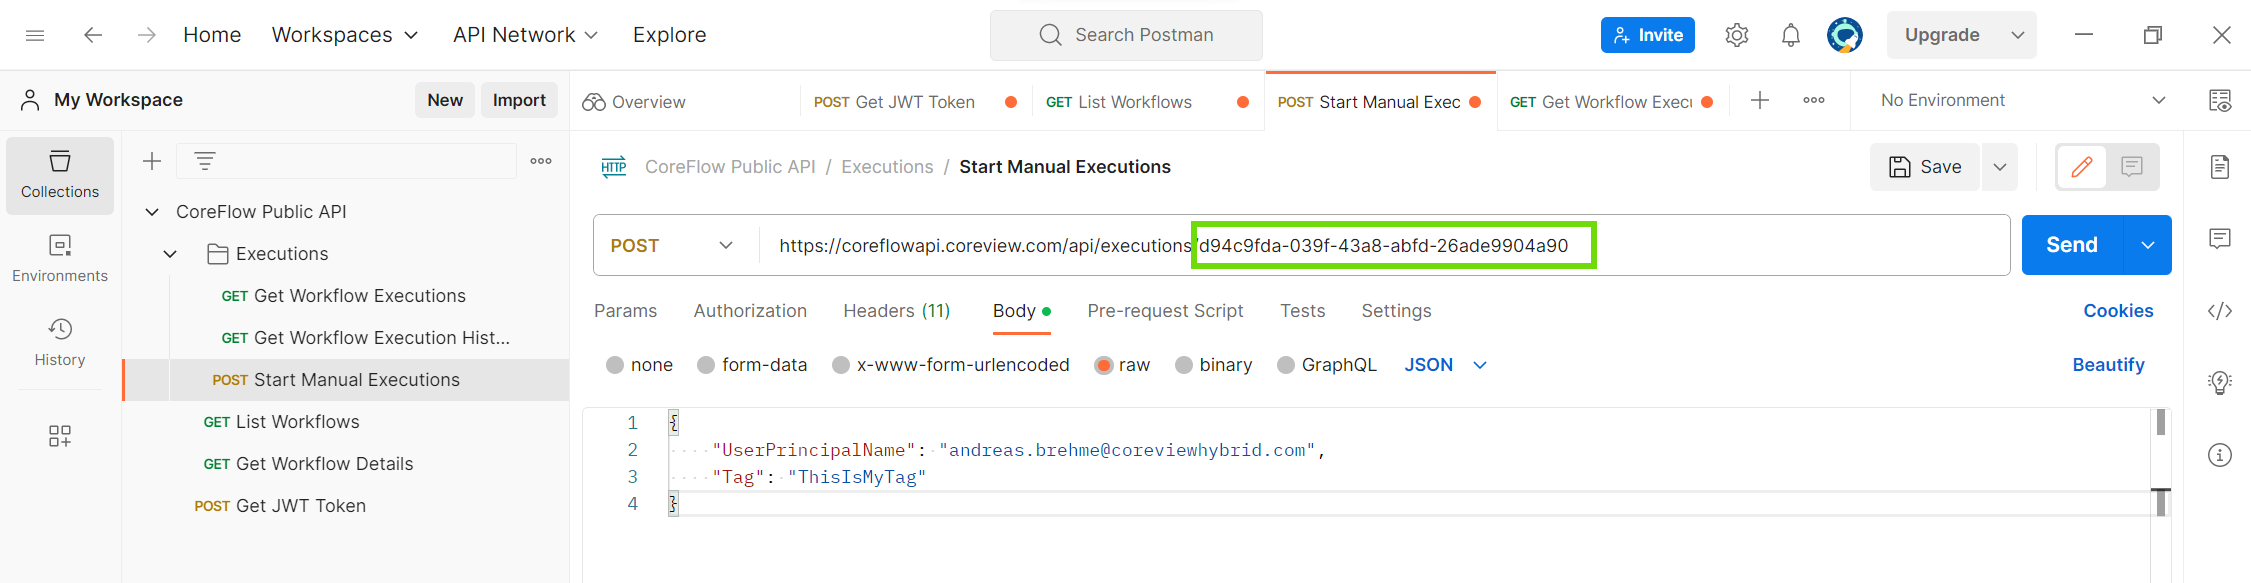
Step 1
After obtaining your data center URL, set it in the "POST" section of the "Start Manual Executions" method.
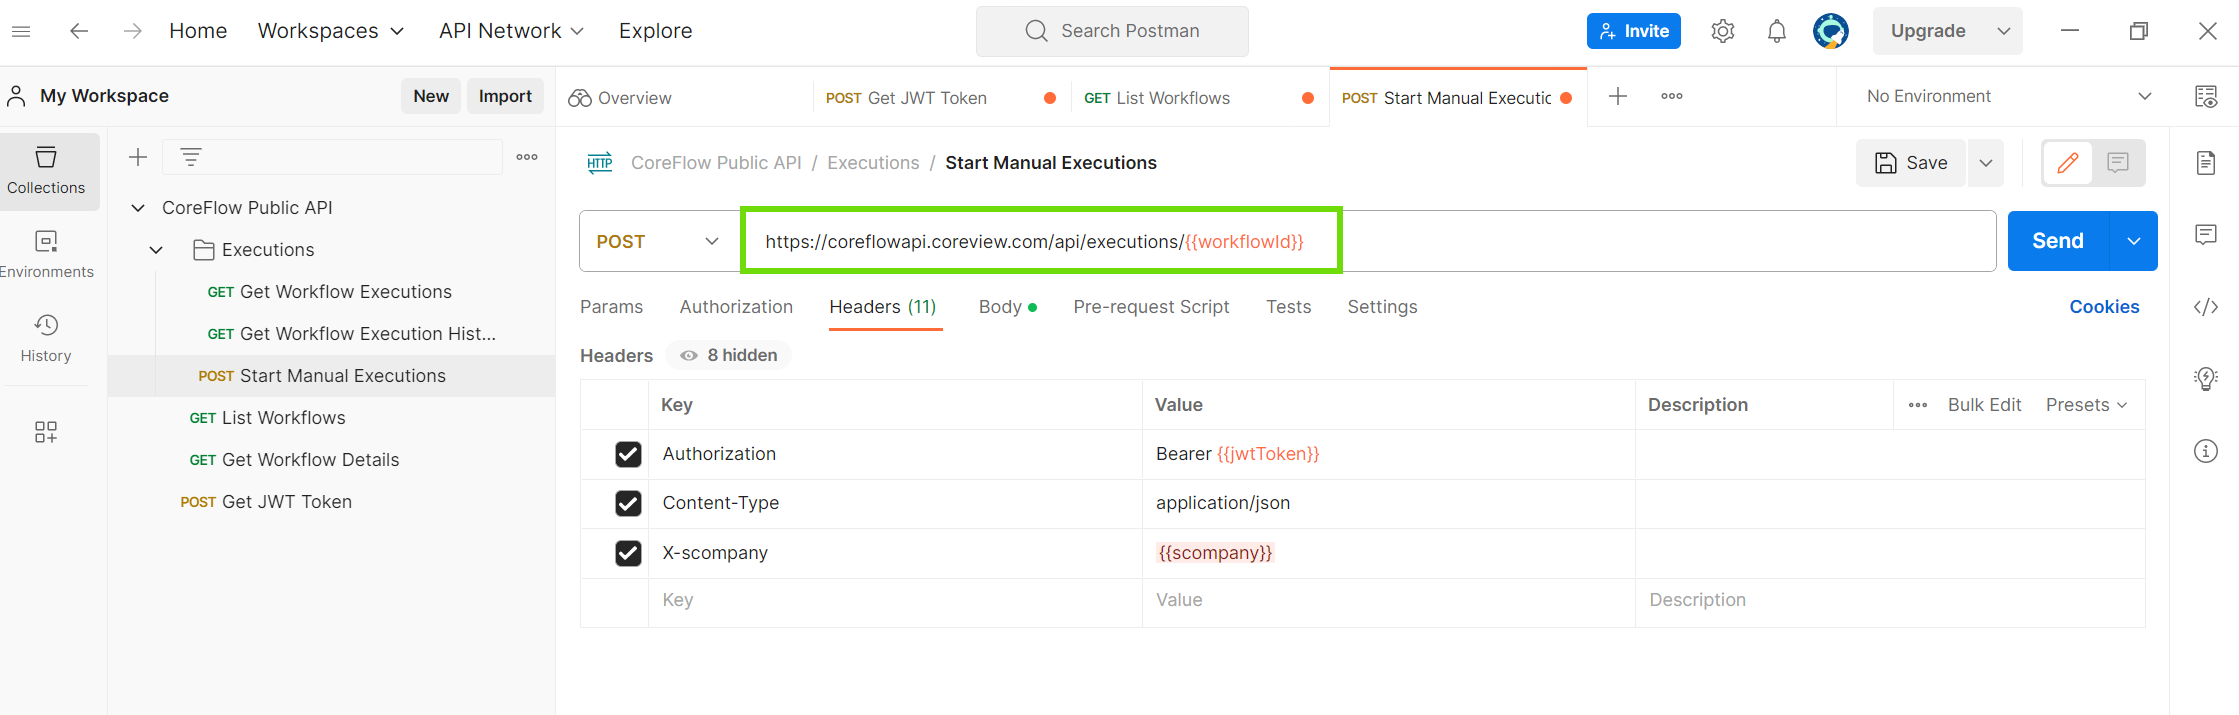
Step 2
You can find the workflow ID from the list you obtained earlier when running the "Get Workflow Details" API. You can also find the same information within the JSON response of the "List Workflows" API you executed before.

Step 3
Now, set the URL with the workflow ID you would like to execute.
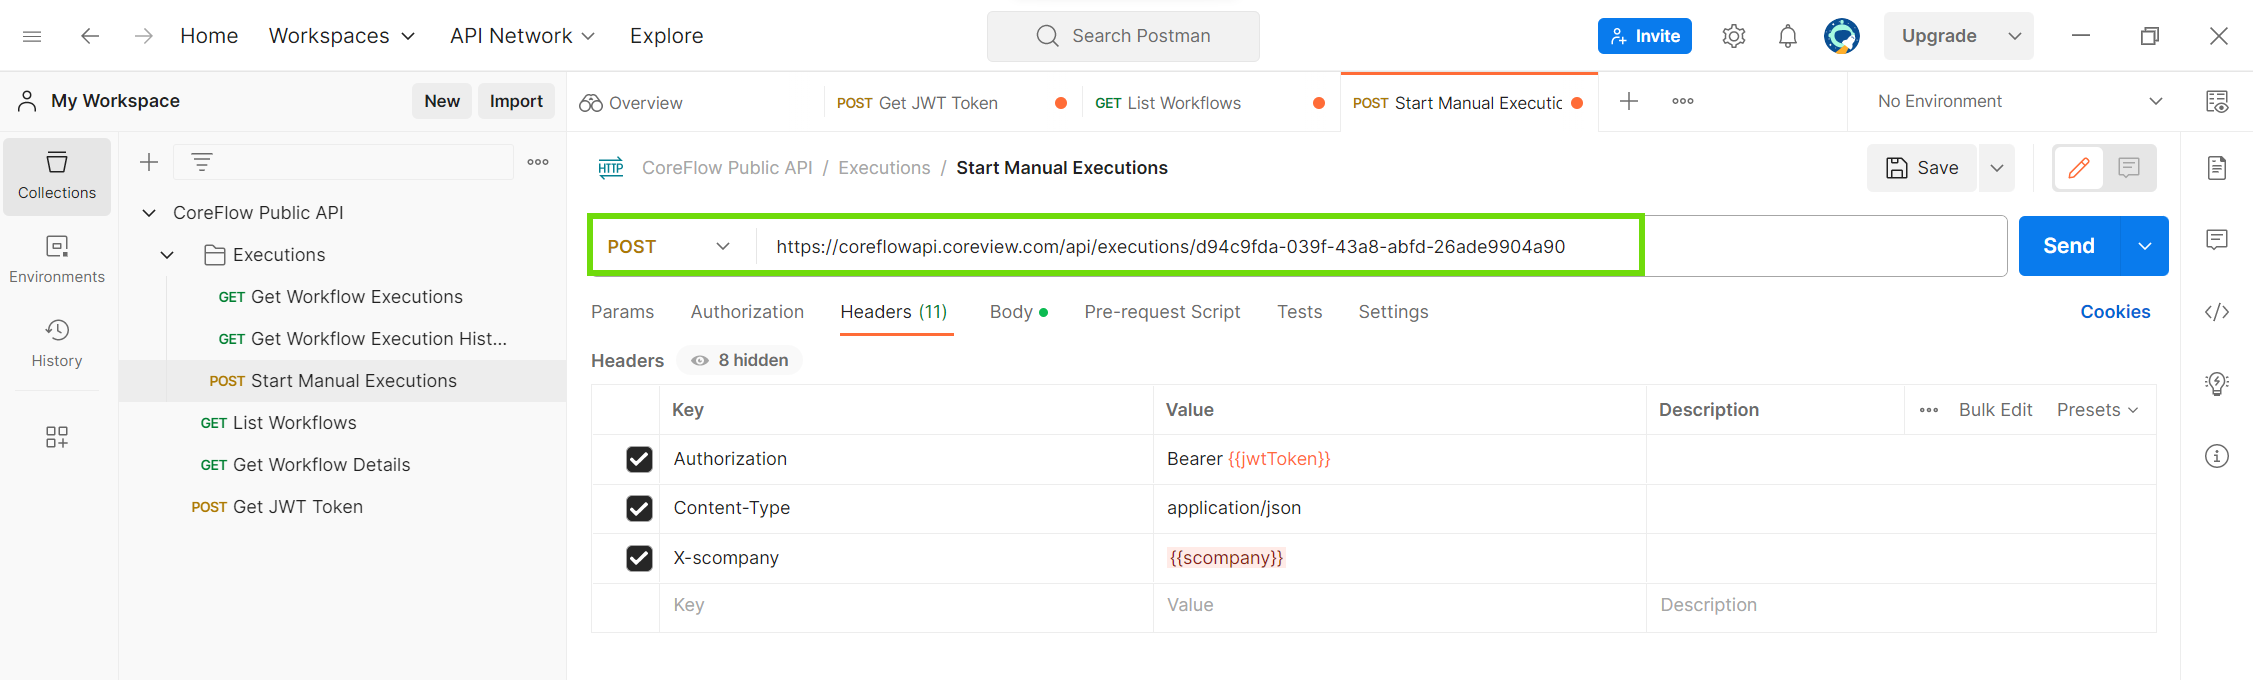
Step 4
Set the bearer token and the company ID in the headers section of your workflow.

Step 5
If your workflow expects some input variables, simply click on the workflow you need to execute programmatically within the CoreView portal, and view the input variables by clicking on “Edit Workflow” and then on “Configure Execution Inputs”.

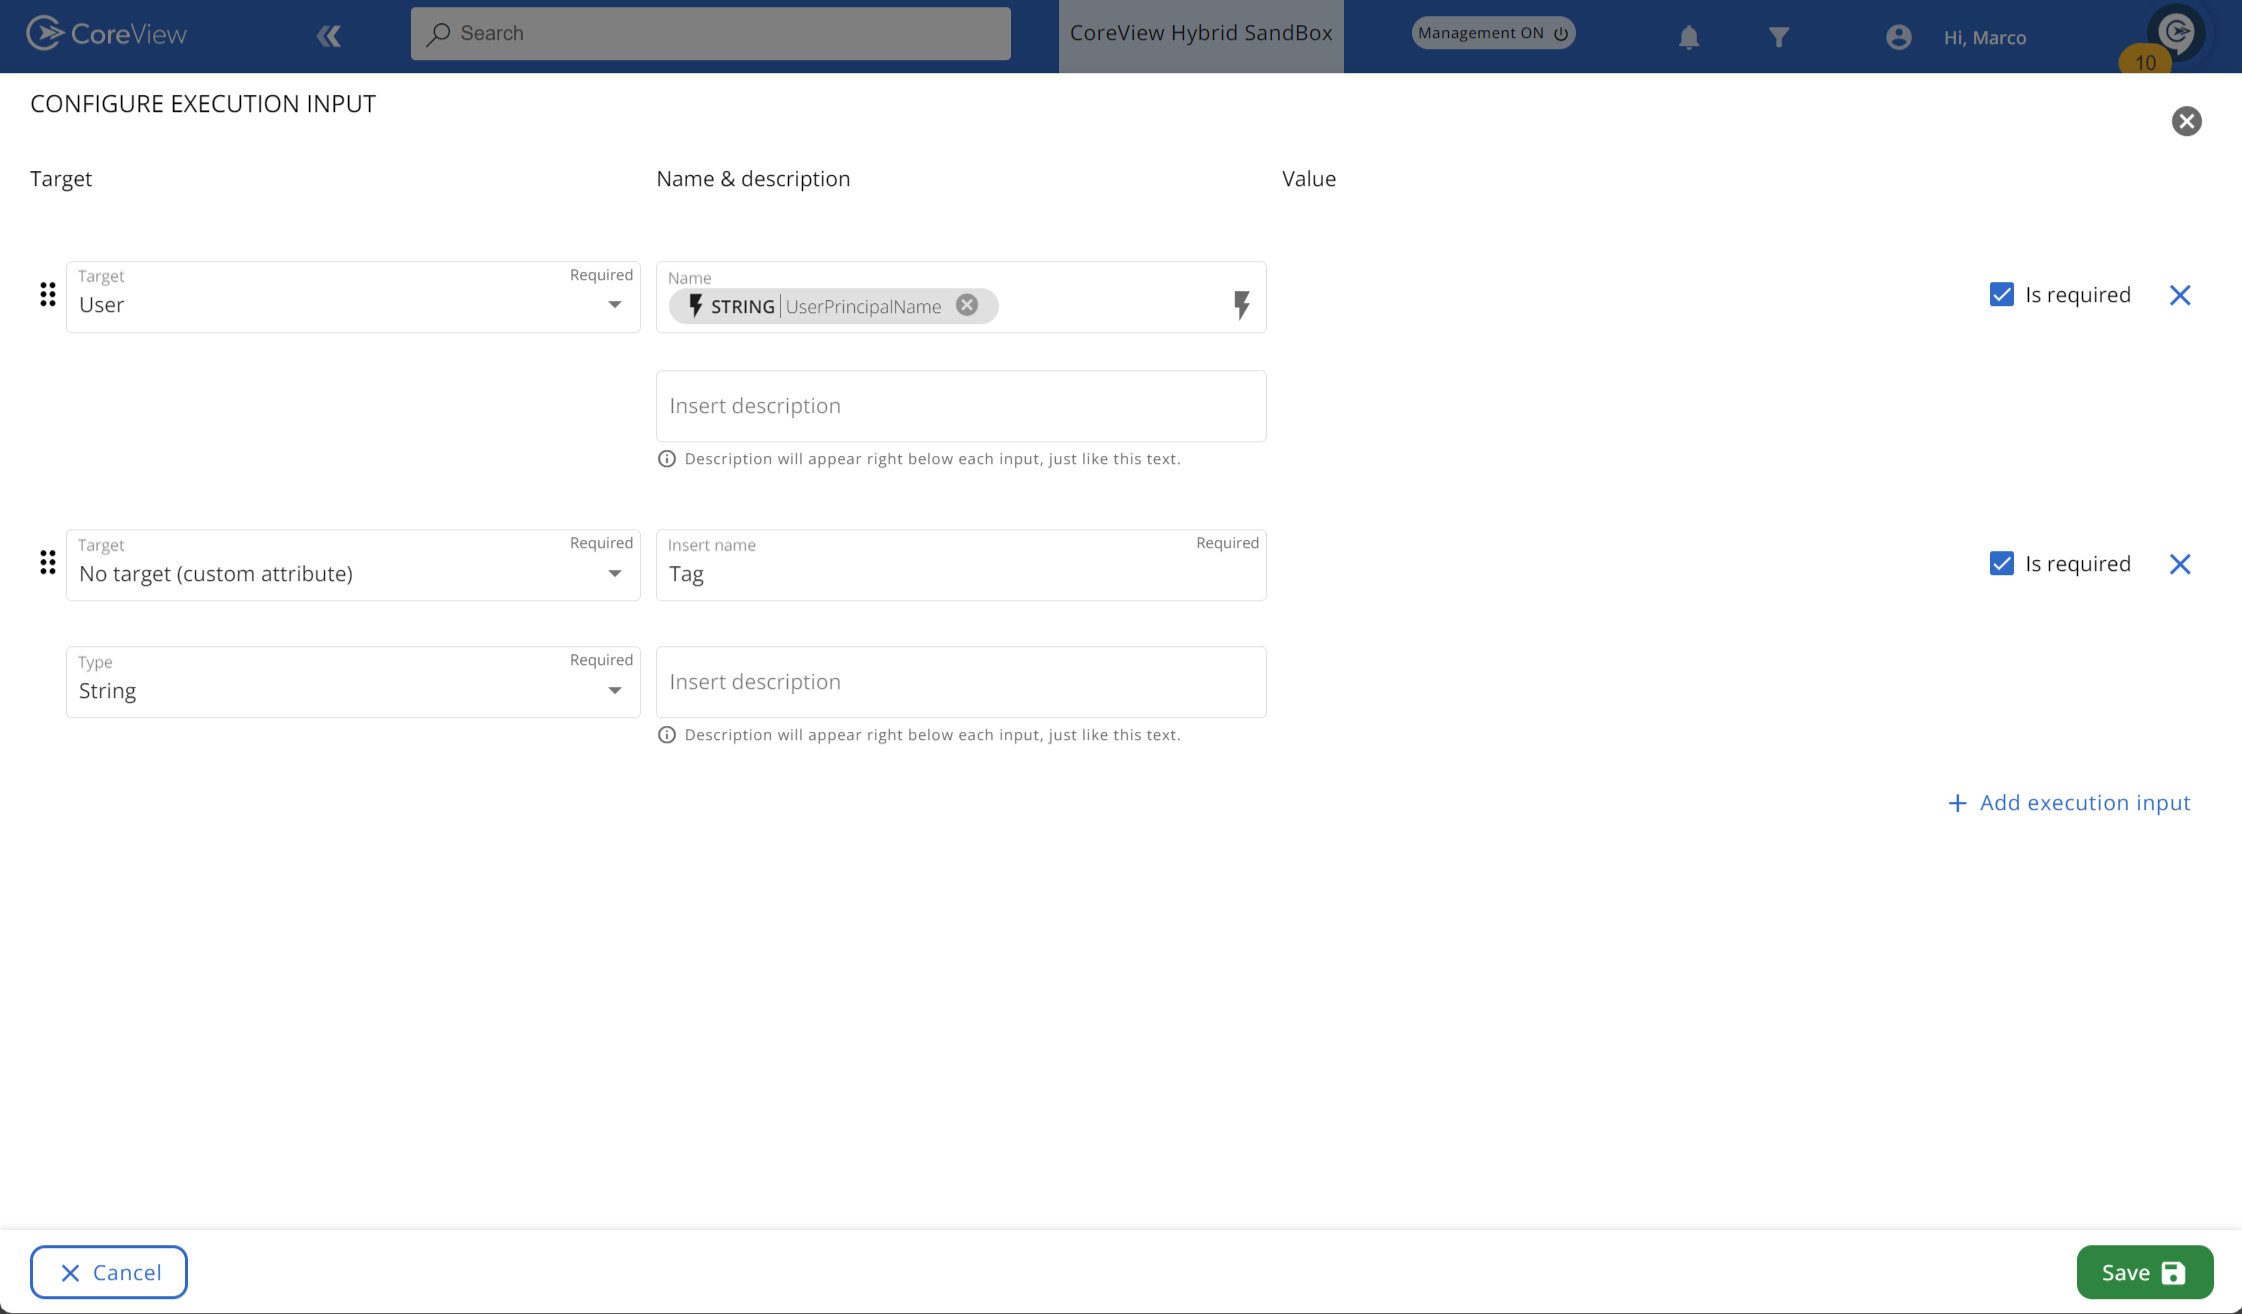
Step 6
Now, click on the “Body” section of your PostMan window and set the properties according to the input variables you just verified.

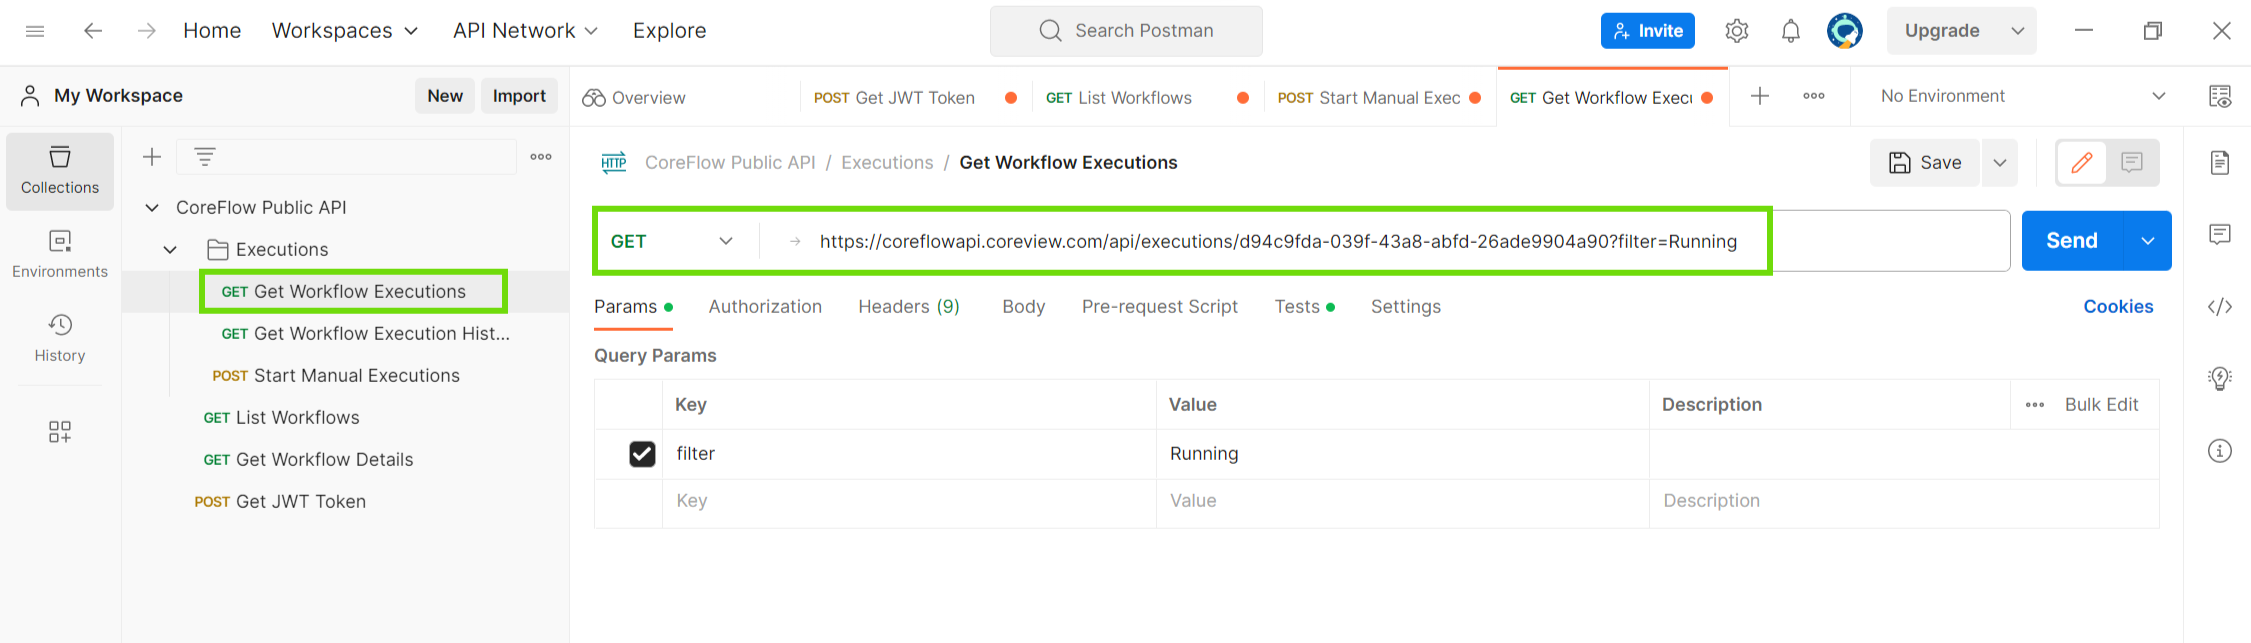
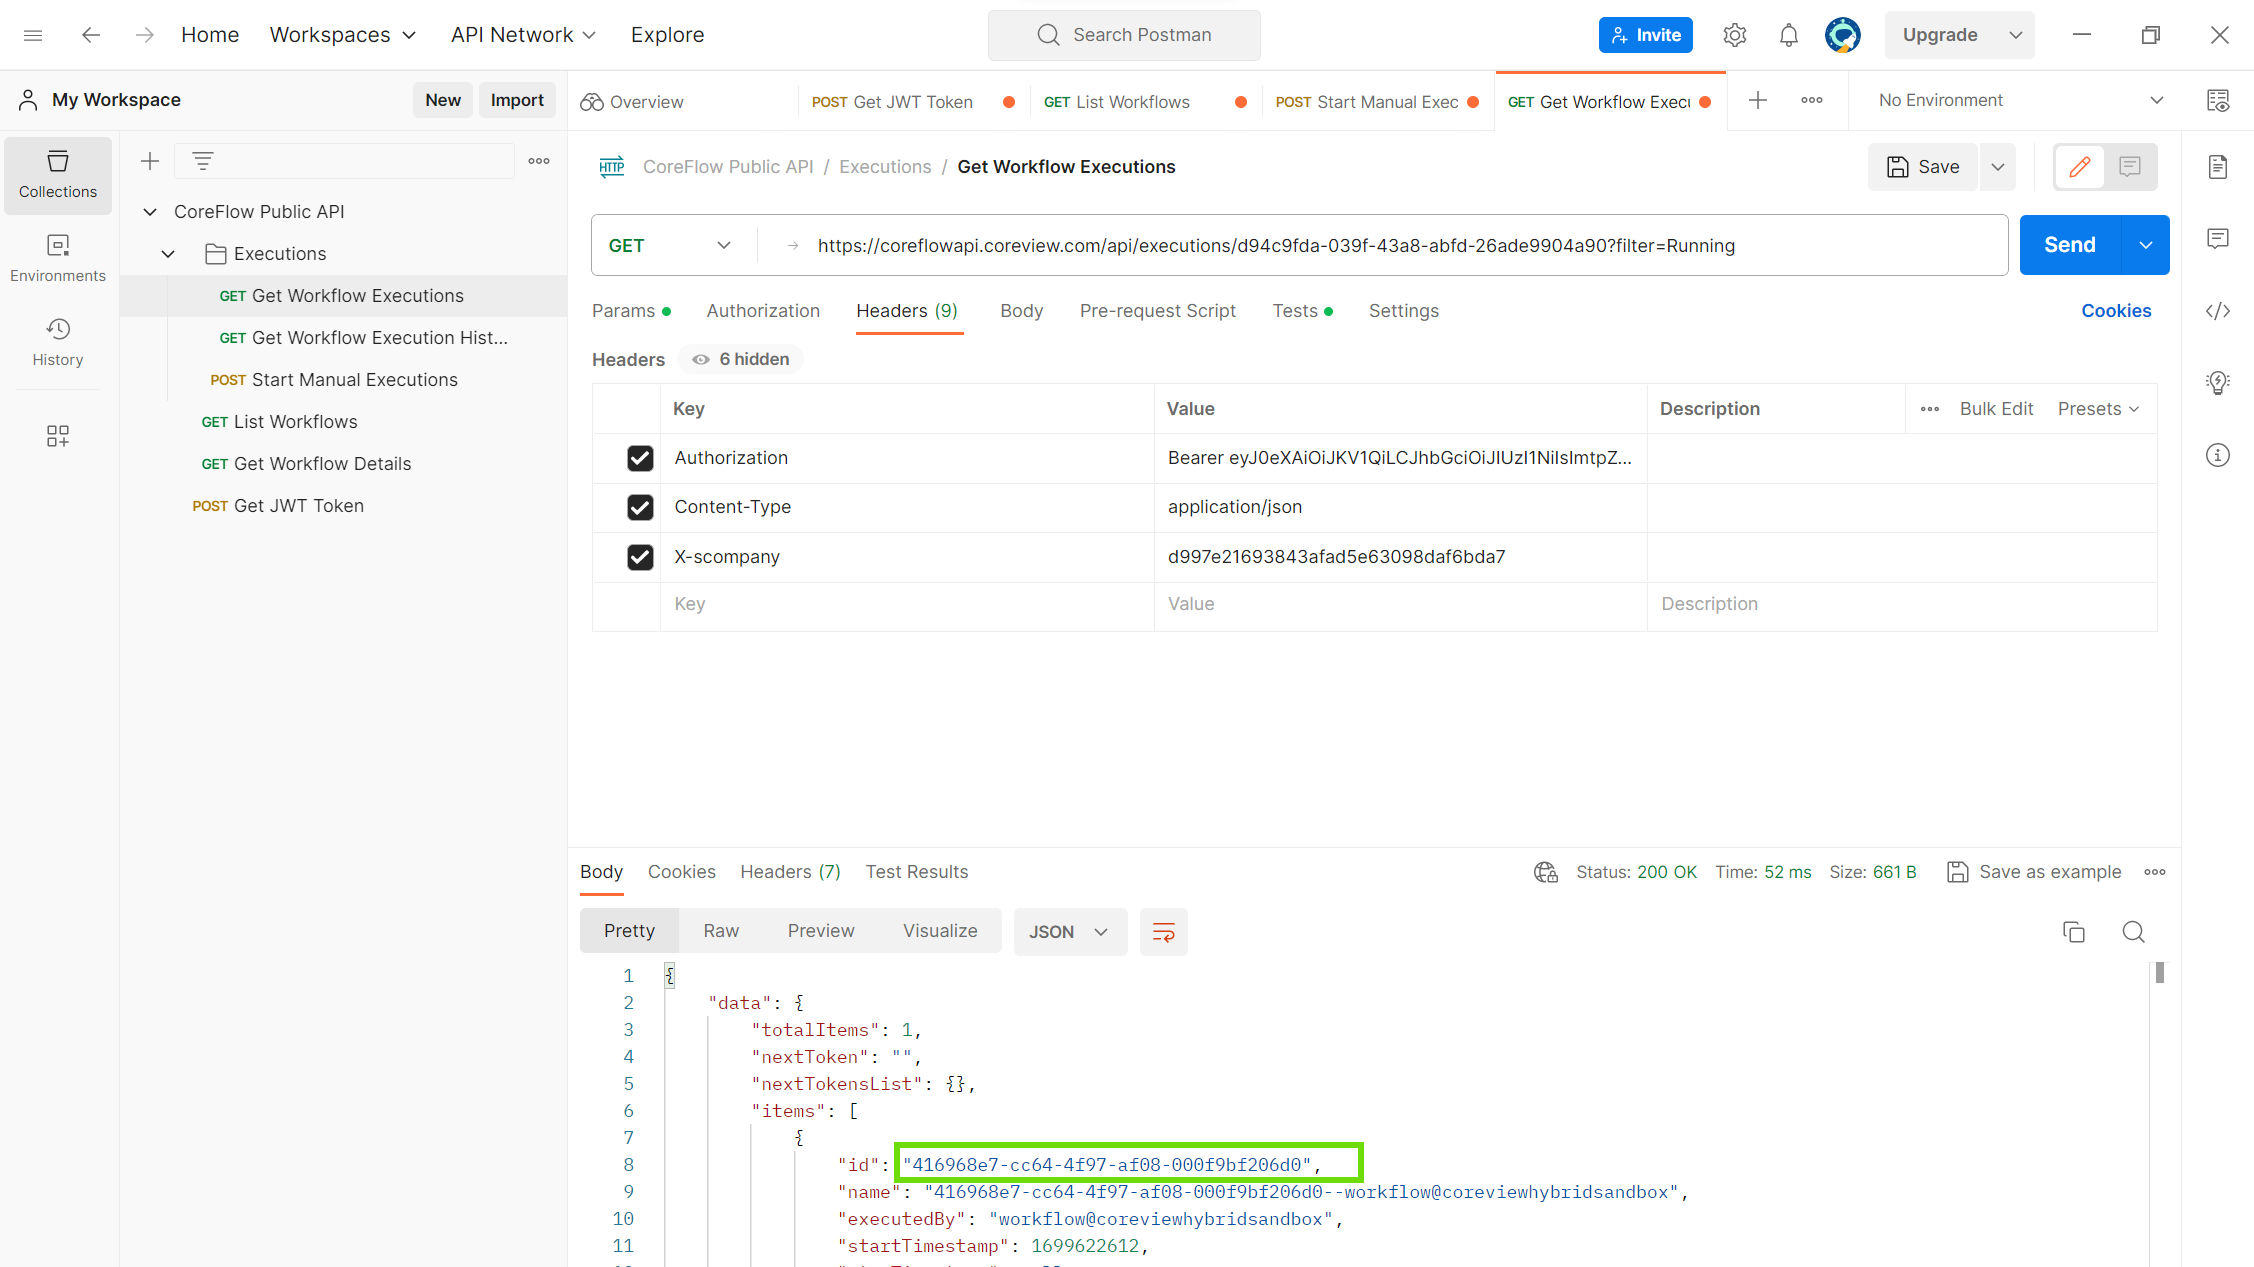
Method 4: Get Workflow Execution
This is useful for obtaining the execution methods of your workflow, such as checking if a specific workflow is running.
Simply copy your workflow ID and paste it into the “GET” command of the “Get WorkFlow Executions” API.
Please view all the steps of the process below:
Step 1
You can query one workflow at a time by setting the filter to “Running”.
Step 2
Please remember to set the company ID and bearer token in the “Headers” section.

Step 3
Once done, click on the “Send” button, and you will retrieve the workflow running at that specific time.

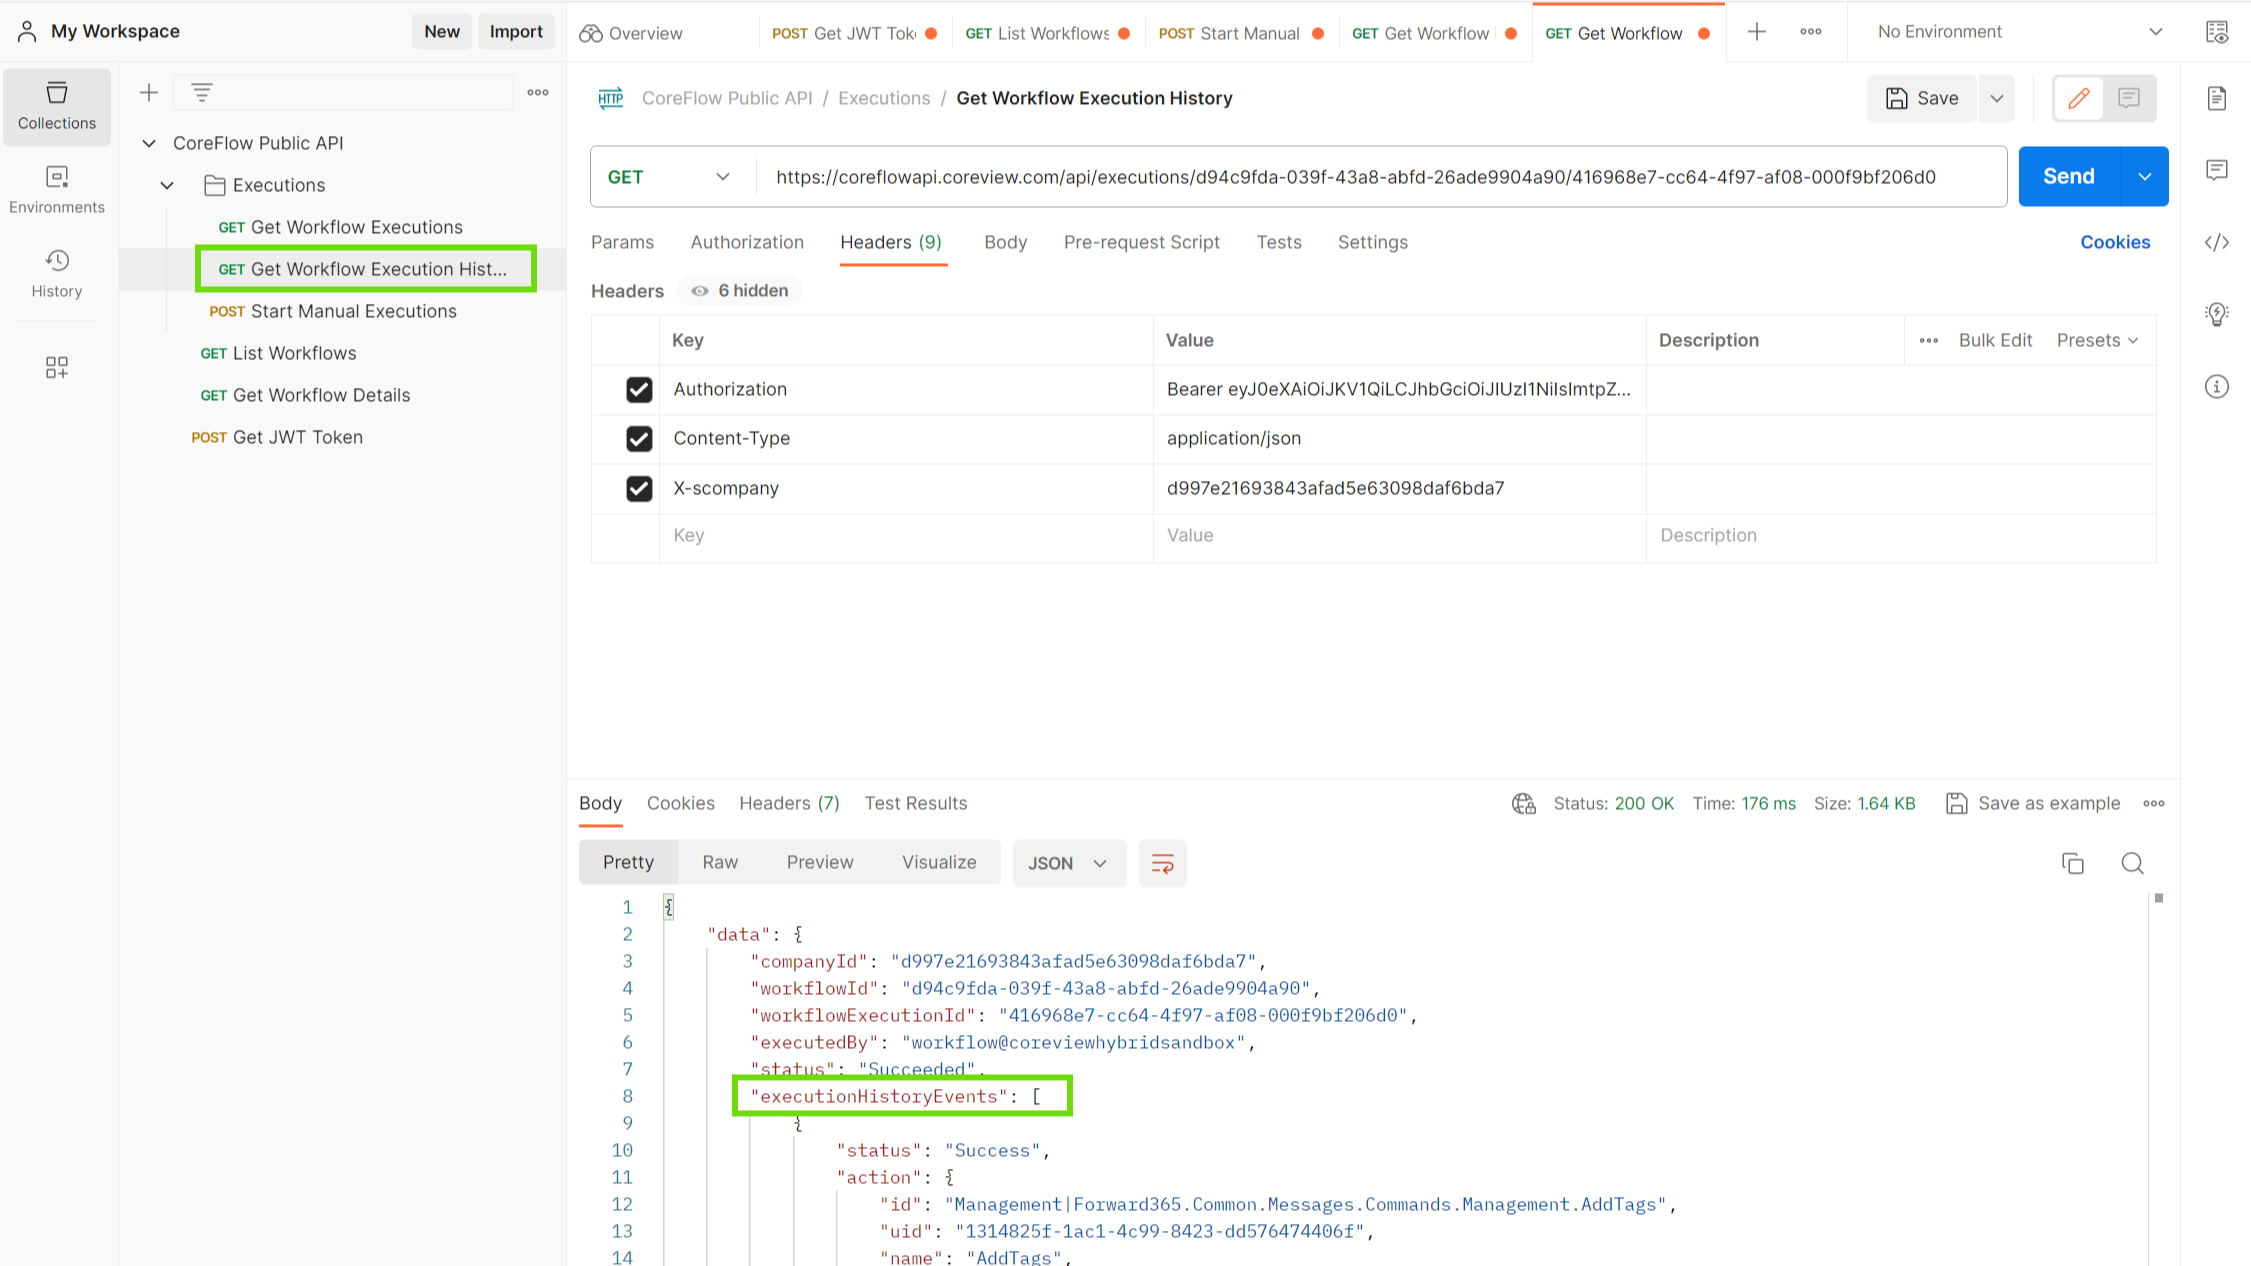
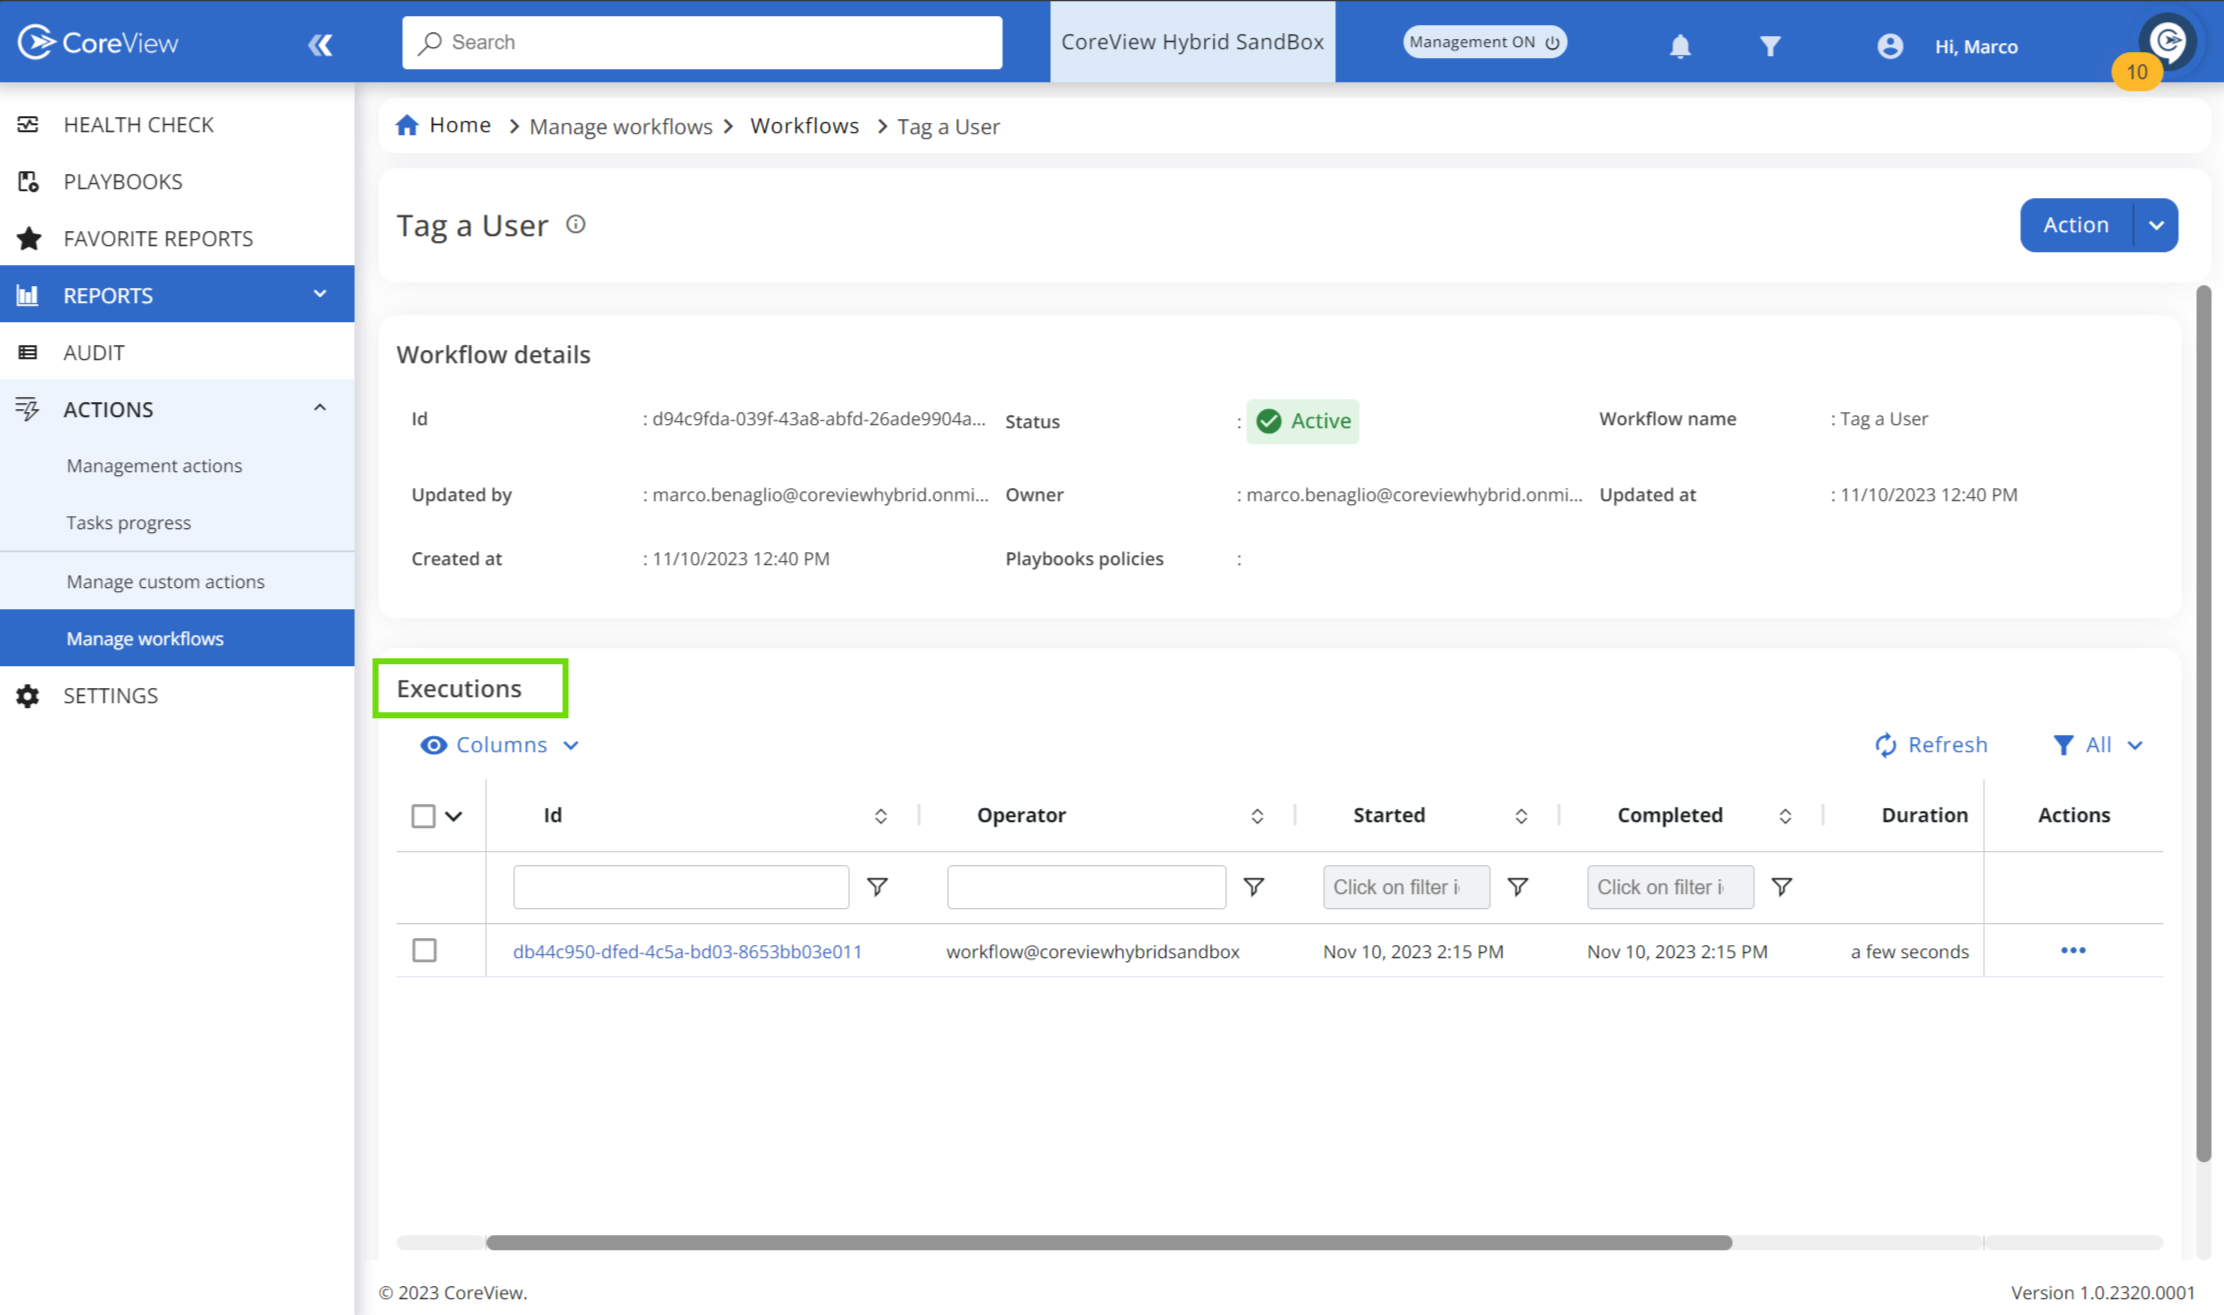
Method 5: Get Workflow Execution History
This is the last API method available. This will provide you with the workflow details of the executed workflow, similar to the details you can obtain when viewing the workflow execution history within the CoreView portal:
Please view all the steps of the process below:
Step 1
Set the URL to call the workflow ID and the execution ID you just obtained from the “Get Workflow Execution”.

Step 2
The workflow ID is the same as the one you executed.
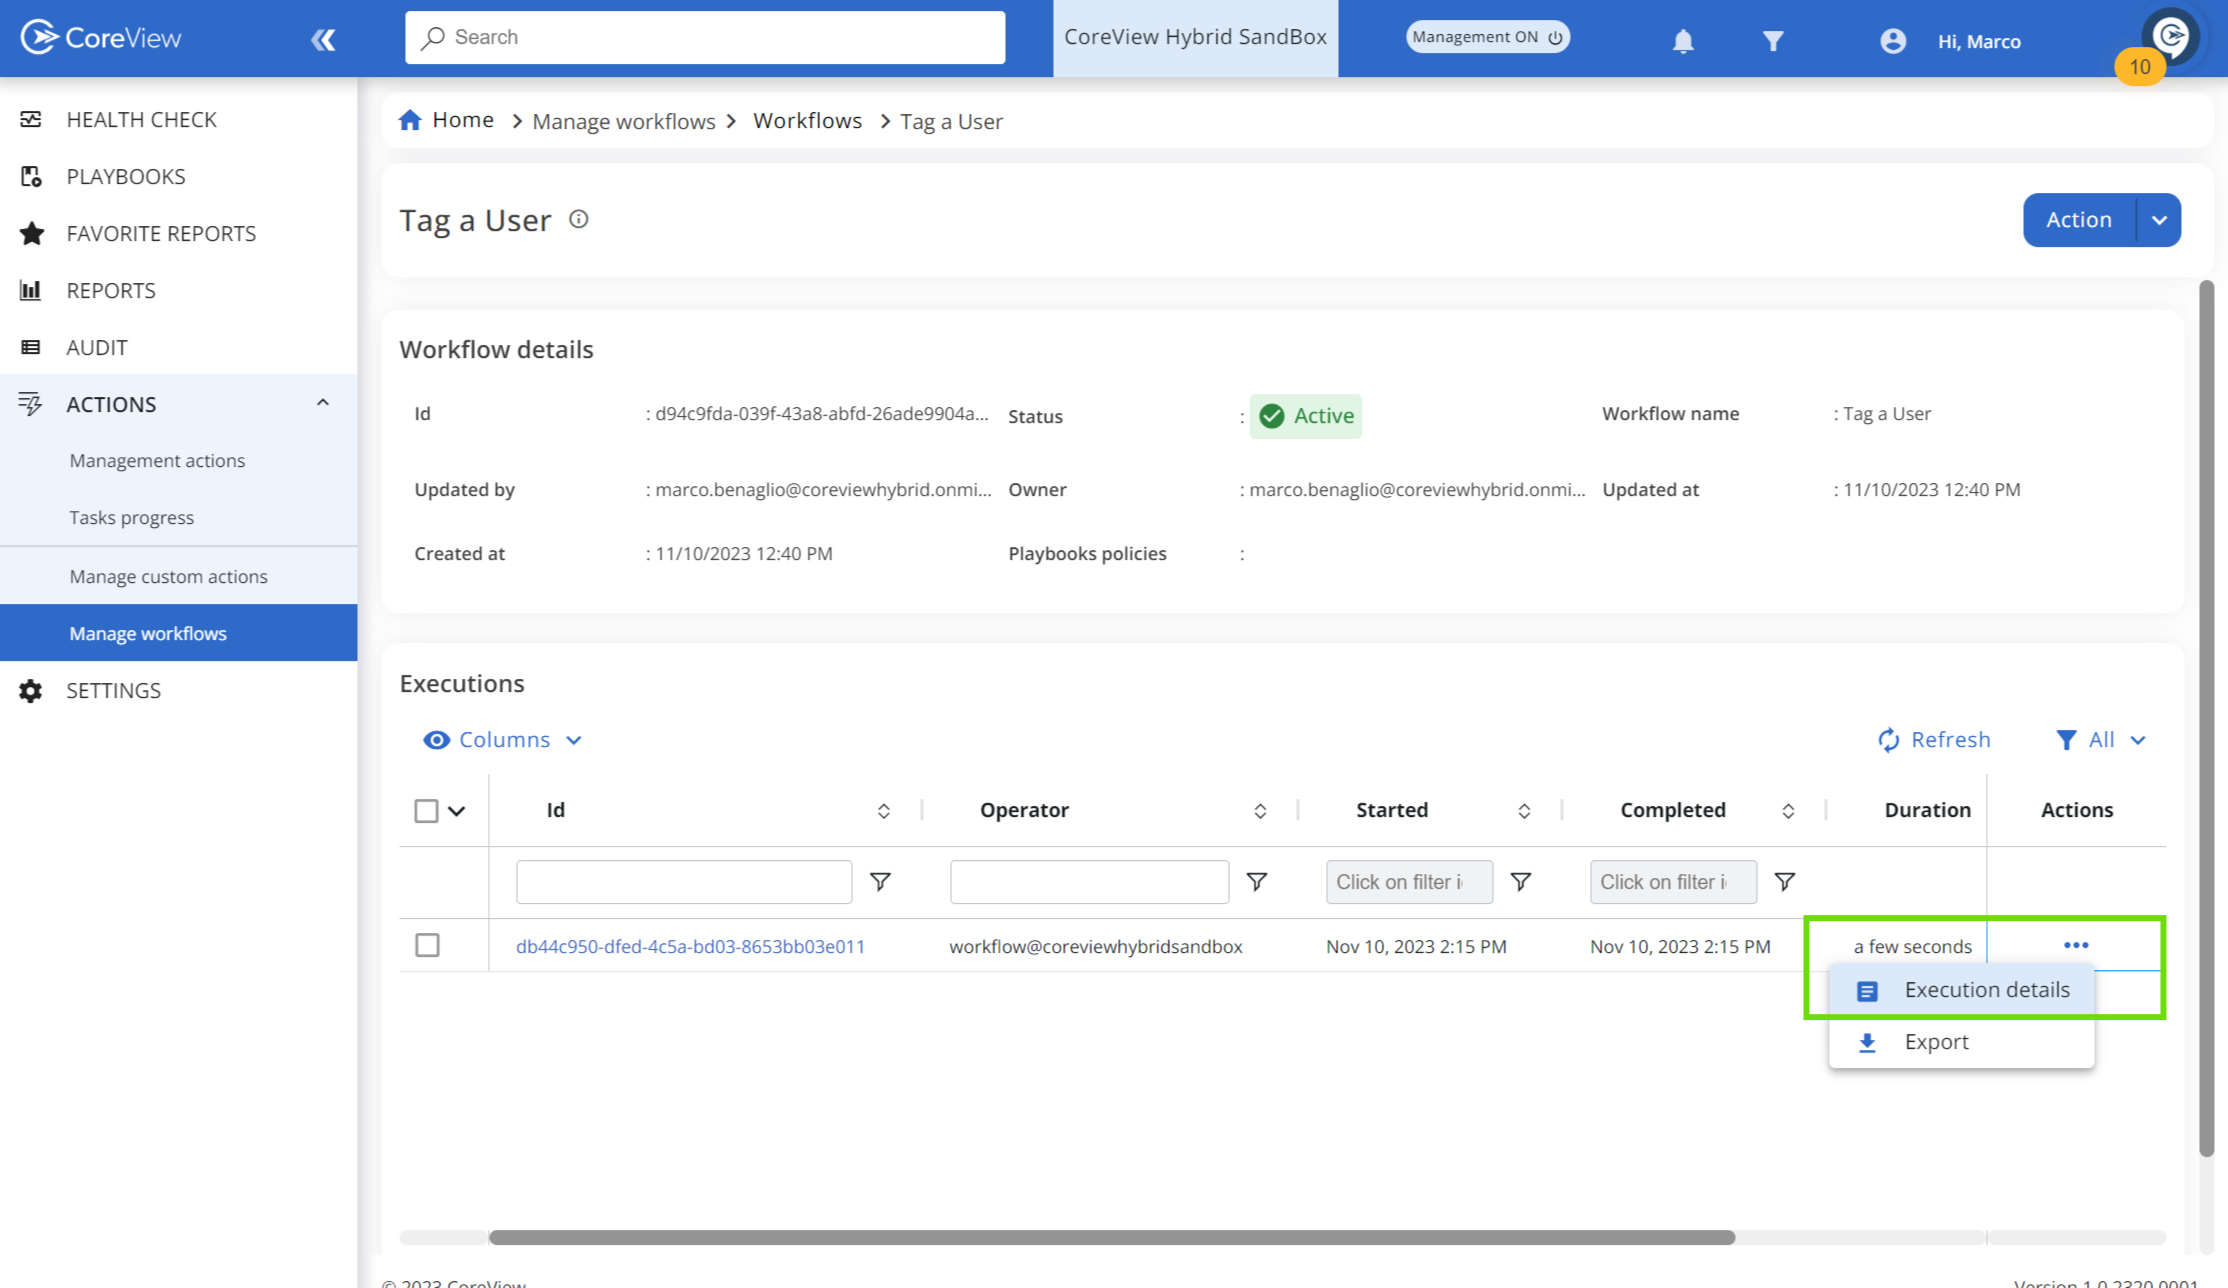
Step 3
Copy the execution ID from within the JSON response you received when running the “Get Workflow Executions”.
Step 4
Please remember to set the bearer authorization token and the company ID in the “Headers” section of your request.

Step 5
After clicking on the “Send” blue button in the PostMan window, you will find all the details about the workflow you just executed. You can use that JSON output for any specific needs.