Introduction to POST requests
What is a POST request?
Imagine sending a letter, which represents your data, to a friend, symbolizing a server. A POST request functions in a similar manner; it allows you to send data from your device to a server for processing or storage.
The ingredients of a POST request
To send a POST request, you need a few essential components:
- URL: think of this as the address for your letter. A URL directs your request to the correct location on the internet.
- Body: this is the content of your letter. In a POST request, the body is usually in JSON format, providing a structured way to represent your data as text.
- Headers: these are extra pieces of information sent with your request, such as the language of your content or expectations for a quick response. Headers in POST requests can specify the content type or include authorization tokens, acting as a form of identification.
Creating a POST request Workflow action
- To add a new POST action to a Workflow, look for the “HTTP Integrations” category.

- Select the “HTTP API POST” action.

- You will then see the variables available for the POST request on the right side of the action creation panel.

Required variables
URL
You must know the destination of your request. This URL is typically provided by the service or application you're using. For example: https://api.example.com/data
Body
The body should be in JSON format, organizing your data in a readable format. For example:
{
 "name": "John Smith",
 "email": "john.smith@example.com"
}
Optional variables
In addition to the required URL and Body, there are two optional variables:

Ensure Success Status Code
To verify the success of your request, set this option to "yes". The action fails if the response status code indicates an error. Success codes range from 200-299 (e.g., 200 for success, 201 for created).

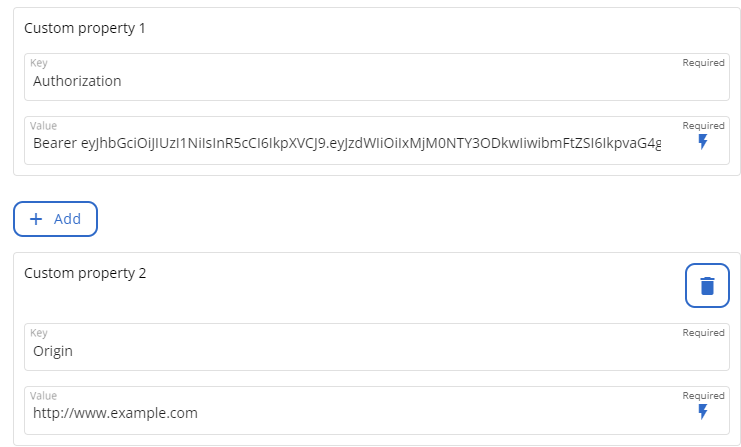
Headers
You can add multiple headers to provide additional information. The headers needed are usually provided by the service or application you're interacting with. Common headers include:
- Origin: sent with CORS requests, as well as with POST requests, to indicate where the request originates from. This header helps the server understand if it should allow the request based on its CORS policy.
- Authorization: includes a token or key if the server requires identification.
Secret key for Bearer token
Using the Authorization Bearer token directly in the Header poses a security risk, as the token can easily be exposed. To enhance security, we've introduced the option to authorize using a Secret value. Begin by saving some secret values on our platform, as detailed in the "Secret values" article.
After creating your secret values, you can utilize them as shown below:
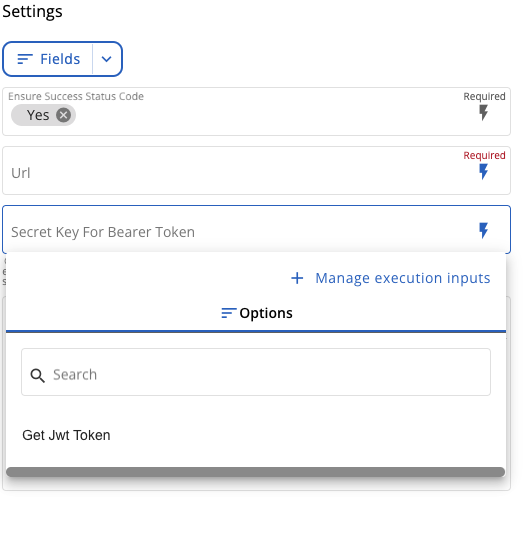
Simply choose the secret name you wish to use for authorization. We will automatically append the necessary information when executing this action.
When saving the secret value for the Authorization header, do not include the word Bearer.
For example, if your bearer token in the Authorization header is Bearer aBc123, you should save the secret as aBc123 (without Bearer).
It's important to note that if both a Secret value is used and Authorization is added in the Header, the system will prioritize the Secret value and remove the Authorization from the Header for enhanced security.
Microsoft Graph Auth secret key
If you aim to call any Microsoft Graph APIs, you can configure the Microsoft Graph app within the CoreView App. Make sure to grant all the necessary consents. This action will make the Microsoft Graph Auth secret key automatically available in the “Secret key for bearer token” field.
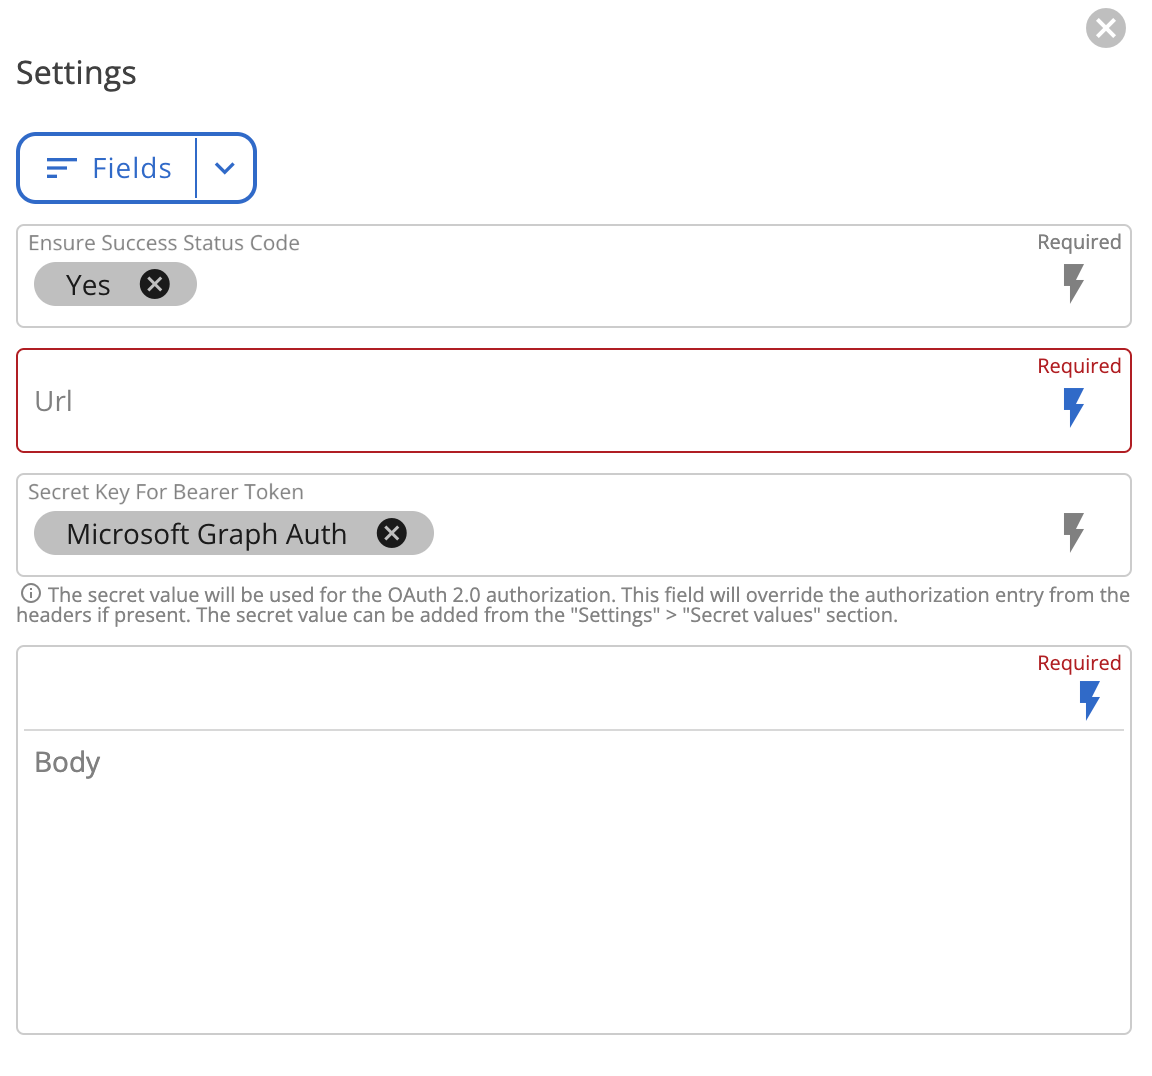
Please note that the secret value will be used for the OAuth 2.0 authorization.
Using the response of the POST request
Action outputs
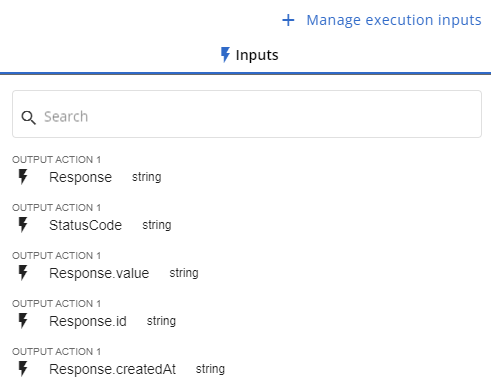
The POST action generates two outputs:
- StatusCode: the status code returned by the server after processing the request.
- Response: the server's response body, typically in JSON format.
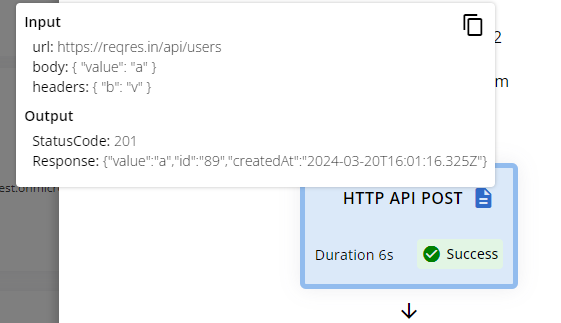
These outputs can be utilized by subsequent actions.
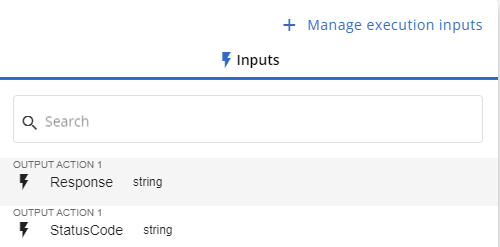
Mapping the response properties
- To use specific properties from the response variable, select the “Set dynamic mapping” option.

- Then, create custom variables for later use. For example:
{
 "value": "This is a value",
 "id": "89",
 "createdAt": "2024-03-20T16:01:16.325Z"
}- From this response, you can create the following variables:

- These variables will be available for subsequent actions: