Custom lists are collections of variables that can be easily reused across multiple Workflows. Once a list has been uploaded as a CSV file, you can associate it with one or more Workflows.
Custom lists help import external information into CoreView. For example, you may download a list of users who must be deprovisioned from an HR tool, upload it as a custom list, and let the deprovisioning Workflow handle the rest.
Export and import a custom list
Export a custom list from CoreView
To export a CoreView report as a custom list, follow these steps:
Step 1: customize report
Go to the desired report and select the columns with the information you require.

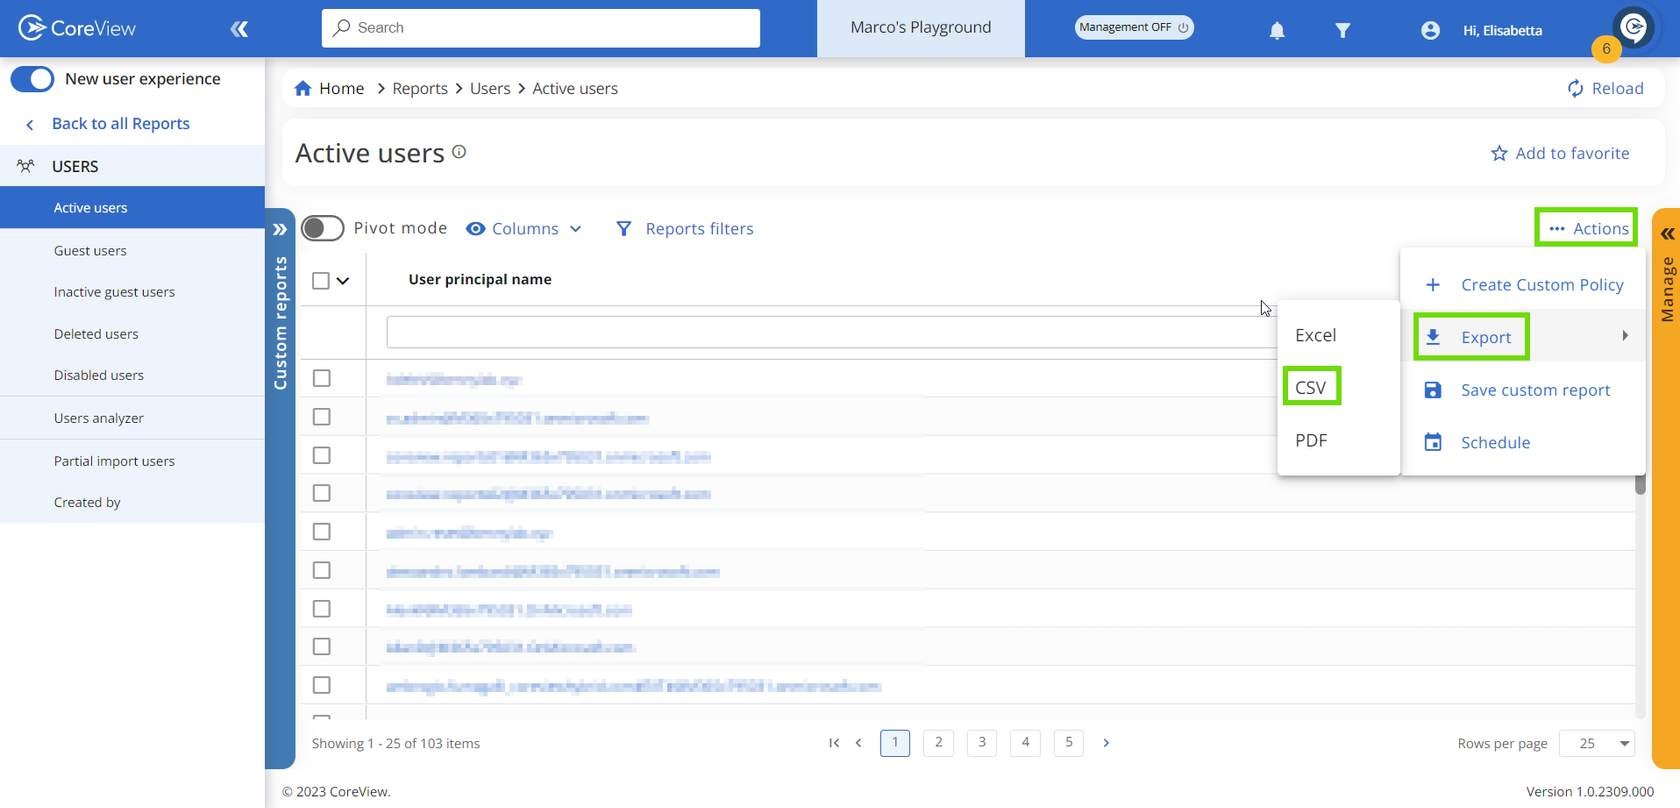
Step 2: export CSV
Click “Actions” in the top right corner and select “Export”, then “CSV”.
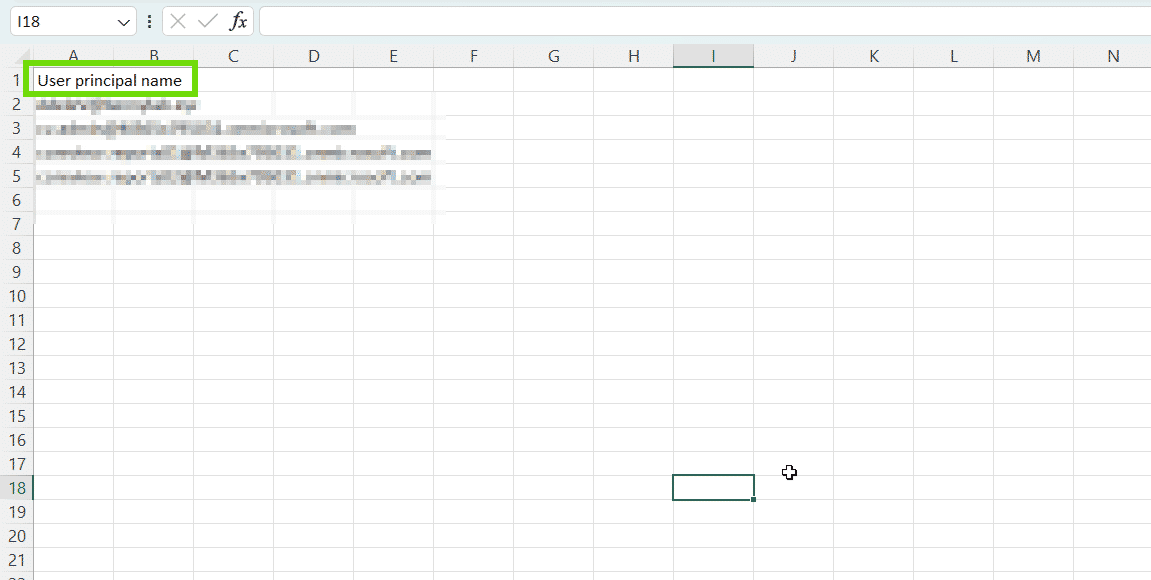
Step 3: review CSV
You can open the CSV file to make any changes, ensuring that you include a column header row at the top of the file with the column names.
Step 4: save the file
Save the file as a CSV.
Import a custom list into CoreView
To import a CSV file as a custom list, follow these steps:
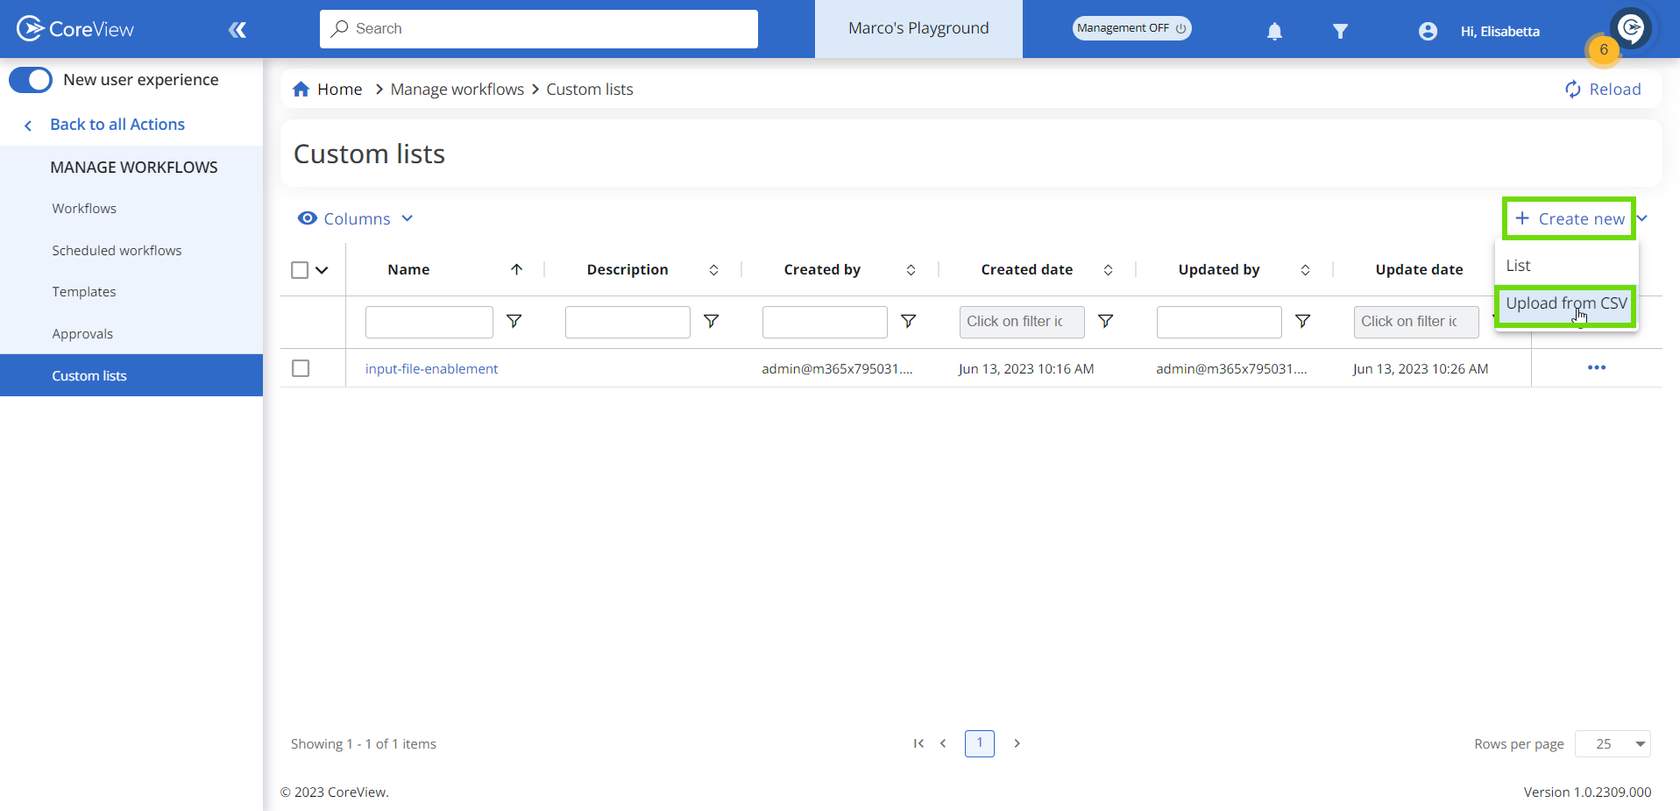
Step 1: navigate to custom lists
In the “MANAGE WORKFLOWS” section, select “Custom lists”.

Step 2: upload CSV
Select "Create new", then “Upload from CSV”, and choose the desired CSV file.
Step 3: name your custom list
Custom list naming convention
To ensure that custom lists can be used as workflow execution inputs, it is essential to adhere to the naming conventions used in workflows. This means that spaces and special characters—except for the underscore (“_”)—are not permitted. If you have any existing custom lists that do not follow this naming convention, please rename them before making further changes.
Step 4: review and save
All items will now be displayed as a list. Delete the items you do not wish to import and click “Next”.

Multi-column custom lists
You can also upload multi-column custom lists into CoreView. These lists serve as a valuable tool for streamlining the creation of workflow configuration inputs. To learn more about using multi-column custom lists in workflows, please visit the guide titled “How to use a multi-column custom lists in Workflows”.
Associate custom lists and Workflows
The benefit of associating a custom list with Workflows is that, if you need to modify a variable in the future, you simply update the custom list, and the changes will automatically apply to the associated Workflows as well.
Associate a custom list with a Workflow
Follow these steps to associate a custom list to a Workflow:
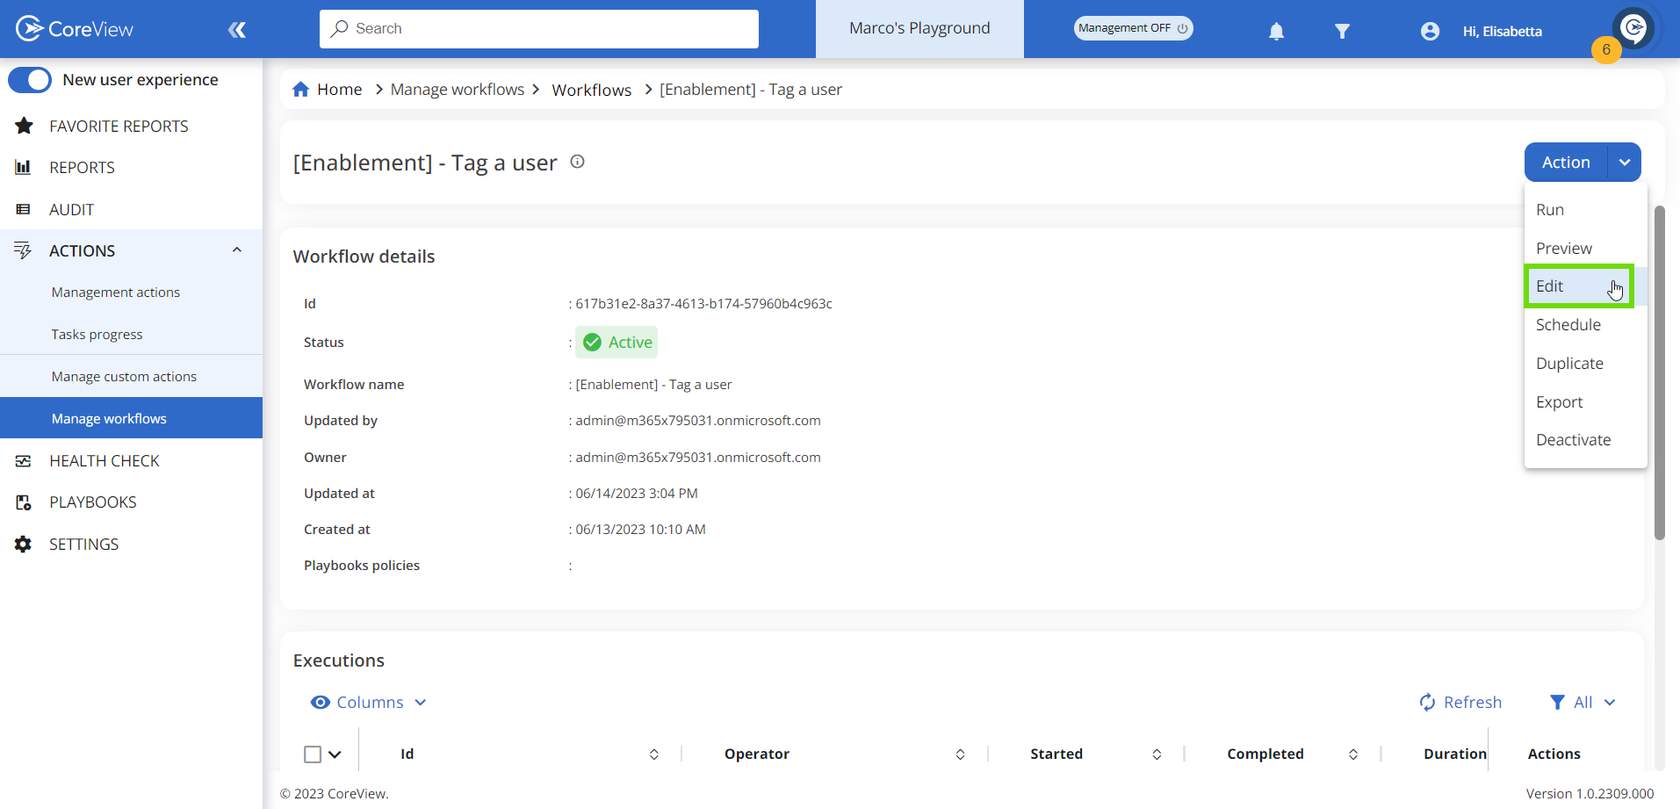
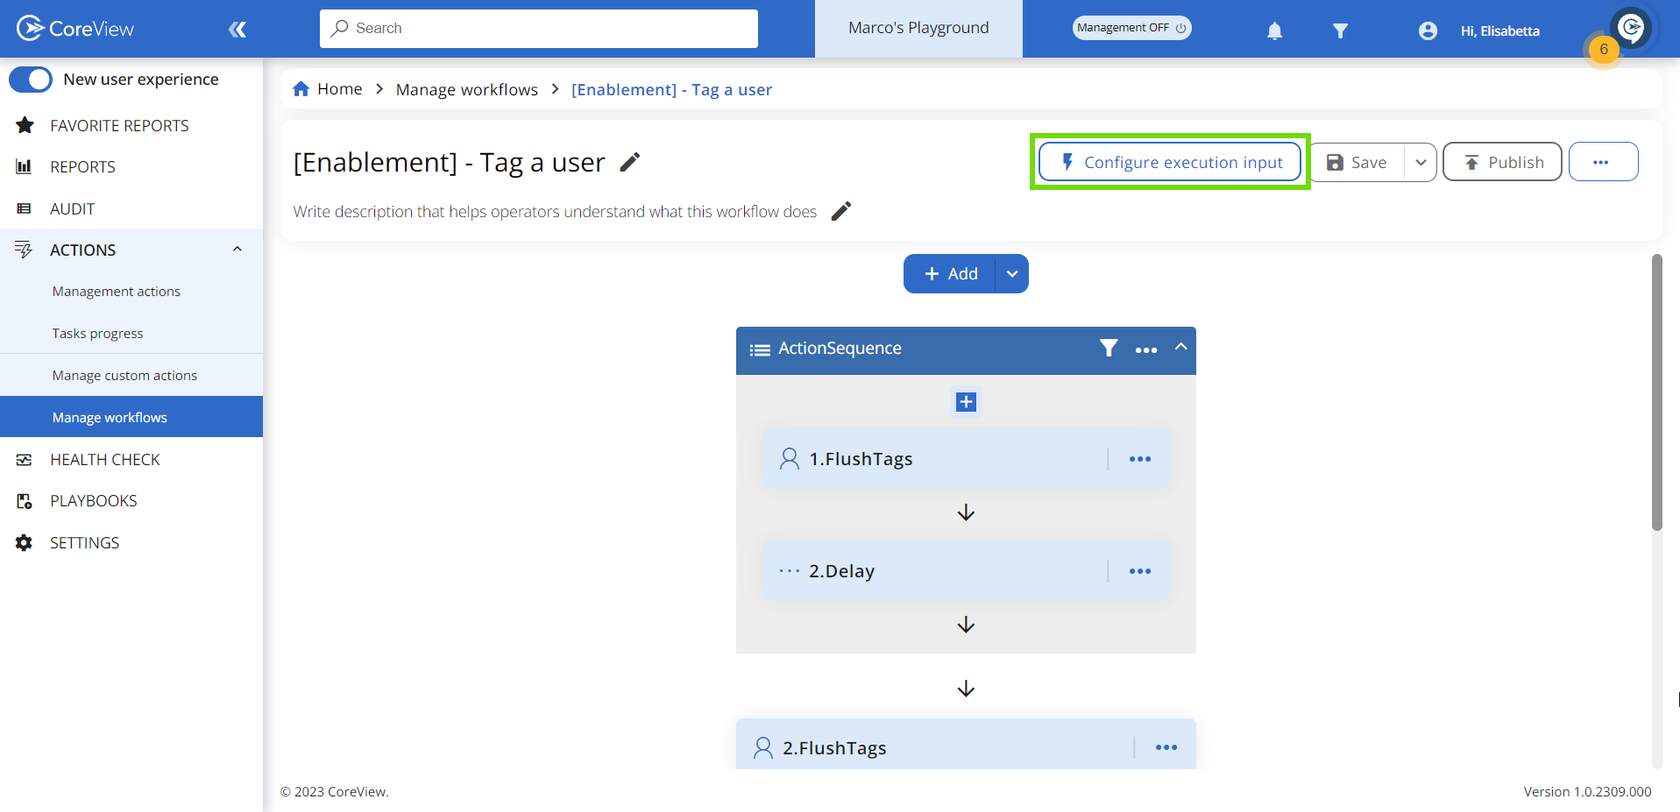
Step 1: open workflow editor
- Select a Workflow.
- Click “Actions”.
- Select “Edit” from the drop-down menu.
Step 2: set execution input
Click “Configure execution input”
- Select “No target (custom attribute)” in the Target field
- Name the input
- Select “List” in the Type field
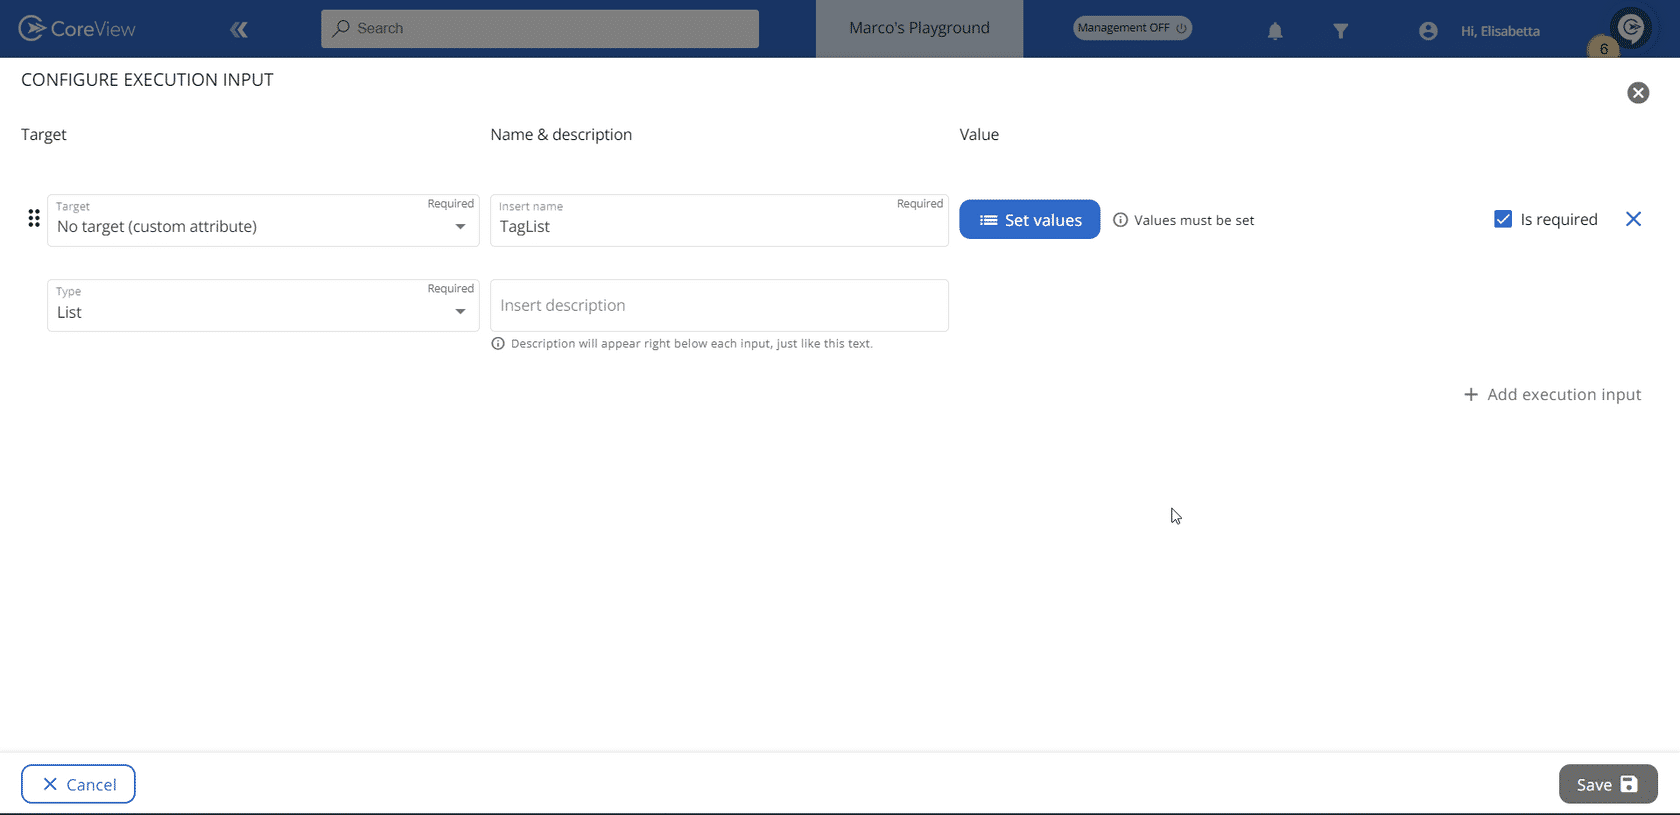
Step 3: select custom list
- Click “Set values” and select “Pick from list”
- Select the desired custom list and press “Save”

View associated Workflows
To view the Workflows associated with a custom list, just follow these steps:
- Select “Custom lists” in the “MANAGE WorkflowS” section in the sidebar menu.
- Click on the name of the list.
- Select “Associated Workflows”.
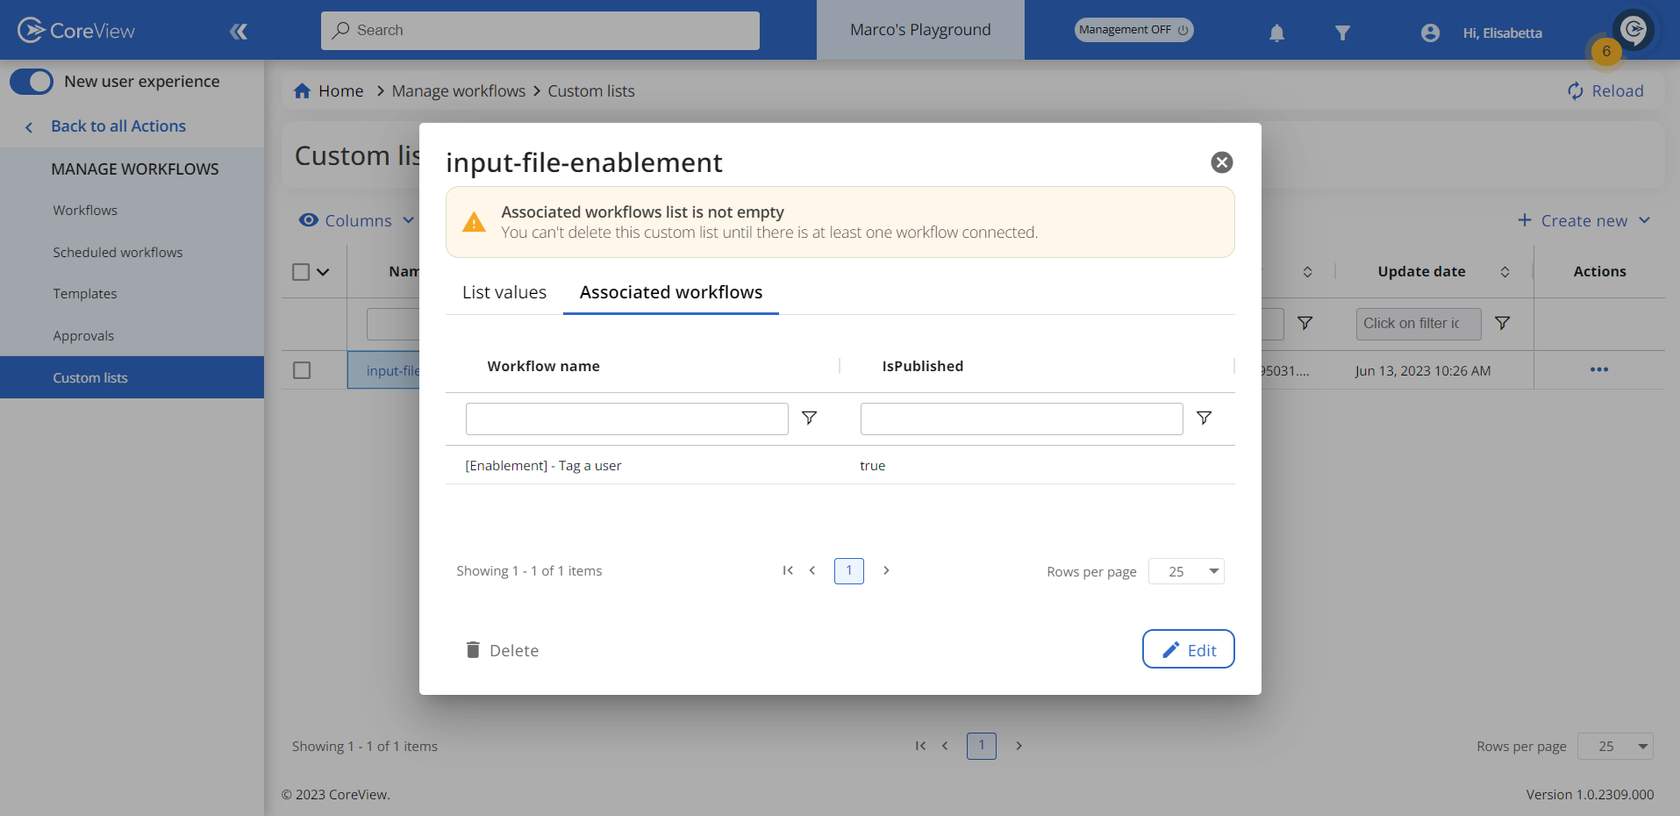
Only custom lists that are NOT associated with any Workflows can be deleted.
Bulk update for custom lists
You can update a custom list by uploading a new CSV file. Here's how:
- Navigate to Actions > Manage workflows > Custom lists.
- Click on the name of the custom list you wish to update.
- In the windows that appears, select “Edit”.
- Click the “Re-upload CSV to add rows” action.
- Select the new CSV file and save.

This action will automatically refresh the list across all associated Workflows.