“Retrieve data from object” is a workflow management action that allows you to extract multiple parameters from an item's unique identifier.
This feature is useful in numerous scenarios. For instance, if you want your operator to input only one variable while the system automatically retrieves all others; or if you're seeking deep customization by fetching properties that aren't available in the report triggering your workflow or in the CSV file you're uploading.
Example
In this hands-on example, we will explore how to gather missing information from an item using “Retrieve data from object”.
Case
Suppose that, due to an import error, the countries associated with users in your system are incorrect. Let's explore how to utilize a workflow to resolve this issue.
Progression
Step 1: create workflow
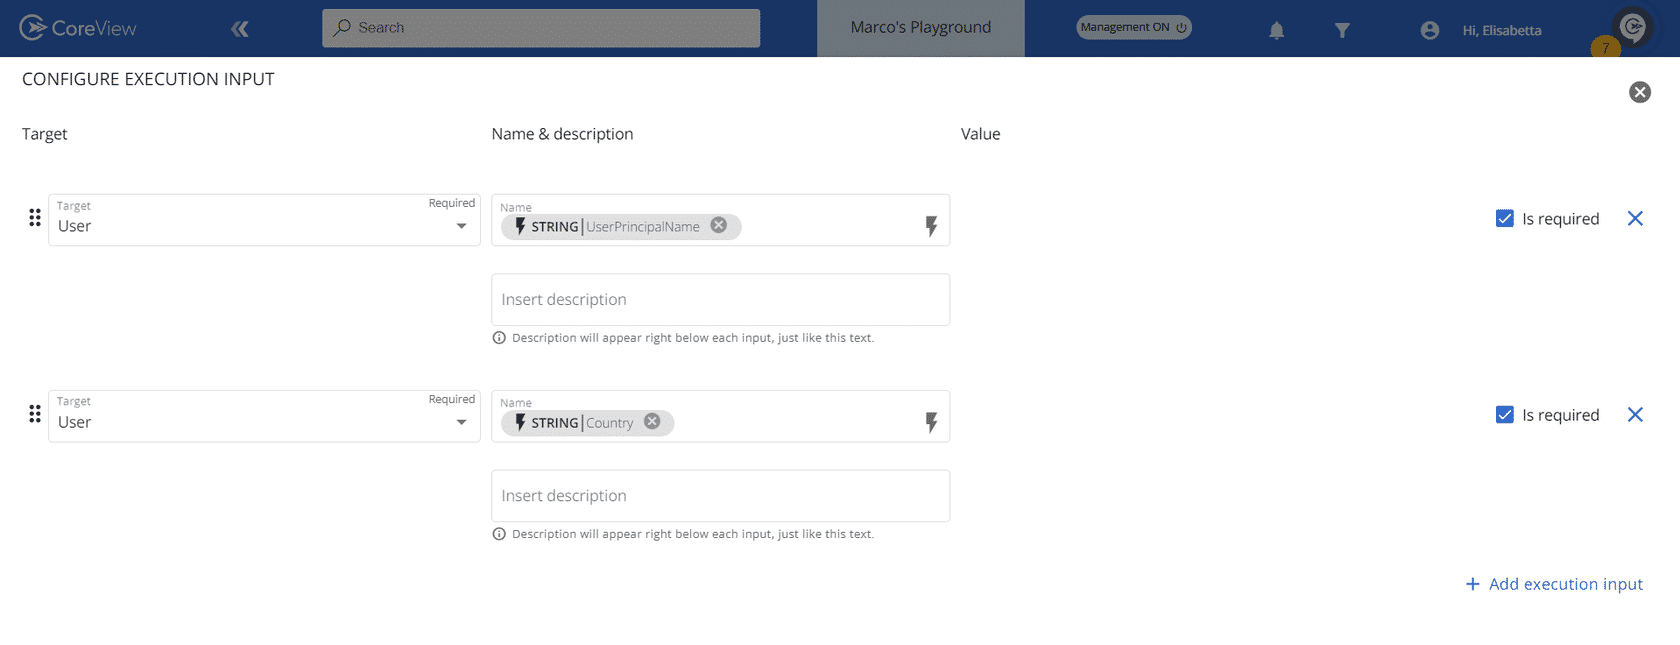
Create a new workflow and configure both “User principal name” and ”Country” as execution inputs.
Step 2: add “Edit User Properties” action
Add an “Edit User Properties” action to modify the country. The action requires the following execution inputs:
- First name
- Display name
- User principal name
- Multifactor auth state
However, you only have “User principal name” and the other execution input, “Country”, which you can select from the “Fields” drop-down menu.

Step 3: add “Retrieve data from object” action
In order to be able to run the workflow, you must retrieve the following information from the user:
- First name
- Display name
- Multifactor auth state
This is the perfect scenario to use the “Retrieve data from object” action. Let's see how to configure it:
a) Add action
Add a new action and select “Retrieve data from object” under the category “Miscellaneous”.
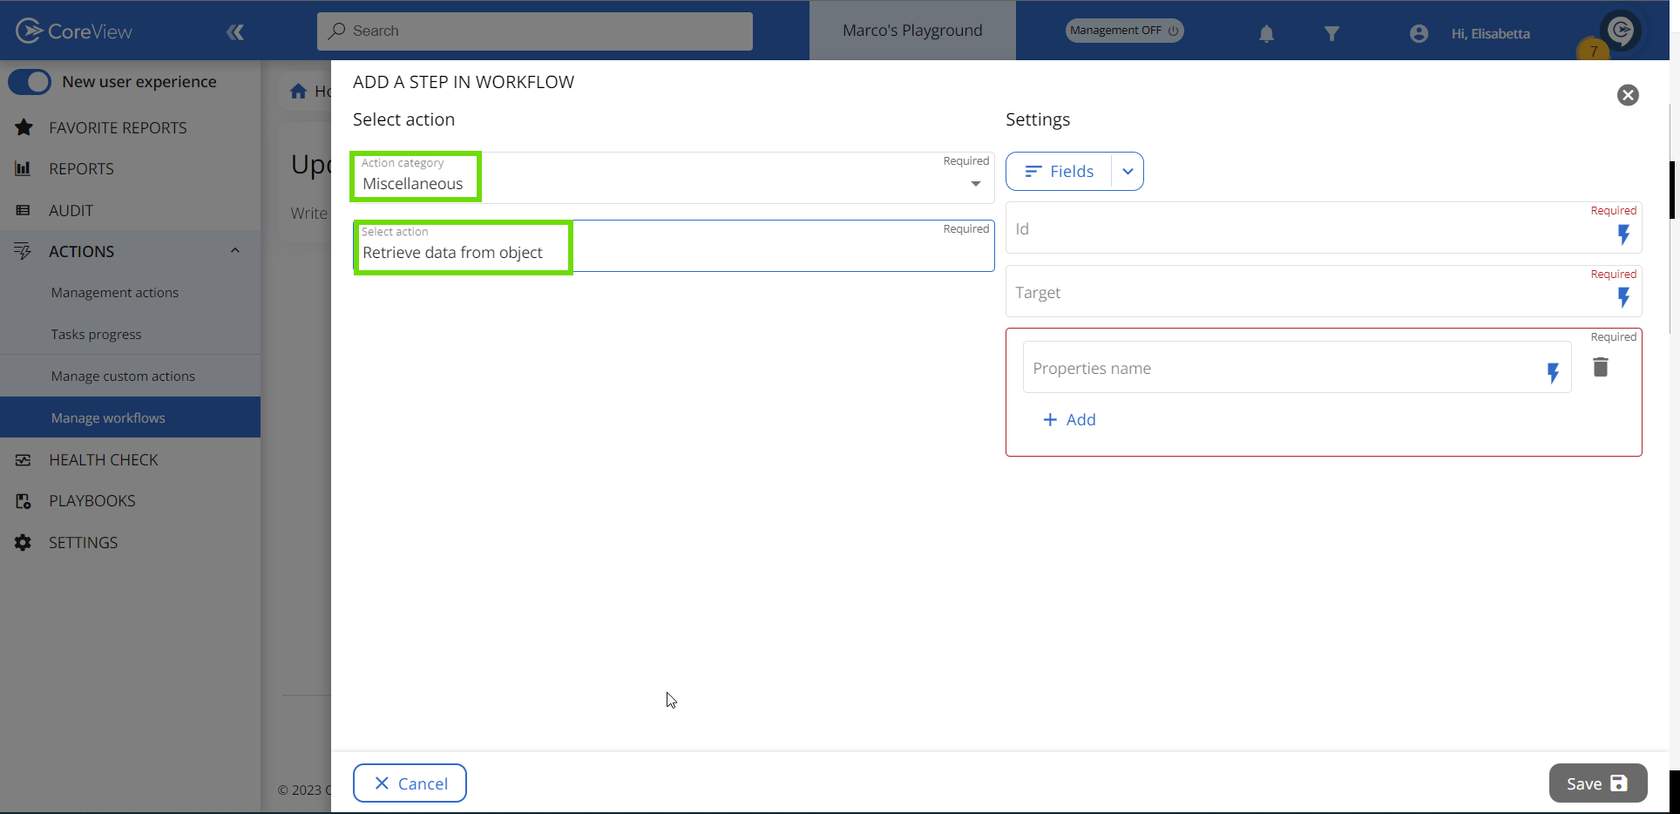
b) Enter ID and Target
Enter the Id and Target related to the item you want to extract data from**
In this case, the target is “User” and the Id is “User principal name”.
**For the Ids of other items, please refer to the table below.

Item Ids
Consult the table below to view the Id of each item:
| Target | Id |
| DistributionGroup | DistributionGroup |
| Mailbox | UserPrincipalName |
| MailContact | MailContact |
| SecurityGroups | SecurityGroups |
| User | UserPrincipalName |
| O365Group | Guid |
| Teams | Guid |
c) Add properties
At this point, you should be able to search for and add the desired properties.
In this example, we need “FirstName”, “DisplayName”, and “MultiFactorAuthState”.
Press ”Save”.

Step 4: complete “Edit User Propeties”
Return to the “Edit User Properties” action and populate the required fields with the retrieved inputs and execution inputs. Click “Save”.
