Create a custom policy
Custom policies can be created either from a report that supports the creation of custom policies or within the “Playbooks” section under “SETTINGS”. The steps may vary based on the starting point chosen for policy creation and the type of remediation action planned. This article offers a detailed guide on the steps to follow considering all these factors.
Step 1: Starting point
- From a report: click on the “Actions” function in the top-right corner, and select “Create Custom Policy”.
Only the reports that support the creation of custom policies will feature the “Create Custom Policy” action.

- From SETTINGS > Playbooks: click on “Create new” and select “Create policy”.

Step 2: Policy details
A wizard guiding you through all the necessary steps to create the policy will appear.
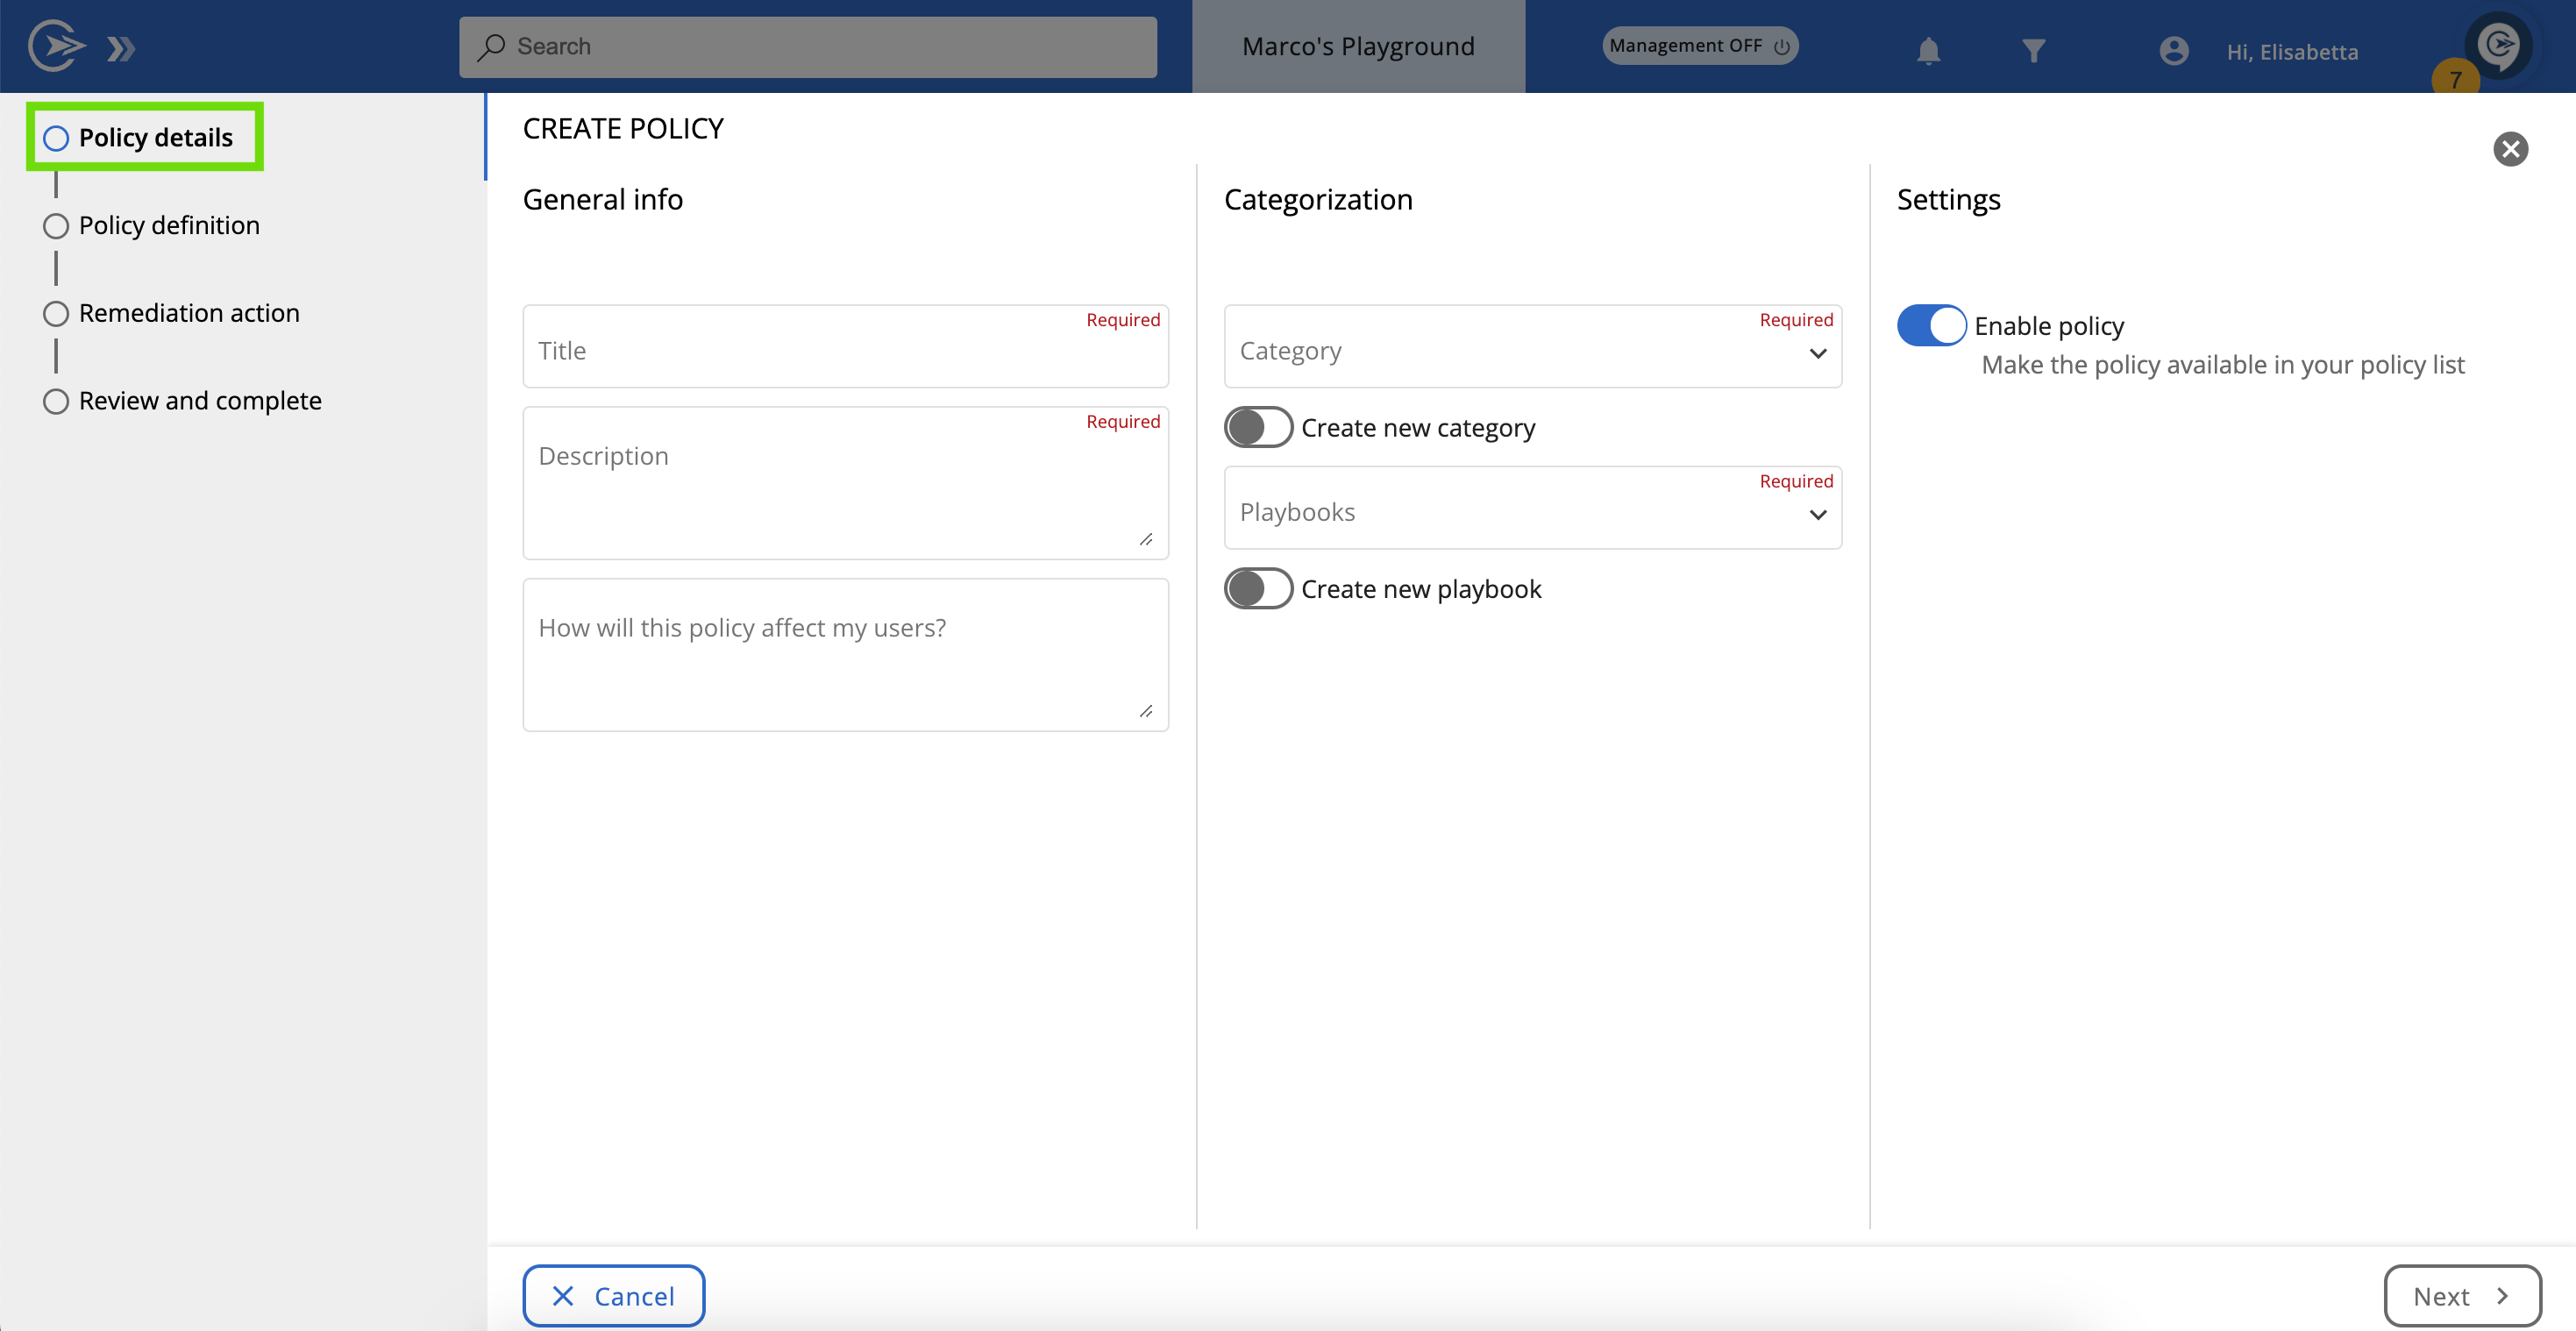
In the first tab, “Policy details”, you will need to complete the following sections:
-
General info: define the policy name, its scope in the description, and optionally, how it will impact your users.
-
Categorization: choose the category and the playbook that will contain your policy. To create a new category or playbook, enable the corresponding toggle and enter the new names.
-
Settings:
- The “Enable policy” toggle is active by default. If turned off, the policy won't appear on playbook dashboards.
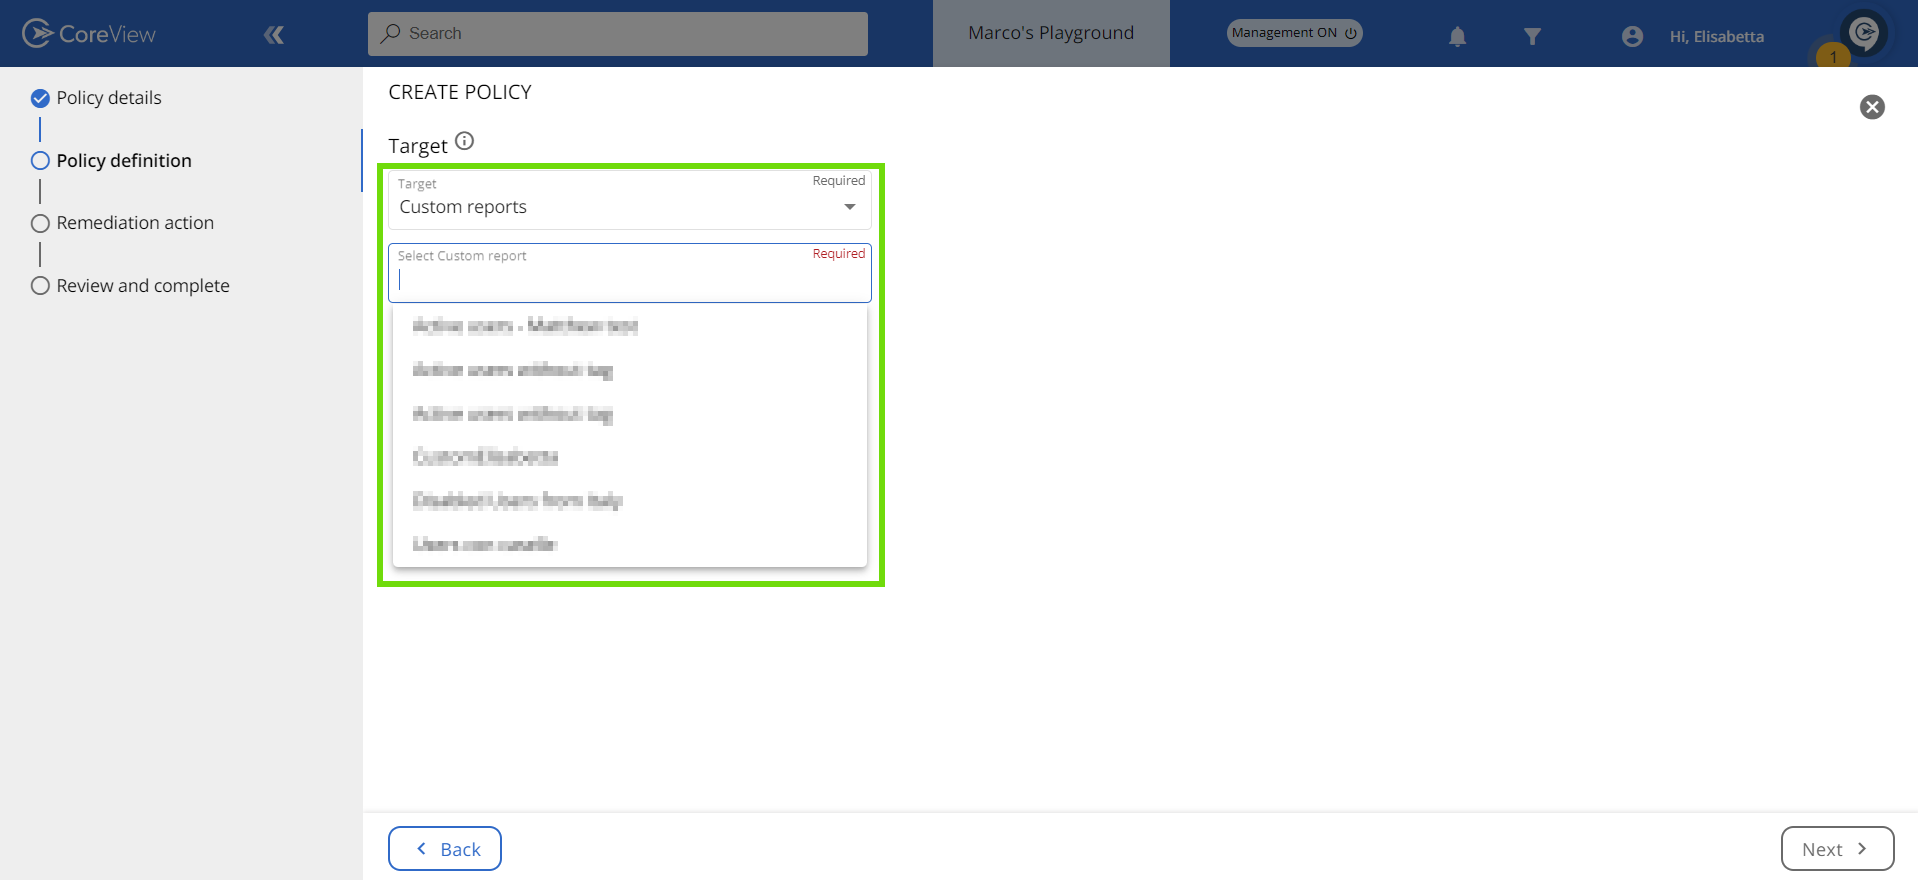
Step 3: Policy definition
-
From SETTINGS > Playbooks: the “Policy definition” tab prompts you to select a “Target” for the custom policy.
For example, if you want to create a policy about inactive Teams users, then the target you need to choose is “Users”. If you want to create a policy about inactive distribution groups, then your policy target is the distribution group.
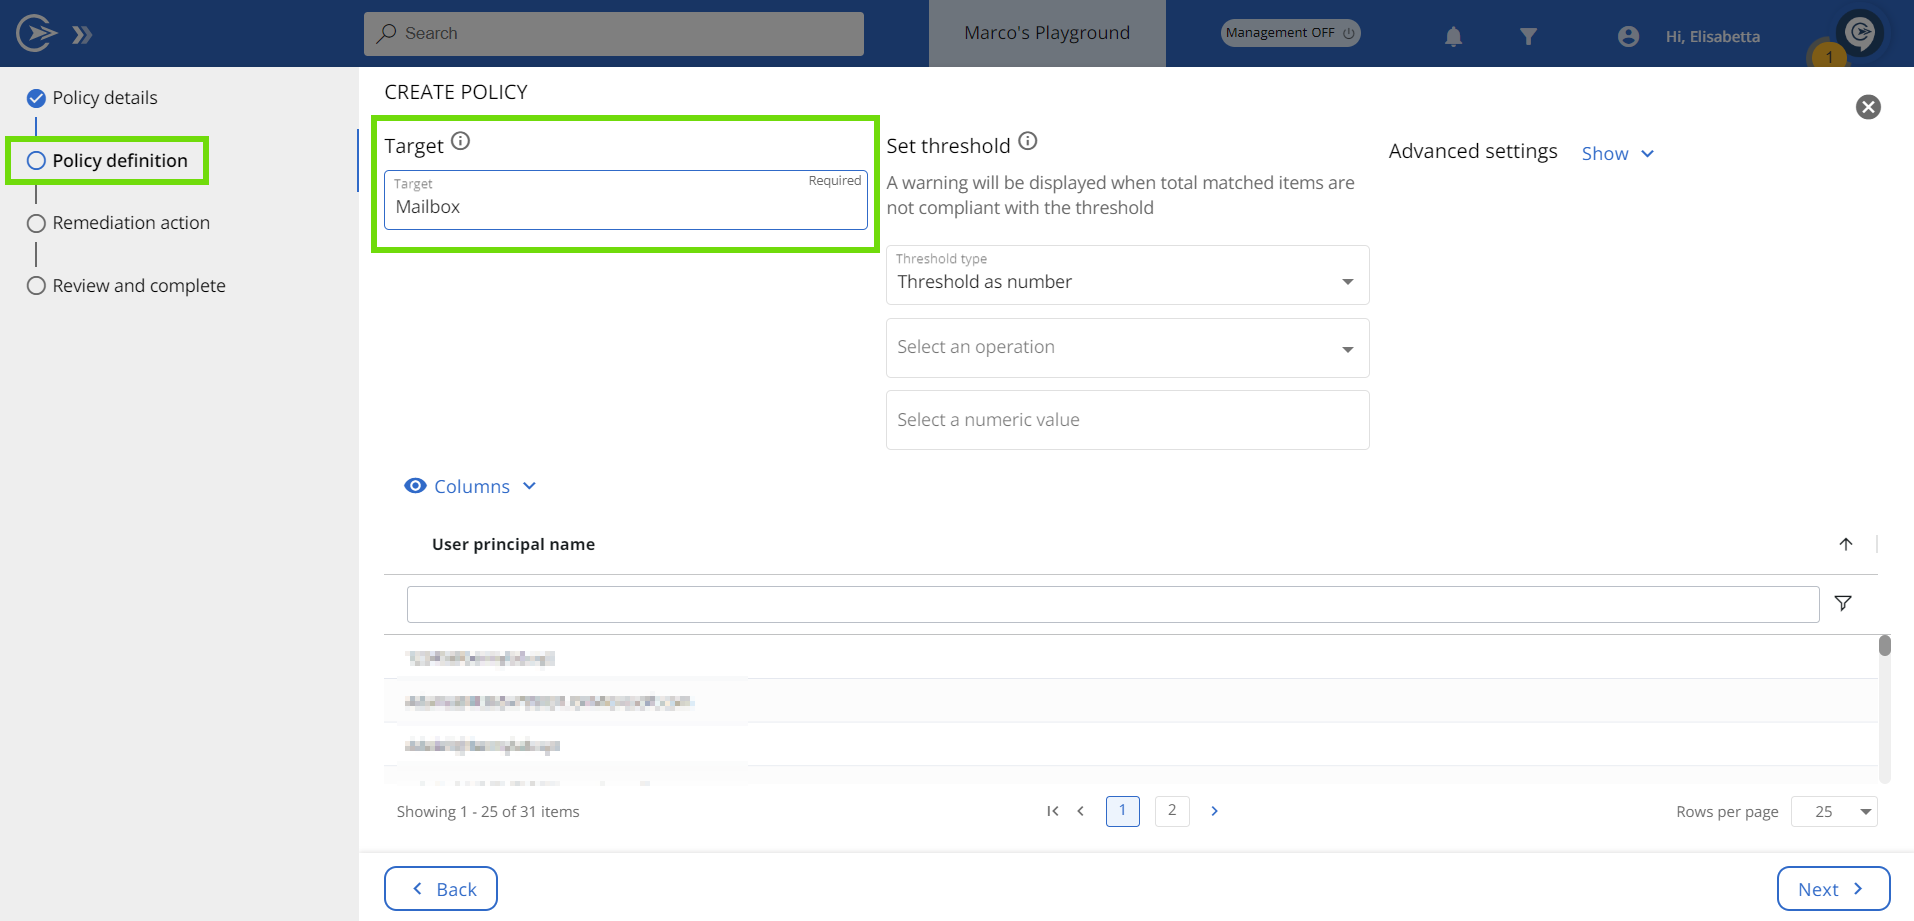
Alternatively, selecting “Custom report” as a target, lets you pick from your Custom report list.
- From a report: in this case, the “Target” and “Report title” fields within the “Policy definition” tab are already specified and cannot be modified. The filters applied in the selected report will also be imported into the custom policy.
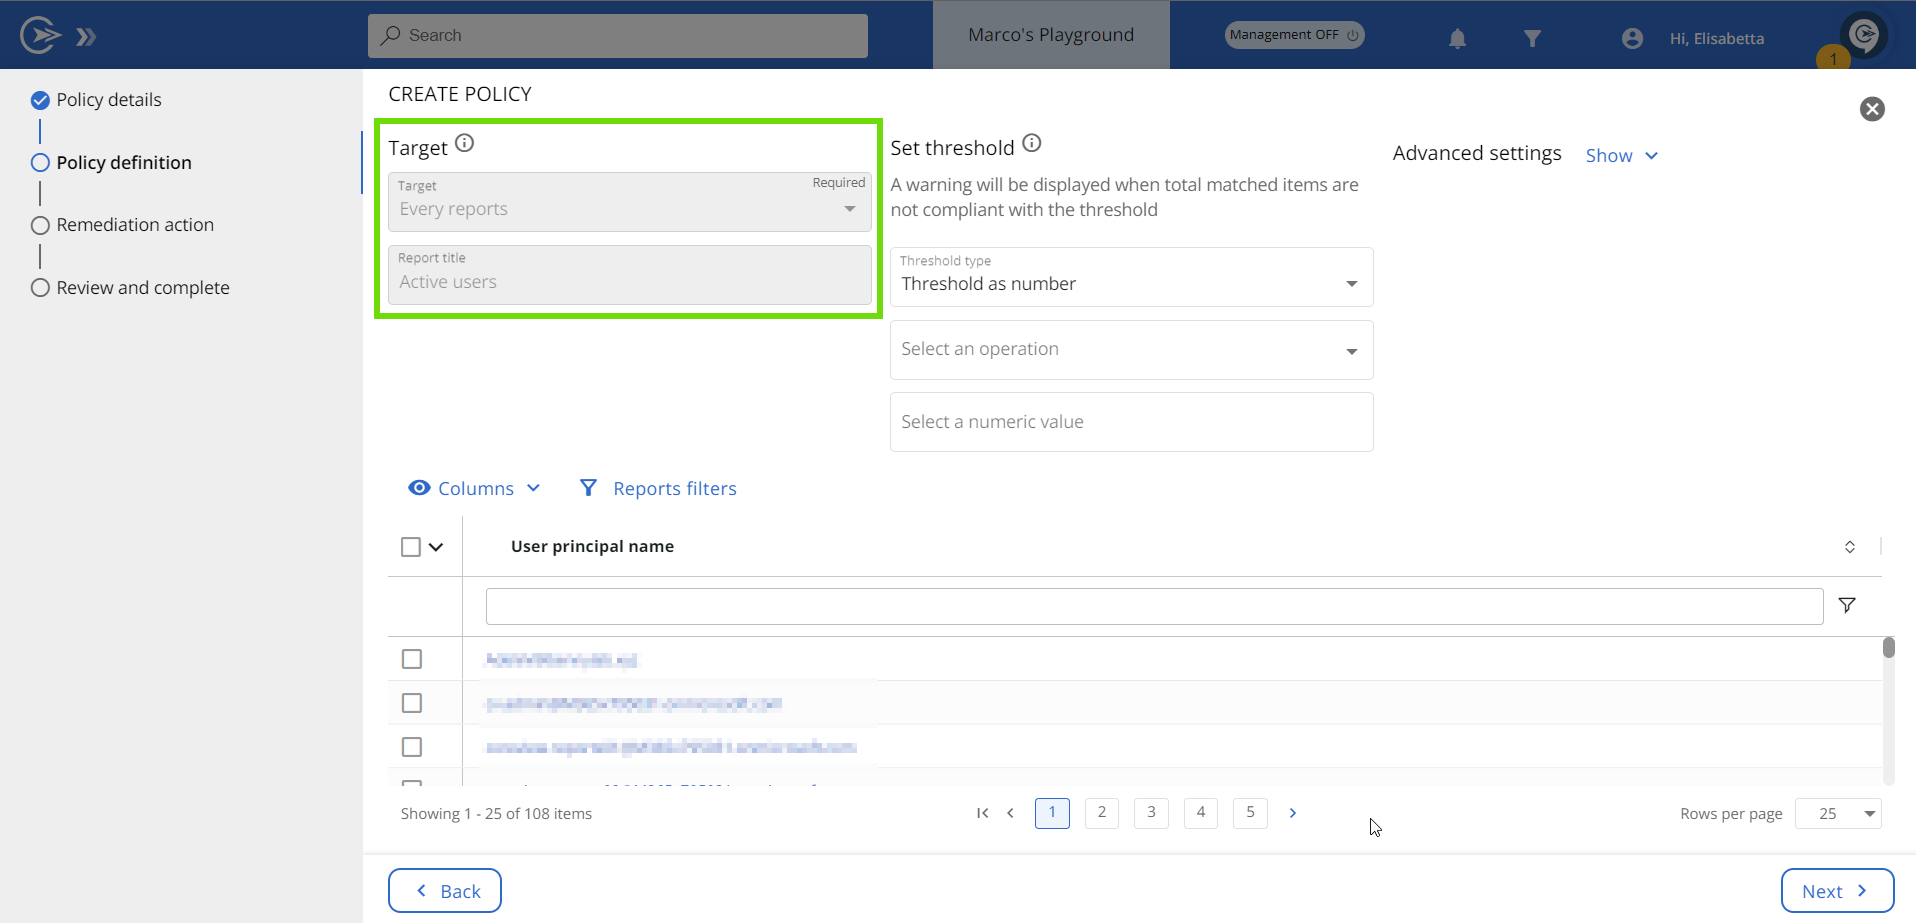
Next, you will be prompted to:
-
Set threshold: choose the number of anomalies that will trigger a warning. The threshold can be set as either a specific number or a percentage. For more details, please refer to the article on Thresholds.
- Advanced settings: by clicking on “Show” next to “Advanced settings”, you will have the option to activate the “Define policy key” toggle. Enable this feature and populate the “Policy key” field. If this field is altered on the target, the system will remove the corresponding record from the exception list.
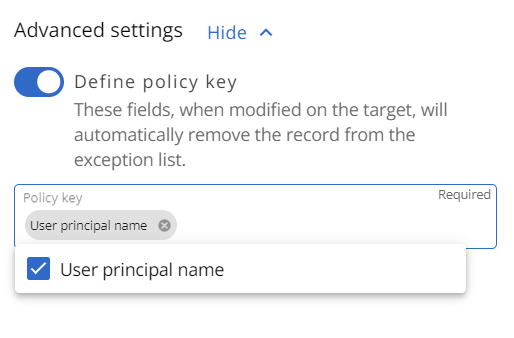
For example, let's say you've created a custom policy that alerts you about email forwarding, and you've set an exception allowing user A to forward to user B. Under “Define policy key”, you've set the “Forwarding to” parameter, which corresponds to user B. As a result, the policy won't consider any forwarding from A to B as a matched item. However, if user B is replaced with user C, the exception will be removed. Consequently, any forwarding from user A to user C will be identified as a matched item by the policy.
- Select columns: utilize the available columns in conjunction with the filter settings to ensure that only the items requiring modification are affected by the remediation action. Depending on the remediation action chosen in the subsequent step, these items will either be remediated by a workflow or included in a report.
If you plan to use workflow remediation, make sure to display the column containing the execution input configured in your workflow.
For example, in the image below, the “User principal name” column is displayed, and the filter on the other columns guarantees that only user items created more than 6 months ago and inactive for the past 6 months will be considered.

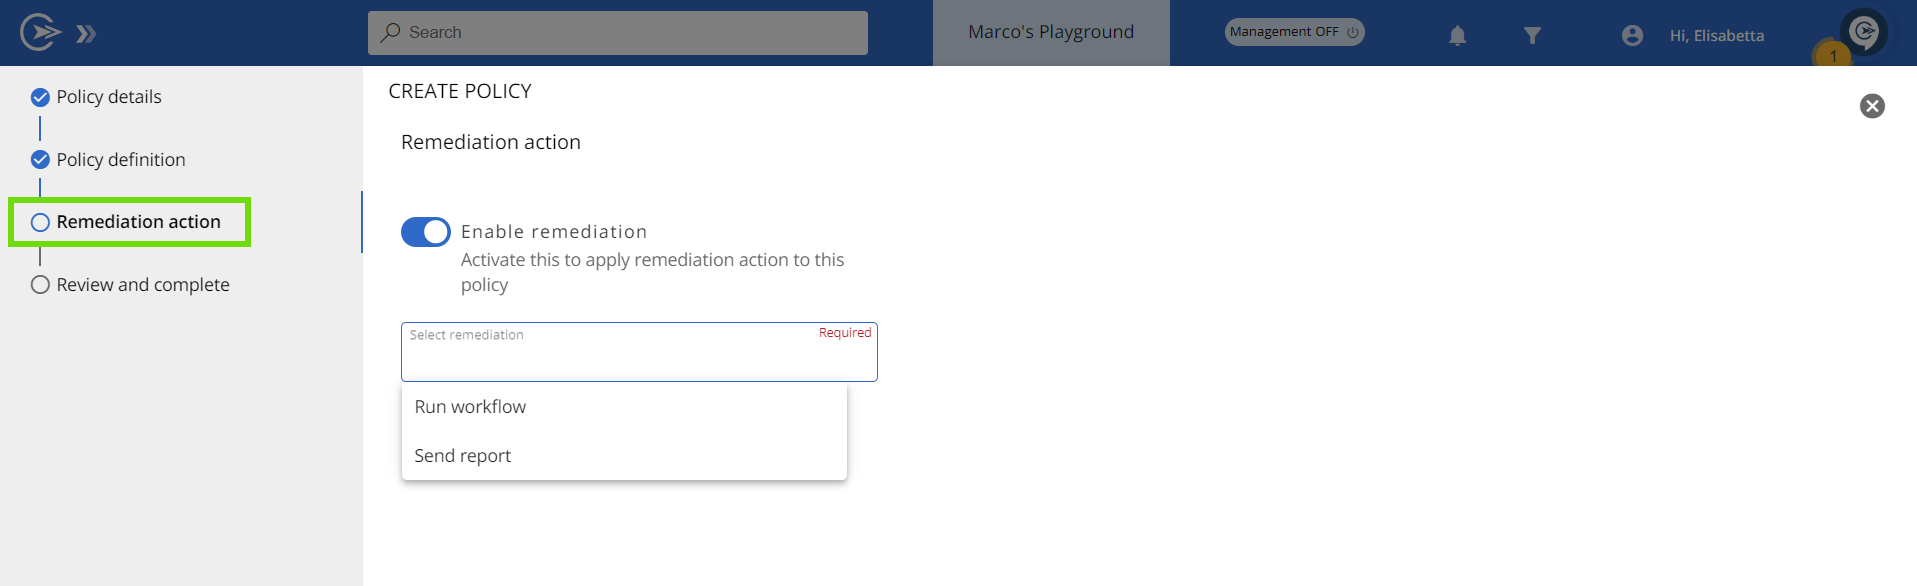
Step 4: Remediation action
In this tab, you can activate the “Enable remediation” toggle to apply a remediation action. You can choose between “Run workflow” and “Send report”.
Step 4.1: Configure workflow as remediation
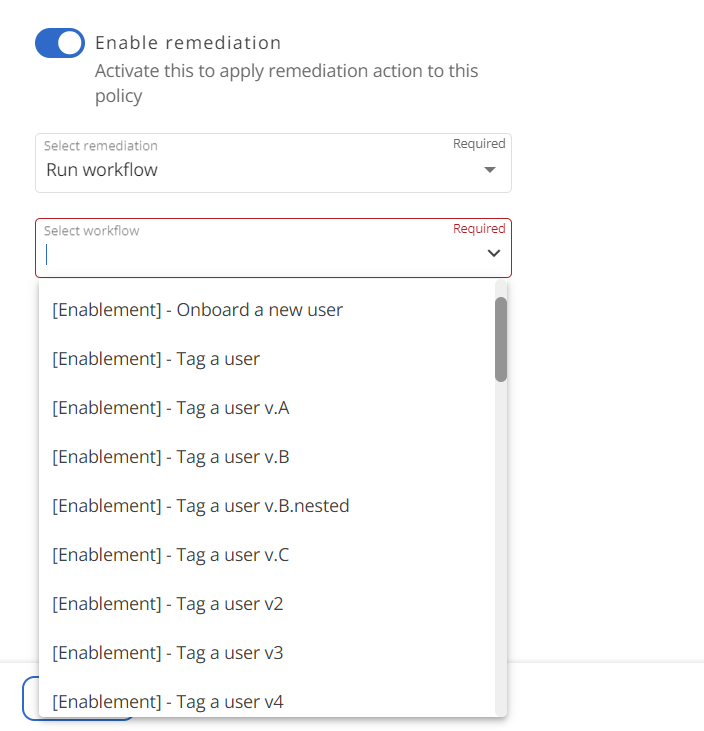
If you select “Run workflow”, you will need to complete the following sections:
- Remediation action: this option enables you to choose a workflow to remediate the matched items.
You must have previously created and published a workflow to be able to select it from the dropdown menu.
- Remediation execution input: click on “Automap” to automatically generate the input.

- Schedule: determine if you want your workflow to be executed automatically on a schedule. If you opt for scheduling, specify the frequency at which the workflow should be executed.
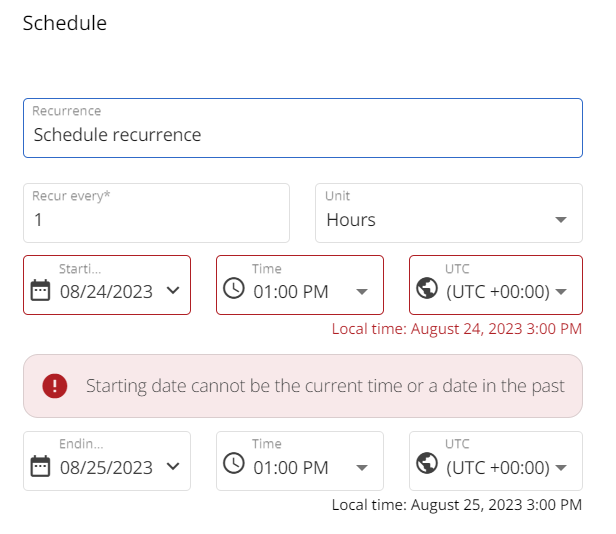
By default, the system will select UTC + 00:00. Adjust this setting as needed to align with your local time zone.
Step 4.2: Configure forwarding of matched items as remediation
This option serves as an alternative to workflow remediation. Use this when you prefer not to execute a manipulation action, but instead wish to receive a report listing the matched items. Selecting “Send report” will prompt you to fill out several fields:
- Remediation action: determine when you want to receive a report (options include: is empty, is not empty, always), the desired format (Excel, CSV, or PDF), the intended recipients, and the frequency at which it should be sent.
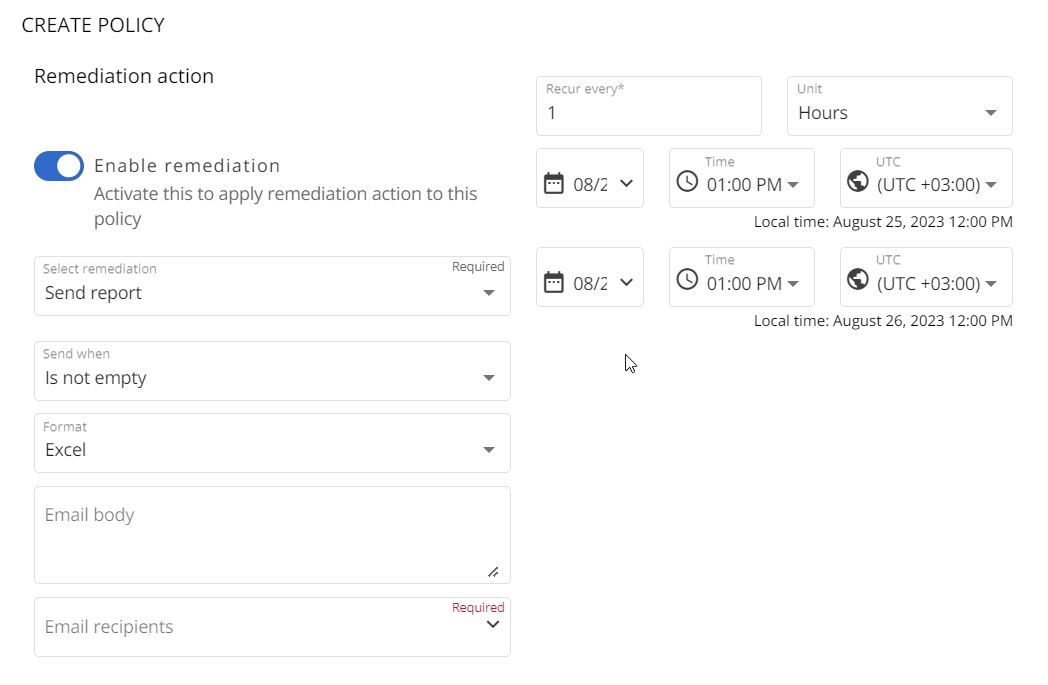
Remember to specify the desired time unit, the start and end dates for receiving your report, as well as the desired time zone.
Step 5: Review and complete
In this tab, you can review all the details related to:
- The policy.
- The policy definition.
- The remediation action.
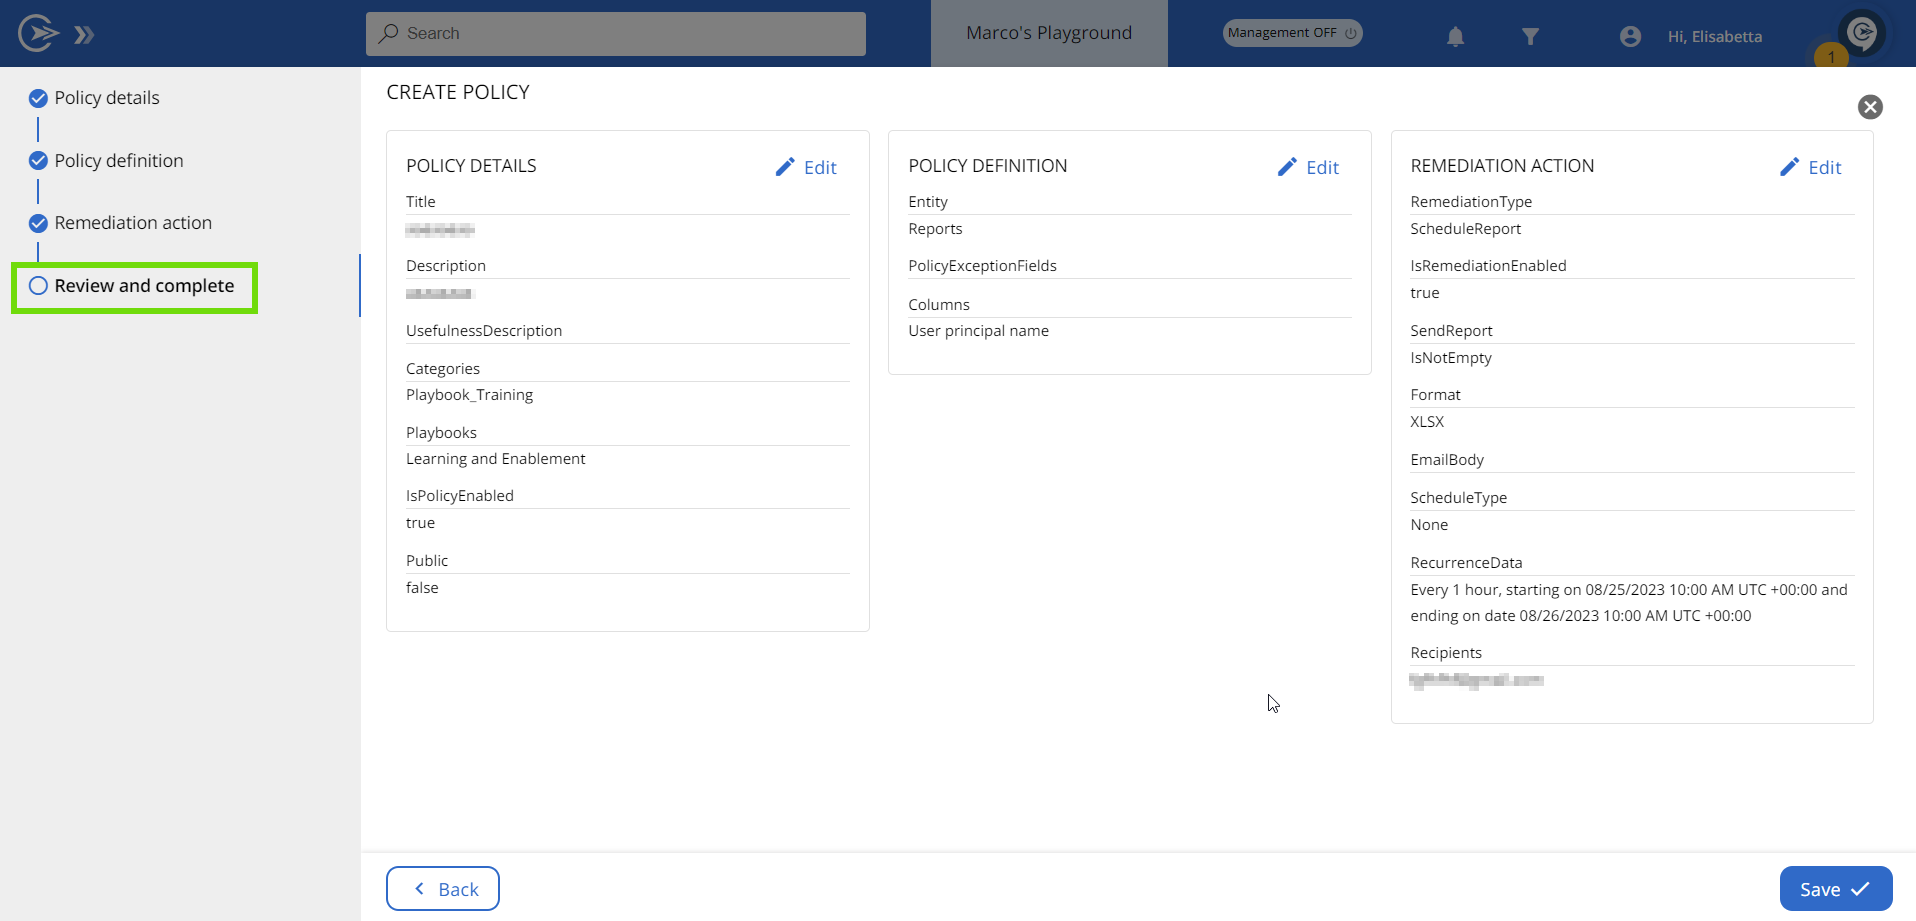
Click “Save” to complete the operation, and your custom policy will be created.