This article will guide you on how to generate a HAR file with CoreView in Chrome, Firefox, and Microsoft Edge.
1. To generate a HAR file in Chrome:
- Navigate to the URL where the issue is occurring.
- Right-click anywhere on the page and select “Inspect”. The developer tools will open either at the bottom or the right side of your browser.
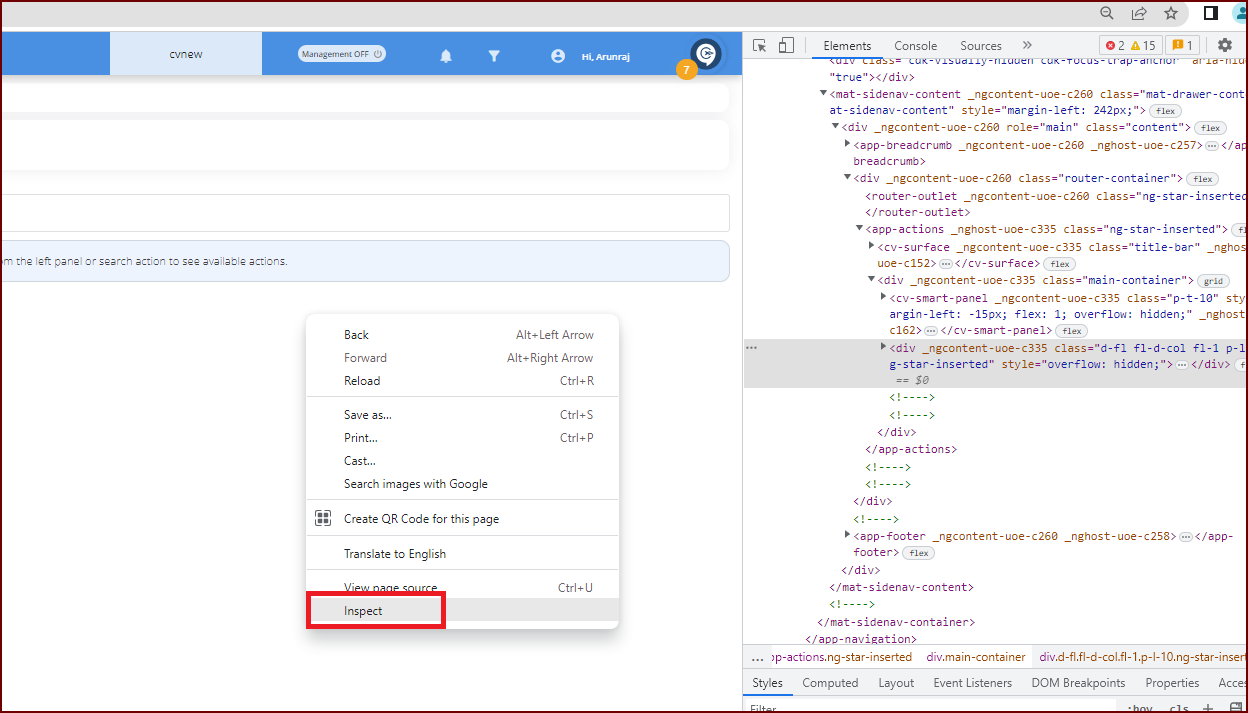
- Now, click on the “Network” tab.
- Click on the record button. Then, force a refresh of the page or click on a link related to the issue. The goal is to reproduce the problem and capture the output.
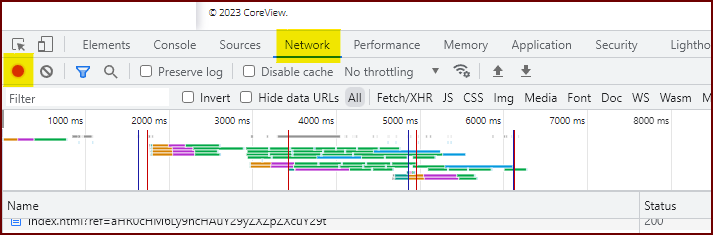
- Once you've reproduced the issue, right-click within the “Network” tab and select “Save as HAR with content”. Then, save the file.

- Now, you can upload this output file to your support ticket or attach it to an email response.
To generate a HAR file in Firefox:
- Navigate to the URL where you're experiencing the issue.
- Go to the “Tools > Web Developer > Network” menu, or press Ctrl+Shift+I (for Windows/Linux) or Cmd+Option+I (for OS X).
- Refresh the page to begin capturing the traffic between the browser and the server. Alternatively, click a link related to the issue.
- The goal is to reproduce the problem and capture the resulting output.
- Click “Export”, followed by “Save as…” to save the HAR file.
To generate a HAR file in Microsoft Edge:
- Navigate to the URL where the issue is occurring.
- Open “Developer tools” (you can use F12 as a shortcut) and select the “Network” tab.
- Refresh the page to begin capturing the traffic between the browser and the server. Alternatively, click on a link related to the issue. The goal is to reproduce the problem and capture the output.
- Click on “Export as HAR”, followed by “Save as…” to save the HAR file.