Automating the monitoring of app activities within Entra ID can be achieved using CoreView. This approach eliminates the need for manual audit requests, allowing for real-time tracking of recent activities with customizable filters. Here’s how to set it up and create an event-based policy that alerts you when an app is registered or modified.
Accessing CoreView and viewing Audit logs
- Log into CoreView by navigating to app.coreview.com
- Click on the Audit icon.
- Proceed to Entra ID Activities by selecting Entra ID, then clicking on Entra ID Activities.

From this point, you'll have access to all the same details as Purview, but with a significant advantage: there's no need to manually request an audit. For instance, you can explore all recent activities by applying filters as needed. Let's see how:
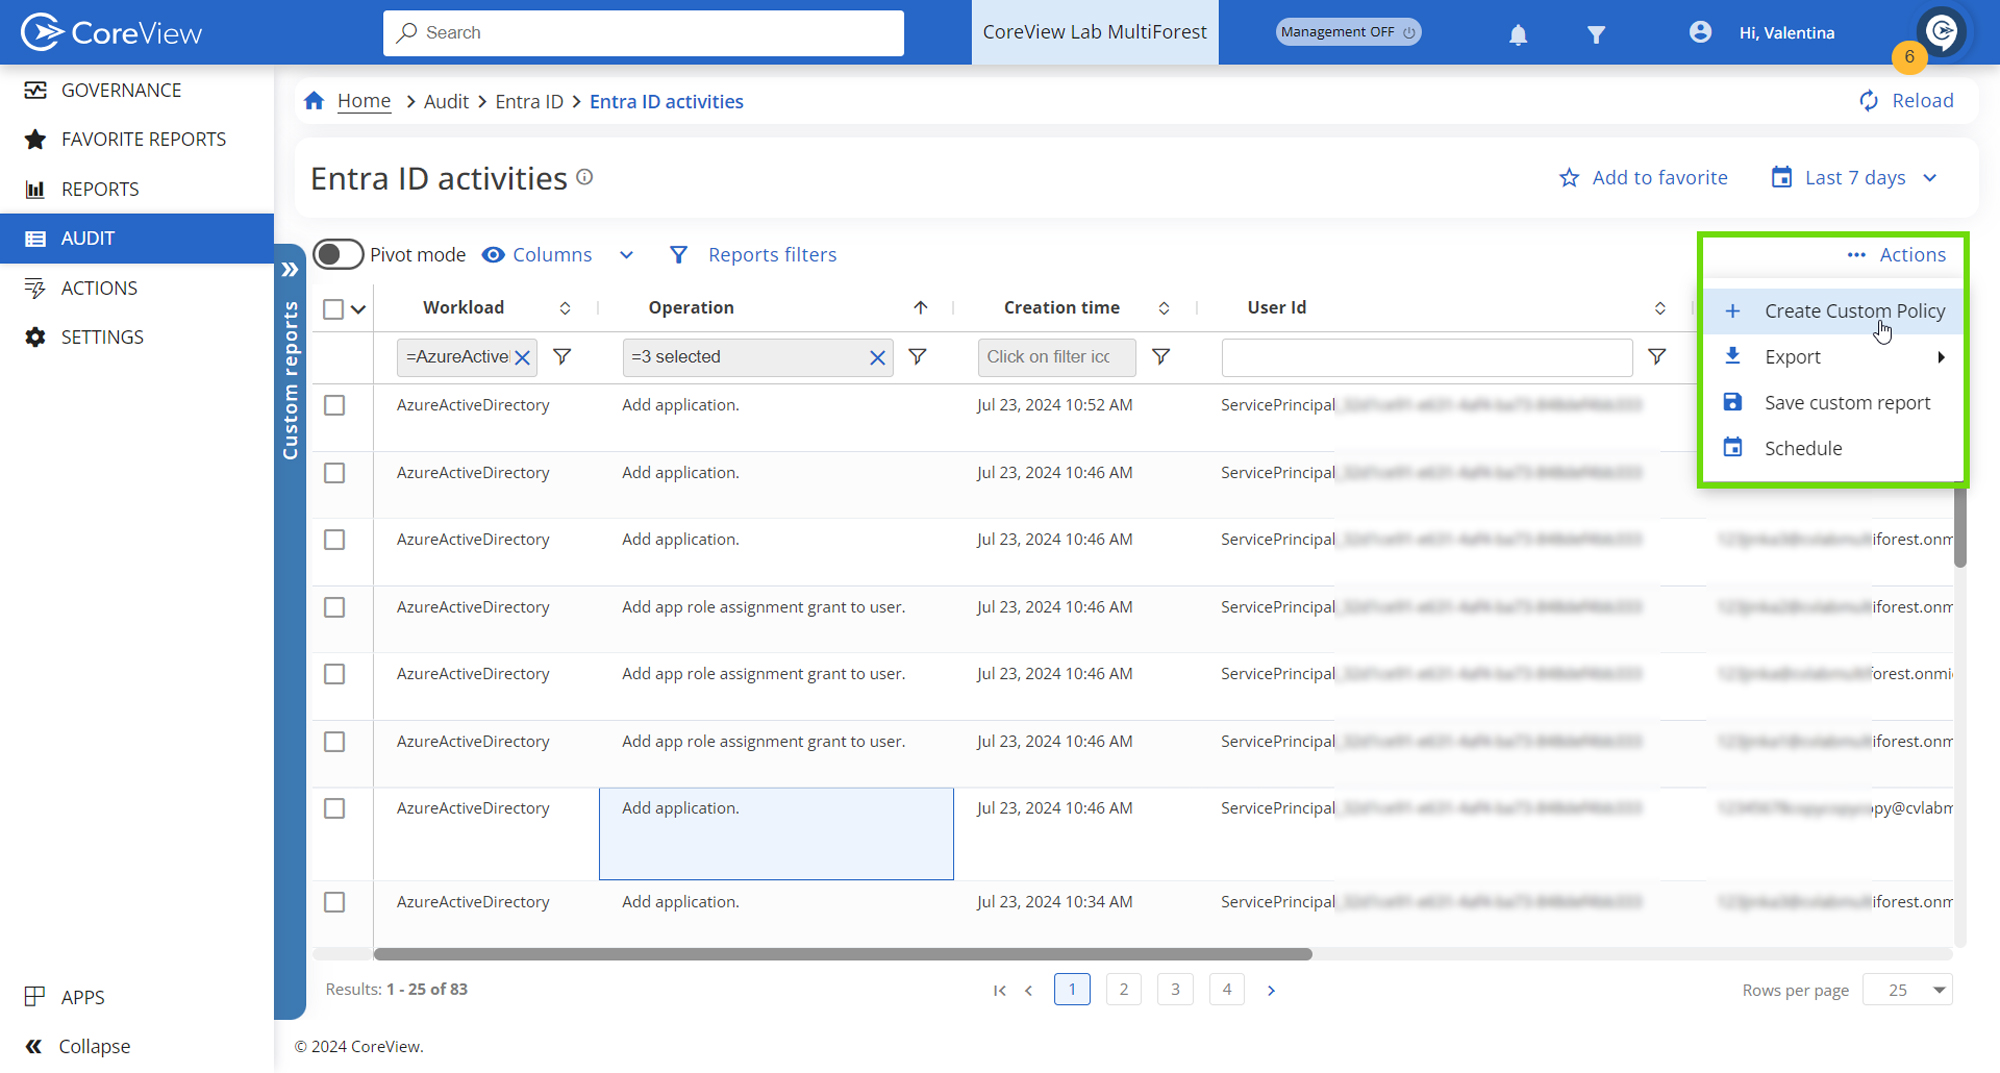
Filtering Activities
To explore activities, proceed as follows:
- Use the filter icon in the Operation column to refine your search.
-
Add the activities you wish to monitor, such as:
- Add app role assignment grant to user
- Add delegated permission grant
- Add service principal
- and more
- Apply the filter to update the spreadsheet with your specified criteria.

Creating an event-based custom policy for alerts
To create an event-based custom policy, follow the steps below:
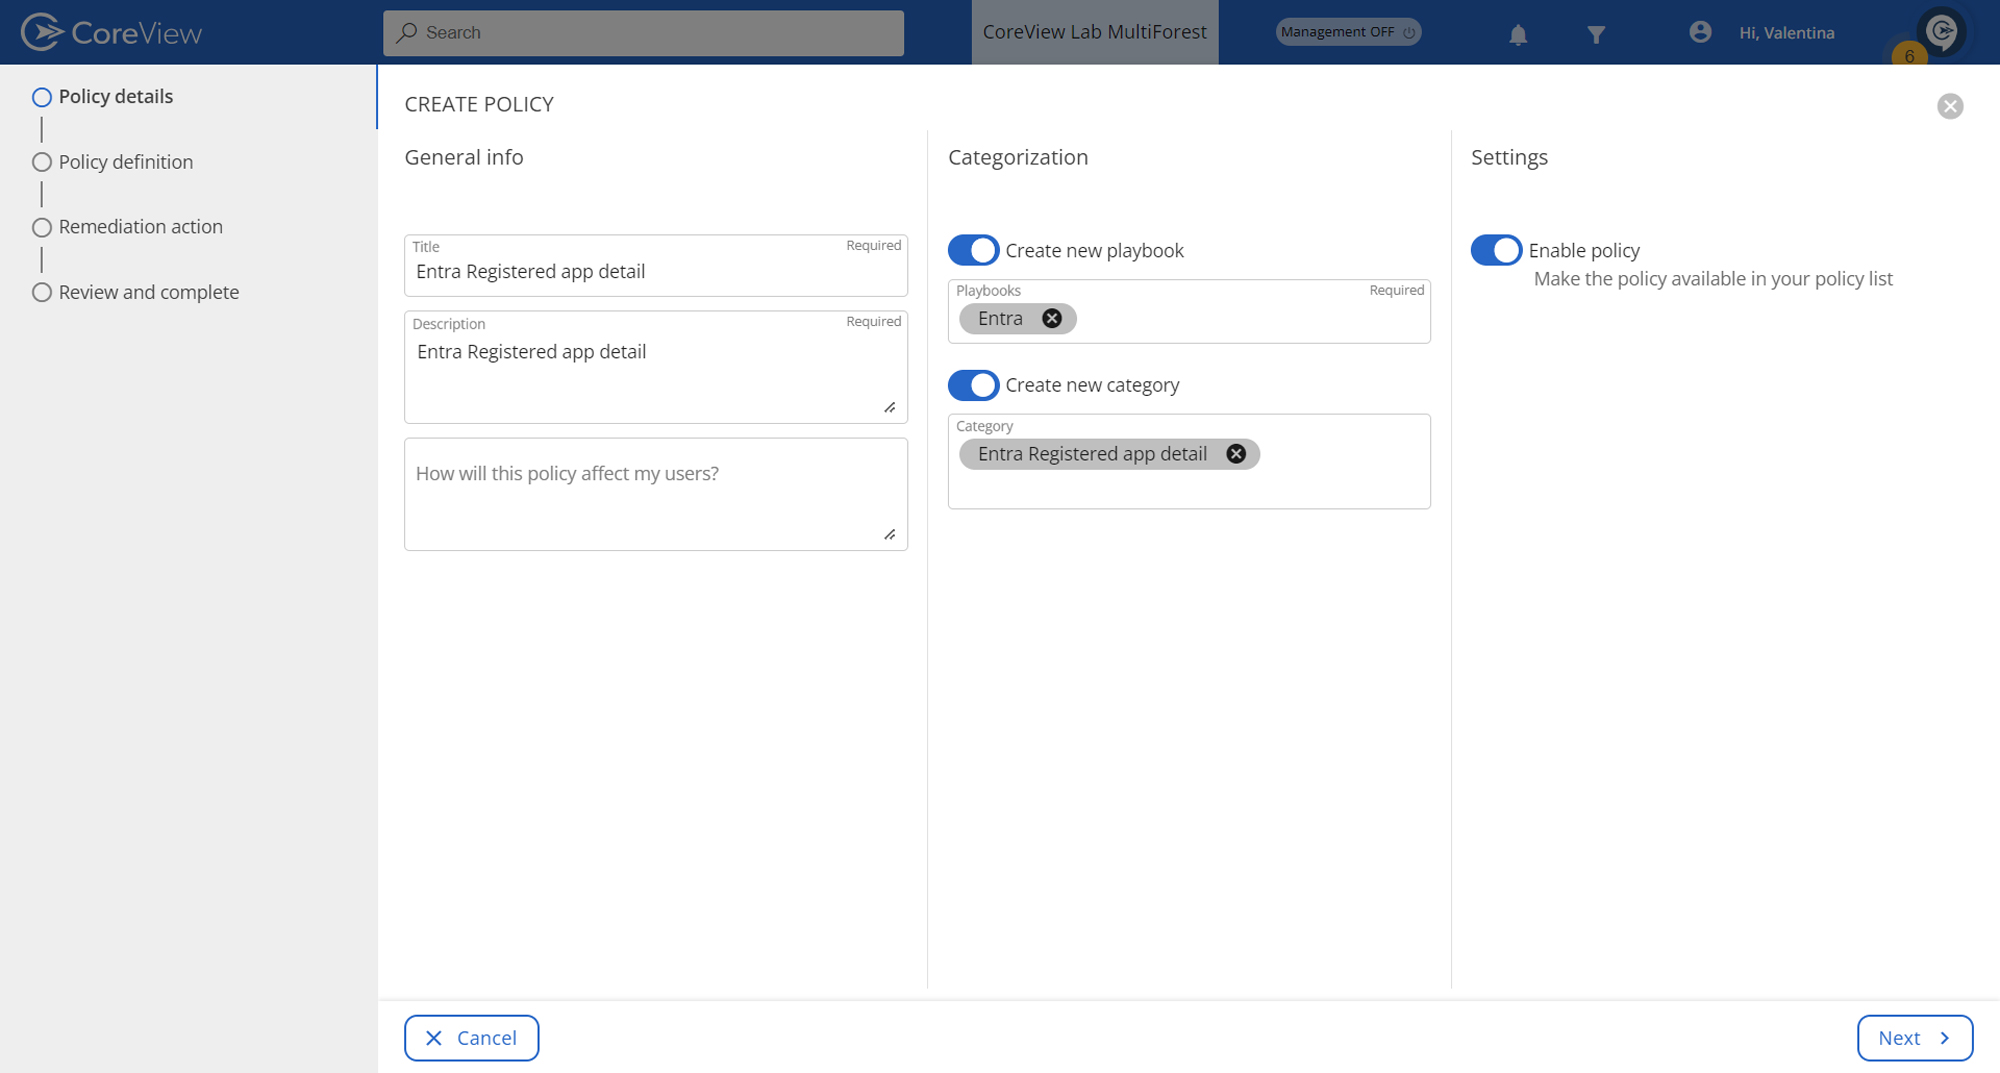
Step 1: Set Up the Policy
- Initiate by clicking on Actions and selecting Create Custom Policy.
- Provide a title and description for your policy, add it to a category, and optionally create a playbook.
- Enable the policy for immediate activation, then click Next.
Step 2: configure policy definition
In the policy defition tab:
- In the audit spreadsheet, filter the Operation column by the actions you're monitoring.
- Apply the filter.

- Customize the viewable columns by using the eye icon, selecting the necessary columns, then click Next.

Step 3: enable remediation to set up automatic email notifications
In the Remediation action tab:
- Enable remediation by toggling the appropriate switch.
- Choose Send notification and select the recipients for the notification emails.
- Click Next to proceed.

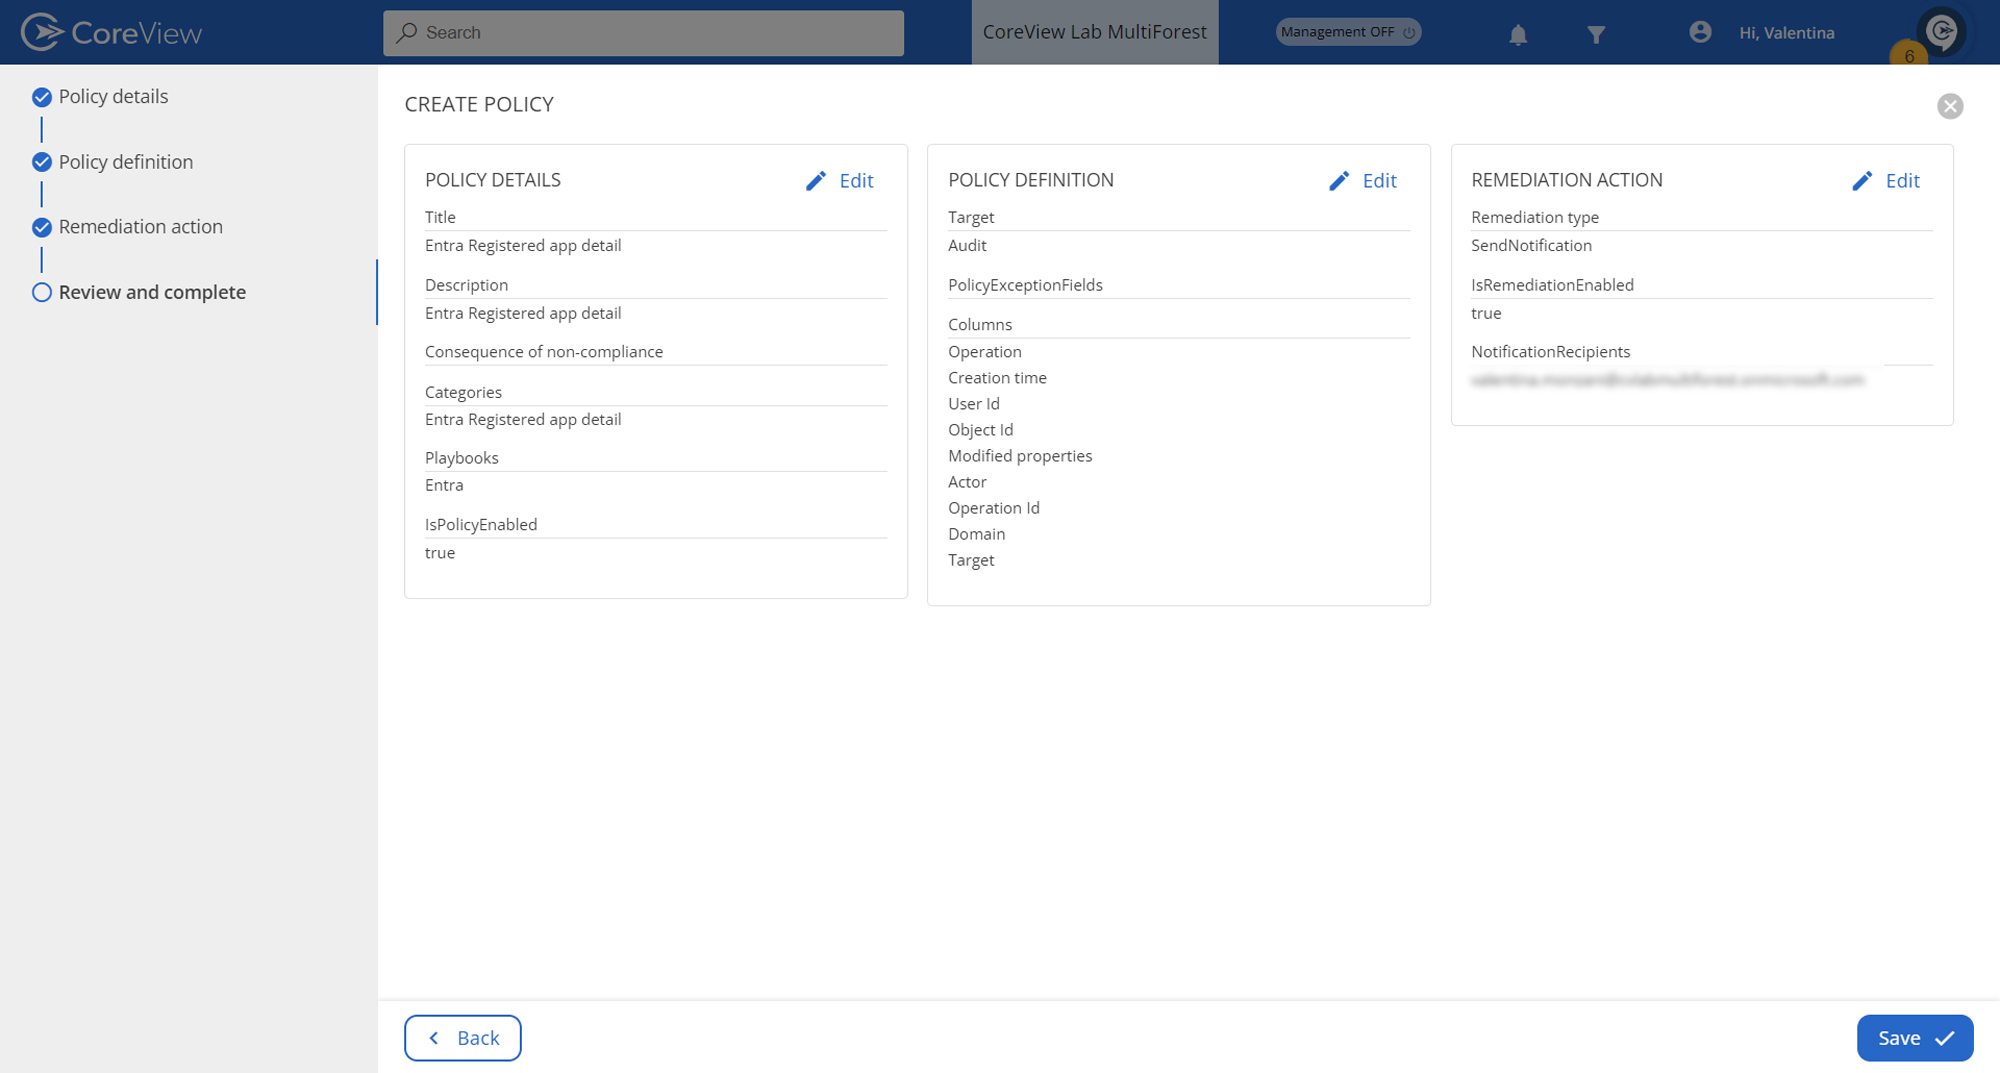
Step 4: review the details
To finalize the process:
- Review the summary of what the custom policy entails.
- Save the policy to activate it.
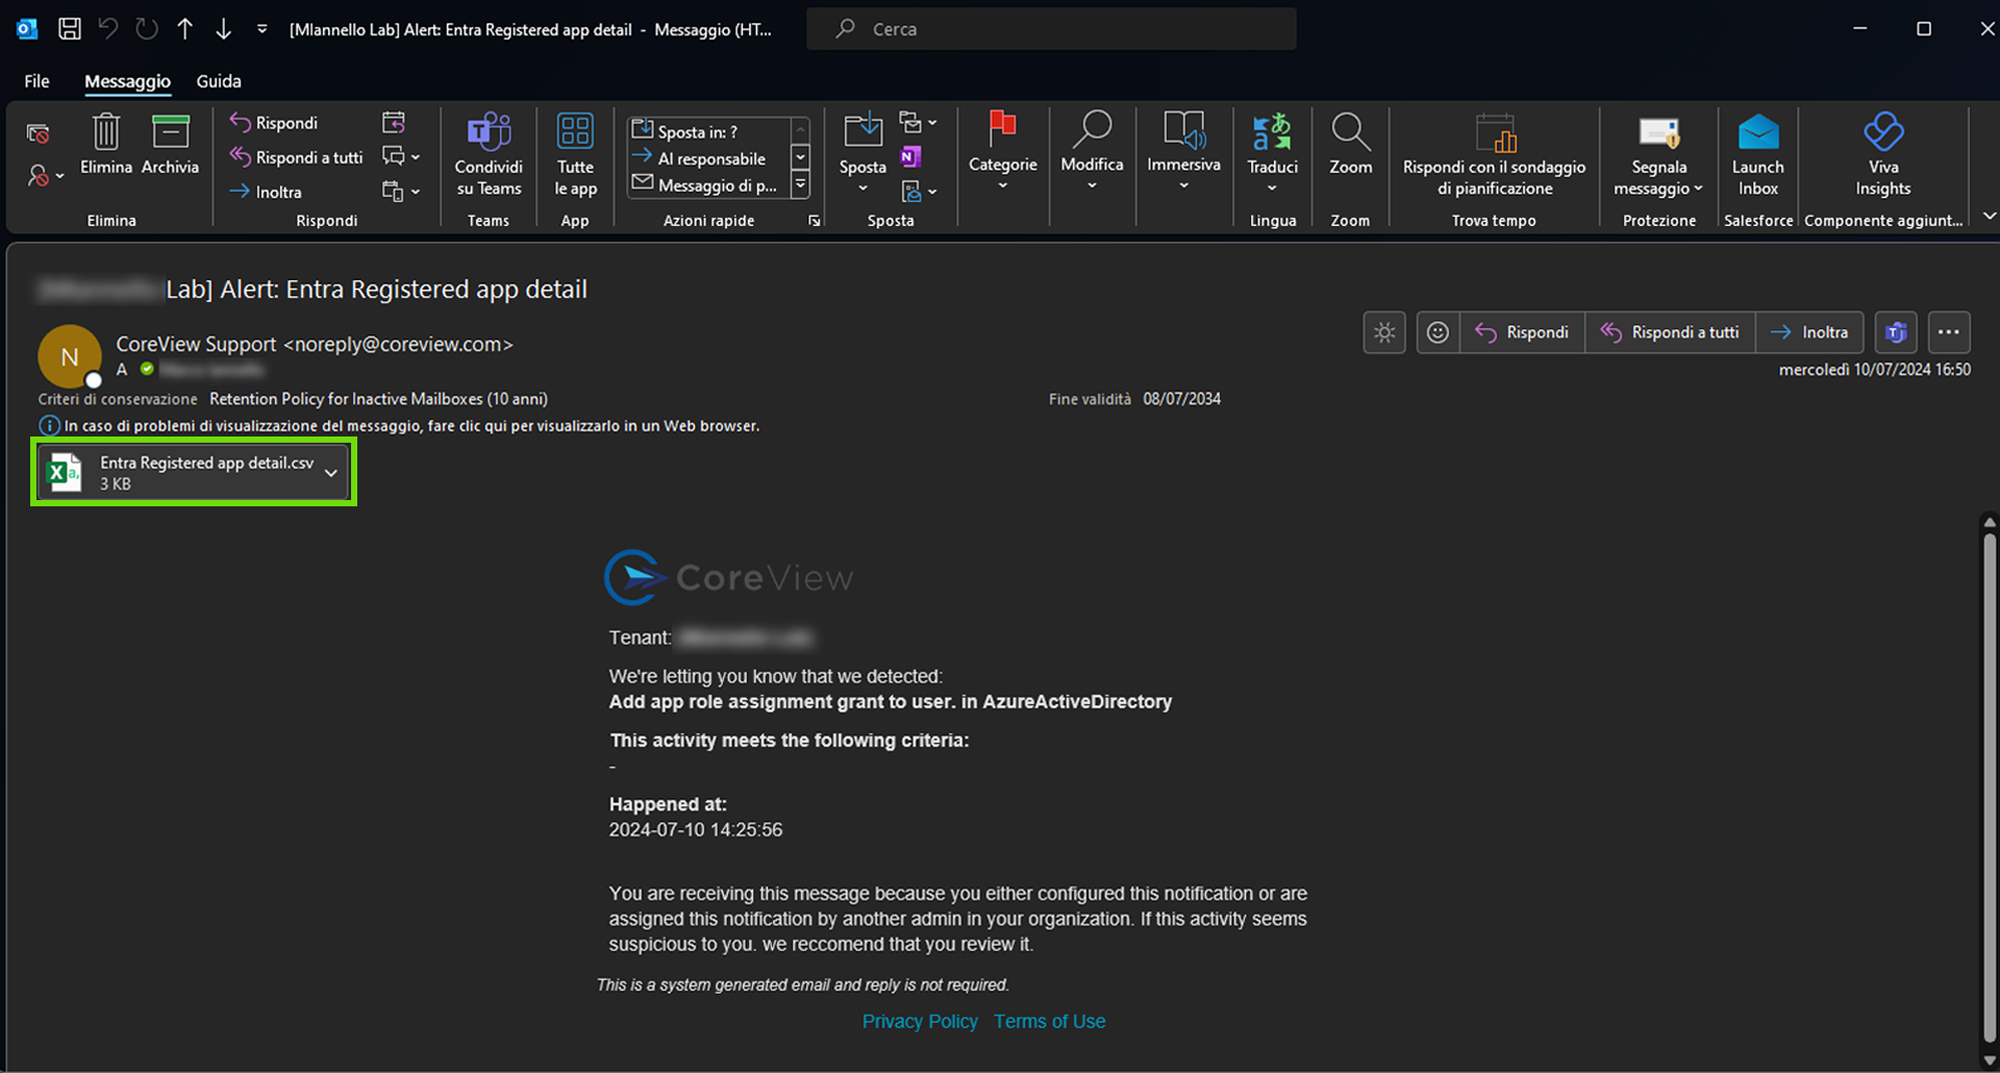
Receiving Automated Notifications
Once active, the policy will send out automatic notification emails containing a spreadsheet with the latest app registration activities and permissions, including timestamps. This feature ensures you stay informed of all significant app activity within your Entra ID environment in real-time.