Microsoft highly recommends securing your Active Directory and Office 365 through the setup of multifactor authentication.
While passwords continue to be the most common method for verifying a user's identity, they are highly susceptible to cyberattacks such as phishing and password spraying.
By enabling multi-factor authentication (MFA), you're adding an extra layer of security. This requires at least two verification methods, effectively blocking potential attackers from gaining access to your systems and preventing serious financial and operational damage.
In this article, we'll guide you through the process of enabling MFA via Azure AD and the CoreView portal.
1. Set up MFA using Azure AD
You can activate multi-factor authentication in Azure AD through several methods, each one tailored to your specific scenario and the type of Microsoft 365 license you hold.
Enabling Azure Multi-Factor Authentication per user:
This traditional method requires two-step verification for each enabled user every time they sign in. Enabling a user bypasses any conditional access policies that could affect that user. While this method is favored for individual changes, Microsoft now advises against it for managing an entire organization, as it can be time-consuming and prone to errors.
For more information, please refer to this MSDN article: Enable per-user Azure AD Multi-Factor Authentication.
Enabling Azure Multi-Factor Authentication with security defaults:
In late 2019, Microsoft released security defaults to help protect organizations from identity-related attacks. These preconfigured security settings include enabling multi-factor authentication for all admin and user accounts. Microsoft is currently working on making these security defaults accessible to all license subscriptions. Depending on the creation date of your tenant, security defaults might already be activated. If not, they must be enabled in the Azure Portal.
Steps to enable security defaults:
- Navigate to the Microsoft 365 Admin Center.
- Click on “Show all”, then opt for the “Azure Active Directory Admin Center”.
- Select “Azure Active Directory”, followed by “Properties”, and then “Manage security defaults”.
- Under the “Enable security defaults” section, select “Yes” and hit “Save”.
To learn more about security defaults, please refer to the MSDN articles: Security defaults and Multifactor Authentication and Set up MFA for M365.
Enabling Azure Multi-Factor Authentication with a Conditional Access policy:
This is a more flexible approach for requiring two-step verification and is the method recommended by Microsoft. It only works for Azure MFA in the cloud, though, and Conditional Access is a paid feature of Azure Active Directory, specifically Premium P1 or P2 editions.
You can create Conditional Access policies that apply to groups as well as individual users. High-risk groups can be given more restrictions than low-risk groups, or two-step verification can be required only for high-risk cloud apps and skipped for low-risk ones. Azure AD Premium P2 licenses add risk-based Conditional Access that can adapt to user patterns, tracking normal behavior to minimize multi-factor authentication prompts that aren’t deemed necessary.
To learn more about conditional access policy and how to create one kindly refer to the article: Create Conditional Access policy.
2. Set up MFA through CoreView
The process described below is not applicable to enabling MFA via a Conditional Access policy.
- Login to the CoreView portal
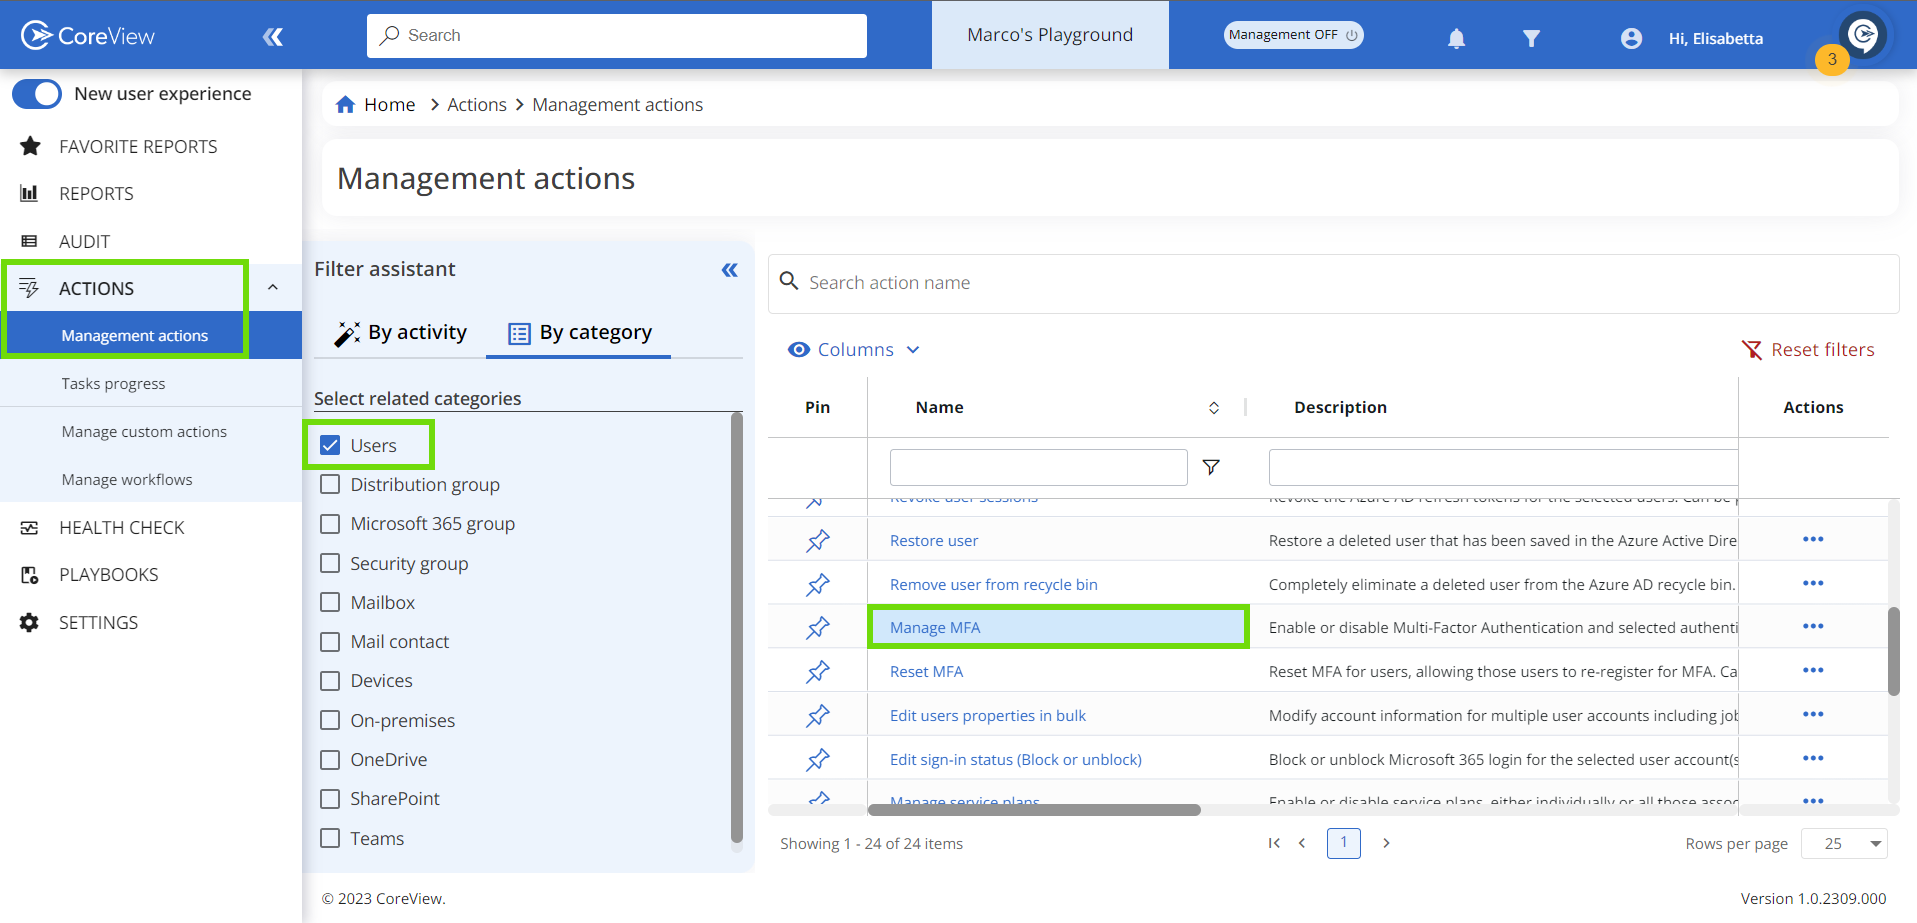
- Under “Actions > Management actions” select “User” and click on “Manage MFA”
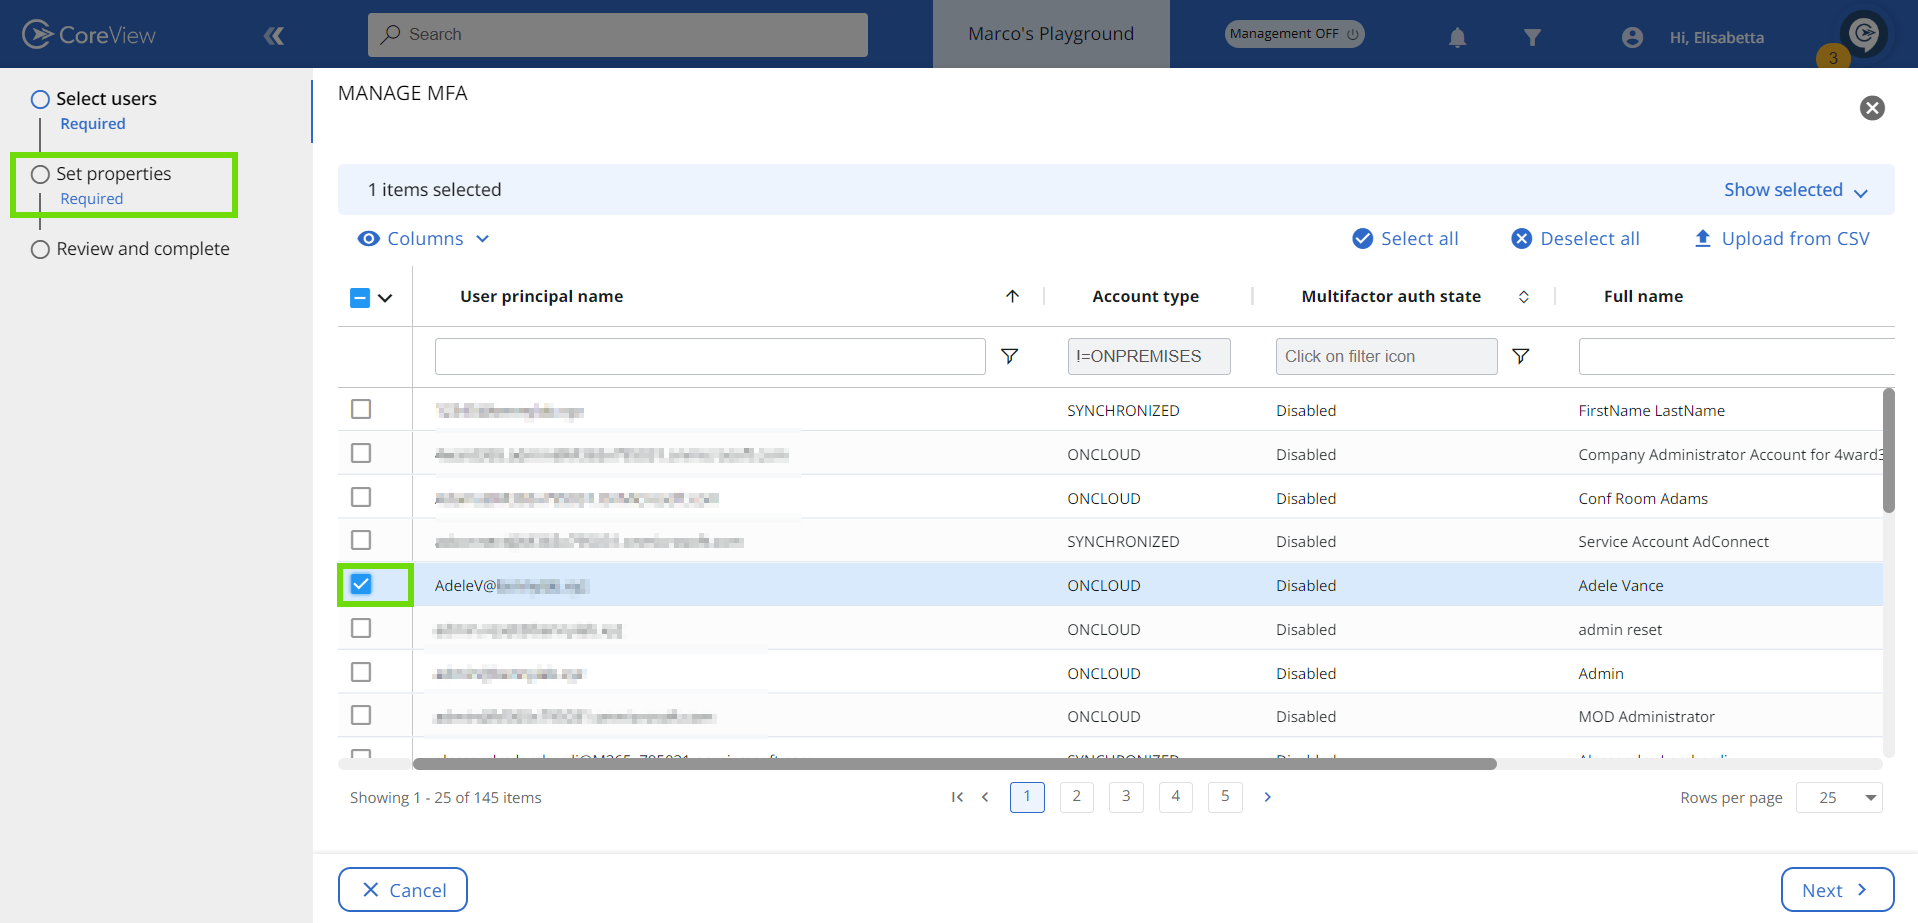
- On the next page select the user(s) for whom you want to enable MFA and click “Next”.
- Under “Authentication info” select “Enabled” from the drop-down menu.
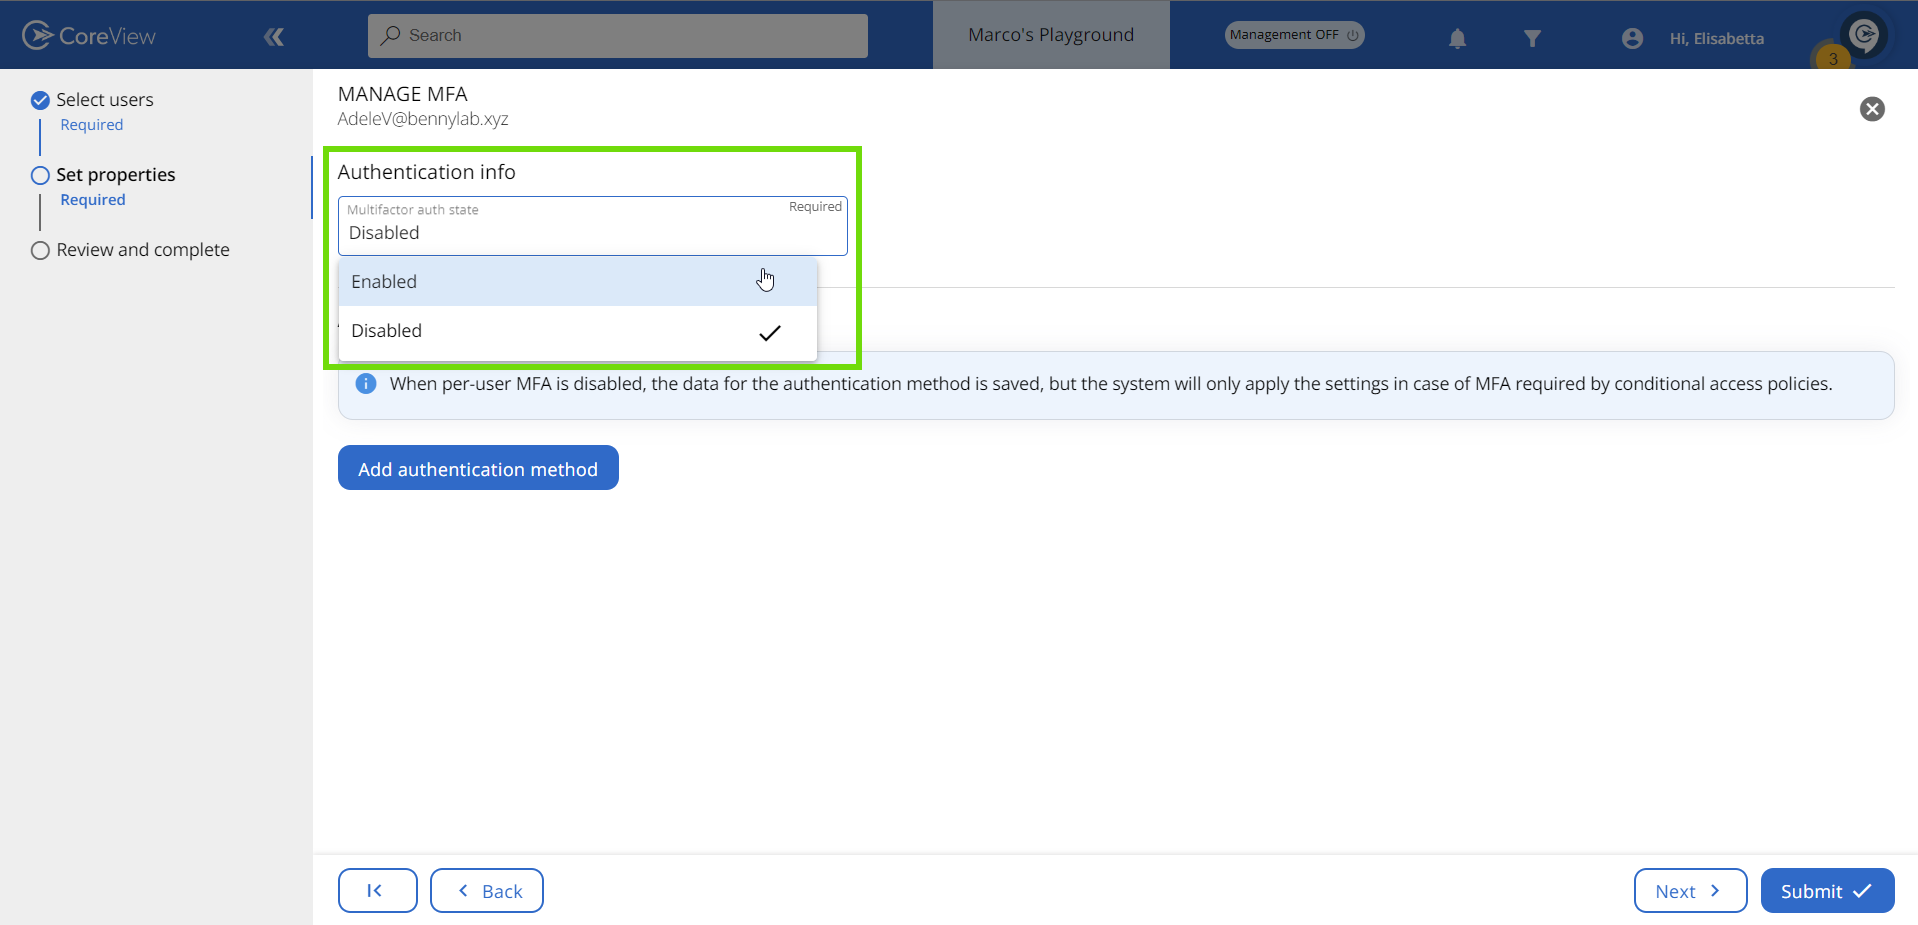
- Click on the “Submit” button to execute the management action.
It's important to note that enabling MFA for a user doesn't automatically enforce MFA. It will only be activated once the user completes the MFA process during their next sign-in to the Office 365 page or app.
What’s the difference between MFA “Enabled” and “Enforced”?
Microsoft Azure Active Directory uses various terms to display the multi-factor authentication (MFA) status for each user. These user status indicators are shown in the Azure portal and are turned off by default.
There are three different MFA states:
- Enabled: the user has been enrolled in MFA but has not completed the registration process. They will be prompted to complete the registration process the next time they sign in.
- Enforced: the user has been enrolled and has completed the MFA registration process. Users transition from the “Enabled” to “Enforced” state automatically once they register for Azure AD MFA.
- Disabled: this is the default state for a new user who has not been enrolled in MFA.
Please note, in the context of enforced MFA user status, certain older non-browser applications, such as Office 2010 or earlier versions, may not support modern authentication protocols. To facilitate MFA for user accounts within these applications, while Azure AD multi-factor authentication remains active, app passwords can serve as an alternative to the user's regular credentials.
To check whether MFA is enabled for a user using CoreView, please refer to the following article: How to check a user's MFA status.
Confusion scenario
Sometimes, you might see a situation where “Enabled” and “Enforced” states seem to act the same. This means the user has MFA turned on and can use it, but their state still shows as “Enabled” instead of “Enforced”.
Explanation
This can happen if you turn off MFA for users after they've finished the registration process, and then turn MFA back on. The registered authentication method is still there, but the user didn't go through the MFA registration process again.
To change the user status to “Enforced”, you have two options:
- An admin can forcefully change the status to “Enforced” from the portal.
- You can ask the user to register their authentication methods again from the portal.
Understanding how to enable MFA in Office 365
You can turn on multi-factor authentication in Azure AD in several ways. The best method for you depends on your situation and the type of Microsoft 365 license you have.
- Enable Azure multi-factor authentication by changing user states.
- Enabling Azure multi-factor authentication with Security Defaults. If you would like to learn how to turn on security defaults, you can read this article from Microsoft.
- Enabling Azure multi-factor authentication with a Conditional Access policy. For more details on Azure AD multi-factor authentication, check out Microsoft's documentation.
How to enable MFA for Office 365 users via Powershell
- Connect to the service: Connect-MsolService
- Create a “StrongAuthenticationRequirement” object with the required parameters:
$sa = New-Object -TypeName Microsoft.Online.Administration.StrongAuthenticationRequirement
$sa.RelyingParty = “*”
$sa.State = “Enabled”
$sar = @($sa)- Enable MFA for the user:
Set-MsolUser -UserPrincipalName $user -StrongAuthenticationRequirements $sarViewing multi-factor authentication user states
How to view MFA user states in the Azure Portal
- After signing in to the Azure portal, either search for or click on “Azure Active Directory” from the main menu.
- In the left navigation, select “Users > All users”.
- Select “Multi-factor authentication” from the top menu.
- A new page will open, displaying the user name and MFA user status.
How to generate a report on users and their MFA status using CoreView
- Log in to the CoreView portal
- Under the “Analyze” tab, go to “Users Report”
- Under “Columns”, choose “Multifactor auth state” and click “Apply”.
- The “Multifactor auth state” column will show if the user has MFA turned on, enforced, or turned off.
For more details, please refer to the link: How to check a user's MFA status.