With the Partner App , you can add and manage new customers by activating their onboarding processes and handling their subscription statuses. This article covers the main onboarding and customer management features:
- Add new customers
- Monitor customer onboarding and import
- Convert a customer to a "Production" account
- Edit customers' SKUs and expiration dates
Add new customers
To create a customer, you can use the “Add customer” option, found under the “Action” menu on the “Customers” page.

When initiating the process, you have to provide the following information:
- Organization name: enter the name of the customer's organization.
- Notification email: specify the email address where the CoreView activation link will be sent.
- SKU assignment: set the SKU to be assigned to the customer. One SKU must be selected.
- Add-on assignment: optionally, set the add-on to be assigned to the customer.
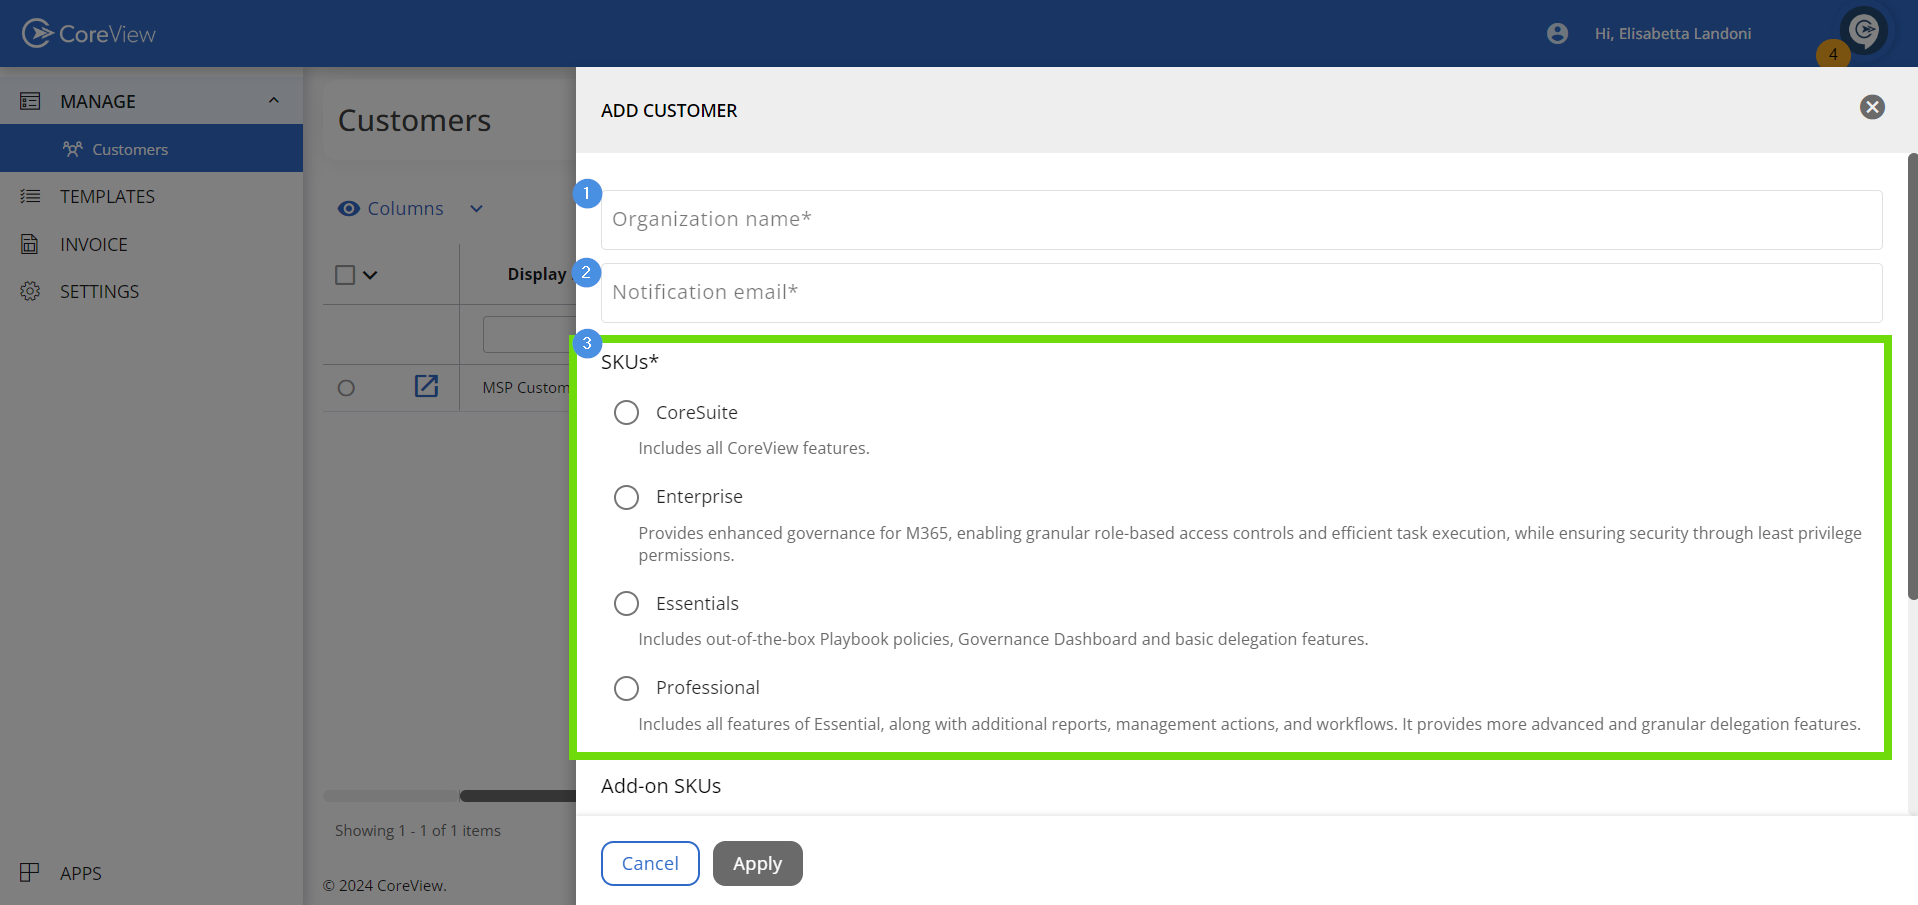

Once all the required details are entered, click the “Apply” button to create the customer tenant and send the activation link to the specified email address.
The customer tenant is initially created as a TRIAL account on CoreView and will be upgraded to production after two weeks.
Monitor customer onboarding
After adding a customer, it will appear in the “Pending customers” tab. This tab provides a location to monitor customer onboarding progress and perform necessary actions.

Here's what you can do from the “Pending customer” tab:
Copy activation link
in the first column of the table, you can find a button to copy the activation link.
This link can be shared with the customer to initiate the onboarding process, for example by sent it via email.
Monitor import status
The “Import errors” and “Event log messages” columns are particularly useful for troubleshooting any potential errors that may occur during the onboarding process.
These columns provide valuable insights into the progress and status of the import. If any issues arise, you can identify them promptly and take appropriate action.
Once the onboarding process is completed successfully, the customer will be moved to the “Customers” tab.
Manage the TRIAL period
Once the customer is onboarded, they will enter a 14-day TRIAL period.
After the 14 days have passed, the customer's account will automatically transition to PRODUCTION. Here’s what you can do to manage this transition period.
Extend the TRIAL period
You can extend your customer's trial to grant them an additional 14-day evaluation period.
Simply follow these steps:
- Navigate to “Manage > Customers” in the side panel menu.
- Click on “Actions > + Extend trial”.
- The system will calculate and display the extended expiration date.
- Click “Submit” to accept changes.
Prevent the automatic upgrade
After the trial period, the account will automatically upgrade to PRODUCTION status. You'll be notified by email before this change occurs.
You can prevent the account from being automatically upgraded using the “Manage subscription upgrade” option.
Convert a customer to a PRODUCTION account
To manually convert a customer to a PRODUCTION account use the “Convert to production account” action.
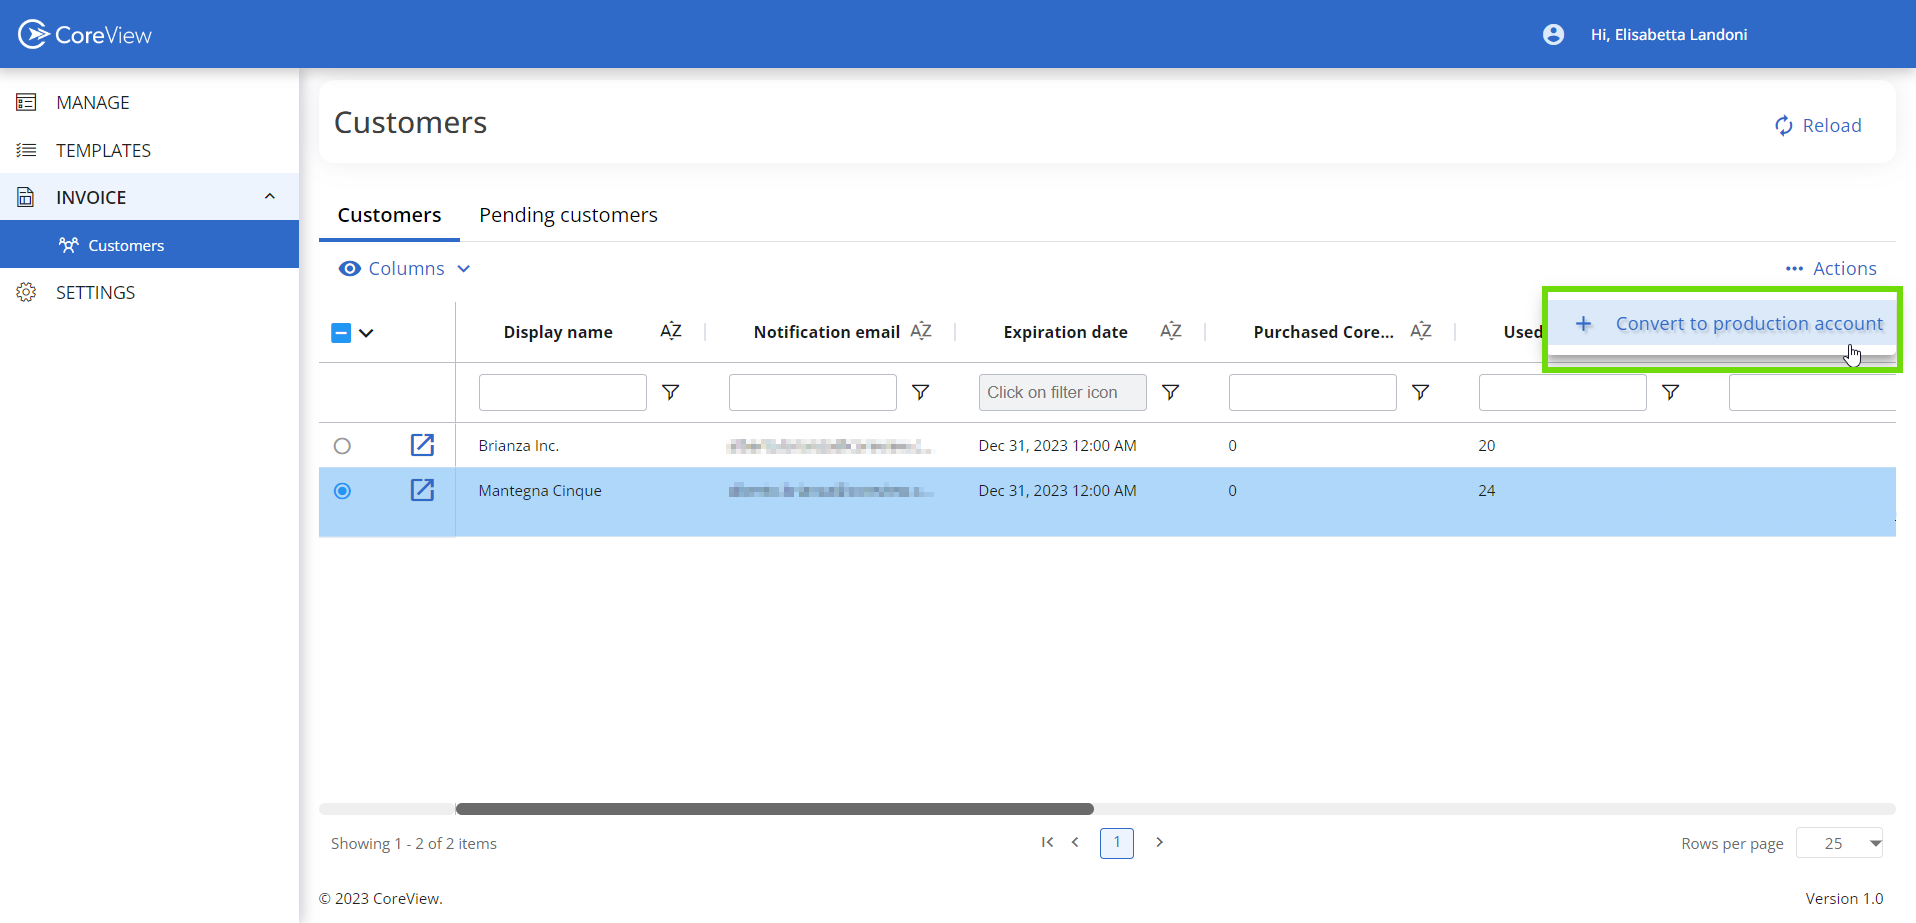
Here are the steps:
- Select the customer (the “Source” field must equal “MSP”).
- From the action menu, choose “Convert to production account”.
- In the panel that opens, you can set a new expiration date and modify the SKUs associated with the customer.

By converting a customer to a PRODUCTION account, you extend their access beyond the trial period and grant them full access to CoreView's features and capabilities.