In this tutorial, you'll learn how to fetch a specific range of events from your calendar by leveraging the Microsoft Graph API. This involves making an HTTP GET request to the Graph API endpoint, targeting a particular date and time range.
Prerequisites
- Microsoft 365 account: you need a Microsoft 365 account with access to an Outlook calendar.
-
Permissions: the requesting account must have the
Calendars.Readpermission in Microsoft Graph. - Access token: you'll need an access token with the appropriate permissions for authentication. This can be obtained through OAuth 2.0.
Refer to the Microsoft Graph permissions documentation for more details on permissions and access tokens.
Execution inputs
Before you start, make sure you have the following information ready:
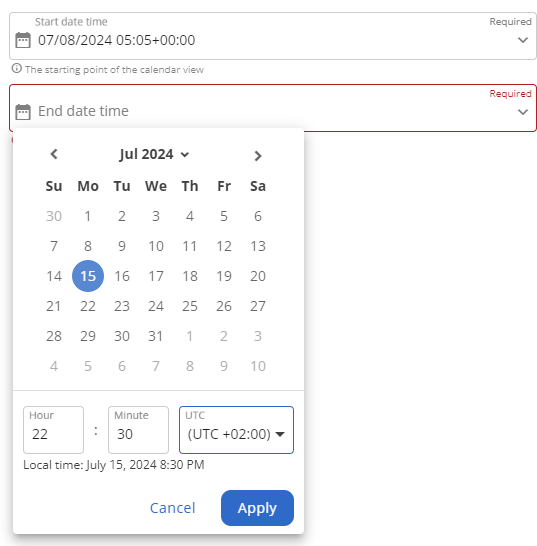
- StartDateTime: the start date and time of the calendar view.
- EndDateTime: the end date and time of the calendar view.
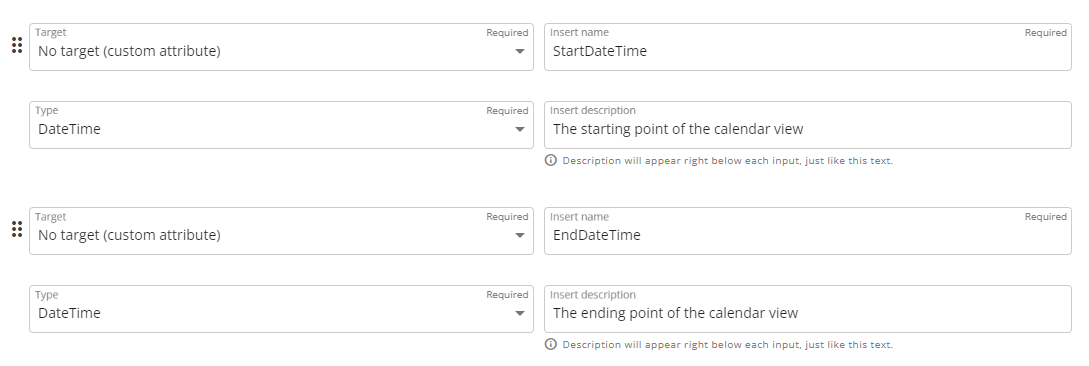
Both execution inputs should be in DateTime format.
Retrieving the calendar view
Step 1: Set up the action
Add a new action to your Workflow. Navigate to the “HTTP Integrations” category and select the “HTTP API GET” action to begin retrieving your calendar view for the specified time range.

Step 2: Setting up the HTTP GET request
URL configuration
Use the URL format below for your request:
https://graph.microsoft.com/v1.0/me/calendarview?startdatetime={startDateTime}&enddatetime={endDateTime}Replace {startDateTime} and {endDateTime} with your actual execution inputs. This URL includes query parameters to define your calendar view's desired time range.

Secret key
Include the secret key for Graph API authorization.

For more information about the secret key, please refer to the Sending a POST request article.
Post-retrieval actions
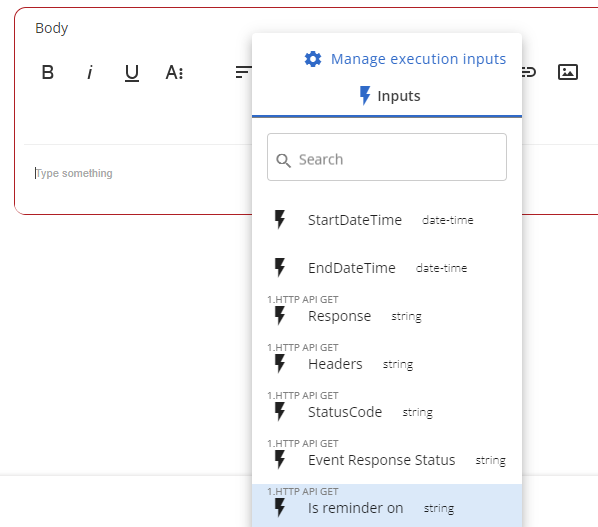
Once your request is sent, you will receive a response that includes:
- StatusCode: indicates whether your request was successfully received and understood.
- Response: the actual data returned, typically in JSON format.
- Headers: additional information about your response.
The response data can be used as input for other actions within the same Workflow through dynamic mappings.
For our calendar request, the response from the Graph API might look like this:
{
  "value": [
    {
      "originalStartTimeZone": "Pacific Standard Time",
      "originalEndTimeZone": "Pacific Standard Time",
      "responseStatus": {
        "response": "accepted",
        "time": "2016-10-19T10:37:00Z"
      },
      "iCalUId": "C3F49BB4B7D7EEE4304DA",
      "reminderMinutesBeforeStart": 15,
      "isReminderOn": true
    }
  ]
}
So, the dynamic mapping would be:

In the “Path name” field, the response must be entered with a capital “R” to ensure a successful output.
You can utilize this data in subsequent actions:
Executing the Workflow
After setting up the action, save and publish your Workflow. When you run it, you'll need to provide the previously defined execution inputs.