Reverting changes made during app registration in Microsoft Entra can be managed through Simeon Cloud. This process ensures that any modifications can be undone with minimal hassle, maintaining your system's integrity.
Here's a step-by-step guide on how to use Simeon Cloud for this purpose.
Backing up current configuration
Before proceeding with the creation of a new registered app, the initial step involves backing up the current configuration.
Before creating a new App
- Log into Simeon Cloud and select “Sync” in left menu.
- Click the “Sync” icon (double arrows) to start the Sync process.
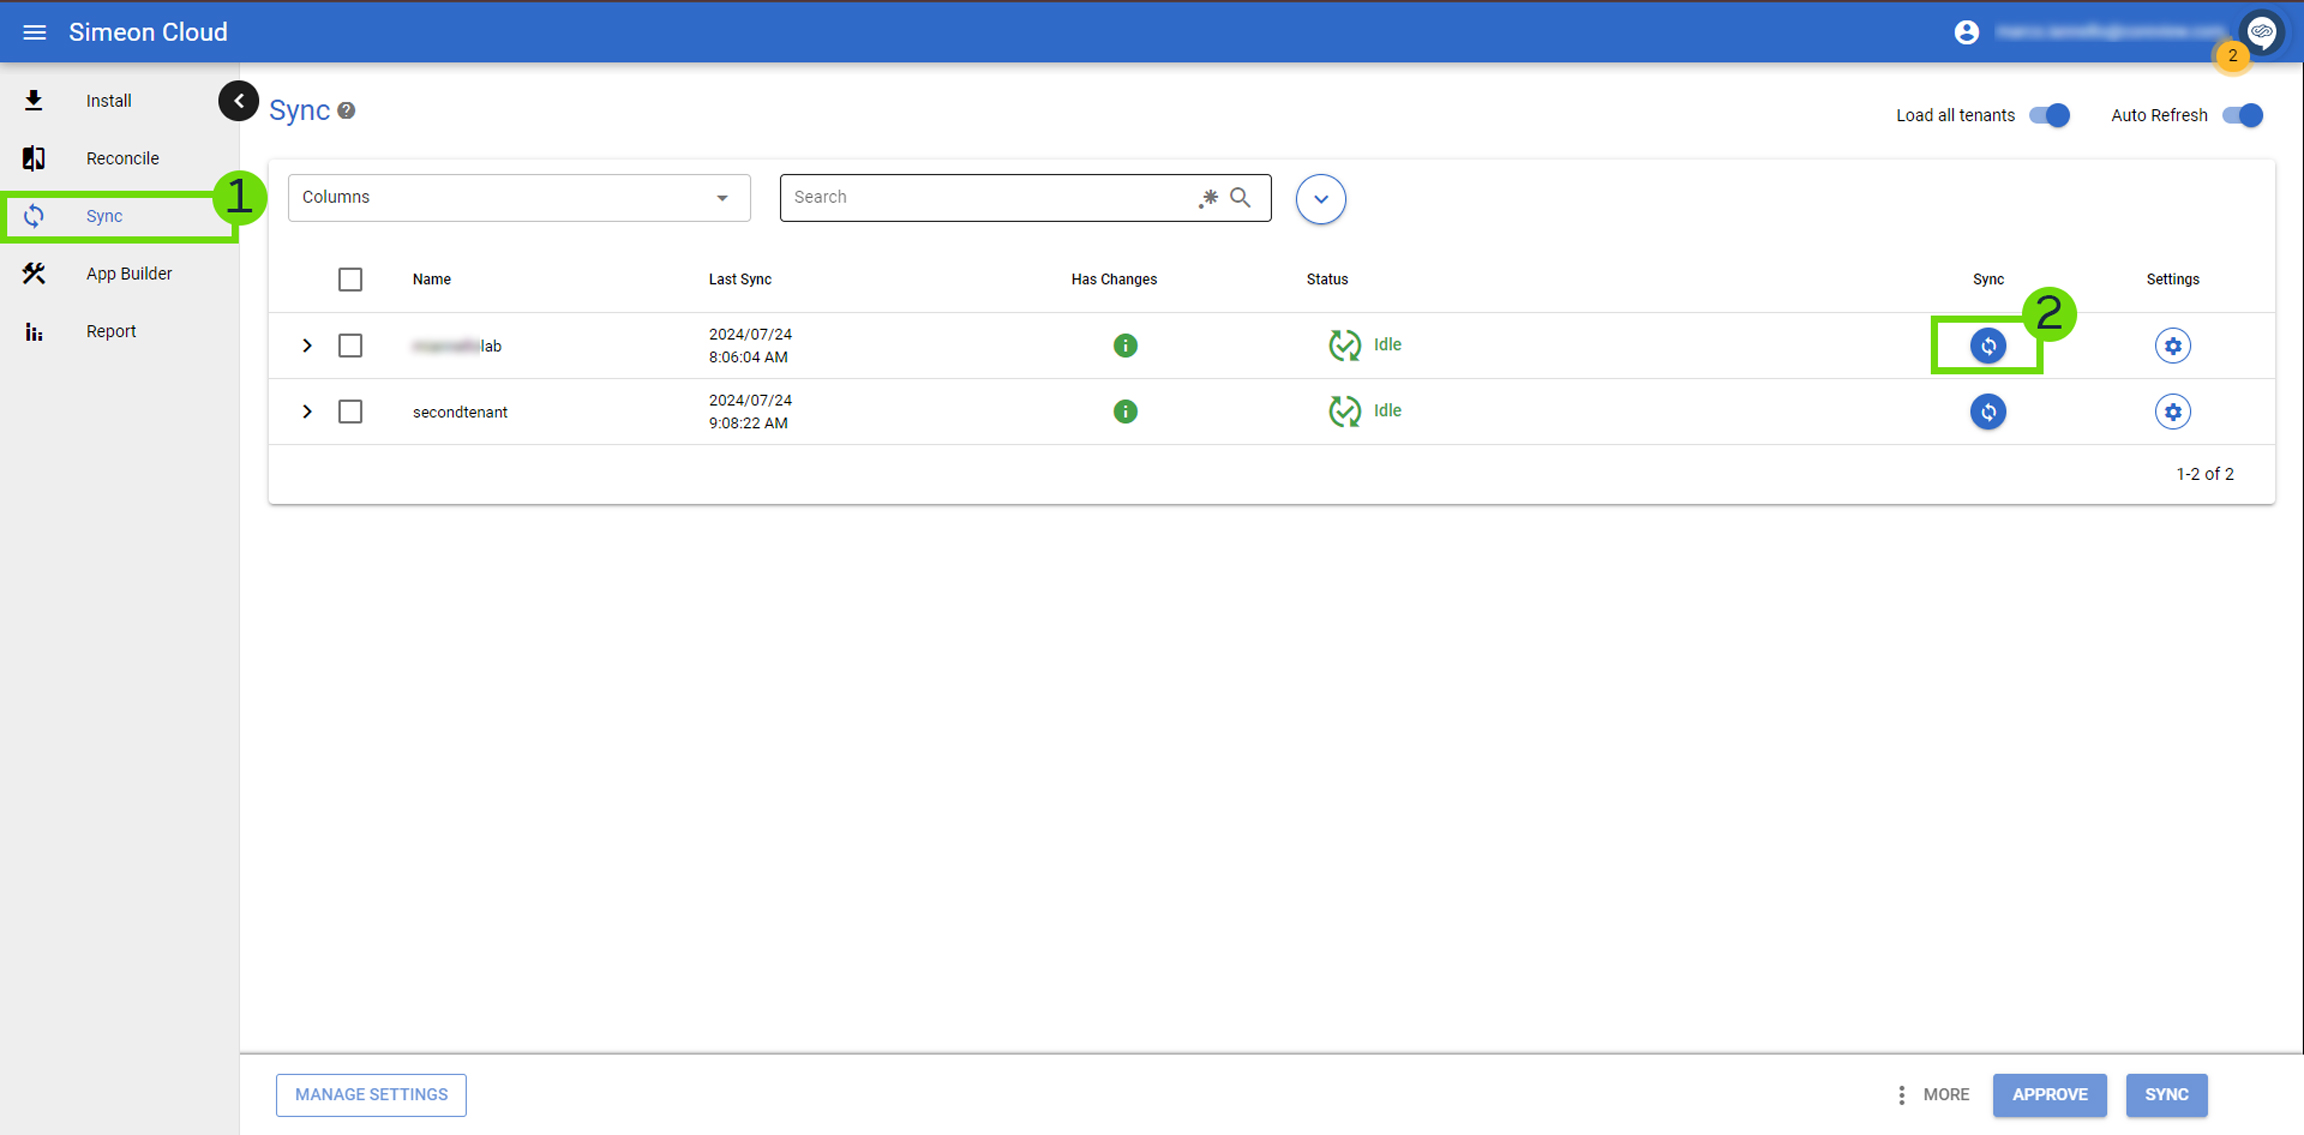
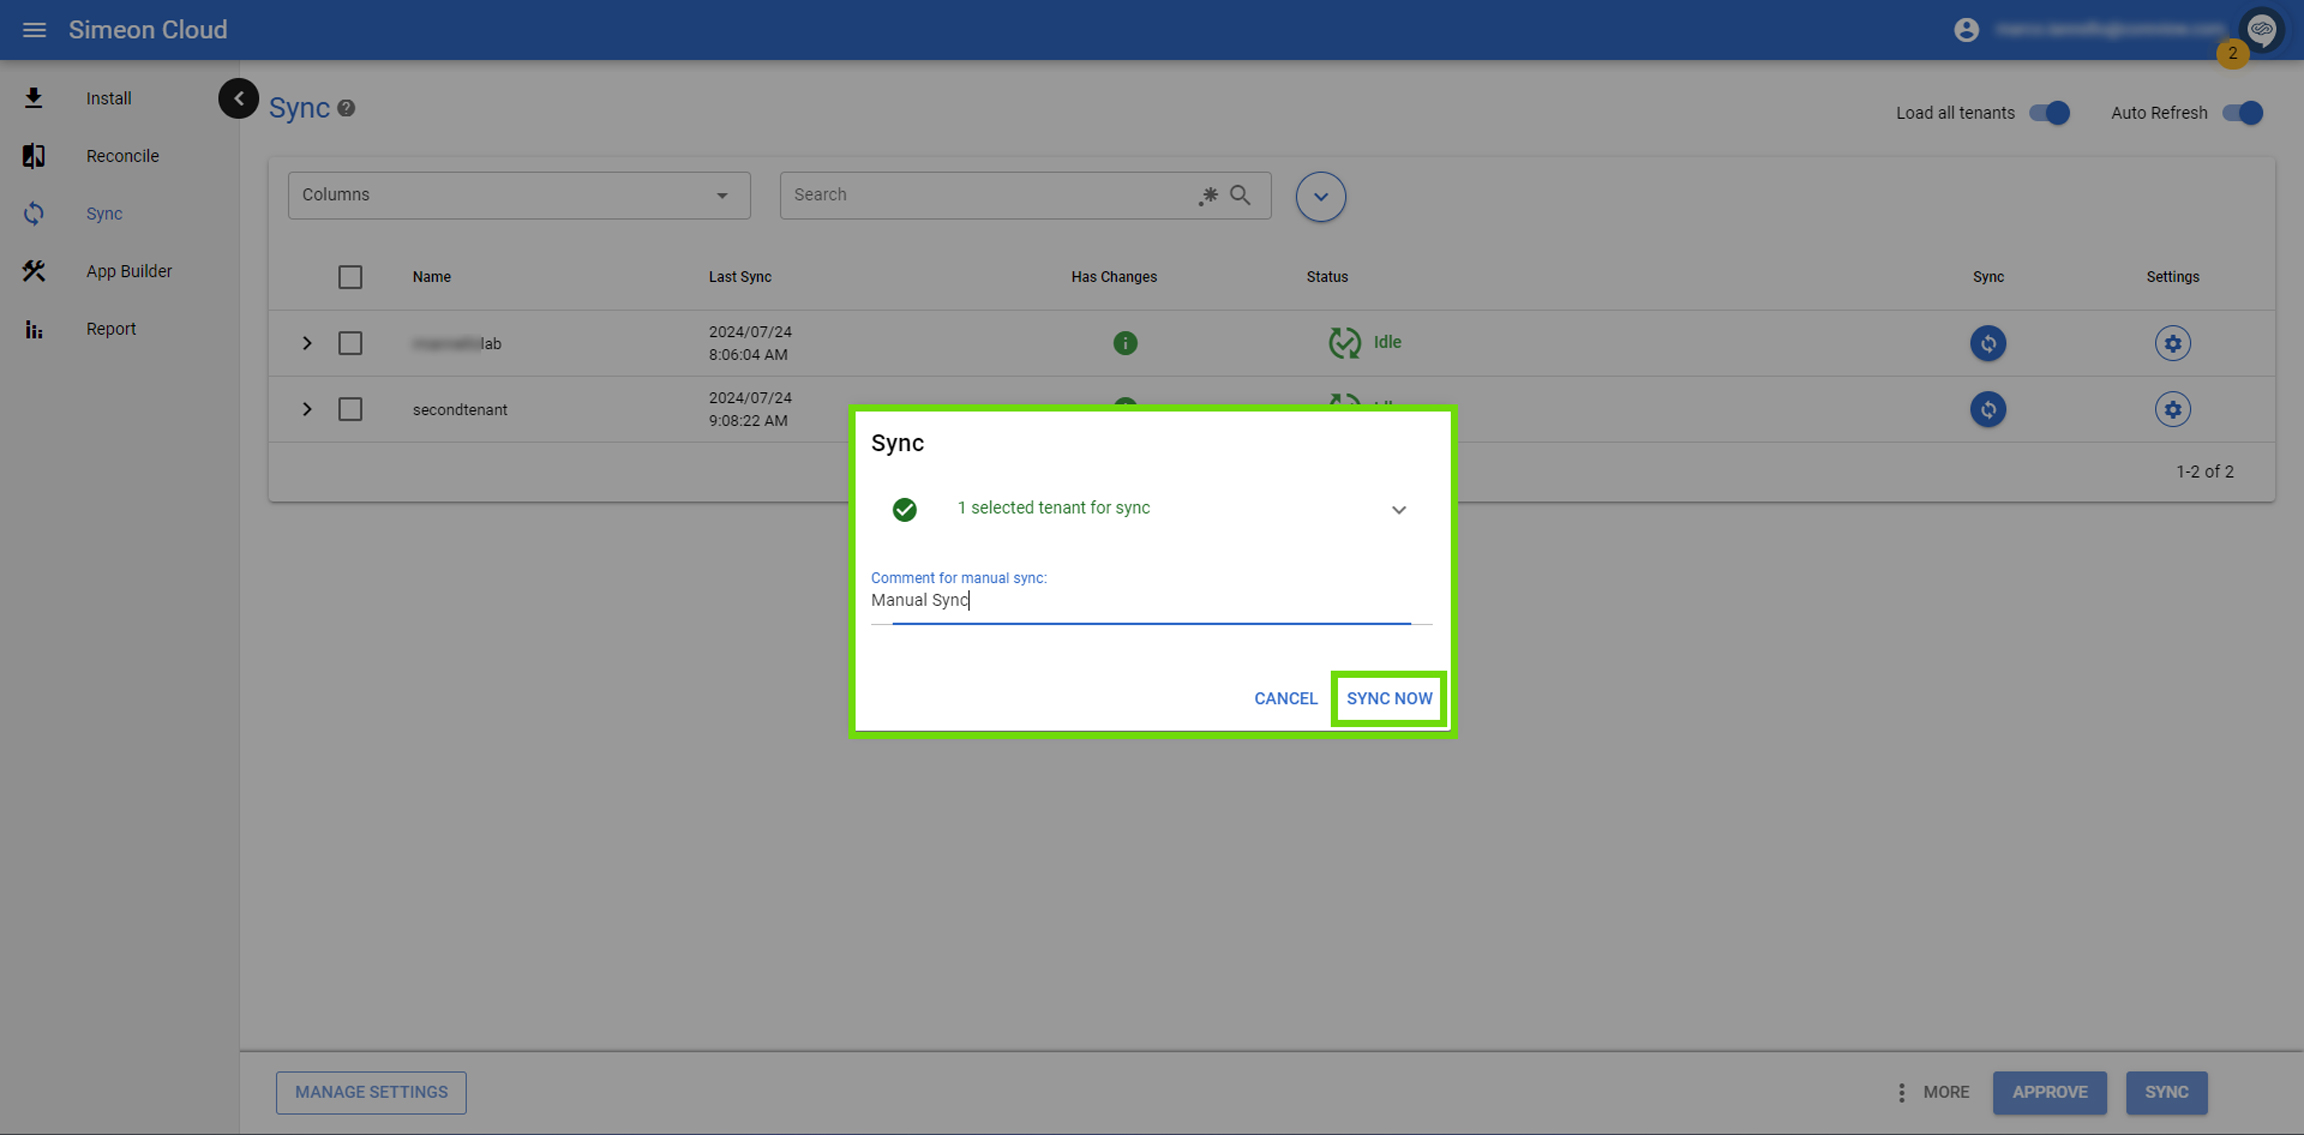
- Insert a comment for the backup if needed.
- Click on “Sync now” to create a backup of your current configuration.
Creating an App in Entra ID
Follow the provided steps to create an app in Entra.
Restoring the tenant configuration with Simeon Cloud
If needed, return to Simeon Cloud to revert your tenant to its state prior to the app's creation.
Step 1: access Reconcile
To start the Reconcile process:
- Click on “Reconcile” in the left menu in Simeon Cloud.
- Select your tenant.

Step 2: select the backup to restore
In the Reconcile page:
- Click on the down arrow.
- Select the same tenant from the list.

- Select the version of the backup you created before the app was made.

- Select “Apply” to confirm.

Step 3: review recent changes
- Click on “Entra ID > App Registrations” to view recent changes.
Please, note that the same operation can be formed in Entra ID > Enterprise Applications

- Uncheck the specific changes you want to revert, such as the creation of the new app and any associated permissions: e.g. “Entra ID > App Registrations”

- Click “Reconcile” to to revert the selected changes.
Once the reconciliation process is complete, it is time to proceed with Sync.

Step 4: Sync the Reverted Configuration
Step 5: approve the changes
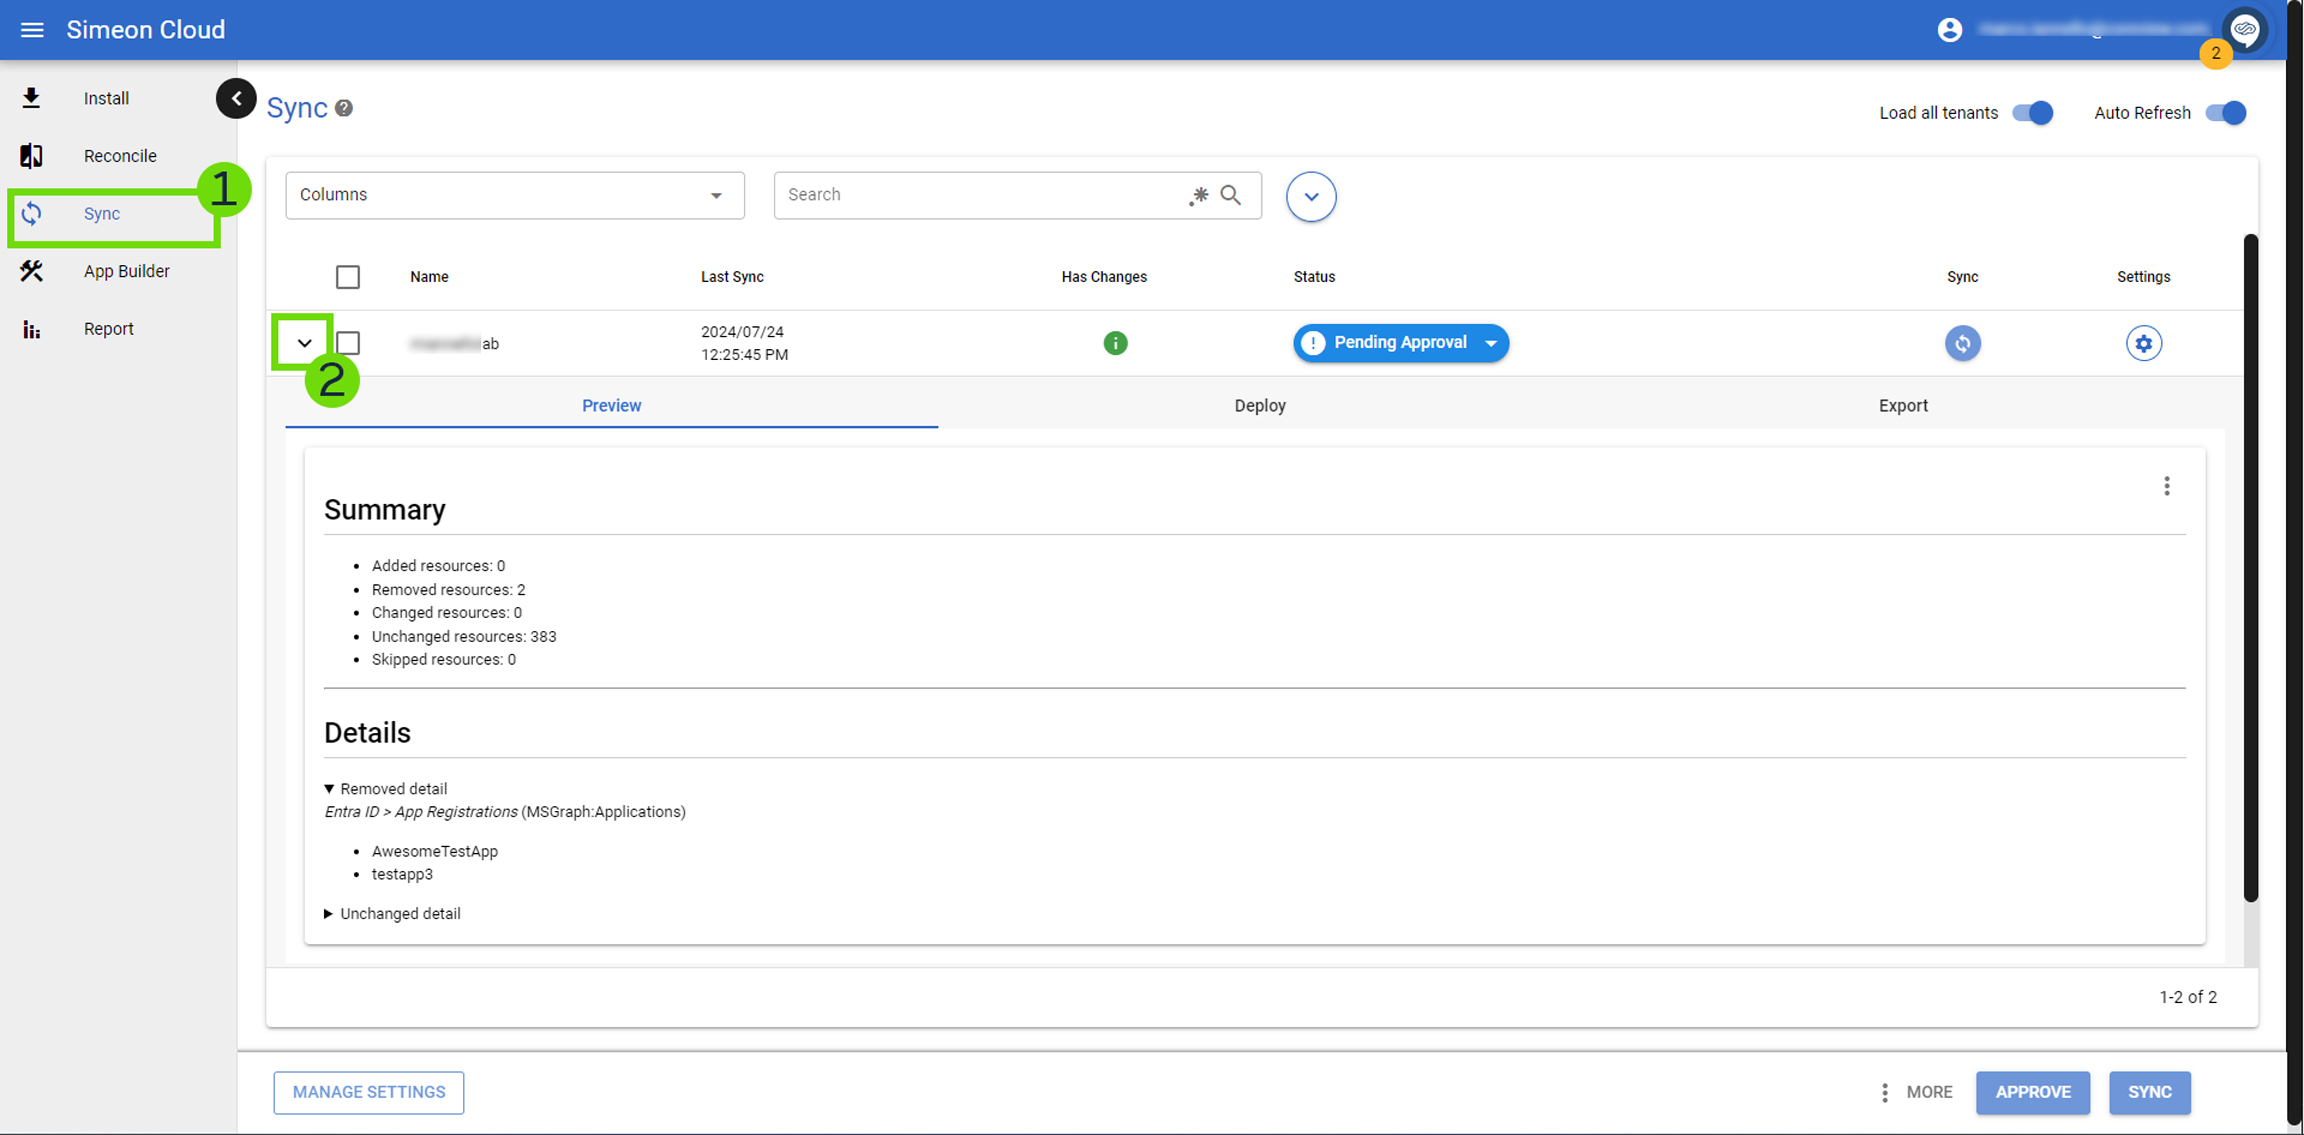
- Review the changes that have been found.
- If the changes are correct, click on the “Pending Approval” button and then on “Approve”.
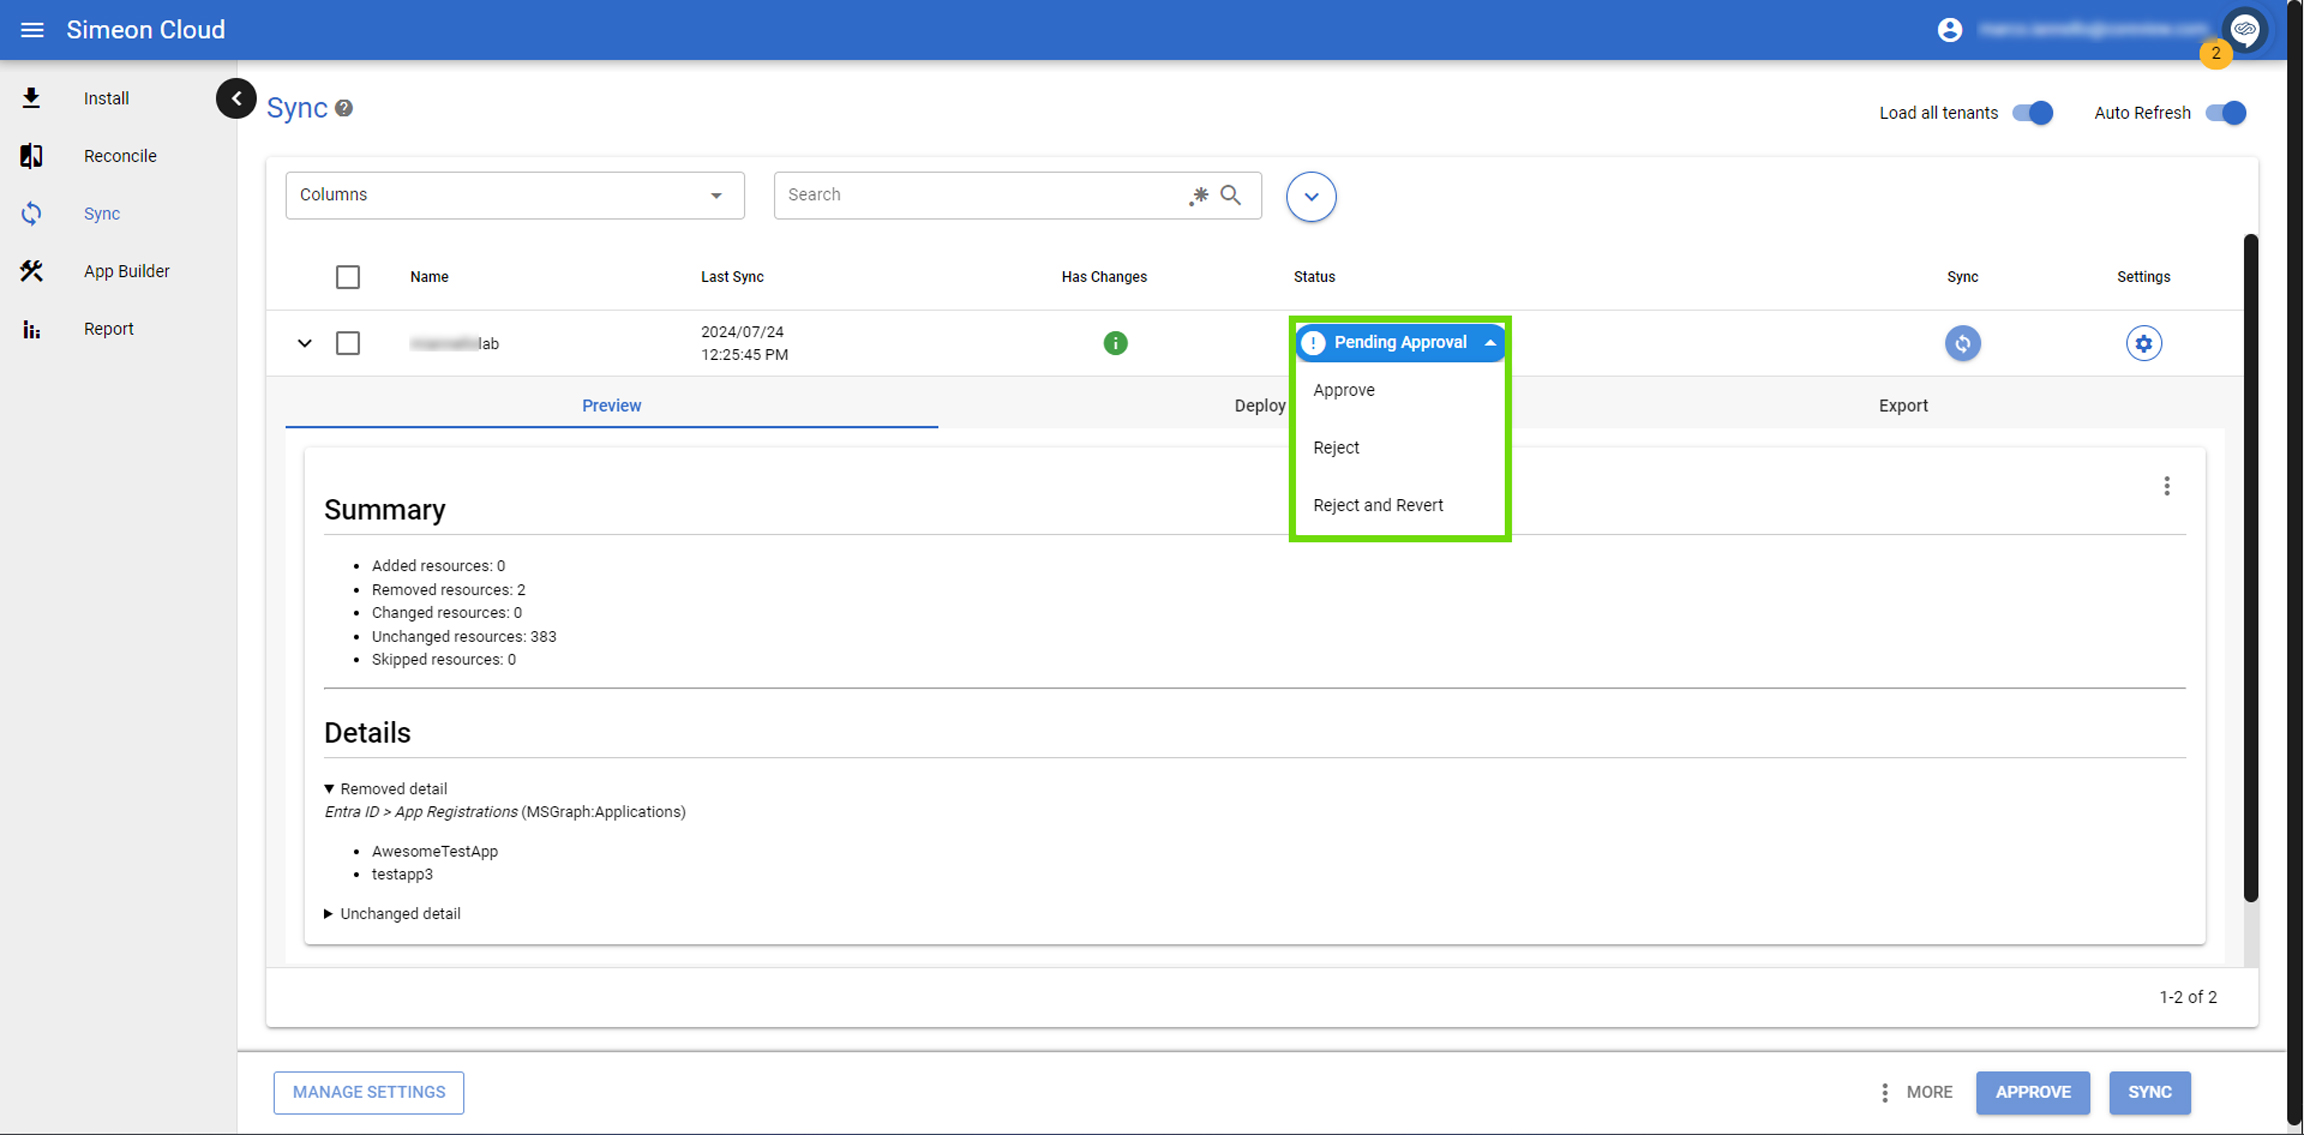
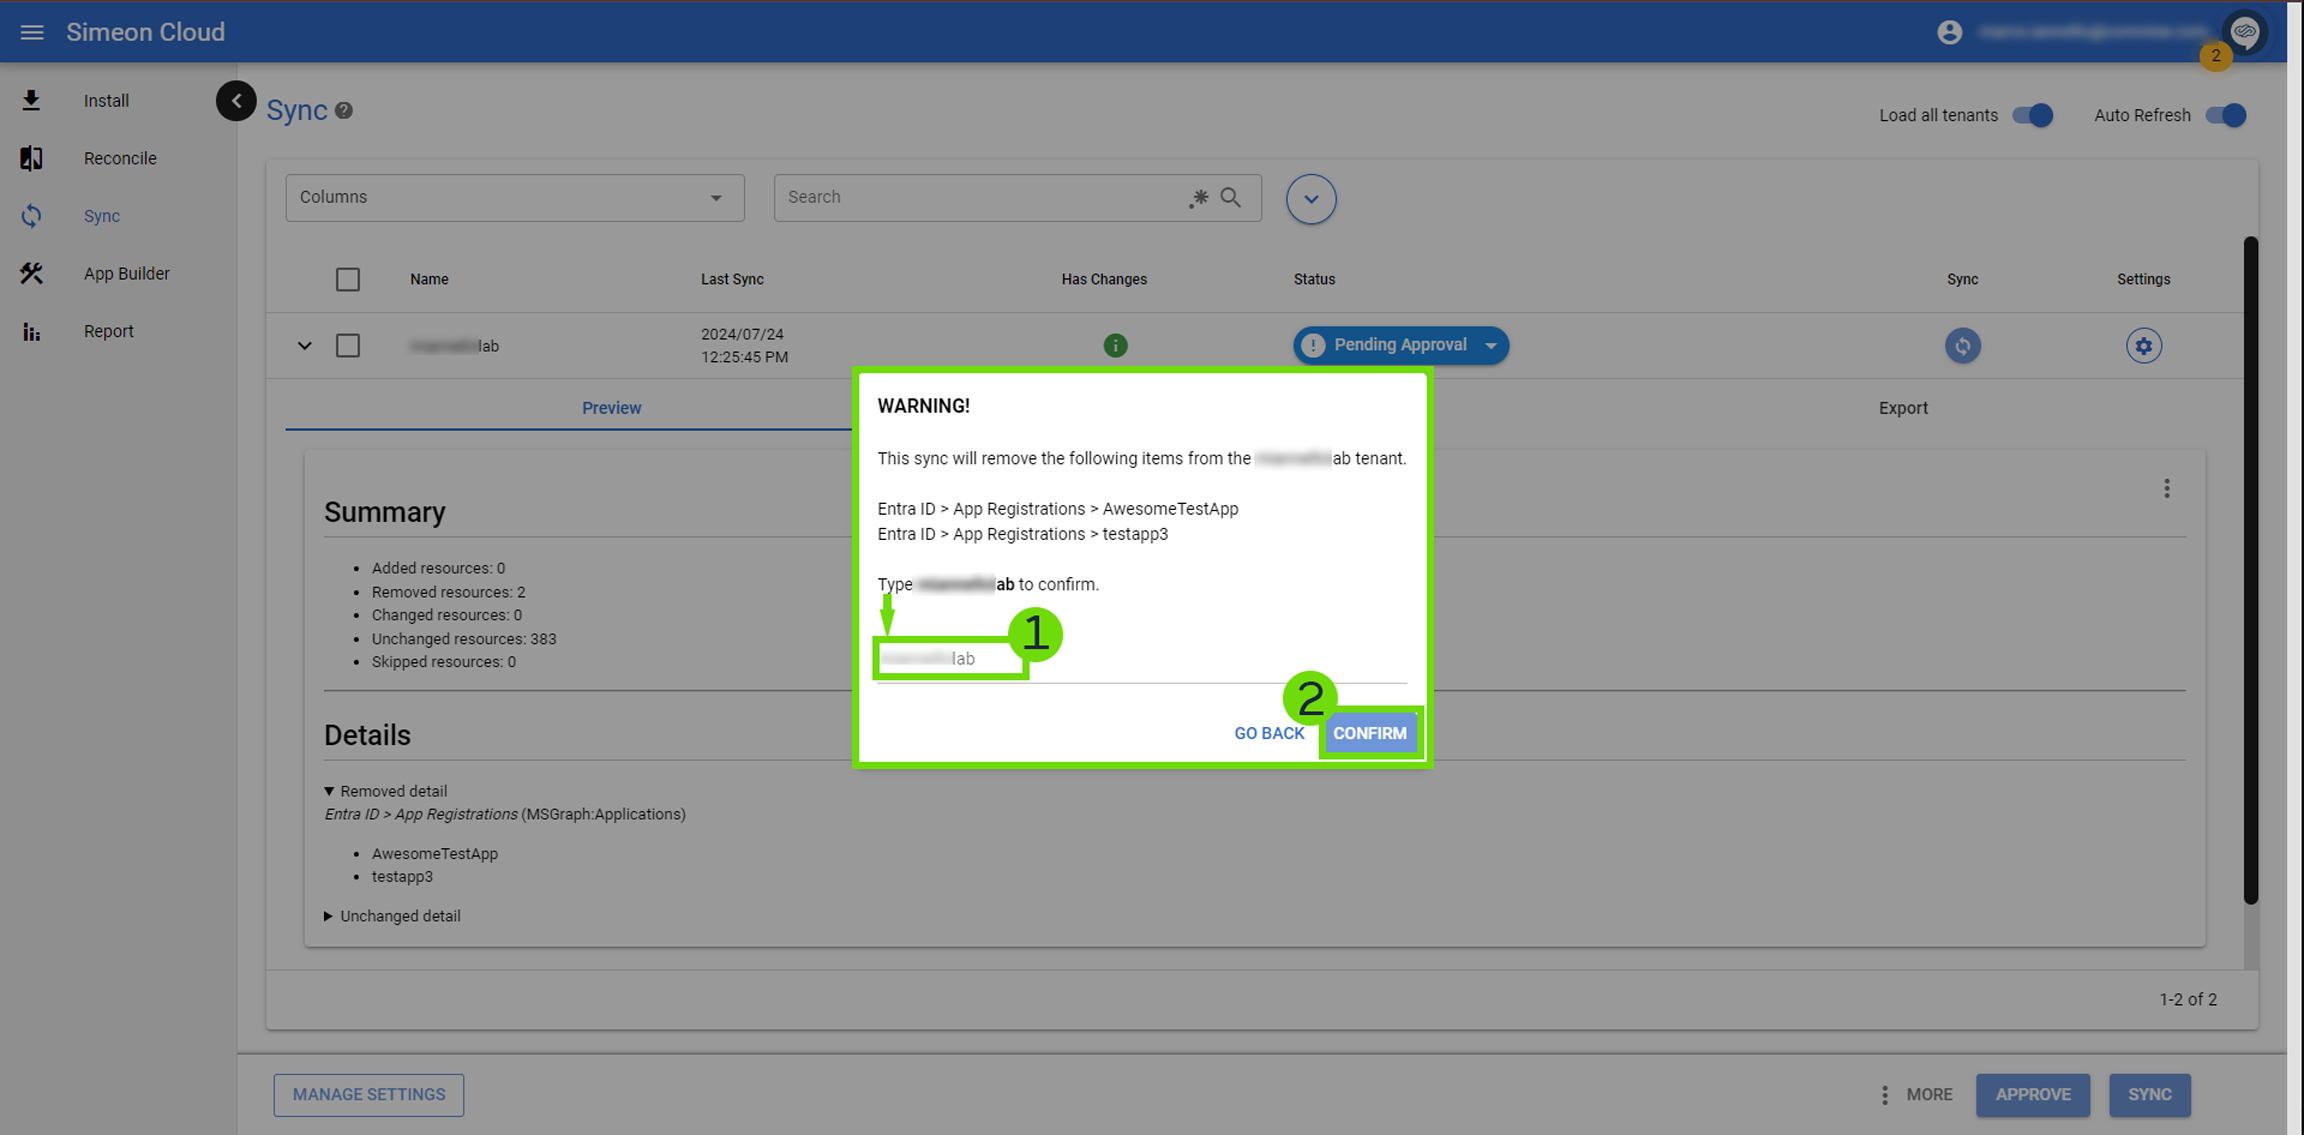
- Select “Approve”:

- Type your tenant name in the confirmation box (step 1 in picture below). Here, you will also see the changes that will occur in your tenant once the synchronization is complete.
- Click on “Confirm” to finalize the approval (step 2 in picture below).
Monitoring the Sync Process
Step 1: check Sync status
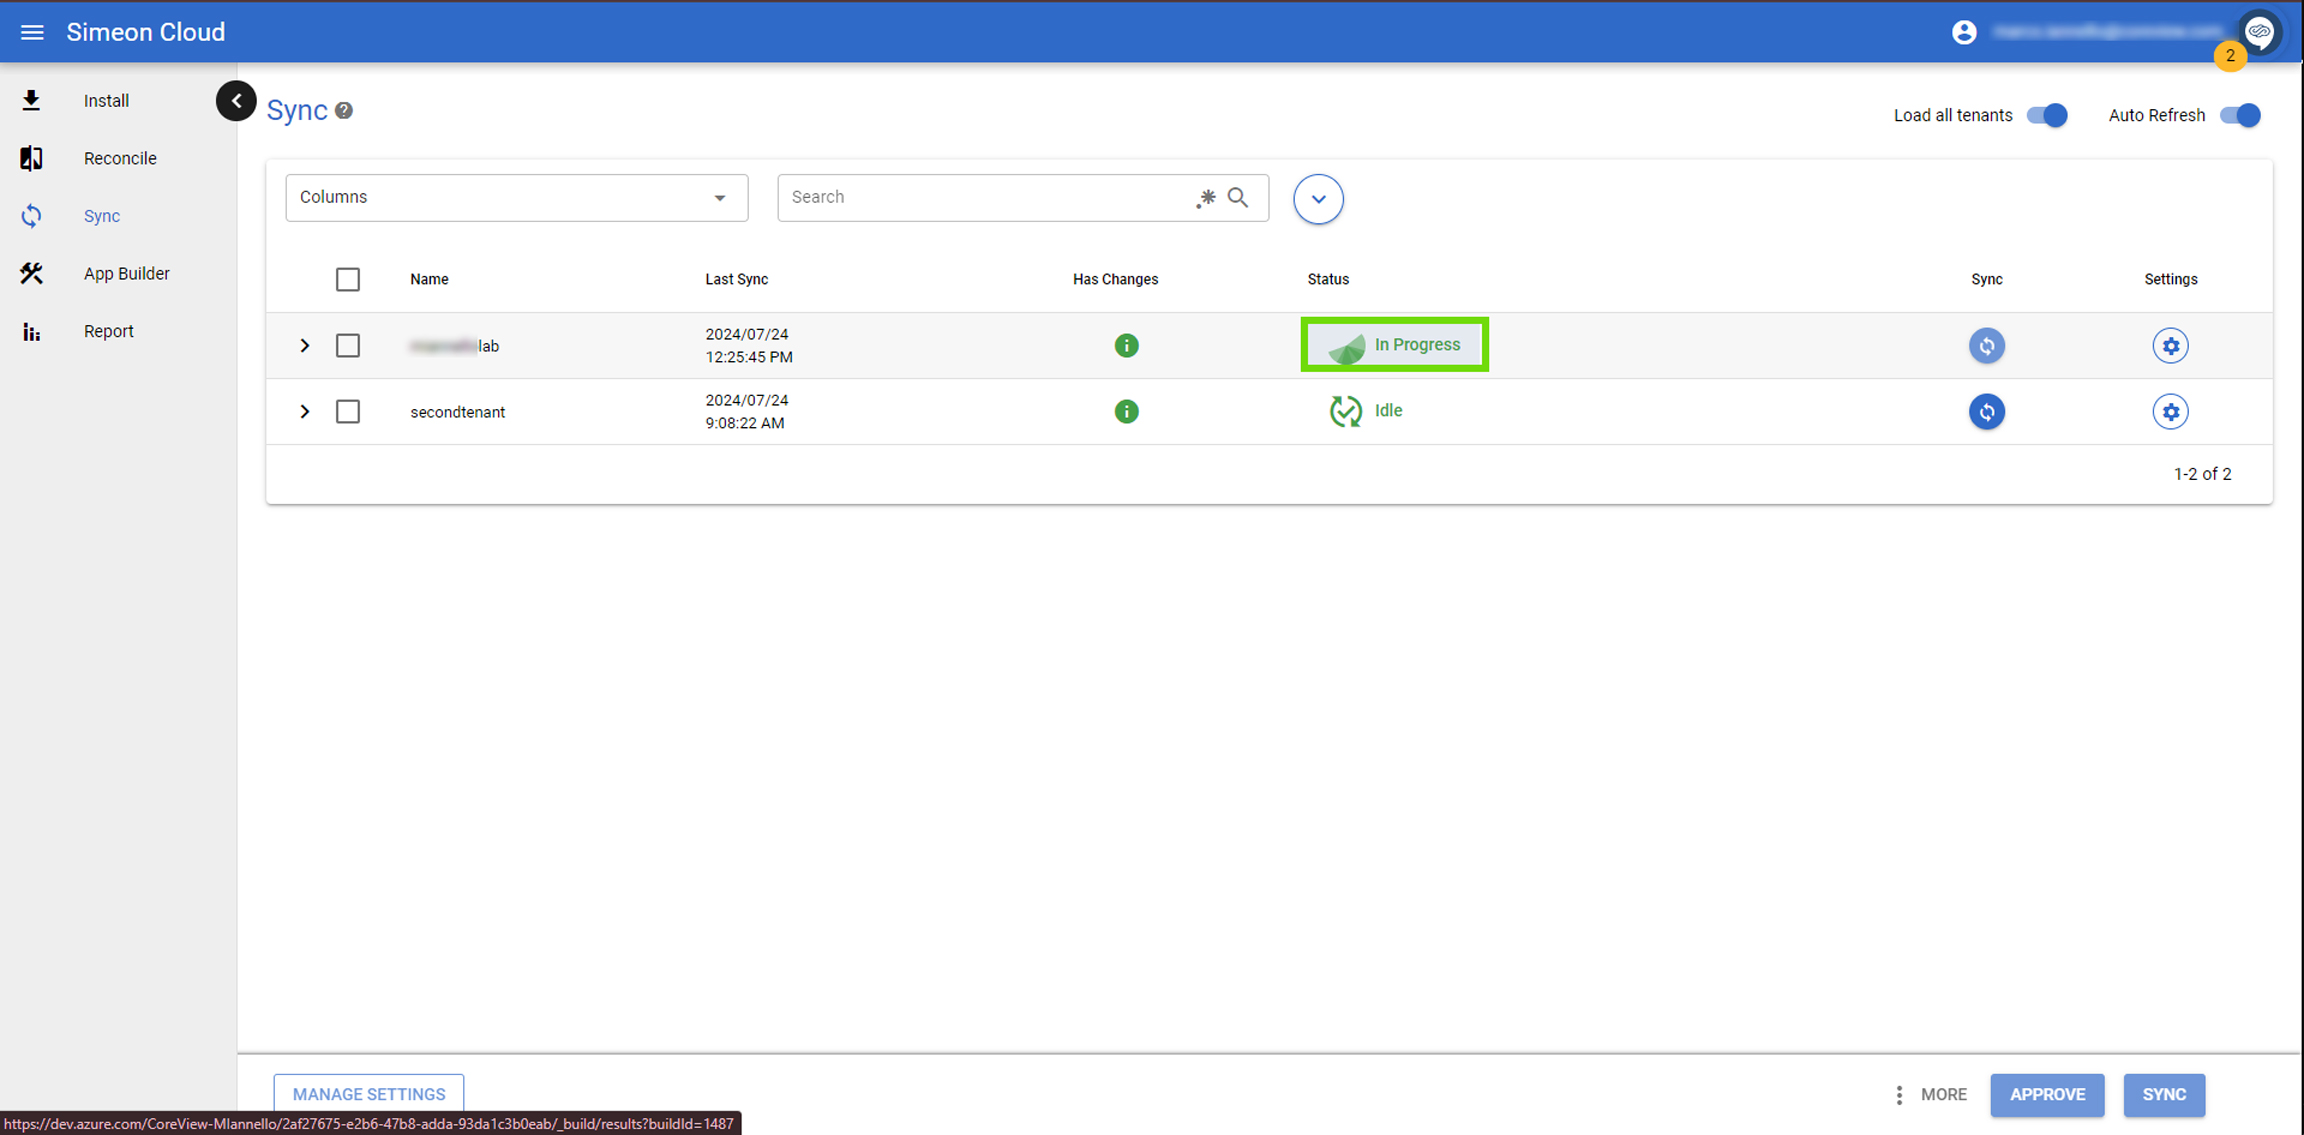
In the sync section, under status, you will see “In progress”: this means everything is going as expected.
- Click on this status, and Simeon will redirect you to your Azure DevOps environment.
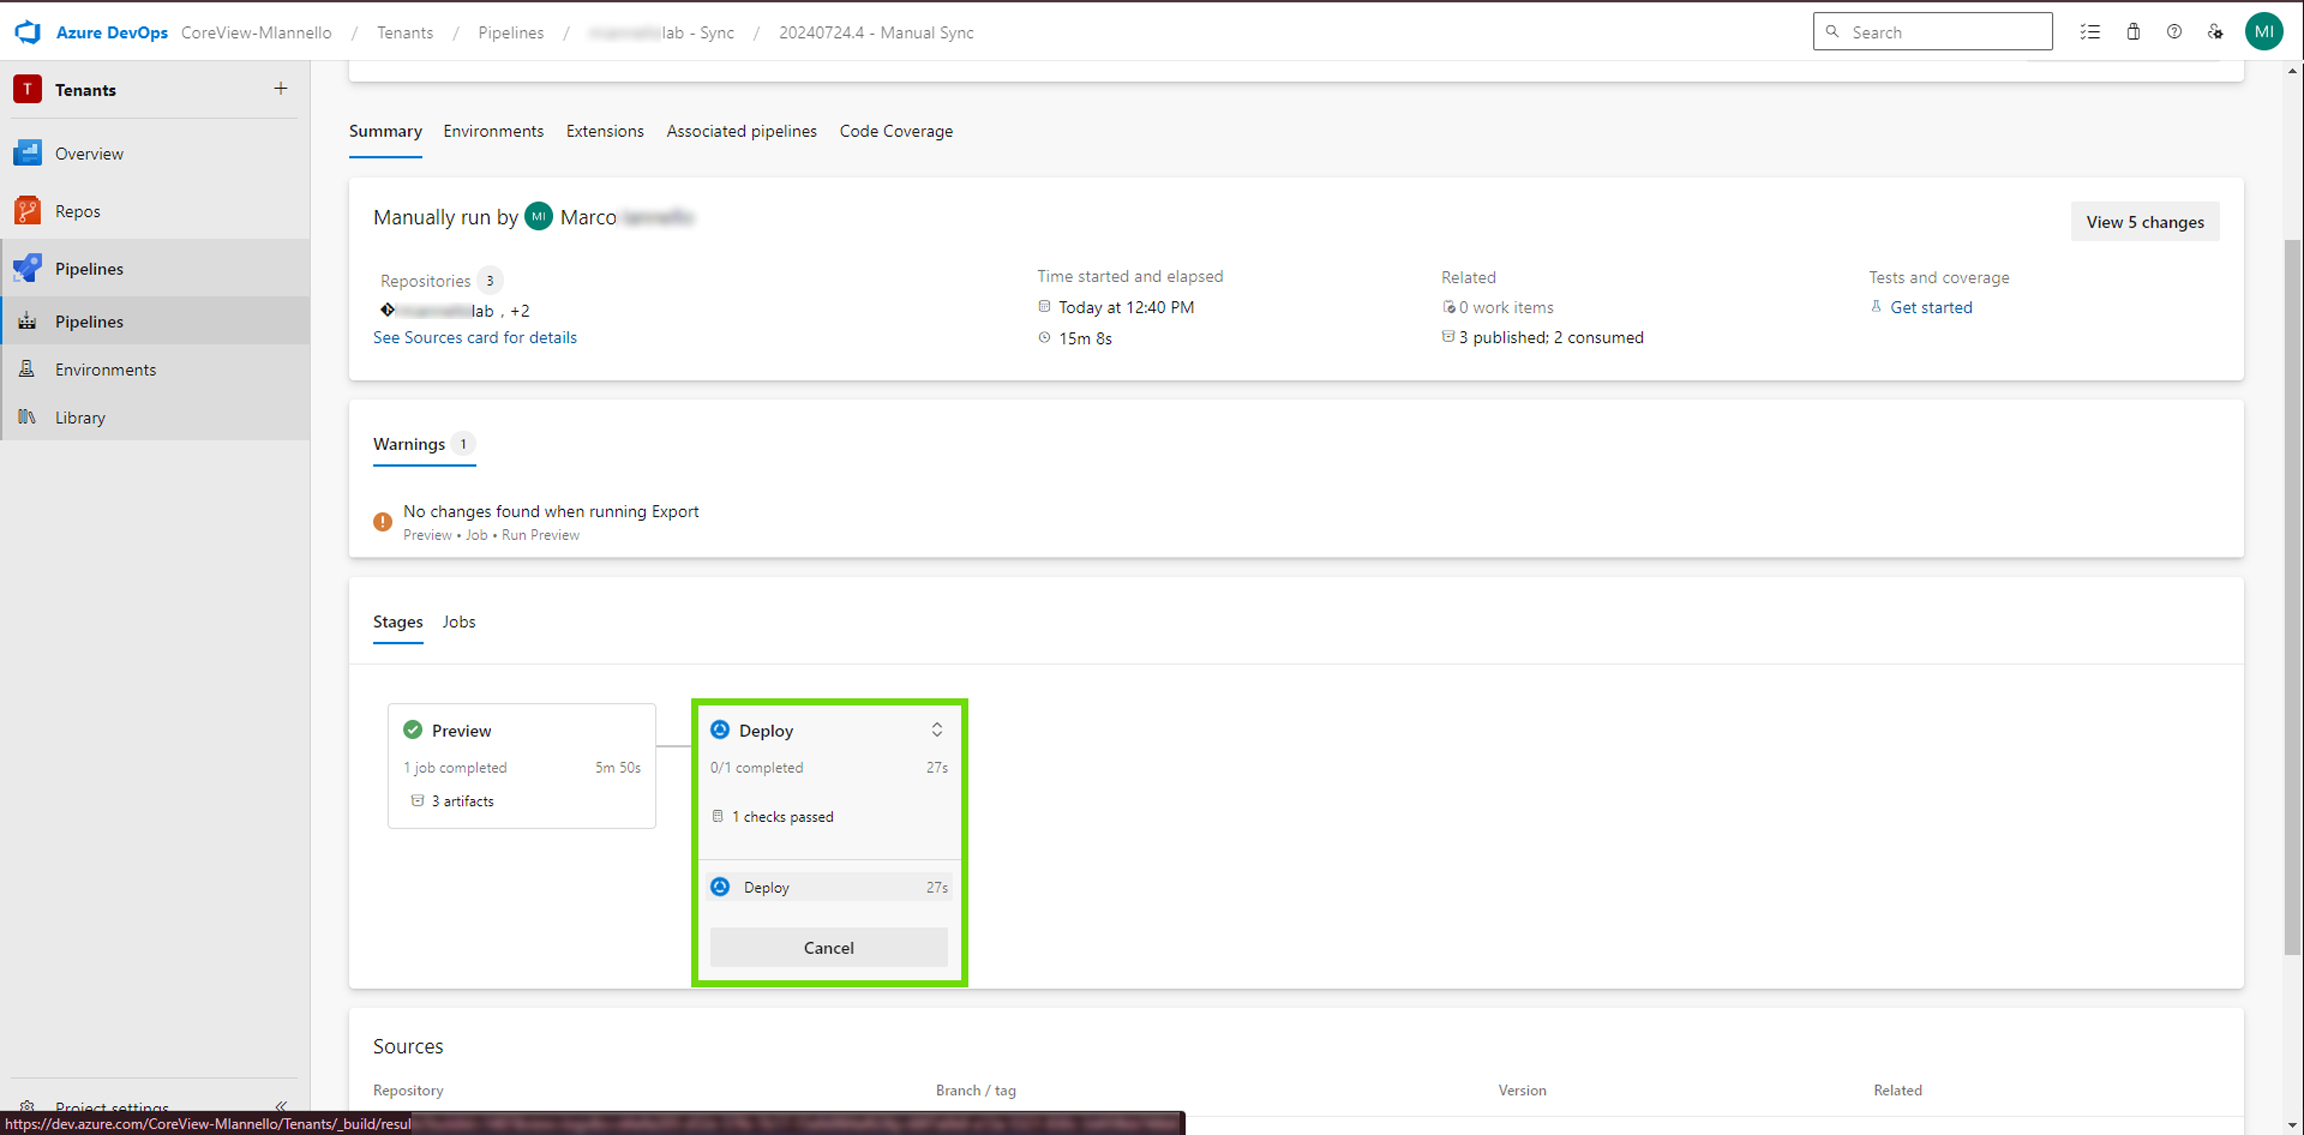
- Click on “Deploy” to monitor the deployment process and ensure everything is proceeding smoothly.

Step 2: completion of Sync
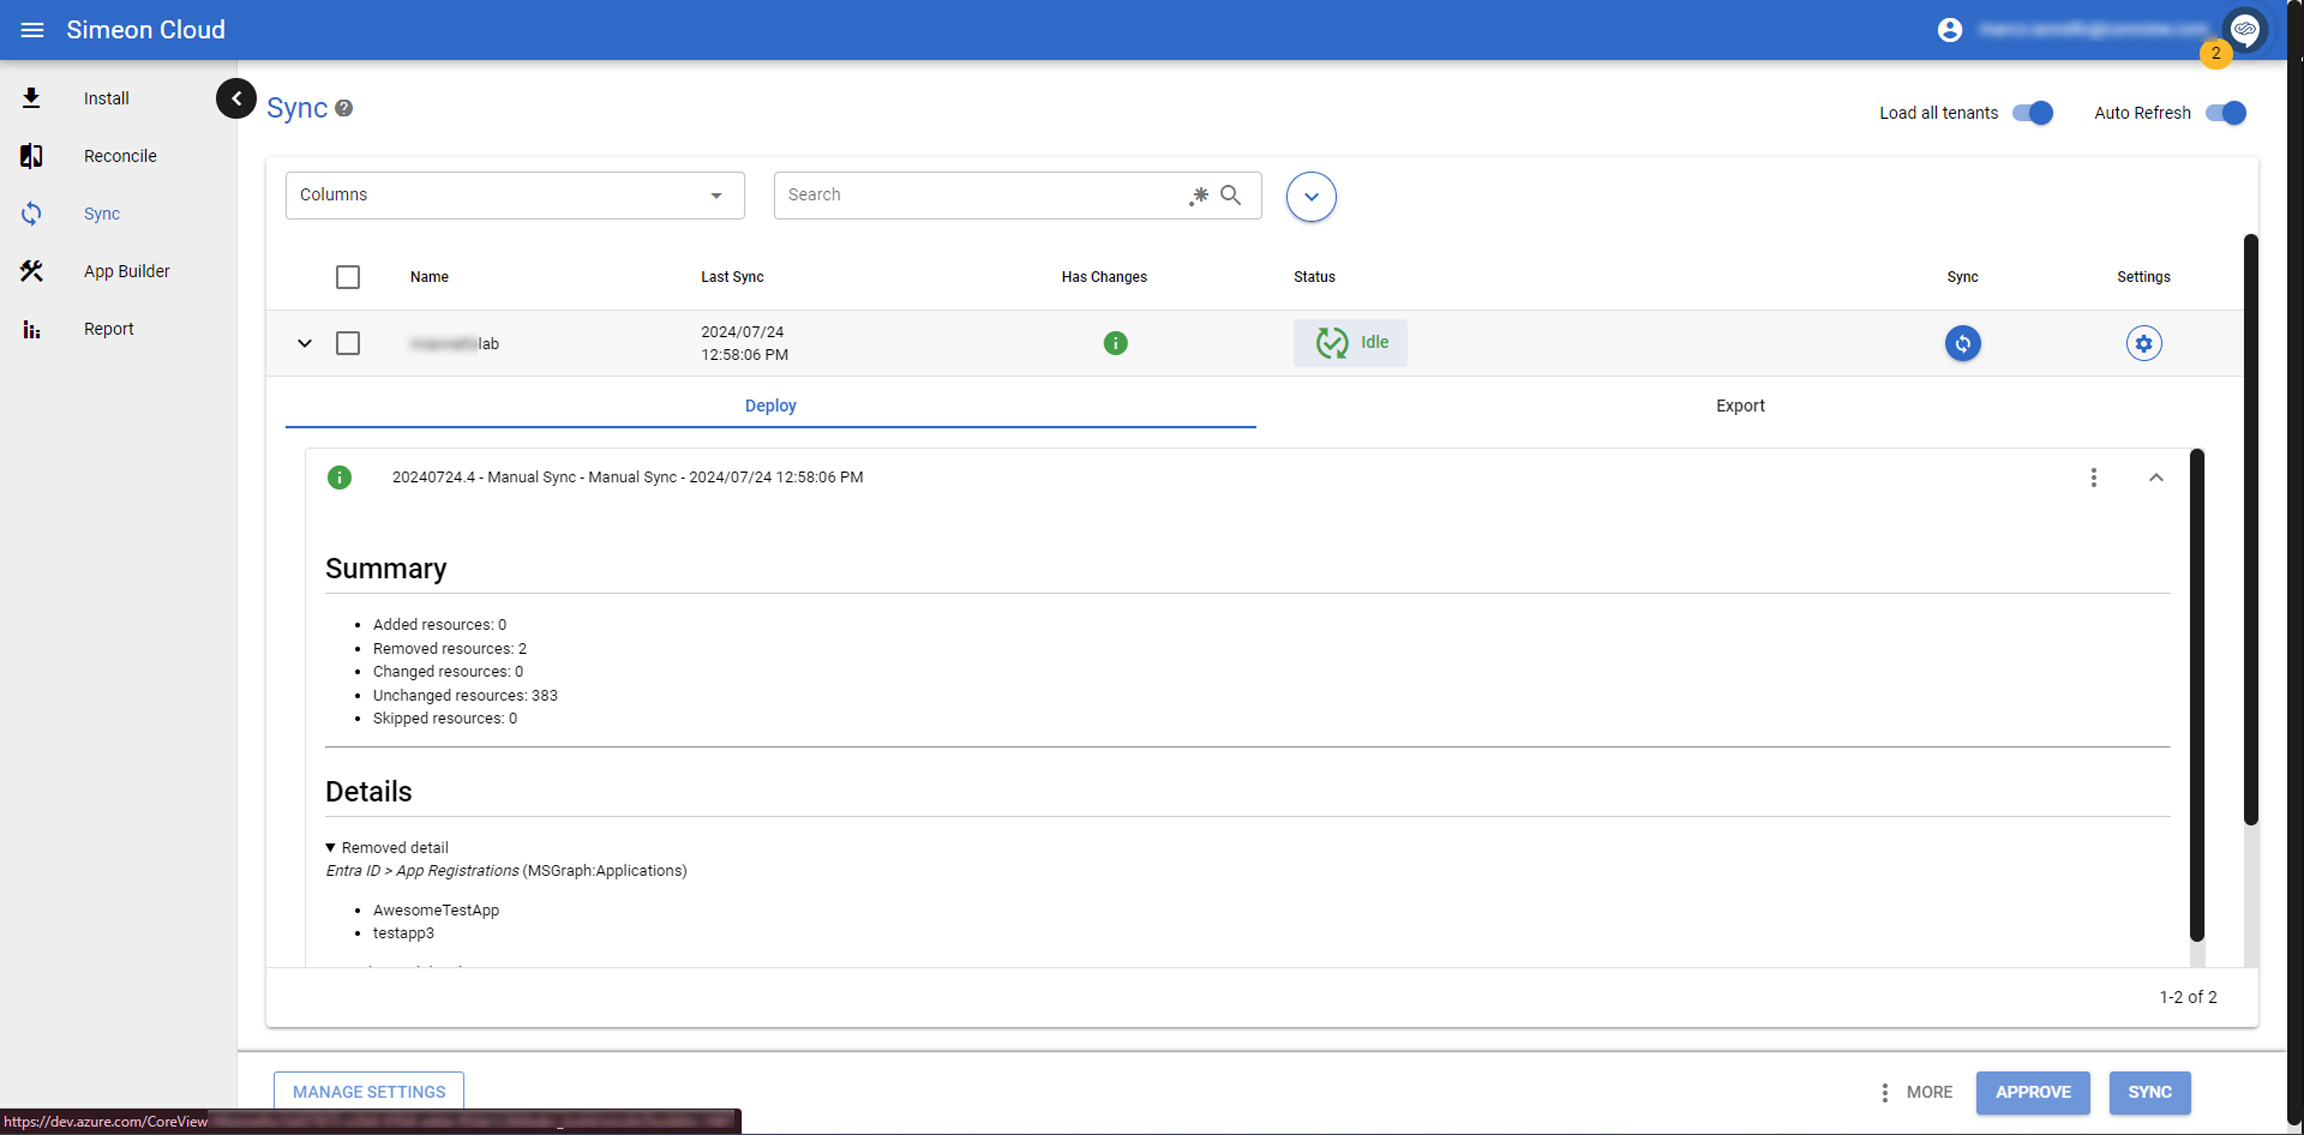
Once the process is complete, you will see an “Idle” status in your tenant line, indicating that the reconciliation process has finished:
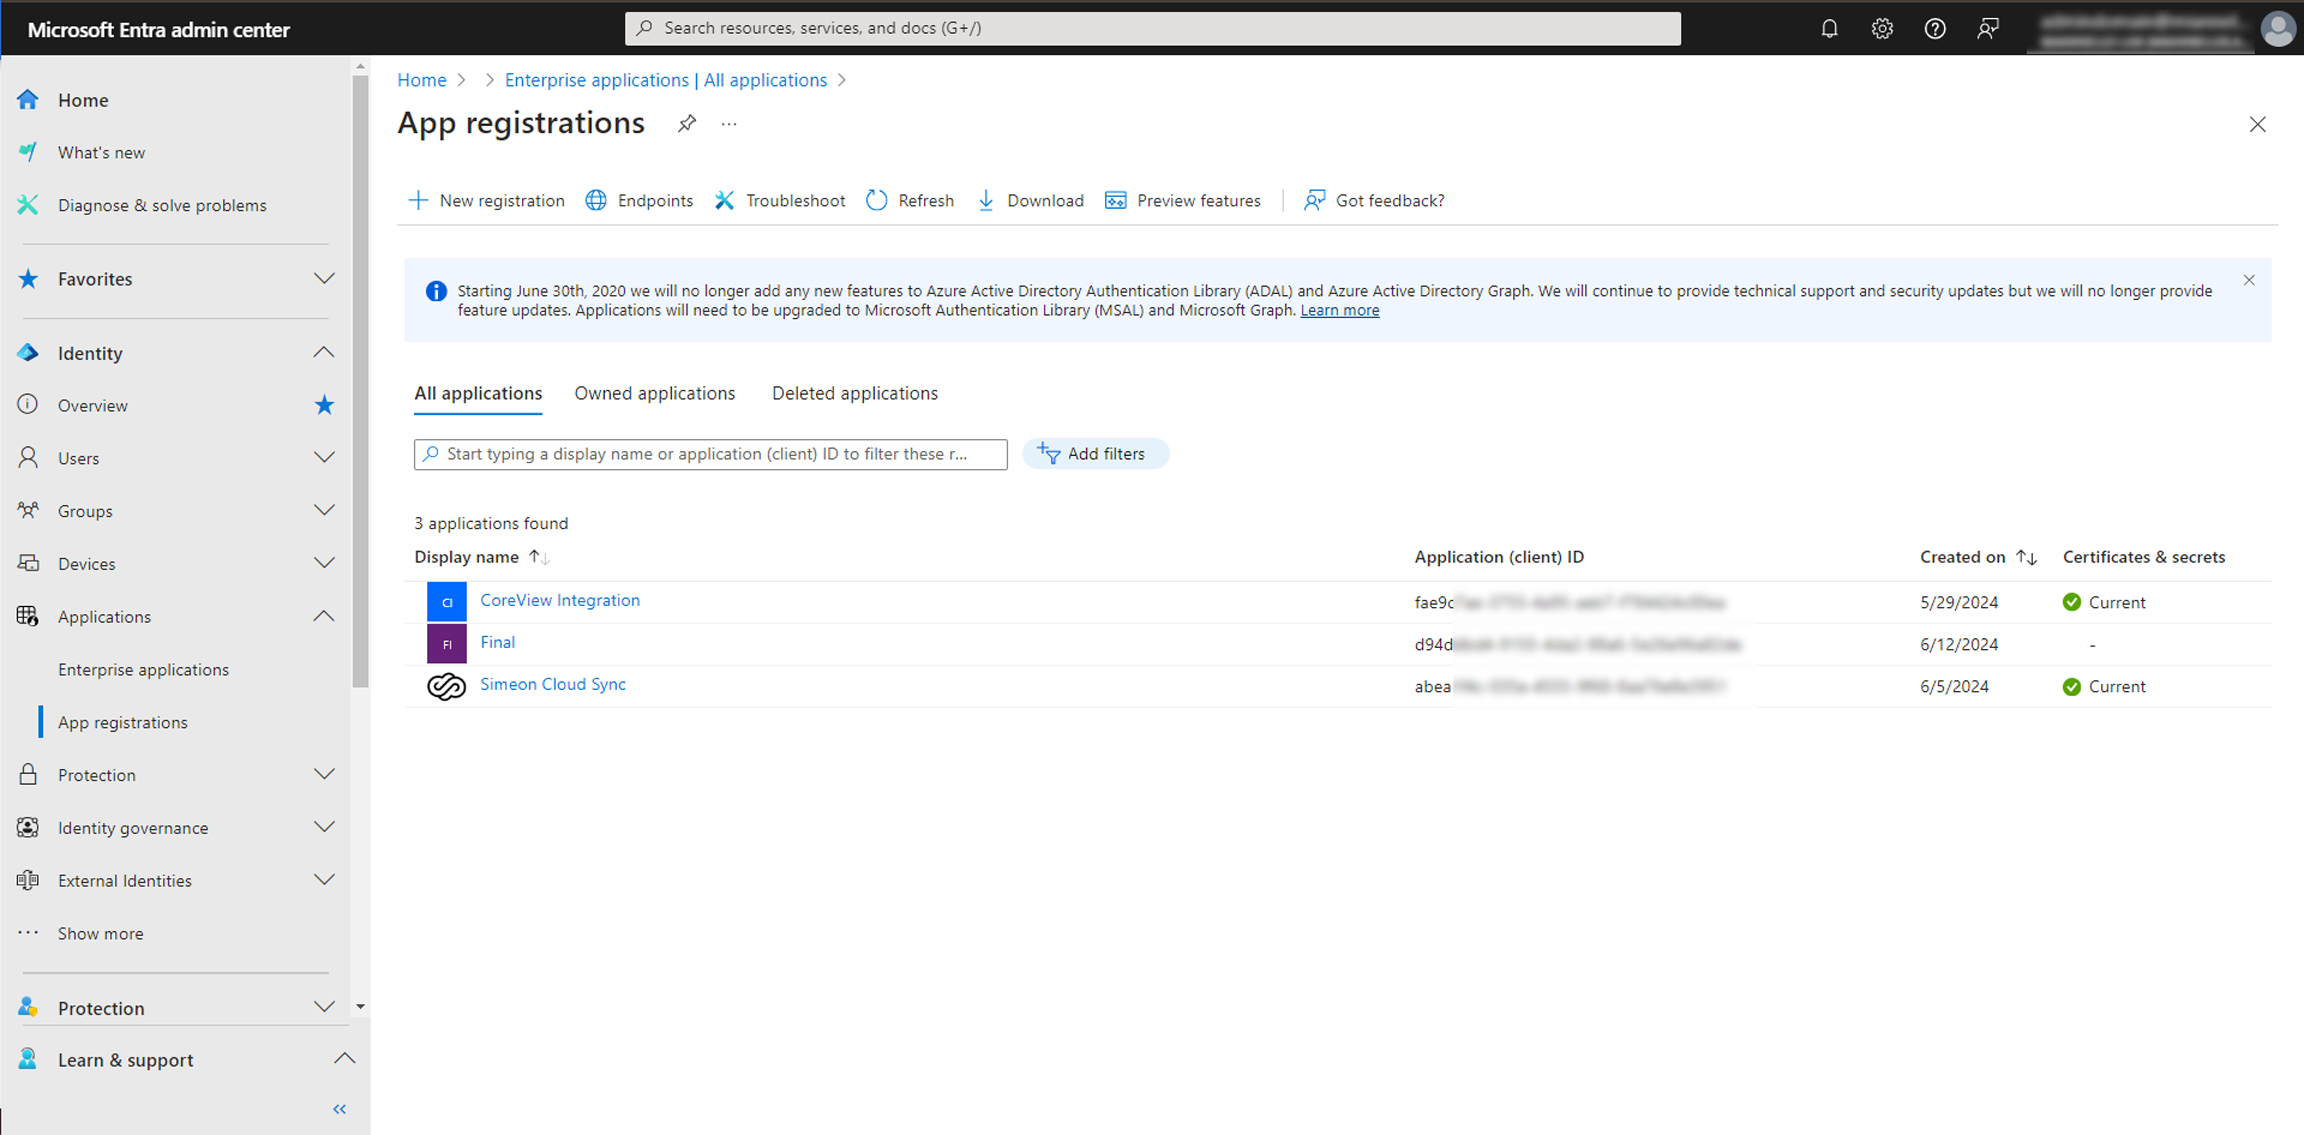
Finally, verify in Microsoft Entra if the app registration has been successfully removed:
This comprehensive approach via Simeon Cloud ensures that any changes can be effectively rolled back, maintaining your system's configuration integrity.