Enforce mode
The “Enforce” mode automatically creates License Pools based on your selected criteria. It also allows you to set secondary filter criteria for further segmentation. For instance, you can use this mode to create License Pools based on the departments of your users.
To access the “Enforce” mode from the “Edit Pool configuration” section, follow the steps below.
Configure filter criteria
Step 1: Select mode
Select “Enforce” under “Pool configuration mode.”

Step 2: Select criteria
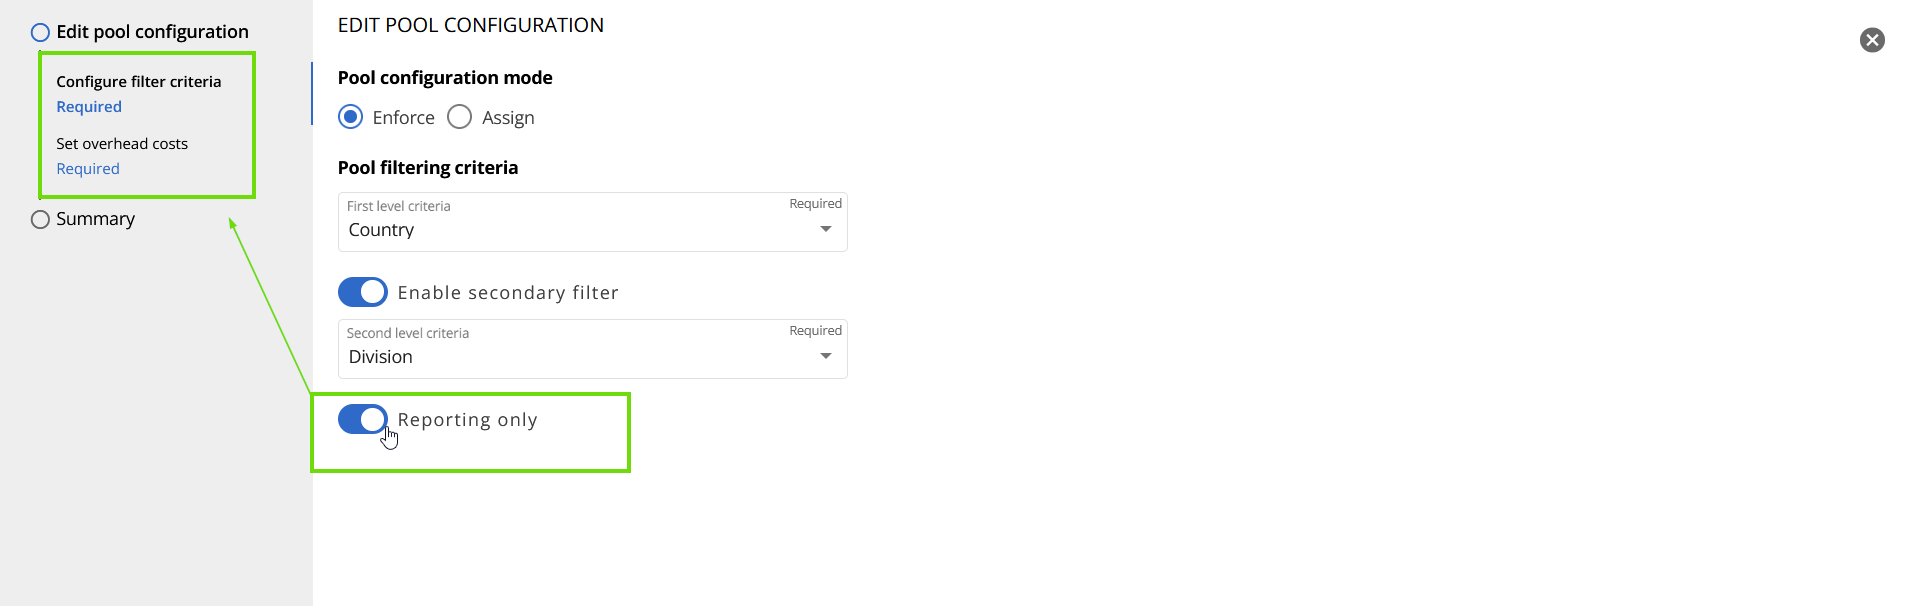
Choose one or more criteria from the list of “First level criteria” and “Second level criteria”. You can activate the “Second level criteria” by switching the “Enable secondary filter” toggle on. Options include “Domain”, “Company”, “Country” and “City”.
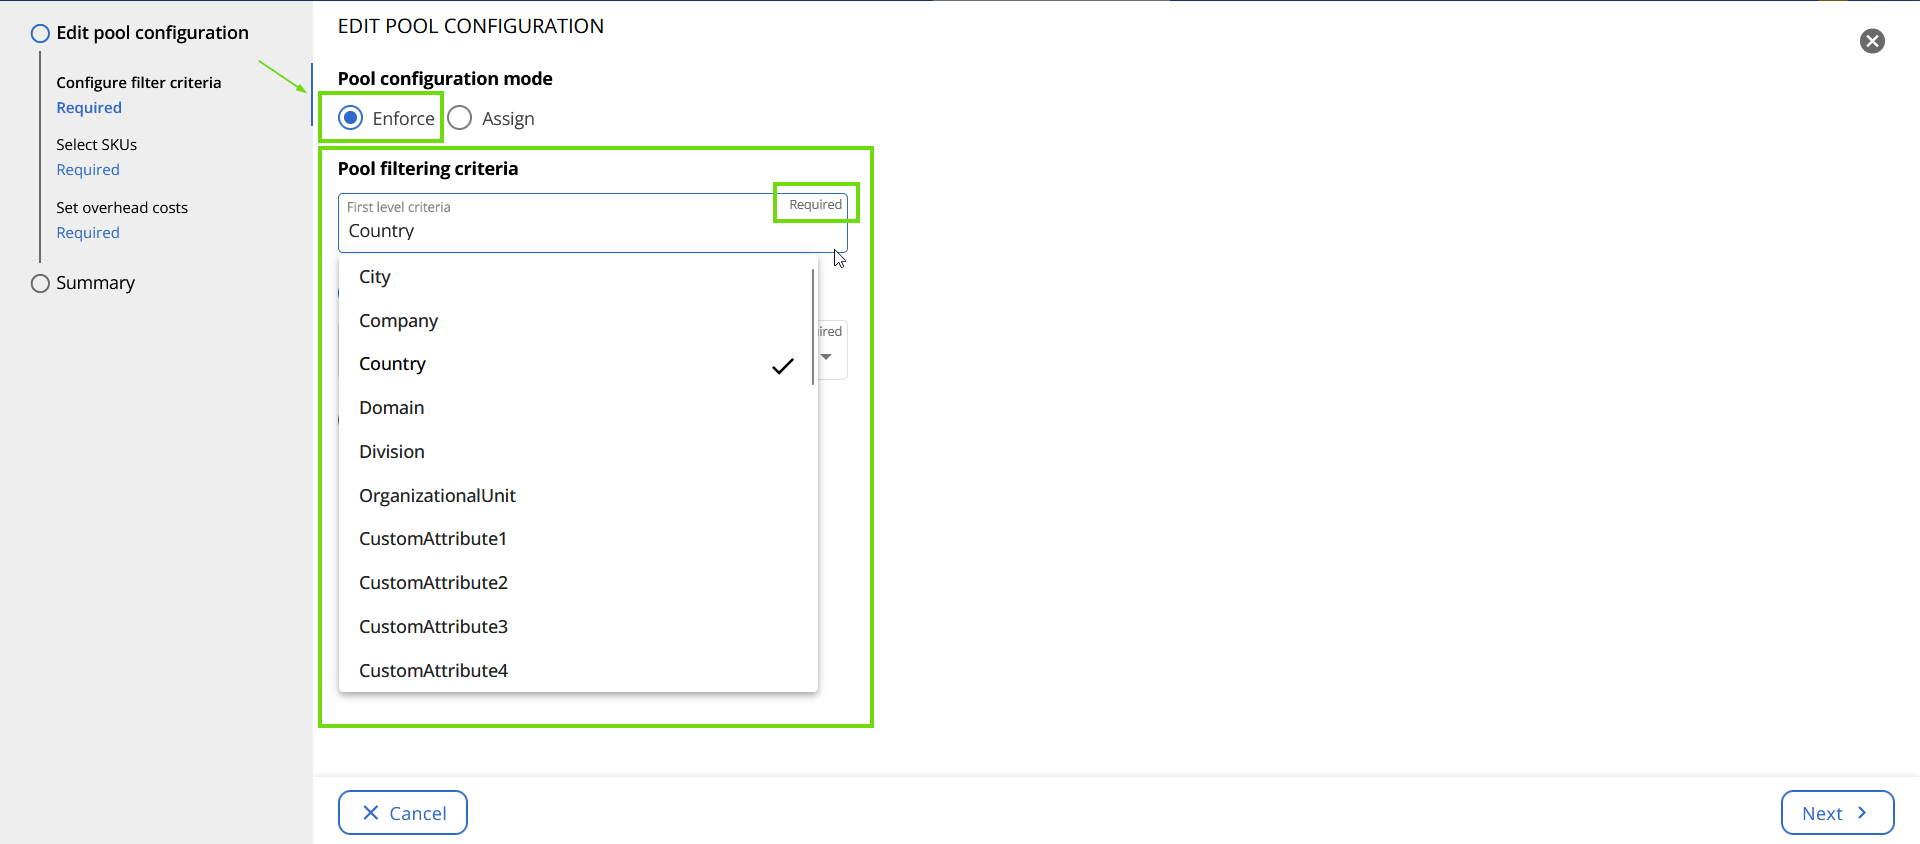
By selecting the “Country” property, all countries represented in the tenant are used to create License Pools. For example, if users belong to three different countries, three License Pools are created.
Adding a second discriminator, such as “Department”, creates more specific License Pools based on each property combination. For example, if the tenant includes users in two countries and across three departments, six License Pools are created: one for each combination of “Country” and “Department”. If the countries are “Italy” and the “US”, and the departments are “Marketing”, “Sales”, and “Product”, the resulting License Pools are:
- US Marketing
- US Sales
- US Product
- Italy Marketing
- Italy Sales
- Italy Product
Configuring License Pools with multiple discriminators
When configuring a License Pool with multiple discriminators, both discriminators must be set at the same time. This ensures that the “License Pool Group Name” field is generated immediately during workflow management action execution and helps prevent errors.
Step 3: Reporting only (optional)
Once you've selected the criteria, if necessary, you can switch on the “Reporting only” toggle. Reporting only provides the ability to view reports of how SKUs are distributed across the criteria you have selected for your Pool. It will not allow you to allocate licenses to Pools, nor allow you to restrict users from assigning licenses. Selecting this mode will eliminate the “Select SKUs” step from the required functions.
Essentially, enabling the “Reporting only” toggle simplifies the creation of License Pools by removing the SKUs tab. This means you can create License Pools, but they can only be used for reporting purposes. It calculates all the licenses and shows how many are in use.
So, you have two options: “Enforce Pools” and “Reporting only”. With the first option, you assign SKUs to each created License Pool, preventing operators from over-allocating those Pools. On the other hand, the “Reporting only” option merely displays the number of licenses in use within each Pool, without any assignment or enforcement of limits.
Once you've made your selection, click “Next”, located at the bottom right corner of the screen.
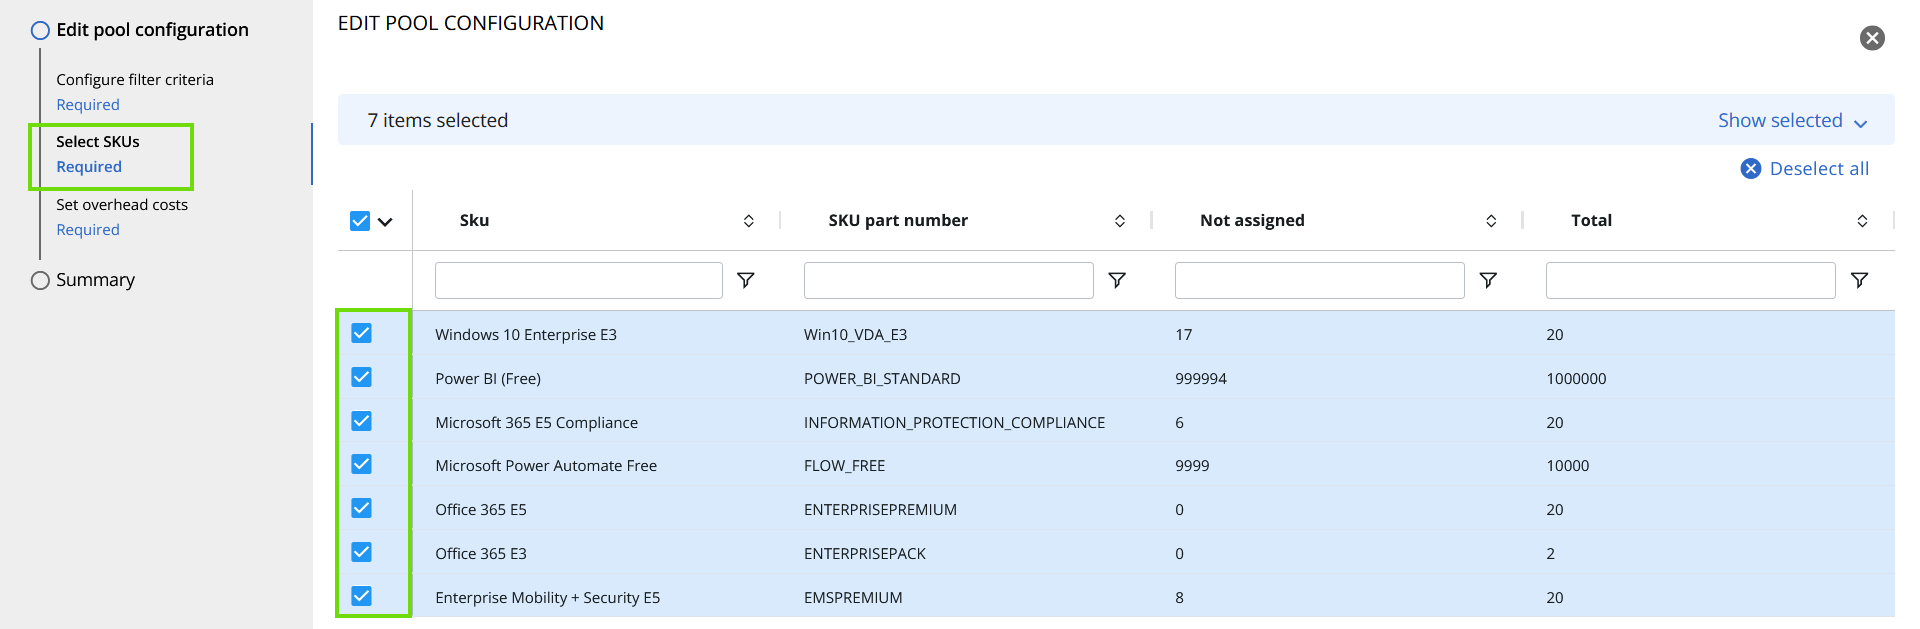
Select SKUs
On this page, you'll see all the SKUs detected within your tenant. Check the ones you want to include and then click “Next”, located at the bottom right corner of the screen.
Licenses that are free or assigned to all users can be excluded from the Pool. This is because delegated operators won't need to manage their allocation.
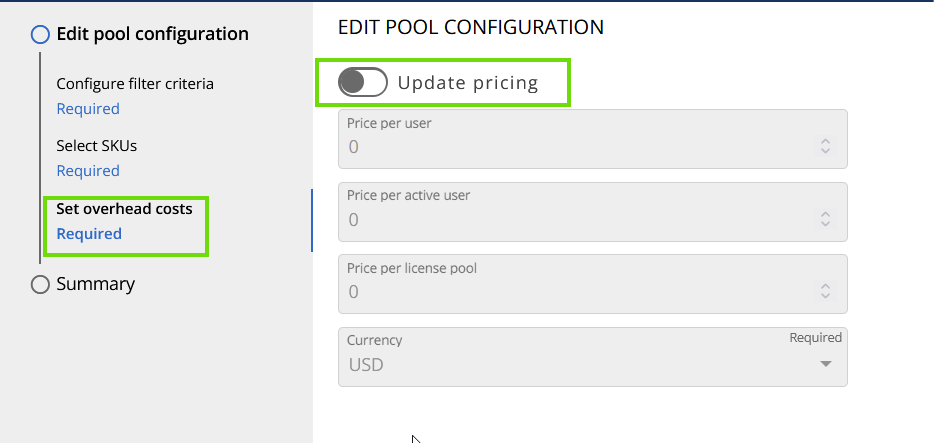
Set overhead costs (optional)
This section enables your organization to include overhead charges associated with users or Pools for the purpose of chargeback reporting.
The fields provided (“Price per user”, “Price per active user”, “Price per license Pool”) are intended for use by the department managing the Pool, allowing them to add a service cost. For example, if the IT department oversees the Pools and wishes to allocate their service costs to other departments, they can input these costs into the specified fields. This will then be reflected in the overall license costs.
If you want to update and edit pricing details, like the price per user, per active user, per License Pool, or the currency, follow these steps:
- Enable the “Update pricing” toggle
- Fill in the values you would like to assign to yourLicense Pools.
- Click “Next”.

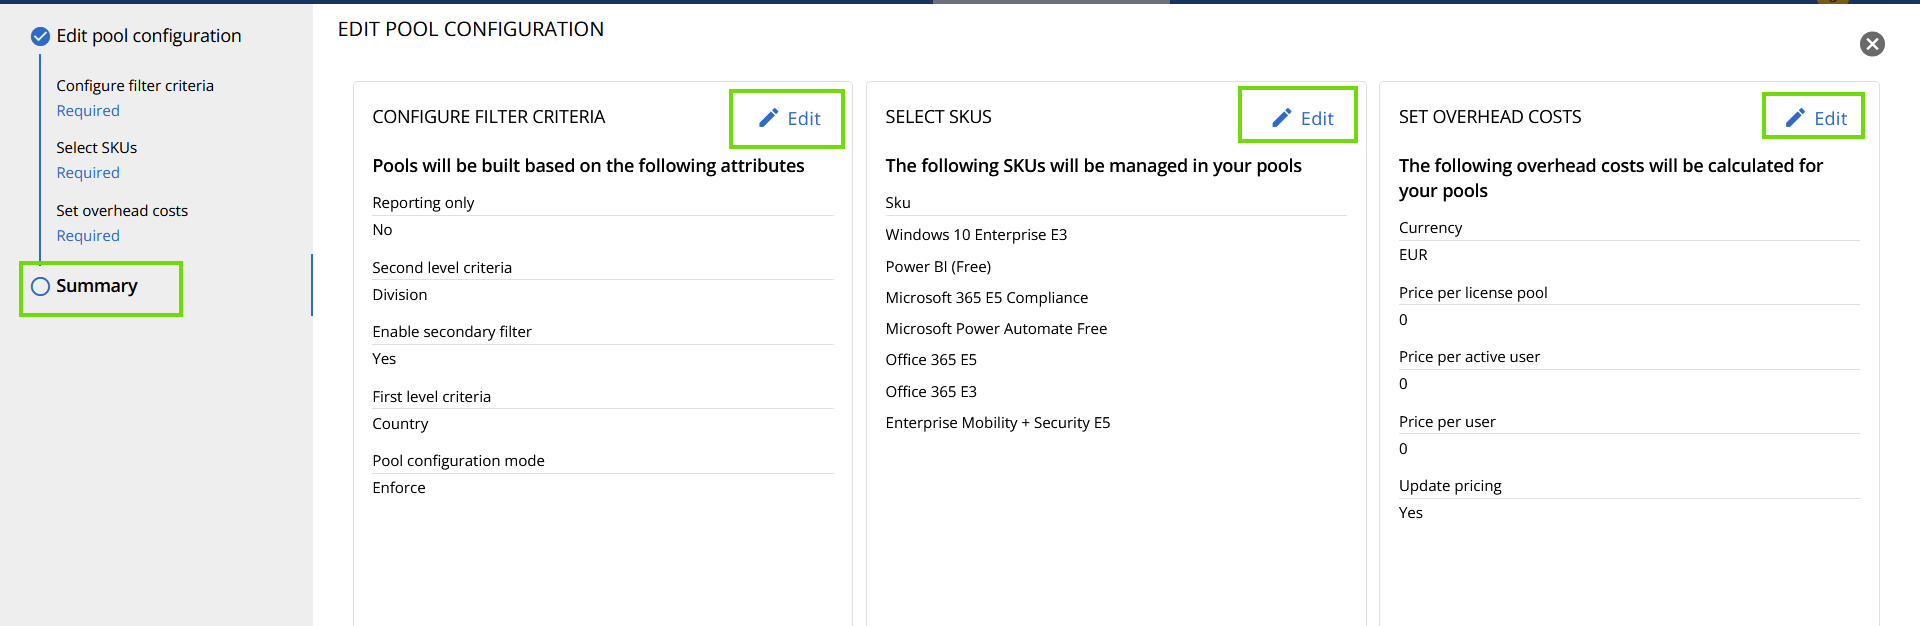
Summary
Step 1: Review
Finally, review all the details. If necessary, you can edit the details by clicking on the pencil icon located in each section.
Step 2: Submit
Once you are done, click “Submit” to make changes official.

License Pools are created based on the selected criteria. Once edited, the updated License Pool will appear in the “License Pools” list.
Remember, to ensure up-to-date user information in each Pool, License Pools are automatically recalculated every 30 minutes.