Please note that this feature is not available in the Configuration Manager SaaS version.
Configuration Manager offers the ability to choose where your Sync operations run through the agent pool feature. While syncs typically run on Microsoft-hosted agents by default, you can select self-hosted agents for enhanced control and security compliance.
Agent pools can be selected either from:
- The Sync page, where you can either select it for individual or multiple tenants
- The Tenants page
- The Reinstall page
It can also be changed manually via the Sync.yml file.
Below you will find detailed step-by-step procedures for each method mentioned above.
Agent pool options
Agent Pool options include:
- Azure Pipelines: this option represents the default Microsoft-hosted Azure agent pool. Selecting this option will ensure the tenant Sync runs on the default Microsoft-hosted agent.
- Default: this option is an empty agent pool provided by Microsoft as a space to create your own self-hosted agents. By default, this pool has no agents and is not in use.
- Custom self-hosted agent pools: created and managed by the client, these provide control over location, IP address, and security settings, but require setup in Azure DevOps.
Benefit of using custom agent pools
The primary benefit of using different Agent Pools lies in their flexibility. Default Microsoft-hosted agents suffice for most users, but self-hosted agents allow for compliance with specific security policies, such as requiring recognized devices or IP addresses. Additionally, self-hosted agents provide greater control over the sync environment.
Select the agent pool
You can change the agent pool in Tenants or in Sync; alternatively, you can also set it manually.
Select agent pool in “Tenants” or “Reinstall”
You can select the preferred agent pool during the installation process of a new tenant or when modifying an existing one. Whether you're installing a baseline tenant, installing a downstream tenant, or editing/reinstalling an existing one, you can access the agent pool options in the advanced settings section.
During installation
During the initial tenant installation process, you can choose your preferred agent pool from the advanced settings.

Existing tenants
Similarly, for existing tenants, you can adjust the agent pool at any time by accessing the same advanced settings area from “Reinstall”.

Select agent pool in Sync
To change the agent pool in the Sync interface, you have two options.
Individual tenants
For individual tenants, locate the tenant in the Configuration Manager interface, and click on the gear icon on the right of the tenant row.

In the pop-up that appears, select “Agent Pool”.

Now, click on the Agent Pool selection dropdown, and choose the desired Agent Pool.

Bulk selection
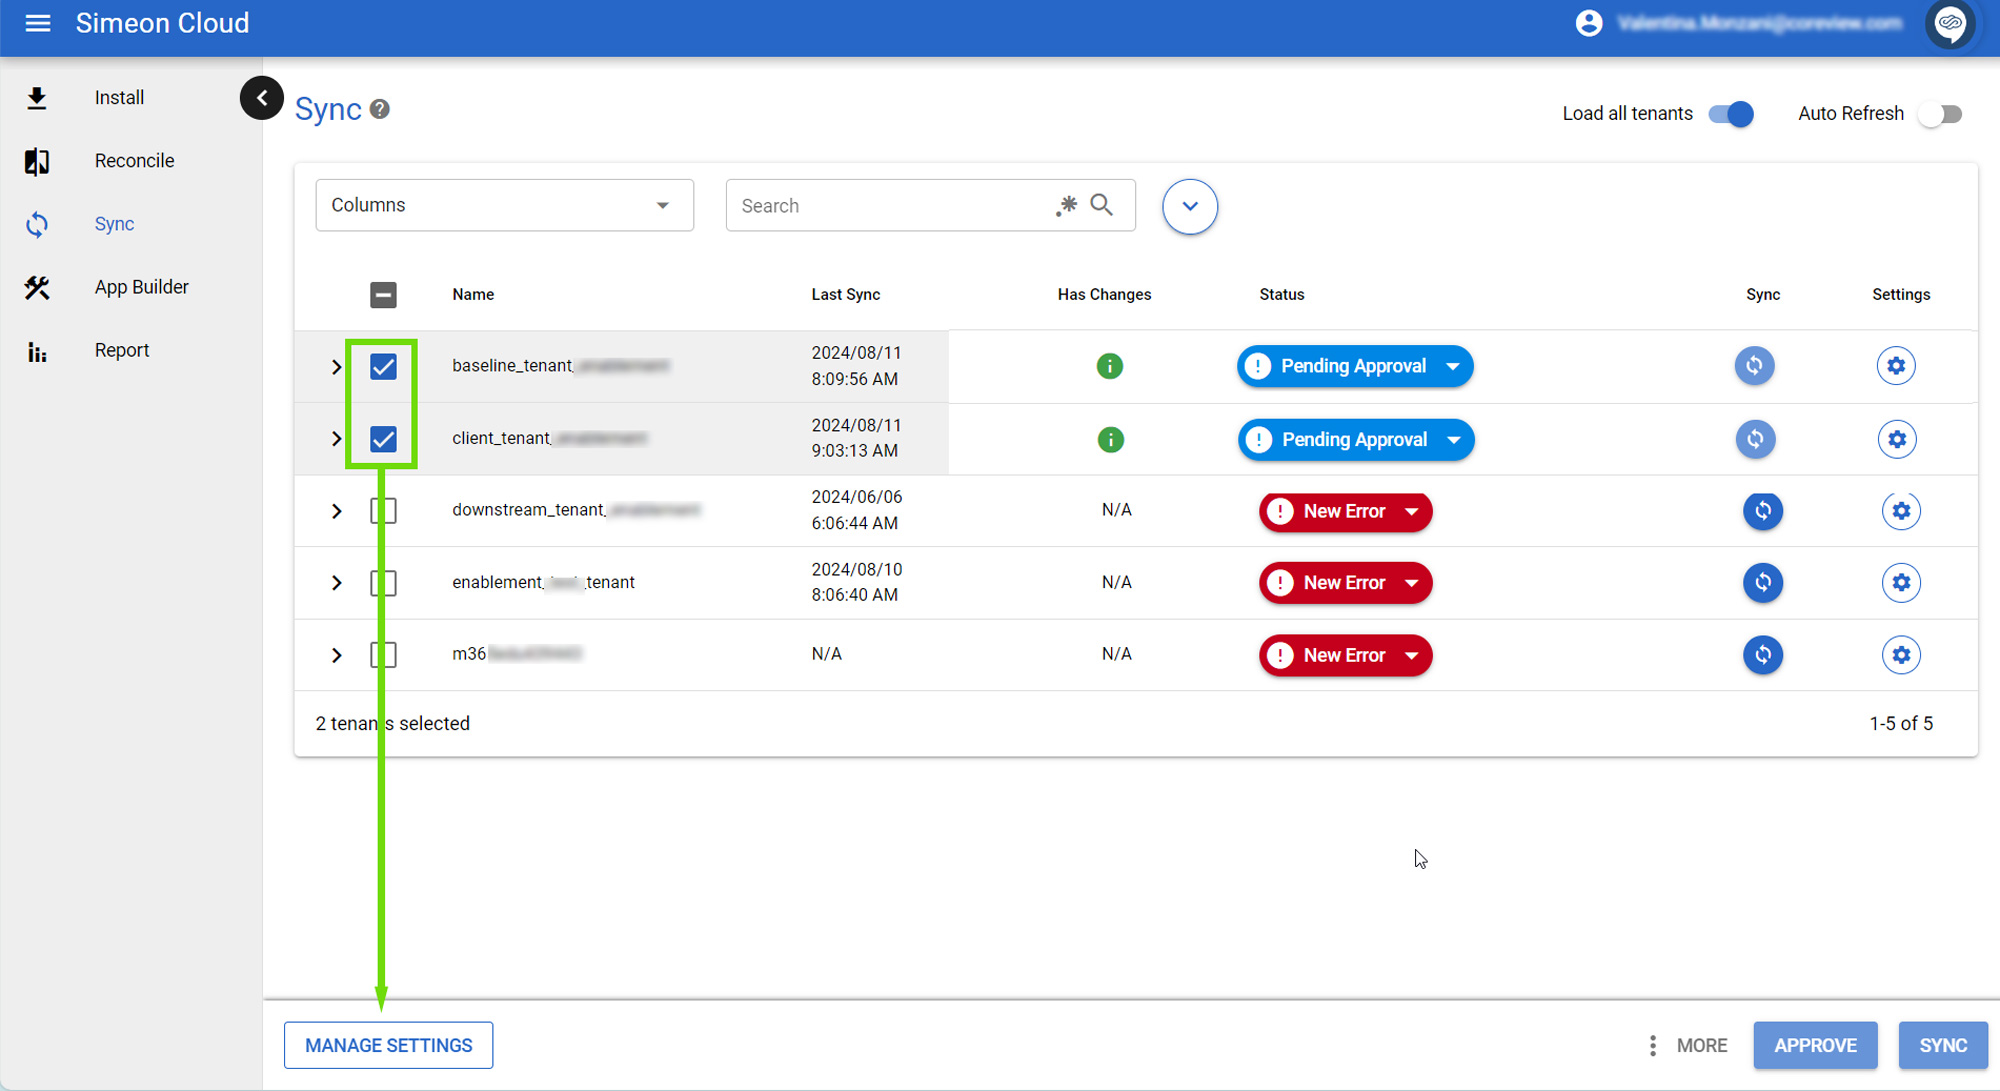
For bulk selection, select multiple tenants in the Configuration Manager interface, click on the “Manage settings” option (bottom left),
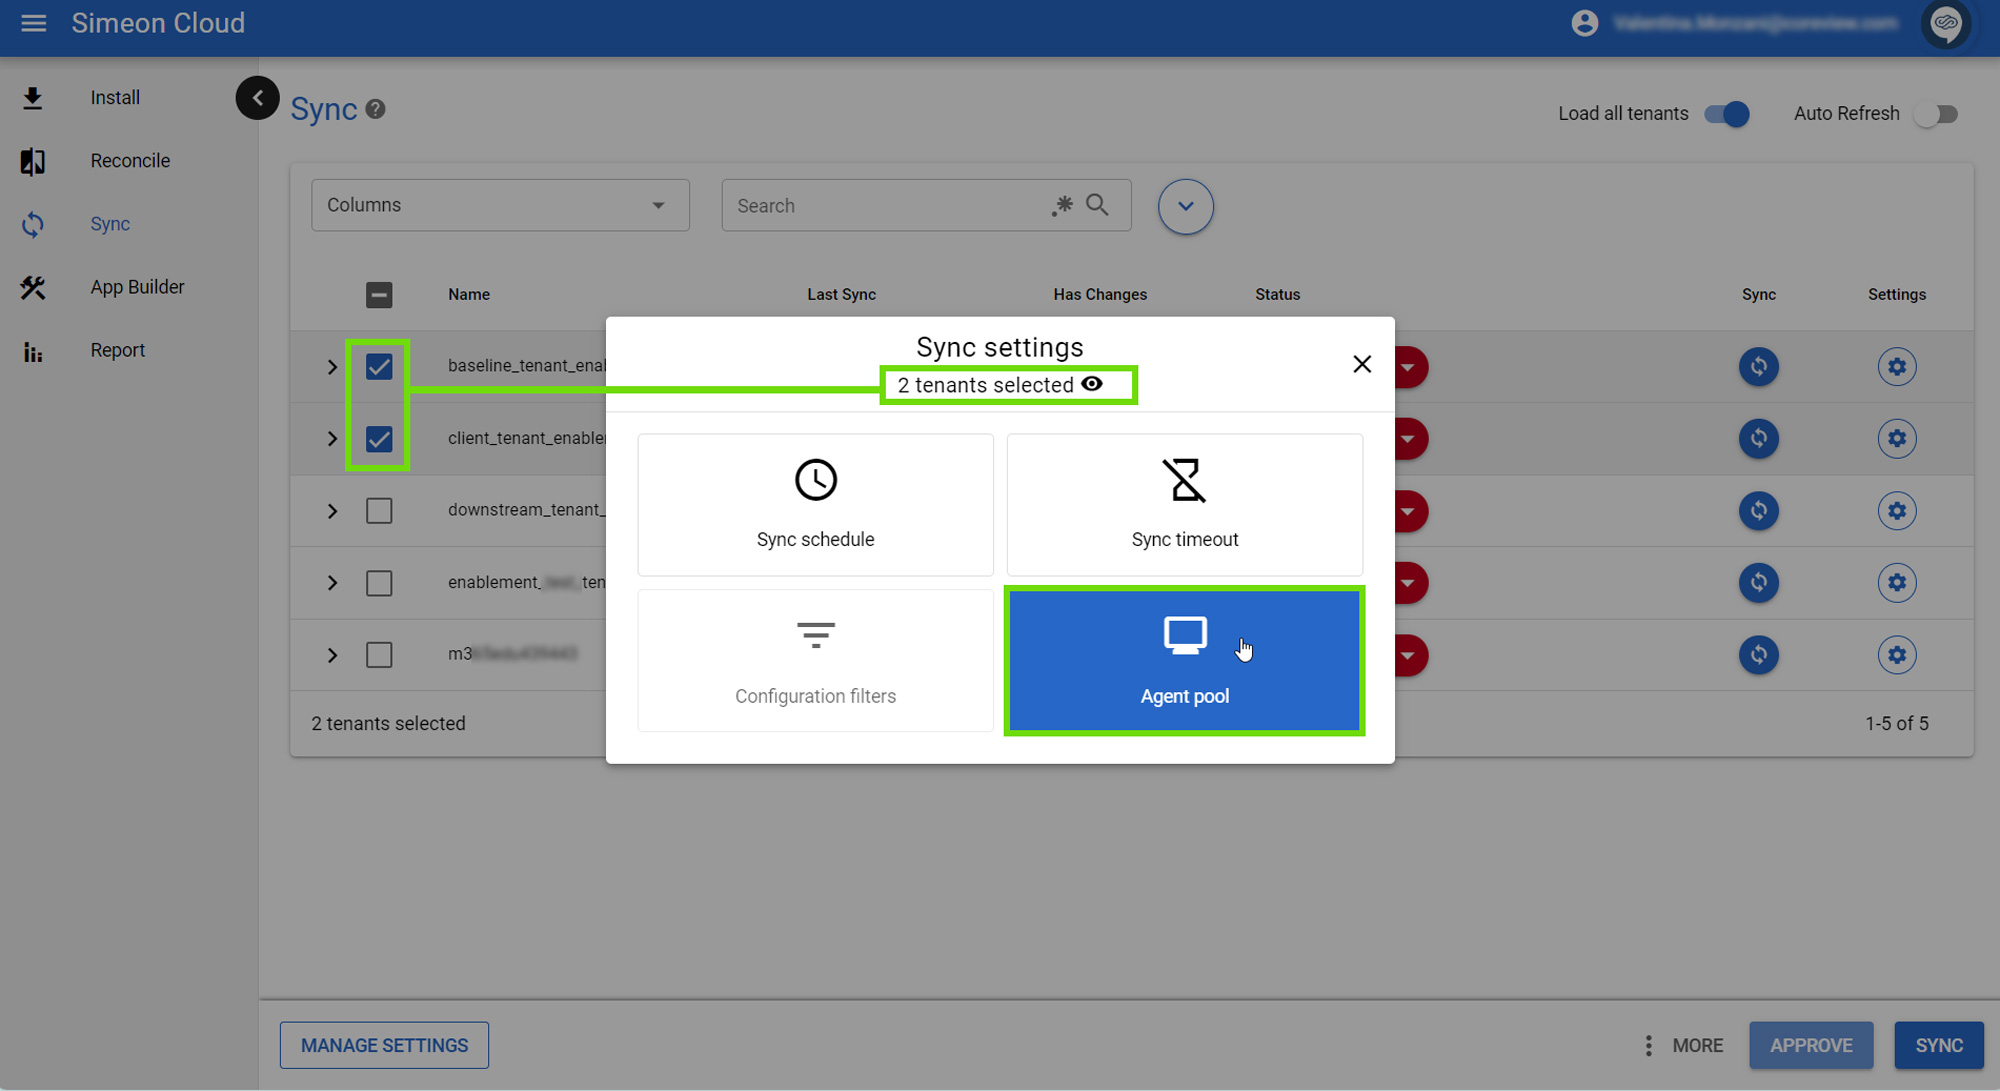
Choose “Agent pool” from the options:
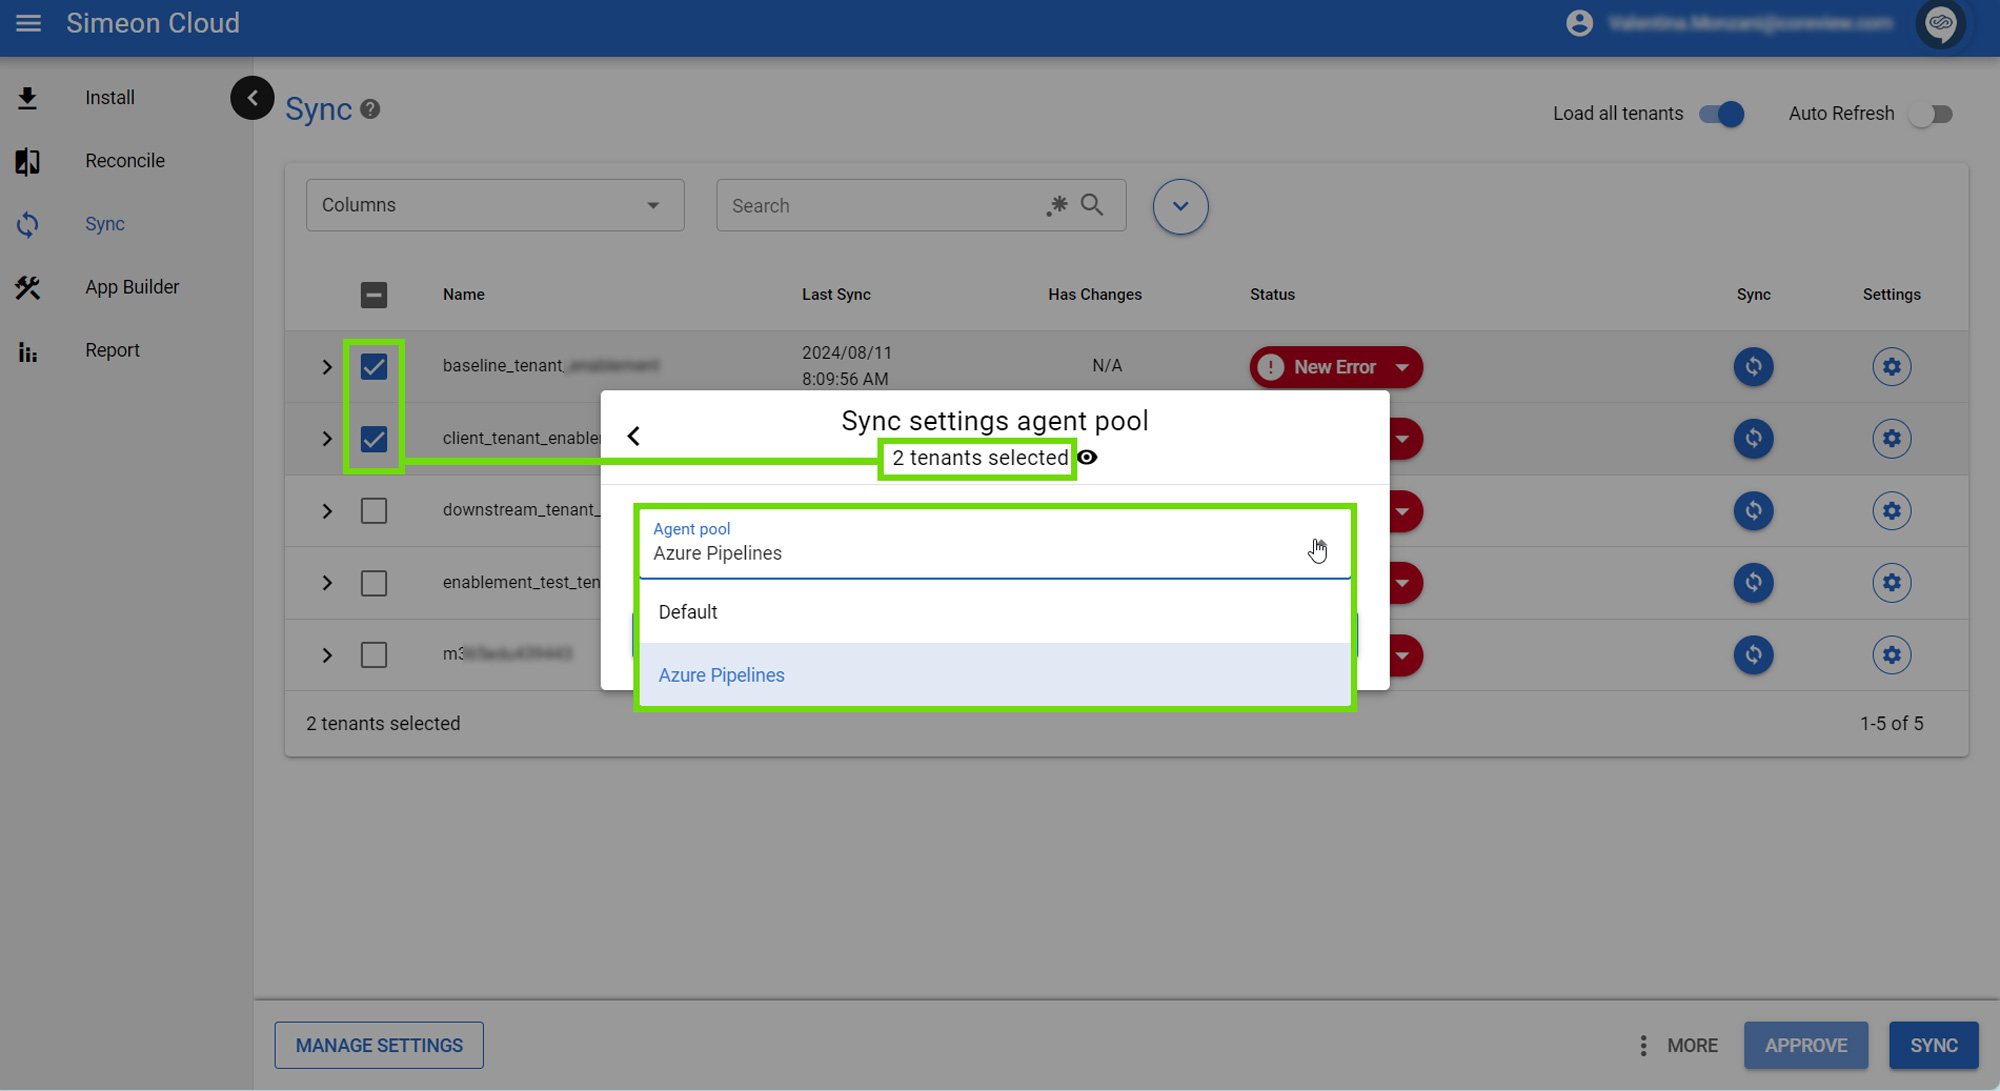
Lastly, select the desired agent pool for all selected tenants using the dropdown:
Change agent pool manually via the Sync.yml file
Once the agent you created is properly configured and operational, you can choose to manually select the agent by editing the Sync.yml file in Azure DevOps.
The pool that the Sync uses is defined by the pool: key.
By default, when using Microsoft hosted agents, the pool: key is set to as follows:
pool:
  vmImage: windows-latest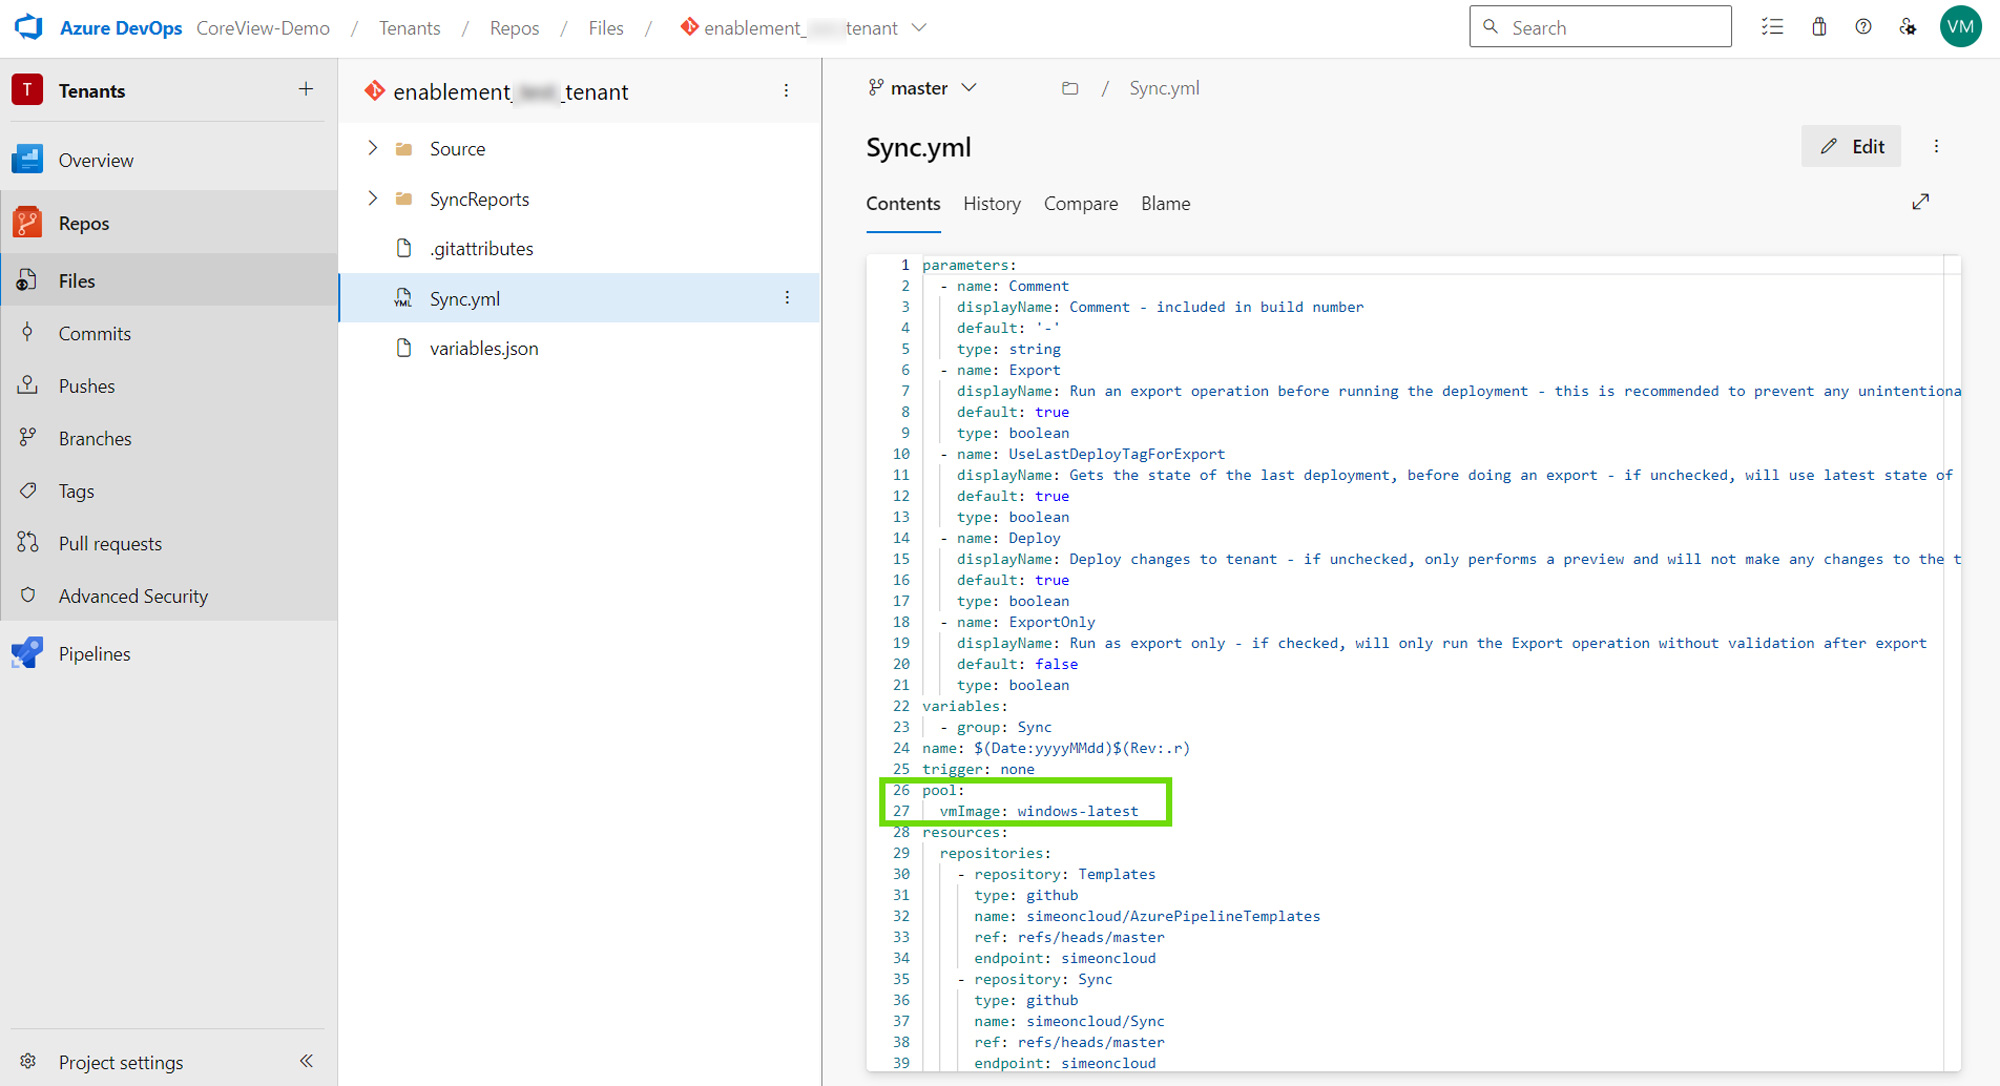
Use a self-hosted agent
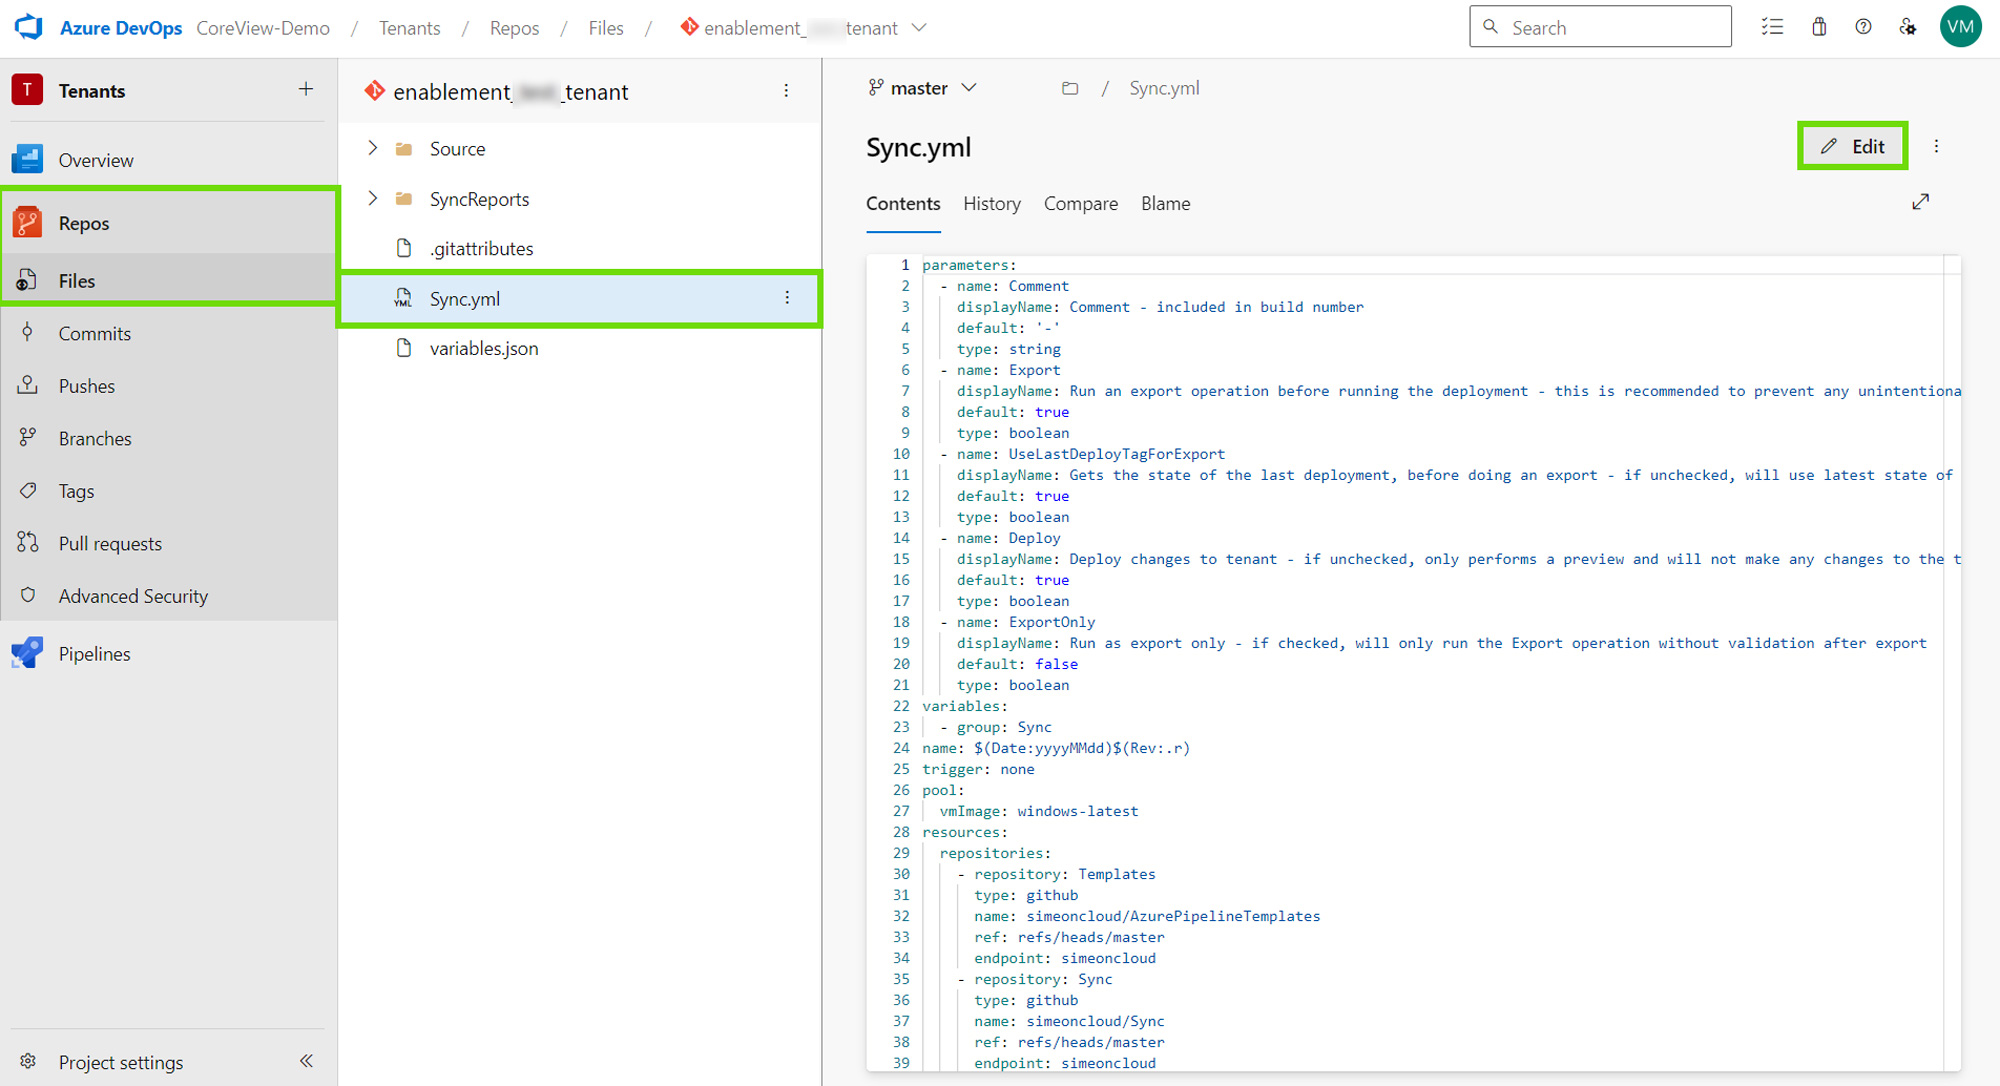
To use a self-hosted agent, after accessing Azure DevOps:
- Navigate to Tenants
- Select “Repos”
- Select “Files” under “Repos”
- Choose “Sync.yml”
- Click on the “Edit” button to modify the file
- Change the
pool: keyto the name of your pool:
pool:
  name: self-hosted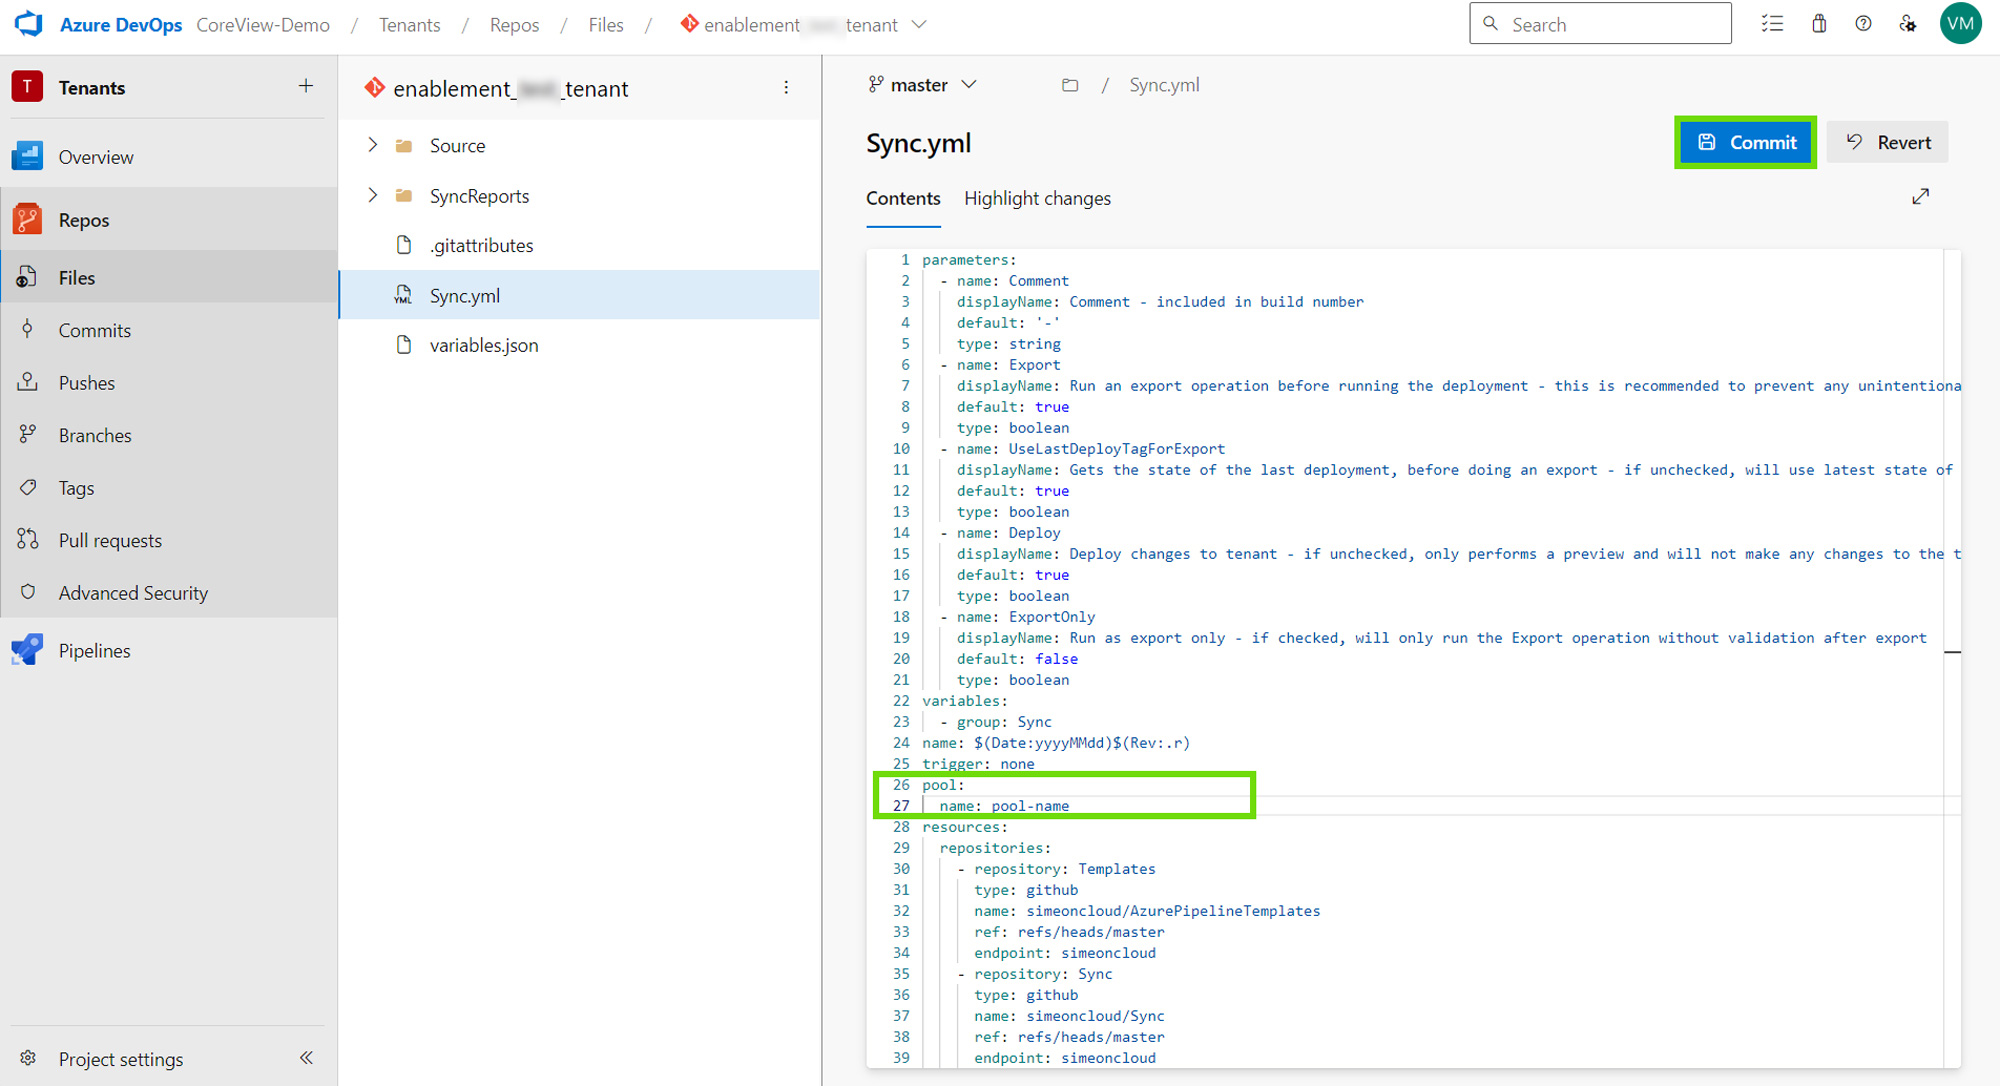
- Click “Commit” to finalize changes.
