Configuration Manager SaaS is hosted on CoreView's cloud infrastructure, so no access to Azure DevOps required. Sections related to Azure DevOps do not apply to Configuration Manager SaaS.
- Navigate to the Intune Admin Center
- Click on “Devices“ > “Configuration Policies”
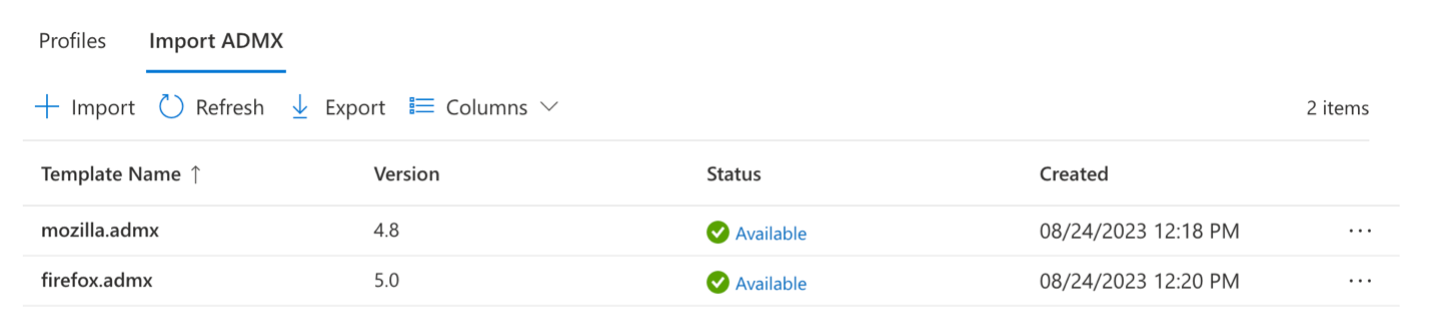
- On the Import ADMX tab:
- click “Import” > upload an ADMX file and its associated ADML file > “Next” > “Create”
- click “Import” > upload an ADMX file and its associated ADML file > “Next” > “Create”
- Wait for the state of the resource to become available
- Navigate to the “Profiles” tab on the top left of the screen
- Click “Create Profile”:
- Select Platform “Windows 10 and later”
- Select Profile Type “Templates”
- Select Template Name: “Imported Administrative templates (Preview)"
- Give the configuration a name
- In this example, since we are using the Mozilla and Firefox ADMX resources, we will be configuring the profile for the resource (this may not be required for all ADMX resources)
- Under “Configuration Settings”, click “Computer Configuration” on the left tab then select “Mozilla” > “Firefox” > Cookies Select “Do not allow preferences to be changed” > on the right panel, select “Enabled" > “OK”
- Finish the creation steps
- Run a Sync to export the newly added ADMX resource and profile to Configuration Manager
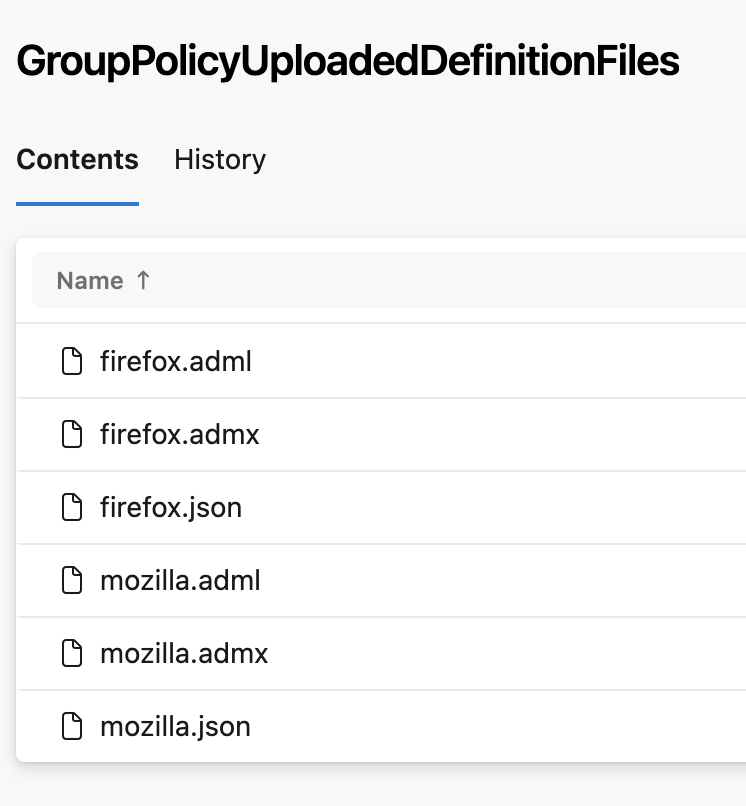
- On Azure DevOps > “Tenants” > “Repos” > navigate to:
Source/Resources/Content/MSGraph/DeviceManagement/GroupPolicyUploadedDefinitionFiles- There will be 3 files per ADMX resource that was created. An ADML file, an ADMX file, and a JSON file:
- The exported ADMX and ADML files will have the following content:
TODO: Add adml file content here- Click “Edit” on each .admx and .adml file and update the contents with the ADMX and ADML files that were initially uploaded to the Intune portal > “Save”
- Sync the baseline tenant and “Approve” to deploy the configuration updates