What is an event-based custom policy?
An event-based policy is a type of custom policy designed to trigger a response to events captured in Audit reports. Unlike regular custom policies, which have static matched items, the matched items in event-based custom policies are dynamic events logged in the audit record within a specific timeframe.
Playbook dashboards
In the Playbook dashboards, only the “Recently failed workflows” and “Recently succeeded workflows” widgets will display data from event-based policies. If all policies in a playbook are event-based and have “Send report” configured as remediation, your dashboard may appear empty.
How can I create an event-based custom policy?
You can create an event-based custom policy from “Audit” reports. This article provides a detailed guide on the steps to follow for creating event-based custom policies.
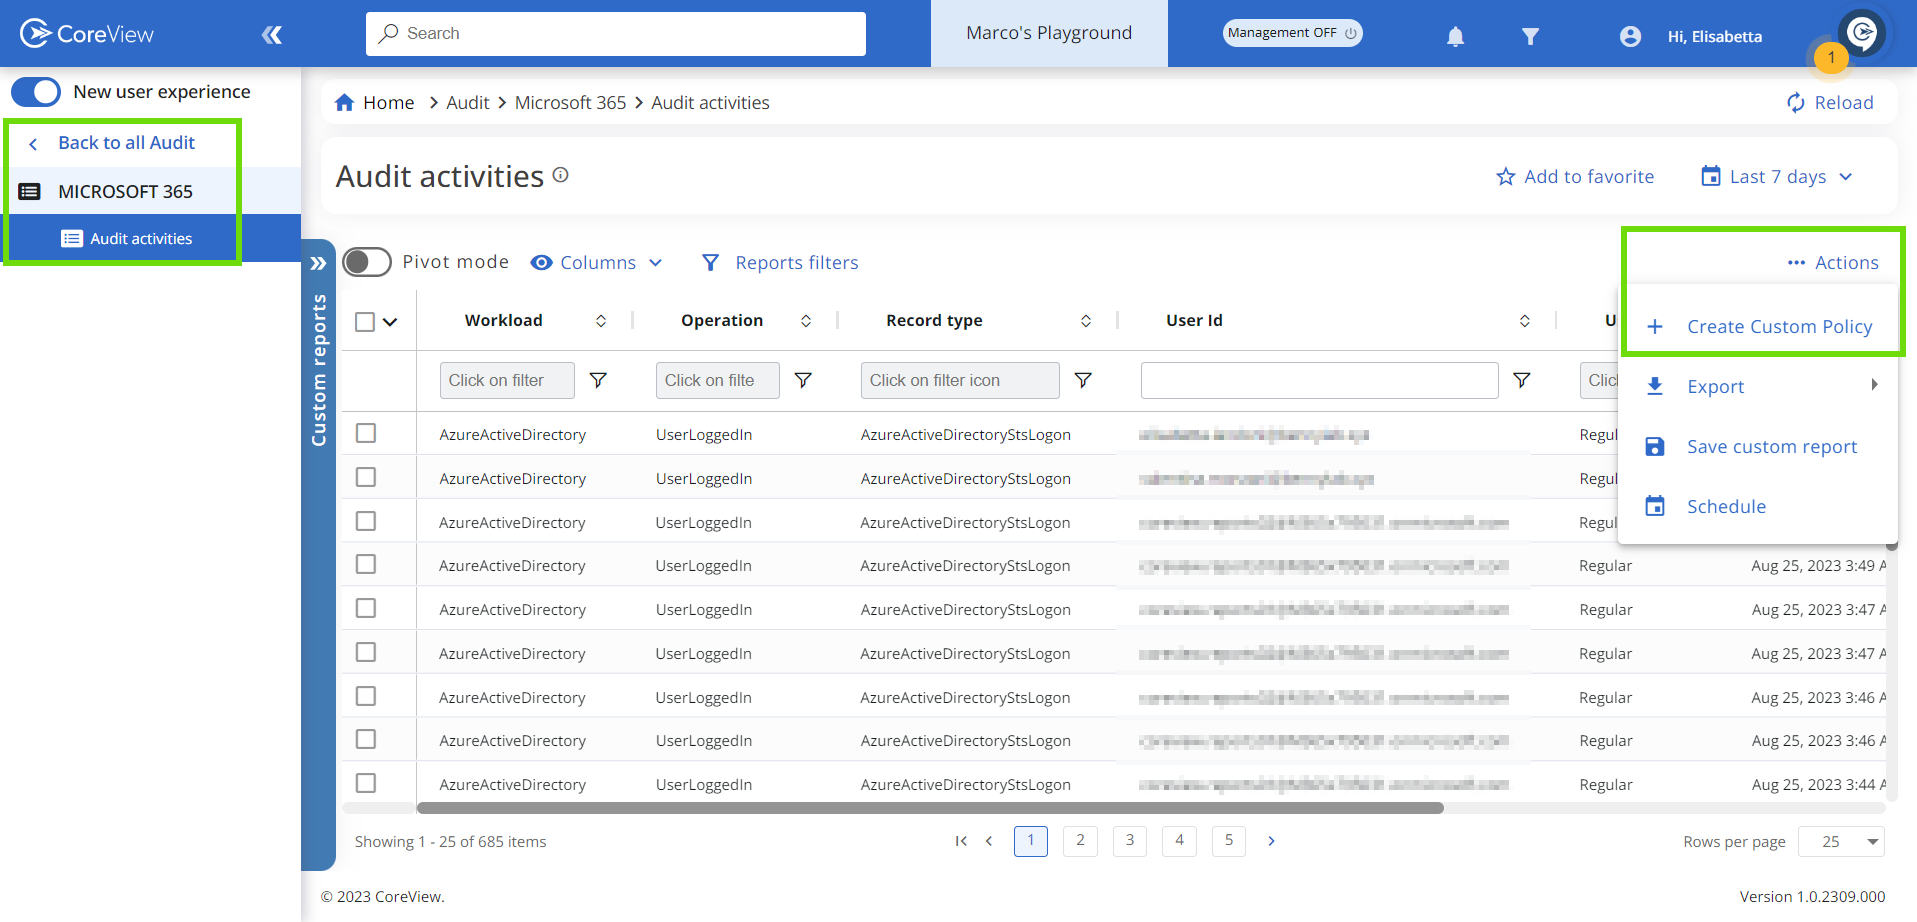
Step 1: Audit report
- Select “AUDIT” from the side panel menu and click on the desired Audit report from the drop-down menu.
- Select “Audit activities”.
- Click on the “Actions” function in the top-right corner, and select “Create Custom Policy”.
Step 2: Policy details
A wizard guiding you through all the necessary steps to create the policy will appear.

In the first tab, “Policy details”, you will need to complete the following sections:
-
General info: define the policy name, its scope in the description, and optionally, how it will impact your users.
-
Categorization: choose the category and the playbook that will contain your policy. To create a new category or playbook, enable the corresponding toggle and enter the new names.
-
Settings:
- The “Enable policy” toggle is active by default. If turned off, the policy won't appear on playbook dashboards.
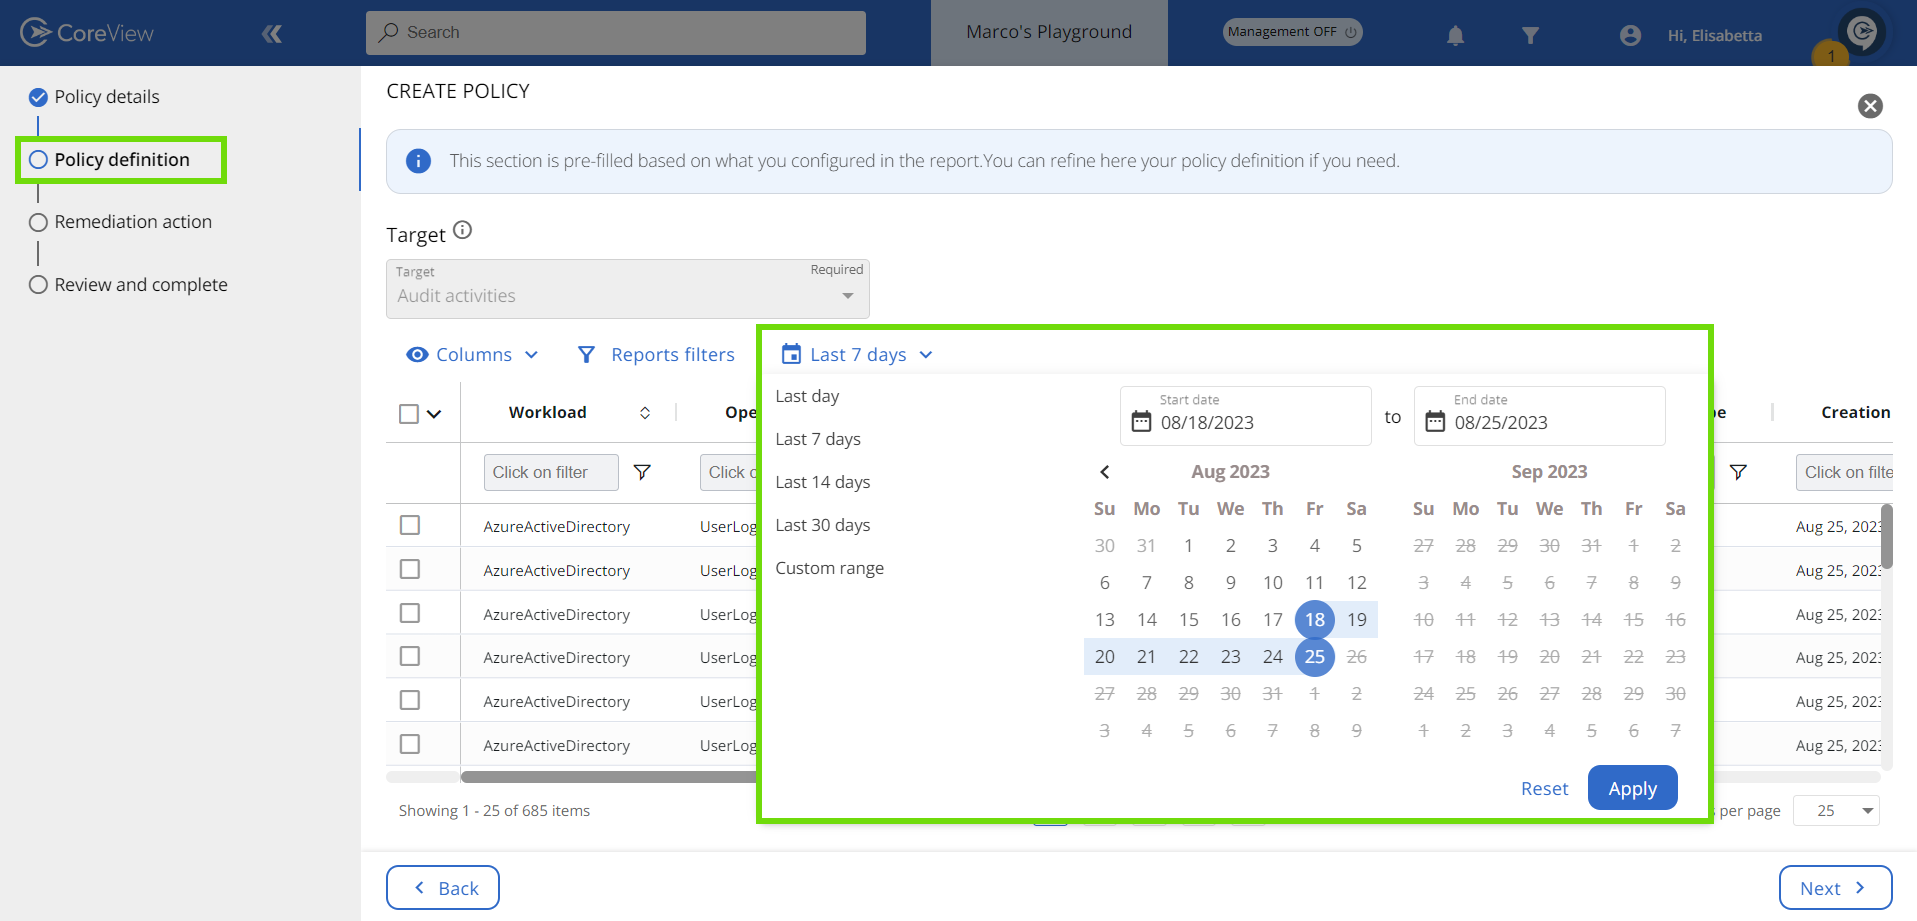
Step 3: Policy definition
When creating the policy from an Audir report, the “Target” field within the “Policy definition” tab is already specified and cannot be modified.
Next, you will be prompted to:
- Select columns: utilize the available columns in conjunction with the filter settings to ensure that only the items requiring modification are affected by the remediation action. Depending on the remediation action chosen in the subsequent step, these items will either be remediated by a workflow or included in a report.
In the example below, the policy has been set to only check “Set Mailbox” operations.

If you plan to use workflow remediation, make sure to display the column containing the execution input configured in your workflow.
-
Select a timeframe: define the time interval during which your policy will actively search for anomalies.
Step 4: Remediation action
In this tab, you can activate the “Enable remediation” toggle to apply a remediation action. If you do, you can choose between “Run workflow” and “Send report”.

Step 5: Review and complete
In this tab, you can review all the details related to:
- The policy.
- The policy definition.
- The remediation action.
In the example below, no remediation action has been selected.
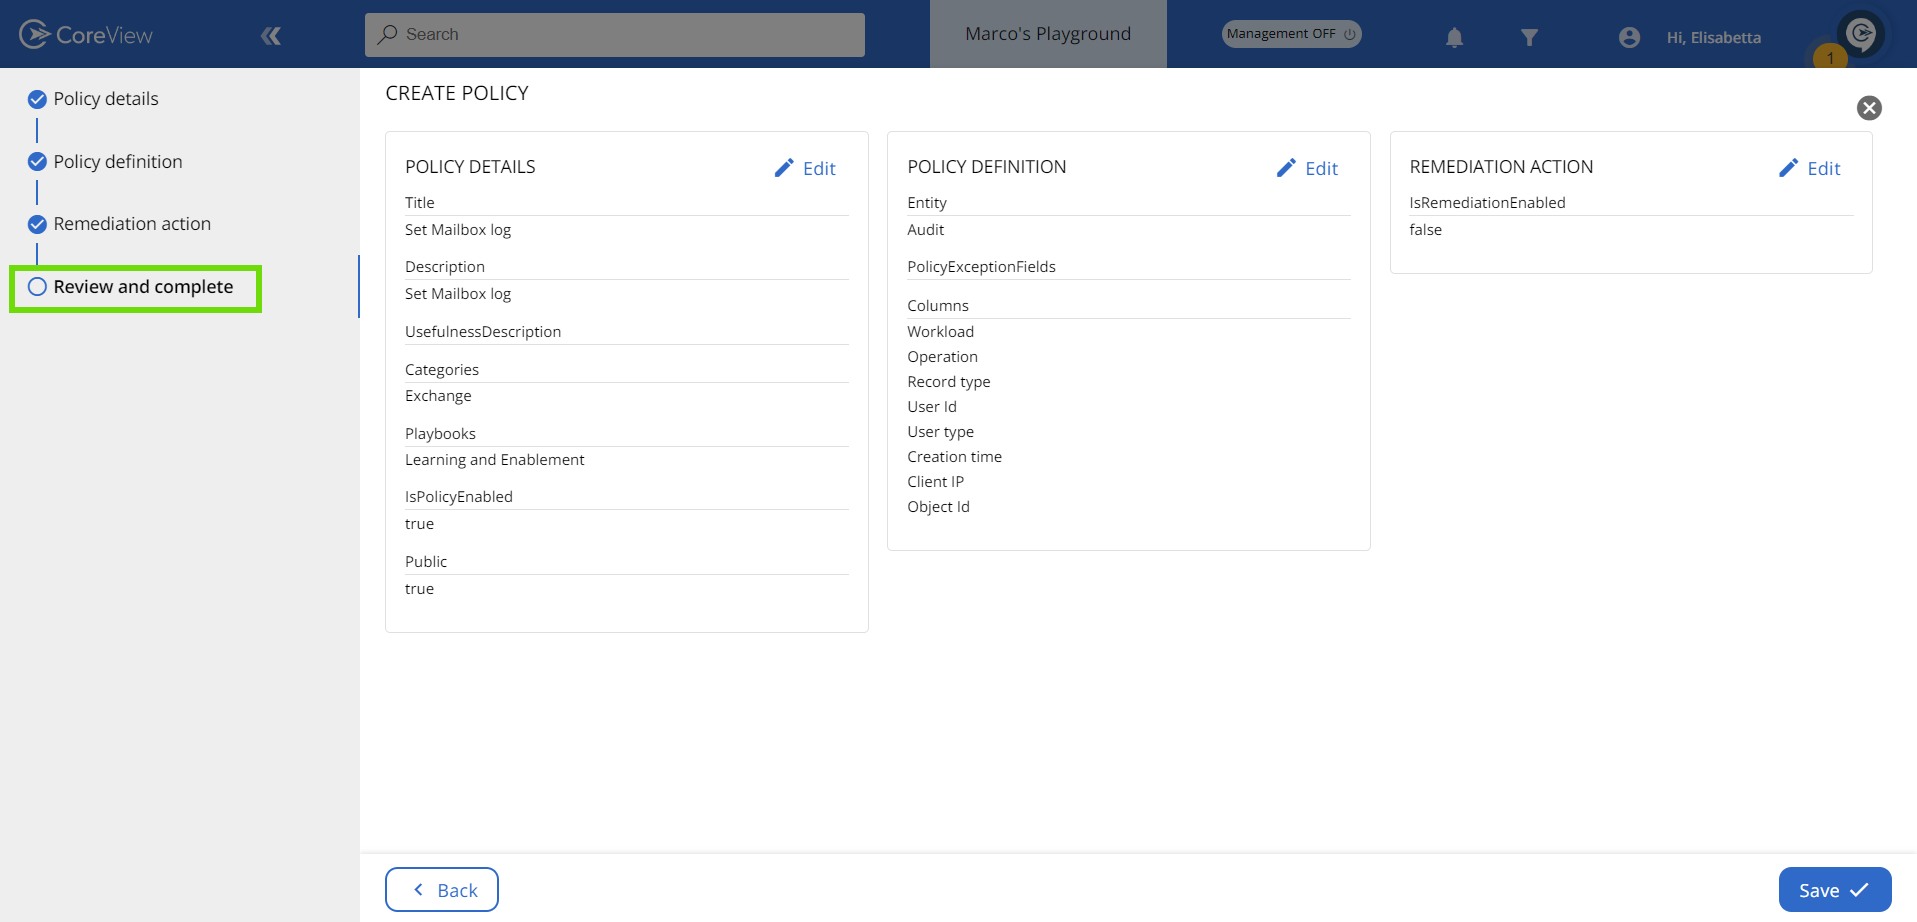
Click “Save” to complete the operation. Event-based custom policies are identified with a green badge.
