How to connect Microsoft PowerApps to CoreView Workflows
This guide provides step-by-step instructions for integrating Microsoft PowerApps with CoreView Workflows. Its purpose is to show a practical example of how you can connect Microsoft PowerApps to the CoreView API to effectively execute CoreView Workflows.
Prerequisites
- PowerAutomate License which includes Premium Connectors
Step-by-step guide
Step 1: generate API Key
- From within CoreView, navigate to “Settings > API Keys”.
- Select “+ Add new API key“ and press “Save”.
- Click the copy button on the Success screen that opens up to copy the API key, and paste it into a safe place for later use.
Step 2: gather information from your workflow in CoreView
- Navigate to your workflow for your PowerApps use case.
- In the top-right corner, click on “Actions” > “Edit” > “Configure Execution Inputs”.
- Copy the name of each input into a notepad for later use.
Note: if any inputs are the “List” type, you will want to mimic those list options within the PowerApp.
Step 3: Microsoft PowerAutomate
This step requires a PowerAutomate Premium license. If you do not have this already, you will need to procure the appropriate licensing to allow for Premium Connectors.
- From “PowerAutomate” > click “Create” > “Instant cloud flow”.
- Set the appropriate Flow name: we advise making this unique to the CoreView Workflow that you will be triggering.
- Choose PowerApps (V2) for the trigger > click “Create“.
- Click on the PowerApps (V2) step.
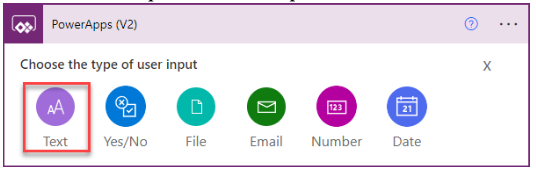
From here you will build all of the inputs that come over from PowerApps, and eventually communicate over to the CoreView workflow. While you can use any of these inputs, the most common use cases will utilize the Text input.
For this example, select the Text input:
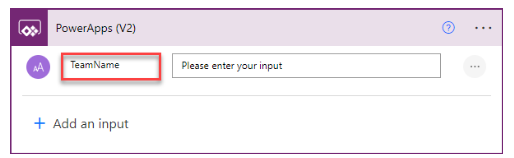
- In the Input field, remove the word “Input” and copy/paste the first input title that you are bringing over from Phase 3.
The order of the inputs must be the same as the submit button command within your PowerApp or the field data will communicate improperly to PowerAutomate and the CoreView workflow.
- Once you finish creating your inputs, click on the + symbol under the step to add another step. Search for and select the HTTP action:
| Label | Value |
|---|---|
| Method | GET |
| URI | https://www.loginportal.online/api/auth |
| [Headers] Accept | application/json |
| [Headers] Authorization | Bearer Insert_CoreView_API_Key |
In “Headers” > “Authorization”, make sure to include a space after the word “Bearer”.

- Click the + symbol below the HTTP step. Search for and select the Parse JSON action:
- Click in the Content field and insert the dynamic input: “Body”.
- Copy and paste the following code starting with { and ending with } into the Schema box:
{
"type": "object",
"properties": {
"userId": {
"type": "string"
},
"sessionId": {
"type": "string" },
"userName": {
"type": "string"
},
"displayName": {
"type": "string"
},
"bearerToken": {
"type": "string"
},
"refreshToken": {
"type": "string"
},
"profileUrl": {
"type": "string"
},
"roles": {
"type": "array",
"items": {
"type": "string"
}
}, "permissions": {
"type": "array" },
"responseStatus": {
"type": "object",
"properties": {}
   }
 }
}- Click the + symbol and add another HTTP step:
| Label | Value |
|---|---|
| Method | POST |
| Label | Value |
|---|---|
| URI | https://<DATACENTER>.coreview.com/api/executions/INSERT_WORKFLOW_ID_HERE |
| <DATACENTER> |
Datacenter prefixes for above URL:
|
| INSERT_WORKFLOW_ID_HERE | Navigate to your CoreView Workflow > “Id:” > copy the Id and paste it into the URL |
| Label | Value |
|---|---|
| [Headers] Accept | application/JSON |
| [Headers] Authorization | Bearer DYNAMIC_BEARER_TOKEN_INPUT |
| For the Authorization header, insert the Bearer dynamic input, as in the screenshot below. | |
| [Headers] x-scompany | Ask CoreView support for your company ID |
| For the x-scompany header, open a ticket with CoreView Support inquiring about your Company ID for use within API connectors, and they will send you the unique Company ID for your tenant. |
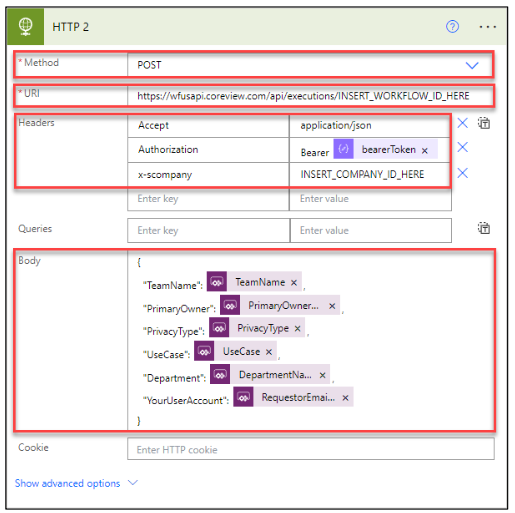
- In the body field, use the following template format to build your JSON input for the CoreView workflow:
{
“CoreView_Workflow_Input_1”: <Insert_Dynamic_Input_1>, “CoreView_Workflow_Input_2”: <Insert_Dynamic_Input_2>, “CoreView_Workflow_Input_3”: <Insert_Dynamic_Input_3>,
}
The final line has no comma at the end.
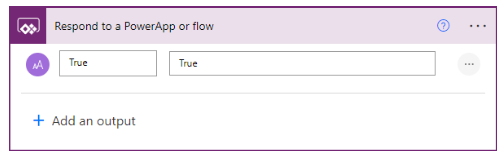
- Click the “+” symbol. Search for and add the “Respond to a PowerApp” or flow, and type “True” into both fields:
- From within your PowerApp, click on “PowerAutomate” in the side command bar. Select “Add flow” and choose your newly created flow.
- Select the button that you are using to submit it to PowerAutomate.
- Use the following code template to build your submission:
NAME_OF_YOUR_POWERAUTOMATE_WORKFLOW.run(INPUT_1.Text, INPUT_2.Text, INPUT_3.Text);

Reset(INPUT_1);Reset(INPUT_2);Reset(INPUT_3);
Step 4: testing
- Click the play icon in the top-right of PowerApps.
- Fill out your inputs and click your submission button.JSON
- Go to your Workflow and confirm that it is running/has run.
If it doesn't run, then you will need to review the steps above to ensure that you have not overlooked anything.
Please note that CoreView support is unable to provide assistance for this process. If you are unable to determine the issue on your own, please consult with your Customer Success Manager (CSM) to explore troubleshooting options, if available.