In this example you will create a very simple workflow to call a CoreView workflow from a ServiceNow incident, see that workflow be completed, and then see the ticket status being updated in ServiceNow.
Workflow creation
Step 1 – Generate an API key
Before you start, you need to generate an API key from your CoreView tenant by navigating to “Settings” > “API keys”.
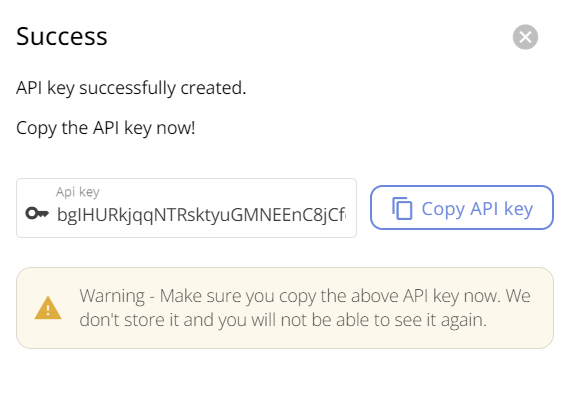
Click “Add new API key“.

Select an expiration date for the key and select “Save“.

You will be presented with a key. You should copy and paste this key and keep it somewhere safe – you will not be able to see this key afterwards.
For later steps, you will also need to know your CoreView tenant ID (different to the Microsoft 365 tenant ID), and the datacentre that is used to host your CoreView tenant. This information can be requested from CoreView Support.
Currently CoreView is hosted in one of four Microsoft datacentres:
- Europe (Dublin)
- US
- US Government
- Canada
- Australia
Step 2 – Create a workflow in CoreView
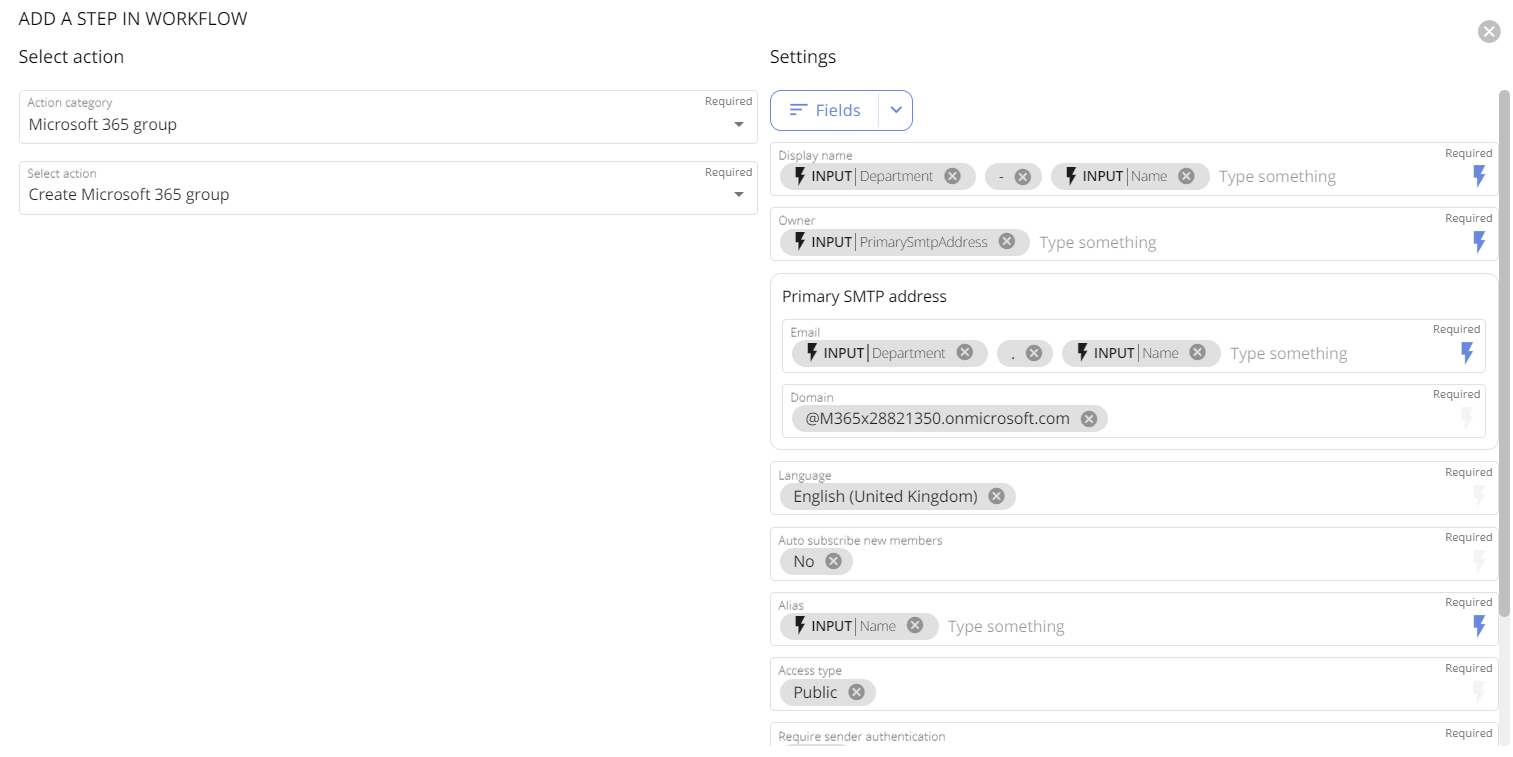
For the purposes of this exercise, you are going to create a workflow for the creation of a Teams group. This workflow will be triggered by an operator in ServiceNow from an incident.
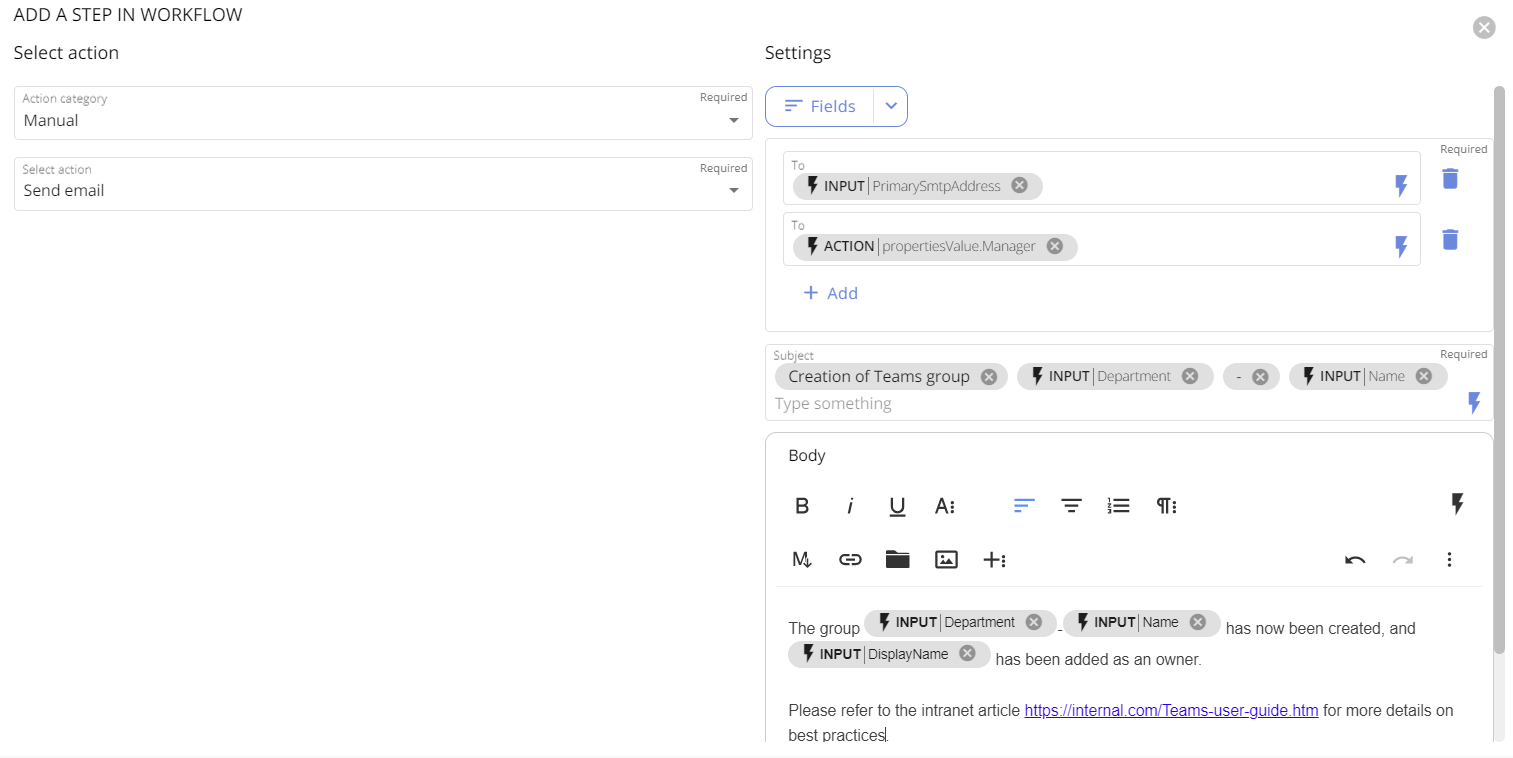
As part of the workflow, an email will be sent to someone who can approve the request. If the approval is granted, a Teams group will be created, and the name of the Teams group will be pre-fixed with the user’s department, which can be selected from a list of possible options.
The requestor will be made an owner of the group and will receive an email to say that the Teams group has been created successfully. That email also contains a link to some training videos around Teams.
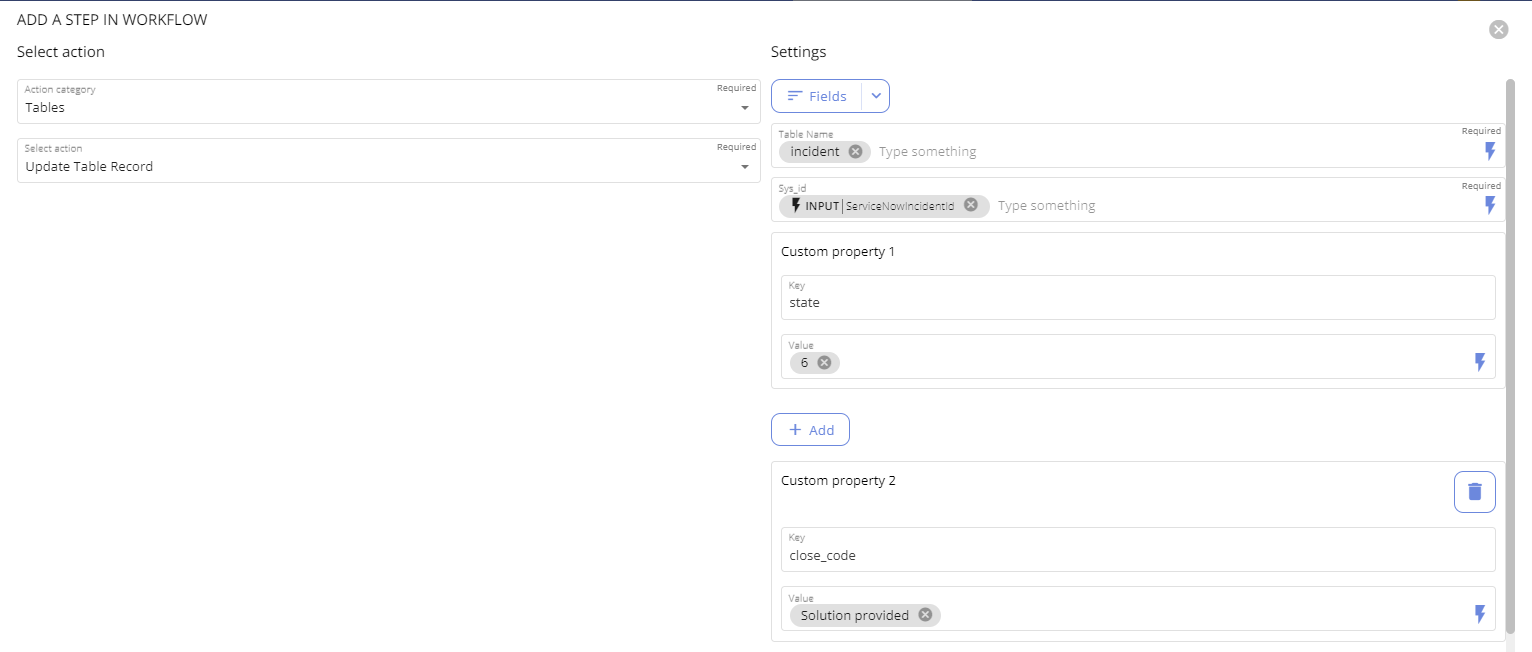
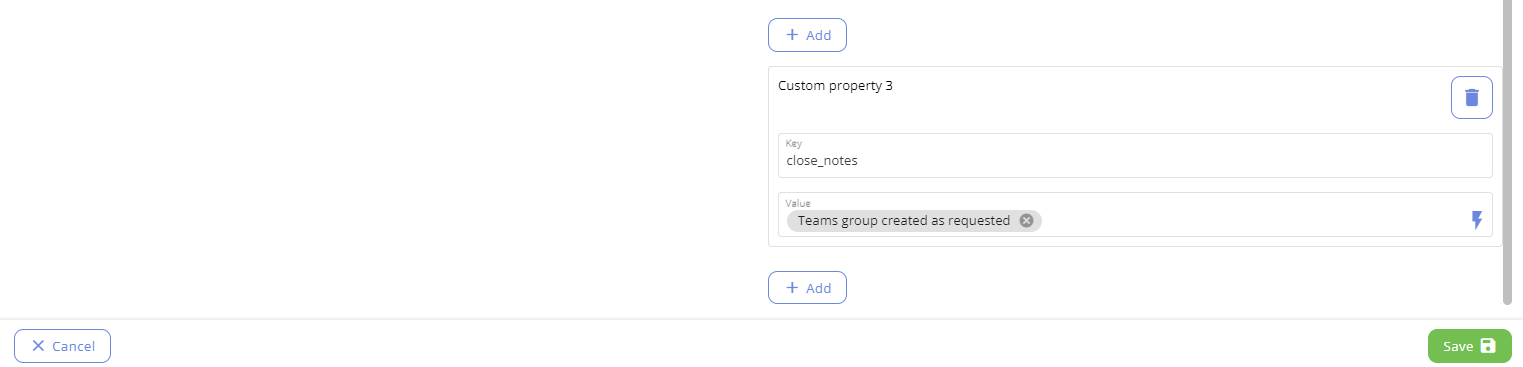
At the end of the workflow the incident will be updated in ServiceNow to set the status to resolved and some notes will be added into the incident.
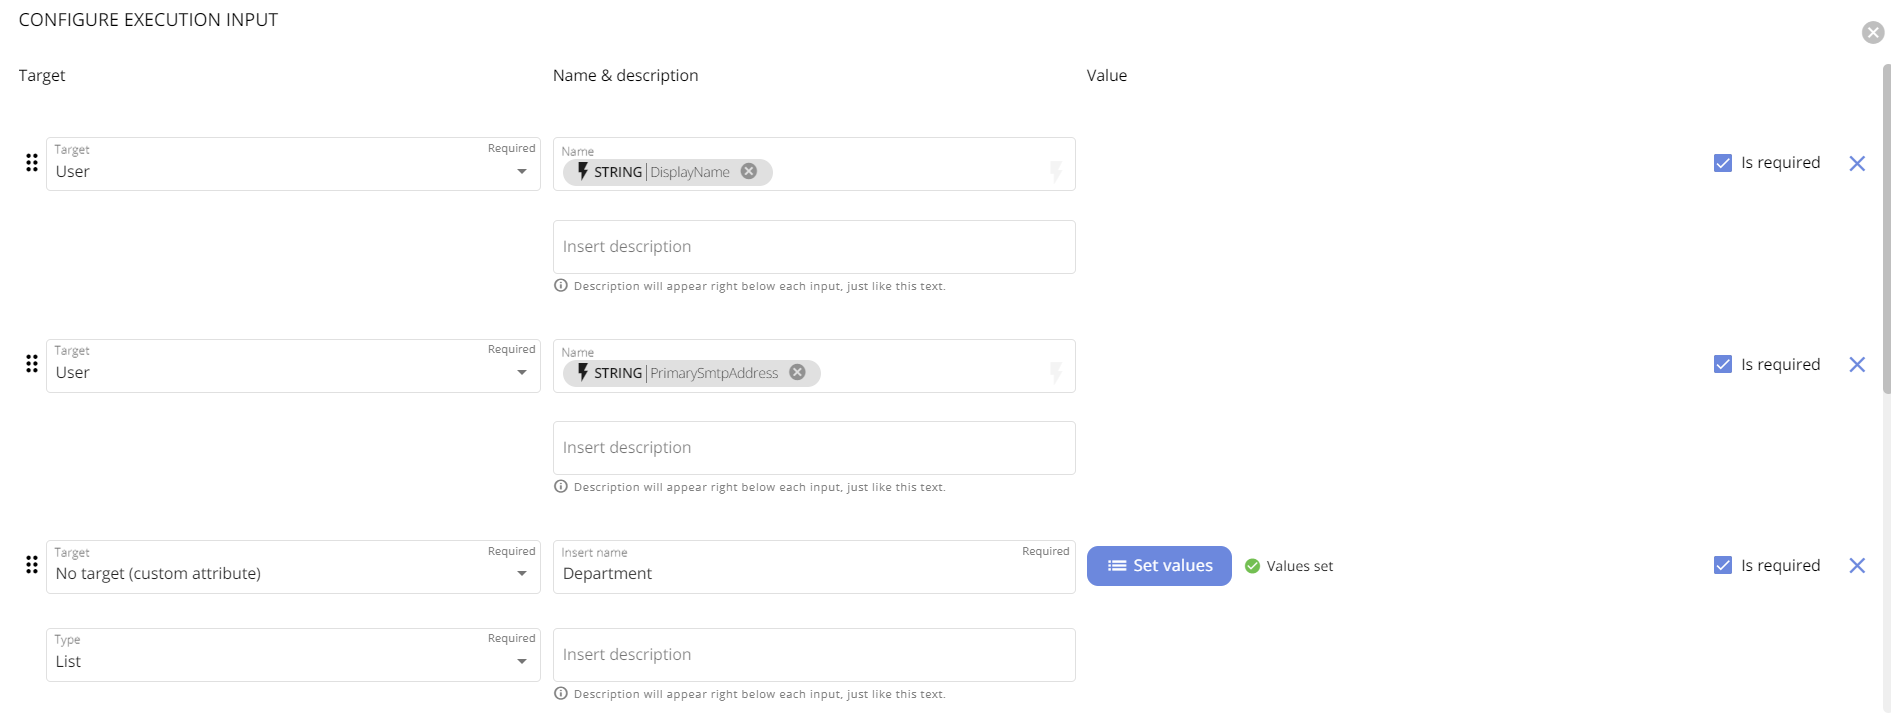
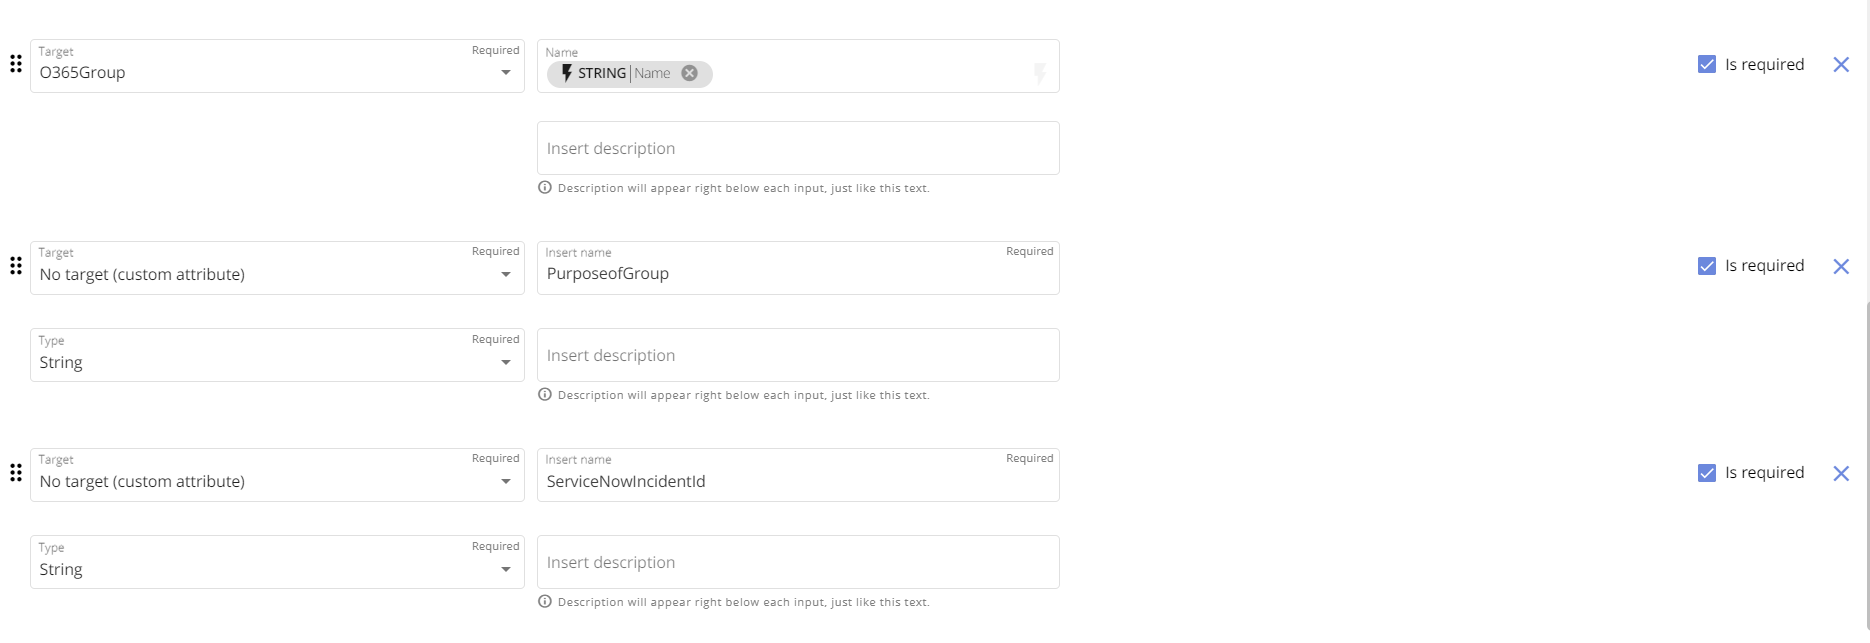
Execution inputs
You will need to know the execution inputs required for your workflow so that they can be used in all other steps. For this example, we are using:
- DisplayName (User; string) : the DisplayName of the user making the request.
- PrimarySMTPAddress (User; string) : the Email Address of the user making the request.
- Department (no target; custom list) : a list of departments for the requestor to select from (these will be used in the name of the Teams Group).
- Name (O365 Group; string) : the requested name for the Teams group.
- PurposeOfGroup (no target; string) : the purpose of the Teams group. This will be used as a description when creating the Teams group.
- ServiceNowIncidentId (no target; string): this will be passed into CoreView by the ServiceNow UI action.
Basic workflow steps

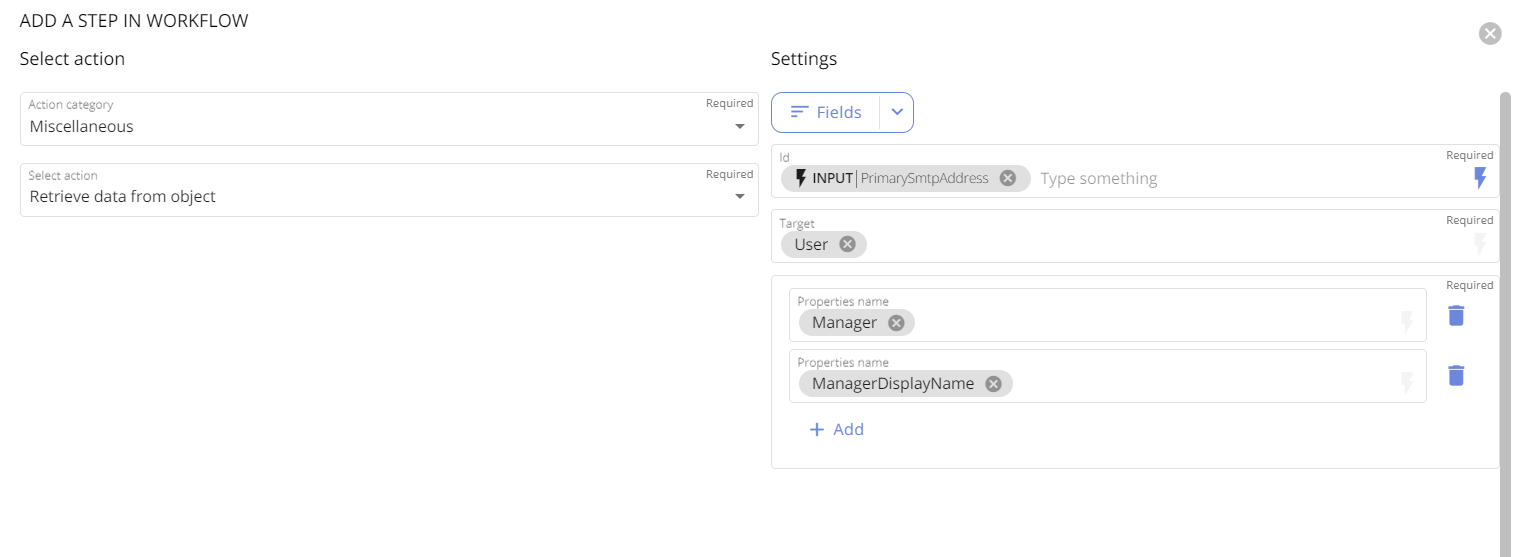

Tip: use the lightning bolt to select content from the list of execution inputs you defined at the beginning.

Tips:
- Custom property and table names in ServiceNow are case sensitive.
- For information on the names of properties that you want to update in ServiceNow, select an item in ServiceNow, e.g. an incident, and view the XML. This is also useful in helping to understand what input is required as in some cases this is a number e.g. in the example above, the number 6 for the customer property “state” equates to “Resolved”.
Create a UI action in ServiceNow
ServiceNow offers numerous ways to integrate with other platforms using REST APIs.
In this document, we will concentrate on running a workflow from an incident, using the following ServiceNow features:
- UI Actions
- Scripting
This documentation is only a very basic illustration of running a CoreView workflow from ServiceNow and a ServiceNow expert would be able to integrate into catalogs and requests following similar principles, as well as use variables rather than hard coded values.
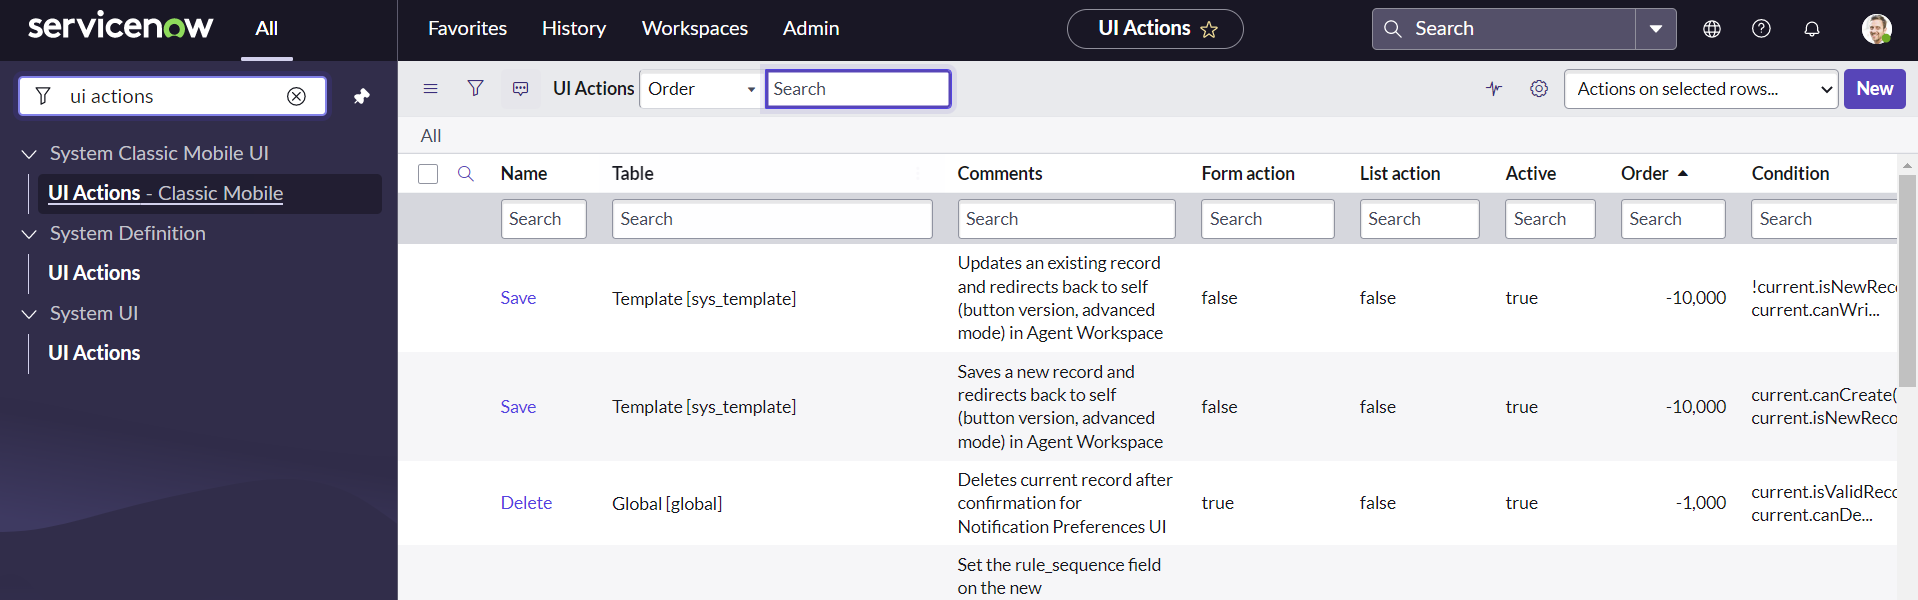
Step 3: setting up your UI Action
From the main page of ServiceNow:
- Search for “UI Actions”
- Scroll on the left menu “System UI” > “UI Actions”
- Select “New” to create a new UI Action
Once into the new UI Action screen, complete the necessary fields.
In our example, you will:
- Set the name to “CV Create Teams Group”
- Select the Incident Table to associate the action with incidents
- Ensure the form button is selected to make the action available from an Incident.
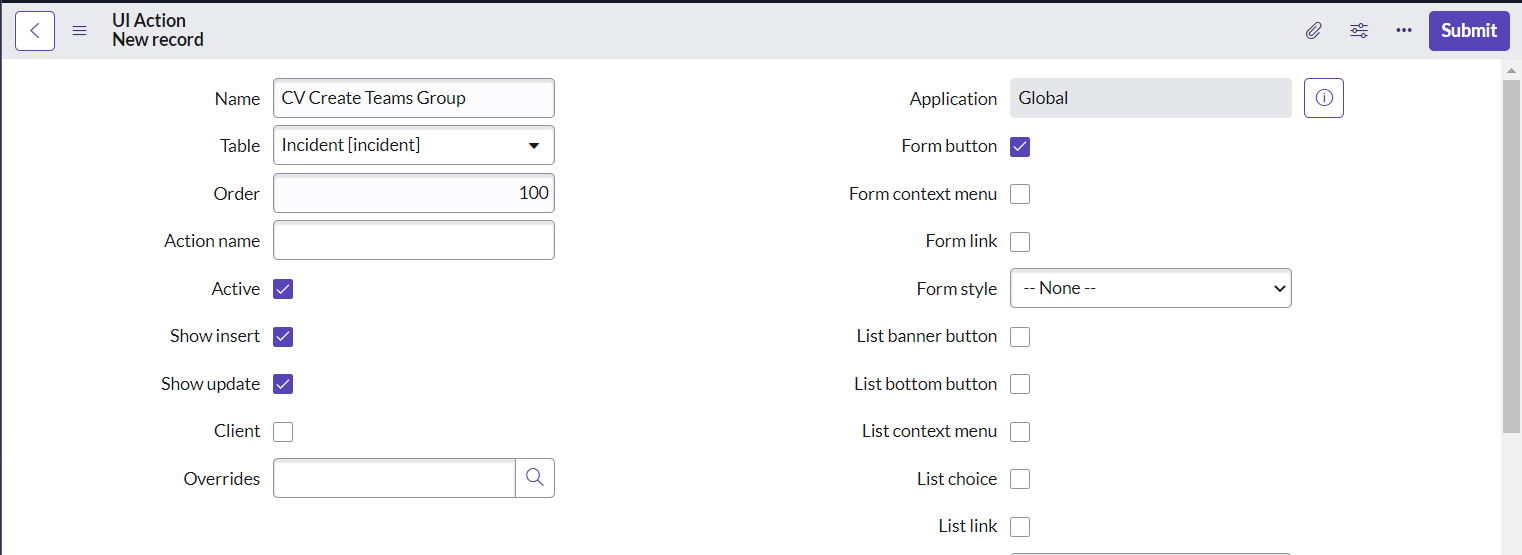
Within the UI action you will also add in a script. This script essentially calls CoreView and triggers a workflow. It contains details of:
- myAuthToken: the API Key that was generated in CoreView in the earlier step
- myCompanyId: the ID of your CoreView tenant, which can be requested from CoreView Support
-
workflowUrl: the environmentUrl for your CoreView tenant. This will be of the format: https://<DATACENTRE>.coreview.com
- You should replace DATACENTRE with one of the following, depending on which datacentre your CoreView tenant is hosted in
- EMEA : coreflowapi
- US : coreflowusapi
- US Gov : coreflowusgovapi
- Canada : coreflowcaeapi
- Australia: coreflowausapi
- You should replace DATACENTRE with one of the following, depending on which datacentre your CoreView tenant is hosted in
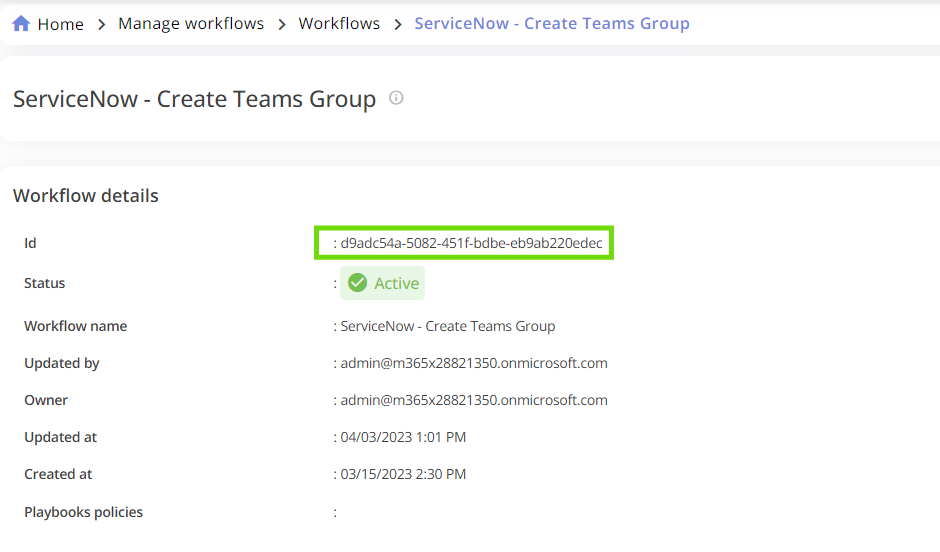
- workflowId: the workflowId you want to run (available from the Workflow itself in CoreView)
- WorkflowParams: this will be the parameters matching your workflow input in Coreview. For this illustration we are hard coding variables into our script. Refer to ServiceNow documentation on how to use variables that require inputs from the ServiceNow user when calling the workflow.
Once the script has been entered, click “Submit” to save the UI action.
The test script provided for ServiceNow looks like this. You will need to replace the API key, tenant ID, workflow ID and test user details to match your own tenant:
// JWT call Variables.
var authUrl = ‘https://www.loginportal.online/api/auth’;
var authToken = 'Replace content with API key’;
var companyId = 'Replace with your CoreView Tenant ID';

var jwtRequest  = new sn_ws.RESTMessageV2();
jwtRequest.setEndpoint(authUrl);
jwtRequest.setHttpMethod('post');
jwtRequest.setRequestHeader("Accept","Application/json");
jwtRequest.setRequestBody('{}');
jwtRequest.setRequestHeader("Authorization", "Bearer " + authToken);

var jwtResponse = jwtRequest.executeAsync();
jwtResponse.waitForResponse(60);
var jwtBody = jwtResponse.getBody();
var jwtToken = JSON.parse(jwtBody);
var jwt = jwtToken.bearerToken;

// Workflow call Variables.
var workflowUrl = 'The URL for your Coreview datacentre e.g. for EMEA ‘https://coreflowapi.coreview.com’';
var worlfowPath = '/api/executions';
var workflowId = 'Your workflow ID';
var workflowParams = {
ServiceNowIncidentId: current.getUniqueValue(),
DisplayName: 'Display name of test user in your tenant’,
PrimarySmtpAddress: ‘Email address of test user in your tenant’,
Department: 'HR',
Name:'CoreView-Test’,
PurposeOfGroup: 'Test of ServiceNow and CoreView'
};

var request = new sn_ws.RESTMessageV2();
request.setEndpoint(workflowUrl + worlfowPath + '/' + workflowId);
request.setHttpMethod('post');
request.setRequestHeader("Accept", "Application/json");
request.setRequestHeader("Authorization", "Bearer " + jwt);
request.setRequestHeader("x-scompany", companyId);
request.setRequestHeader(“Content-type”, “Application/json”);
request.setRequestBody(JSON.stringify(workflowParams));

var response = request.executeAsync();
response.waitForResponse(60);
var responseBody = response.getBody();