This article covers what multi-factor authentication is and how to configure a conditional access multi-factor authentication policy for operators and administrators who access CoreView.
Multi-Factor Authentication (MFA) Overview
Multi-factor authentication (MFA) is when a user is prompted for additional forms of identification during a sign-in event. This could be done by entering a code on their cell phone or providing a fingerprint scan. When you require a second form of authentication, security is increased as this additional factor isn't easy for an attacker to obtain or duplicate.
The following guide will teach you how to set up the basic Conditional Access MFA policy for operators and admin accessing your CoreView Portal.
To implement MFA, you'll need a functioning Azure AD tenant. Each account to be assigned to an MFA policy requires at least an Azure AD Premium P1 or a trial license to be enabled. If necessary, you can add trial licenses at no extra cost.
Remember to create your CoreView operator accounts by selecting the flag “Use organization account” in order to enable the single sign-on feature available between your Azure Ad environment and CoreView portal. This feature allows you to leverage any security setting you applied in your Azure AD environment.

The recommended way to enable and use Azure AD multi-factor authentication is with Conditional Access policies. Conditional Access lets you create and define policies that react to sign-in events and request additional actions before a user is granted access to an application or service.

Conditional Access policies can be granular and specific to empower users to be productive wherever and whenever and protect your organization.
This guide will create a basic Conditional Access policy to prompt for MFA when a user signs in to the CoreView portal.
However, please consider that you can assign different criteria to your conditional access policies, such as a risk-based Conditional Access policy. For more details about this topic, please review the reference section of this document.
First, create a Conditional Access policy and assign your security group of users as follows:
- Sign in to the Azure portal using an account with “Global administrator” permissions.
- Search for and select “Azure Active Directory”, then choose “Security” from the menu on the left-hand side.
- Select “Conditional Access”, then choose “New policy”.
- Enter a name for the policy (in the screenshot below, we have used “Test MFA”)
- Under “Assignments”, choose “Users and groups”, then check the “Select users and groups ” item from the list.
- Check the box for “Users and groups”.
- Browse for and select your Azure AD group (in our example, we have selected “CoreView MFA Enabled”).
The group named “CoreView MFA Enabled” has previously been created, and a pilot user account has been assigned to this group. All users who are members of this group will be asked to complete multi-factor authentication when they log into the CoreView portal

To apply the Conditional Access policy for the group, select “Done”.
With the Conditional Access policy in place and a test group of users assigned, it's time to define the cloud apps or actions that will activate the policy.
These cloud apps or actions represent the situations where you deem additional processing necessary, such as prompting MFA.
To set up the Conditional Access policy to prompt for multi-factor authentication when a user logs into the CoreView portal, please follow these steps:
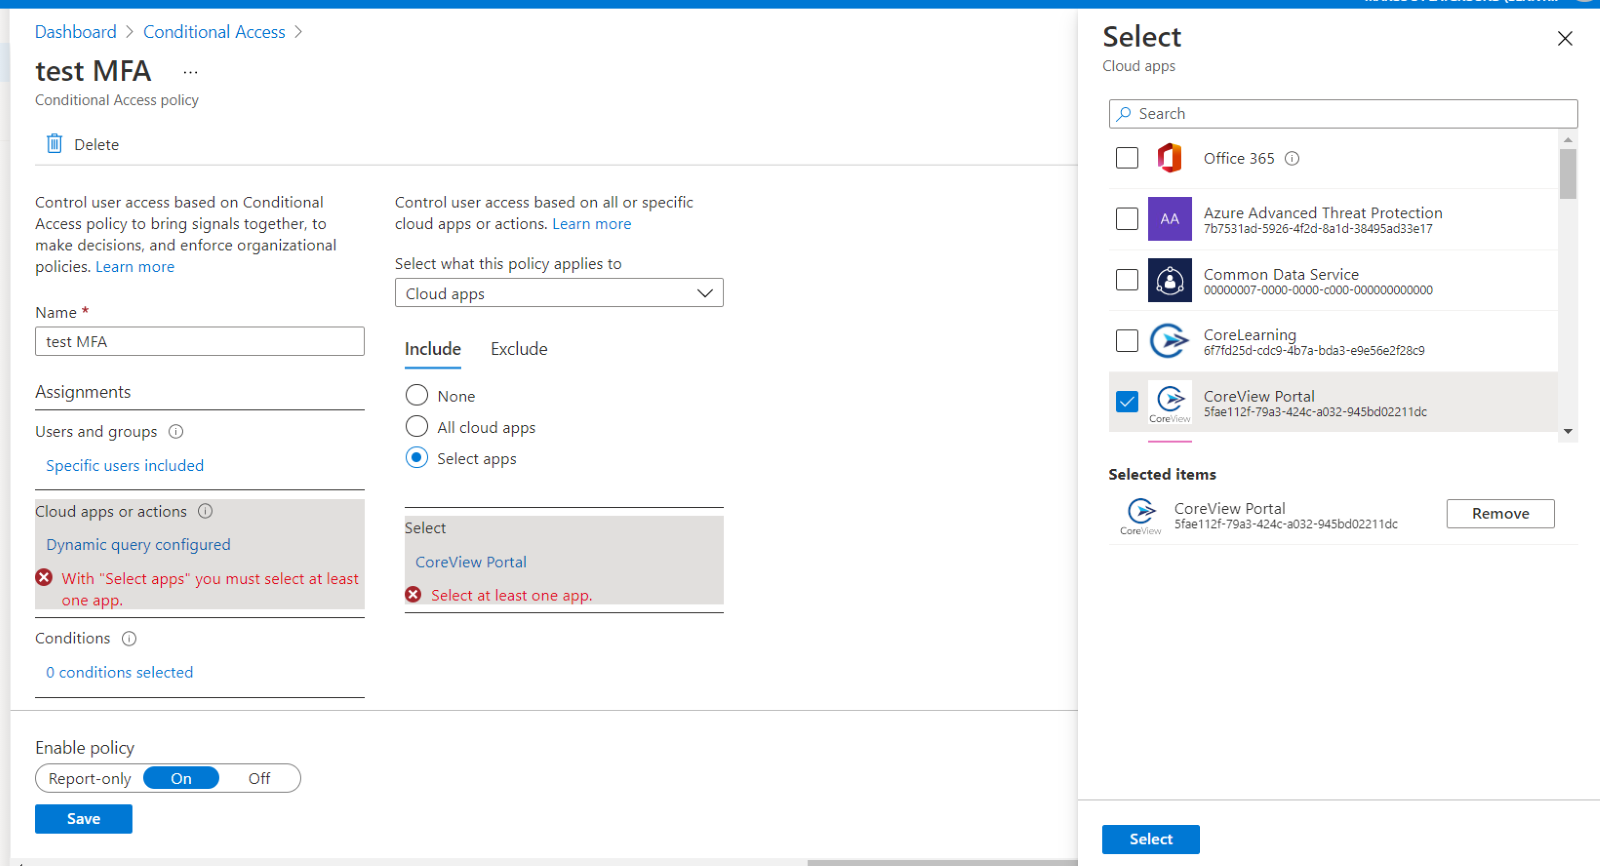
- Select “Cloud apps or actions”; under “Include”, check the “Select apps” item from the list.
- Choose “Select”, then browse the list of available sign-in events and choose “CoreView Portal”. This ensures that the policy applies to sign-in events related to the CoreView portal, as shown in the image below:
- To select the apps, choose “Select”, then “Done”.
- Under “Access controls”, choose “Grant”, then make sure the “Grant button is checked.
- Check the box for “Require multi-factor authentication”, then choose “Select”.
Conditional Access policies can be set to “Report-only” if you want to see how the configuration would impact users or “Off” if you don't want to use the policy right now.
As a test group of users was targeted for this guide, let's enable the policy and then test CoreView log-in multi-factor authentication. The steps are:
- Turn on the “Enable policy” toggle.
- Select “Create” to apply the Conditional Access policy.
Microsoft Documentation References